battery Hyundai Accent 2009 Owner's Manual - RHD (UK. Australia)
[x] Cancel search | Manufacturer: HYUNDAI, Model Year: 2009, Model line: Accent, Model: Hyundai Accent 2009Pages: 232, PDF Size: 8.36 MB
Page 21 of 232

1FEATURES OF YOUR HYUNDAI
10
B070F03A-DAT Keyless Entry System (If Installed)Locking doors
1. Close all doors.
2. Push the button on the transmitter.
3. At the same time all doors lock, theturn signal lights will blink once to indicate that the system is armed.
Unlocking doors 1. Push the button on the transmitter once more after all doors were locked.
2. At the same time all doors unlock,
the turn signal lights will blink twiceto indicate that the system is dis- armed. NOTE: The transmitter will not work if any of following occur:
- The ignition key is in ignition
switch.
- You exceed the operating distance
limit (10 m).
- The battery in the transmitter is weak.
- Other vehicles or objects may be blocking the signal.
- The weather is extremely cold.
- The transmitter is close to a radio
transmitter such as a radio station or an airport which can interfere with normal operation of the trans-mitter.
When the transmitter does not workcorrectly, open and close the doorwith the ignition key. If you have a problem with the transmitter, con- tact an authorised Hyundai Dealer. NOTE: Keep the transmitter away from wa- ter or any liquid. If the keyless entry system is inoperative due to expo-sure to water or liquids, it will not be covered by your manufacturer ve- hicle warranty.
Page 22 of 232
1
FEATURES OF YOUR HYUNDAI
11
!
WINDOW GLASS
B050A01A-AAT
To raise or lower the window, turn the window regulator handle clockwise or counterclockwise. WARNING:
When opening or closing the win-dows, make sure your passenger's arms, hands and body are safely out of the way.
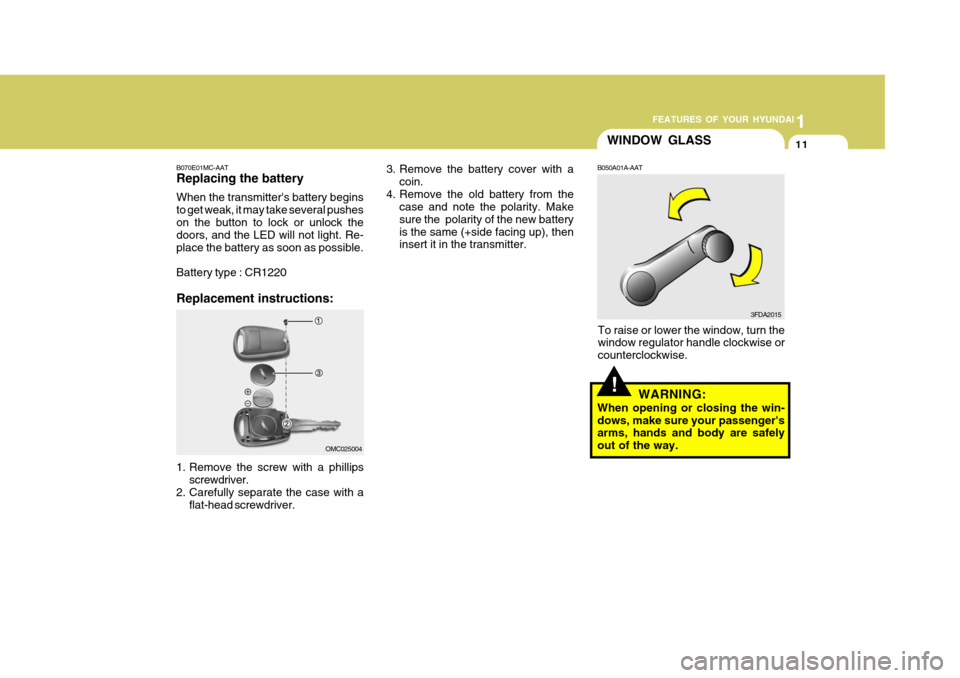
3. Remove the battery cover with a
coin.
4. Remove the old battery from the case and note the polarity. Makesure the polarity of the new batteryis the same (+side facing up), then insert it in the transmitter.
B070E01MC-AAT Replacing the battery When the transmitter's battery begins to get weak, it may take several pusheson the button to lock or unlock the doors, and the LED will not light. Re- place the battery as soon as possible. Battery type : CR1220 Replacement instructions:
1. Remove the screw with a phillipsscrewdriver.
2. Carefully separate the case with a flat-head screwdriver. OMC025004
3FDA2015
Page 33 of 232
1FEATURES OF YOUR HYUNDAI
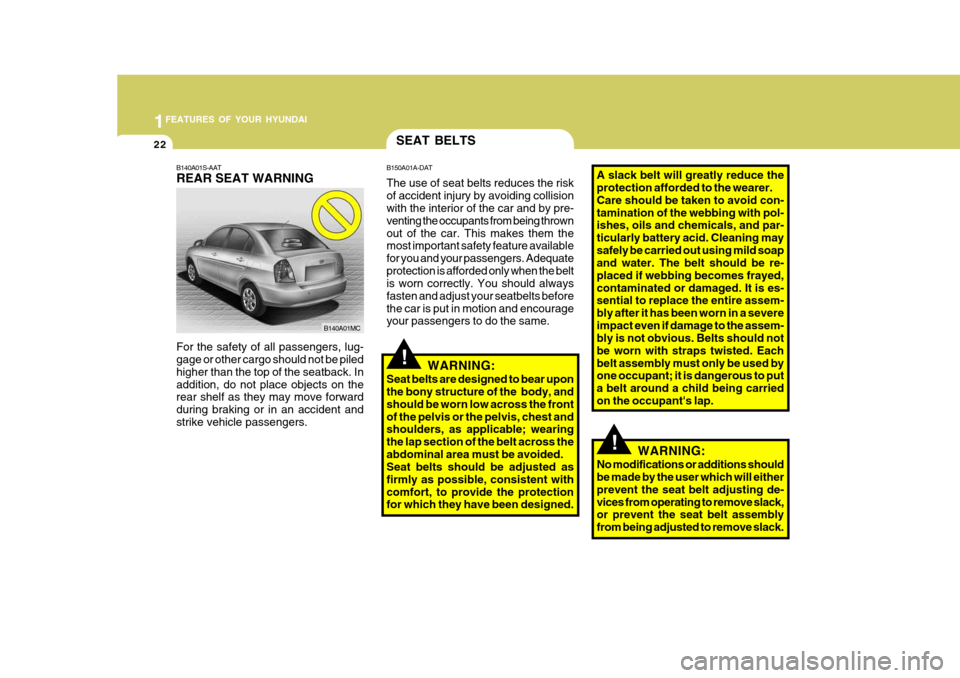
22
B140A01S-AAT REAR SEAT WARNING For the safety of all passengers, lug- gage or other cargo should not be piled higher than the top of the seatback. Inaddition, do not place objects on the rear shelf as they may move forward during braking or in an accident andstrike vehicle passengers.
B140A01MC
!
!
SEAT BELTS
B150A01A-DAT The use of seat belts reduces the risk of accident injury by avoiding collision with the interior of the car and by pre- venting the occupants from being thrownout of the car. This makes them the most important safety feature available for you and your passengers. Adequateprotection is afforded only when the belt is worn correctly. You should always fasten and adjust your seatbelts beforethe car is put in motion and encourage your passengers to do the same.
WARNING:
Seat belts are designed to bear uponthe bony structure of the body, and should be worn low across the frontof the pelvis or the pelvis, chest and shoulders, as applicable; wearing the lap section of the belt across theabdominal area must be avoided. Seat belts should be adjusted as firmly as possible, consistent withcomfort, to provide the protection for which they have been designed. A slack belt will greatly reduce theprotection afforded to the wearer. Care should be taken to avoid con-tamination of the webbing with pol- ishes, oils and chemicals, and par- ticularly battery acid. Cleaning maysafely be carried out using mild soap and water. The belt should be re- placed if webbing becomes frayed,contaminated or damaged. It is es- sential to replace the entire assem- bly after it has been worn in a severeimpact even if damage to the assem- bly is not obvious. Belts should not be worn with straps twisted. Eachbelt assembly must only be used by one occupant; it is dangerous to put a belt around a child being carriedon the occupant's lap.
WARNING:
No modifications or additions should be made by the user which will either prevent the seat belt adjusting de-vices from operating to remove slack, or prevent the seat belt assembly from being adjusted to remove slack.
Page 52 of 232
1
FEATURES OF YOUR HYUNDAI
41
B990B01MC
o The SRS can function only when
the ignition key is in the "ON" position. If the SRS is not working properly,(1) The SRS SRI does not come on when the ignition key is turnedto the "ON" position or after the engine is started.
(2) The SRS SRI blinks for a sec- ond and remains on after illu-minating for about 6 secondswhen the ignition key is turned to the "ON" position or after the engine is started.
(3) The SRS SRI illuminates while driving.
If this occurs, have your vehicleimmediately inspected by your Hyundai dealer.
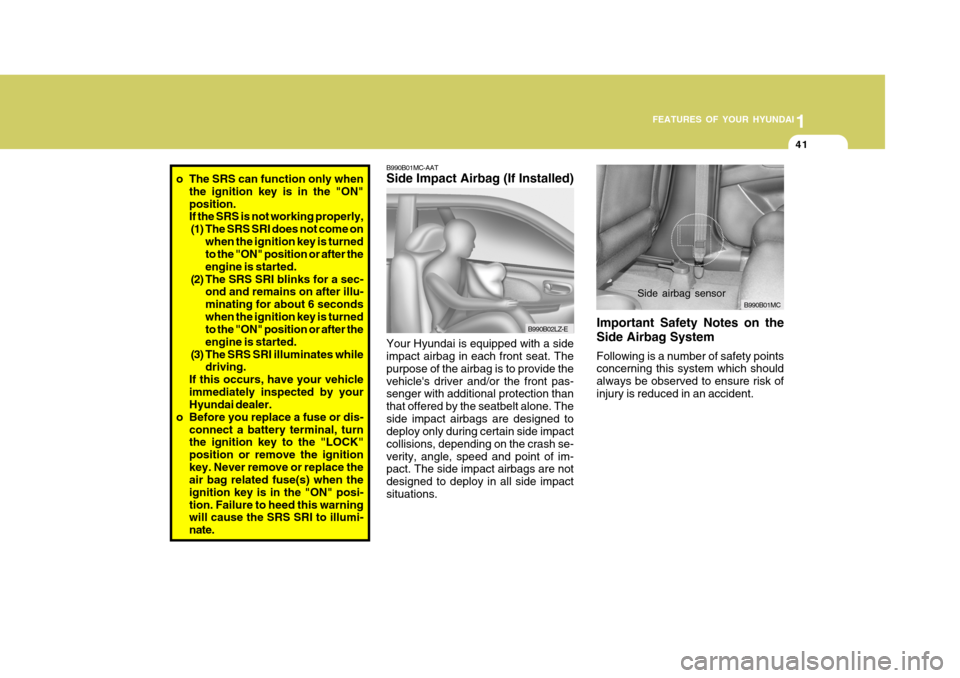
o Before you replace a fuse or dis- connect a battery terminal, turnthe ignition key to the "LOCK" position or remove the ignitionkey. Never remove or replace the air bag related fuse(s) when the ignition key is in the "ON" posi-tion. Failure to heed this warning will cause the SRS SRI to illumi- nate. B990B01MC-AAT Side Impact Airbag (If Installed) Your Hyundai is equipped with a side impact airbag in each front seat. The purpose of the airbag is to provide thevehicle's driver and/or the front pas- senger with additional protection than that offered by the seatbelt alone. Theside impact airbags are designed to deploy only during certain side impact collisions, depending on the crash se-verity, angle, speed and point of im- pact. The side impact airbags are not designed to deploy in all side impactsituations.
Side airbag sensor
B990B02LZ-E
Important Safety Notes on the Side Airbag System Following is a number of safety points concerning this system which should always be observed to ensure risk ofinjury is reduced in an accident.
Page 70 of 232
1
FEATURES OF YOUR HYUNDAI
59
OUTSIDE TEMPERATURE
TRIPMETER
AVERAGE FUEL CONSUMPTION DISTANCE TO EMPTY
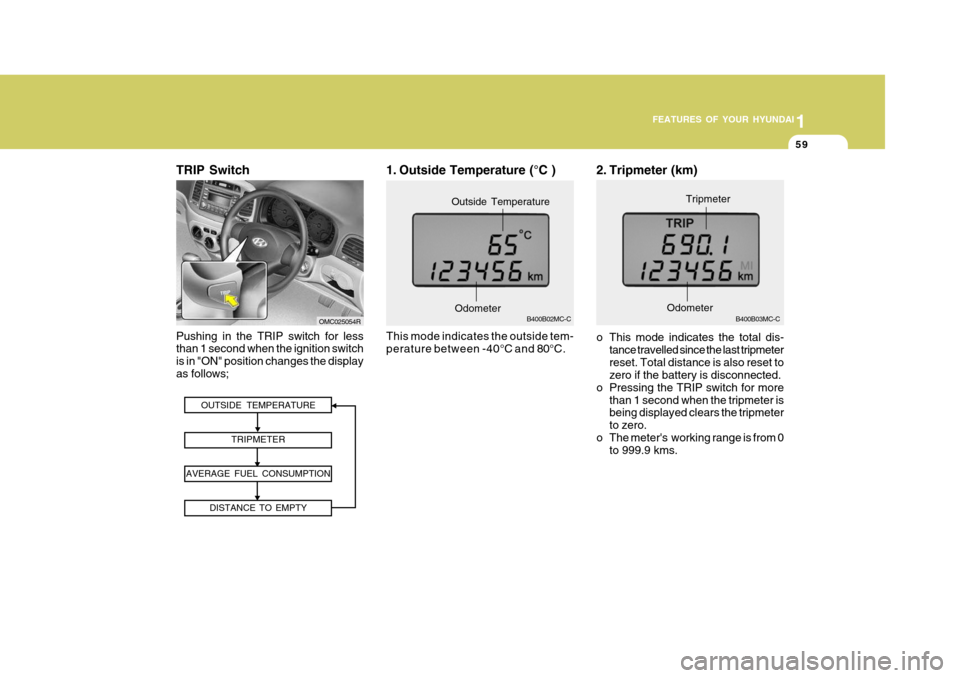
TRIP Switch Pushing in the TRIP switch for less than 1 second when the ignition switch is in "ON" position changes the displayas follows;1. Outside Temperature (°C ) This mode indicates the outside tem-
perature between -40°C and 80°C. B400B02MC-C
Odometer
Outside Temperature
2. Tripmeter (km)
o This mode indicates the total dis-
tance travelled since the last tripmeter reset. Total distance is also reset to zero if the battery is disconnected.
o Pressing the TRIP switch for more
than 1 second when the tripmeter isbeing displayed clears the tripmeter to zero.
o The meter's working range is from 0 to 999.9 kms. B400B03MC-C
Odometer Tripmeter
OMC025054R
Page 71 of 232
1FEATURES OF YOUR HYUNDAI
60
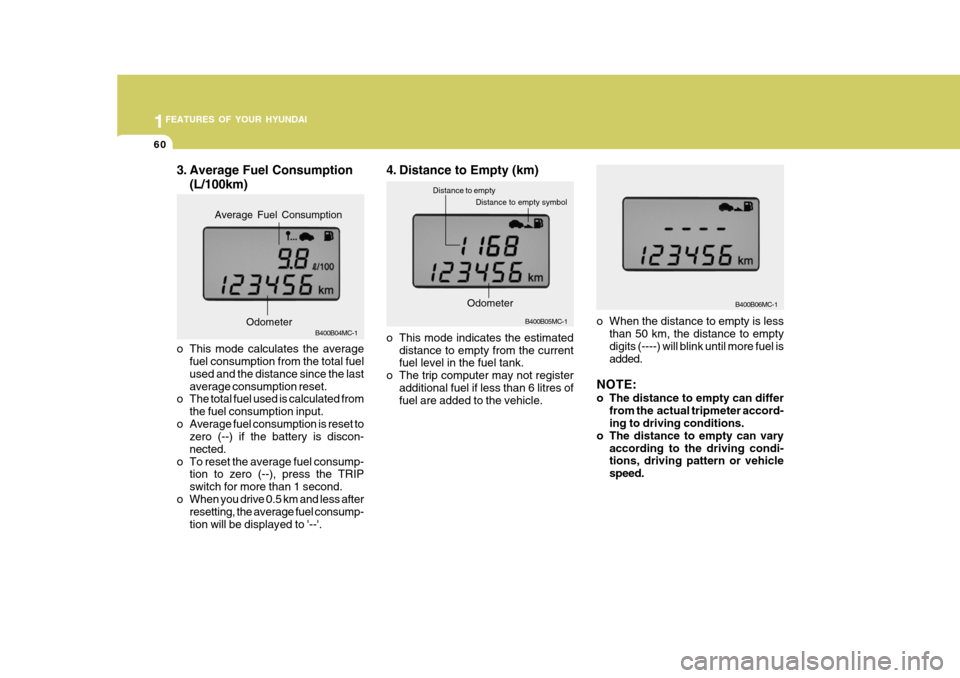
3. Average Fuel Consumption
(L/100km)
B400B04MC-1
o This mode calculates the average fuel consumption from the total fuel used and the distance since the lastaverage consumption reset.
o The total fuel used is calculated from
the fuel consumption input.
o Average fuel consumption is reset to zero (--) if the battery is discon-nected.
o To reset the average fuel consump- tion to zero (--), press the TRIPswitch for more than 1 second.
o When you drive 0.5 km and less after resetting, the average fuel consump-tion will be displayed to '--'.
Odometer
Average Fuel Consumption
o When the distance to empty is less
than 50 km, the distance to empty digits (----) will blink until more fuel isadded.
NOTE:
o The distance to empty can differ from the actual tripmeter accord- ing to driving conditions.
o The distance to empty can vary according to the driving condi-tions, driving pattern or vehicle speed.
4. Distance to Empty (km)
o This mode indicates the estimated
distance to empty from the current fuel level in the fuel tank.
o The trip computer may not register additional fuel if less than 6 litres offuel are added to the vehicle. B400B05MC-1
Distance to empty symbol
Distance to empty
Odometer
B400B06MC-1
Page 73 of 232
1FEATURES OF YOUR HYUNDAI
62
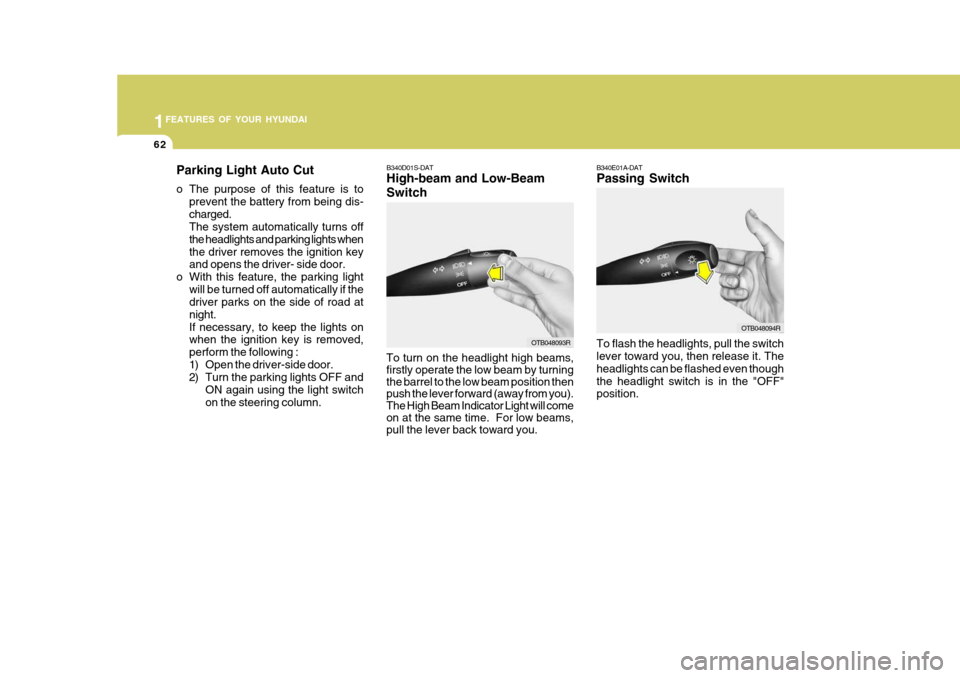
B340E01A-DAT Passing Switch To flash the headlights, pull the switch lever toward you, then release it. The headlights can be flashed even thoughthe headlight switch is in the "OFF" position.
B340D01S-DAT High-beam and Low-Beam Switch
OTB048093R
To turn on the headlight high beams, firstly operate the low beam by turning the barrel to the low beam position then push the lever forward (away from you). The High Beam Indicator Light will come on at the same time. For low beams, pull the lever back toward you.
OTB048094R
Parking Light Auto Cut
o The purpose of this feature is to
prevent the battery from being dis- charged. The system automatically turns off the headlights and parking lights whenthe driver removes the ignition key and opens the driver- side door.
o With this feature, the parking light will be turned off automatically if thedriver parks on the side of road at night.If necessary, to keep the lights on when the ignition key is removed, perform the following :
1) Open the driver-side door.
2) Turn the parking lights OFF and ON again using the light switch on the steering column.
Page 80 of 232
1
FEATURES OF YOUR HYUNDAI
69POWER OUTLET
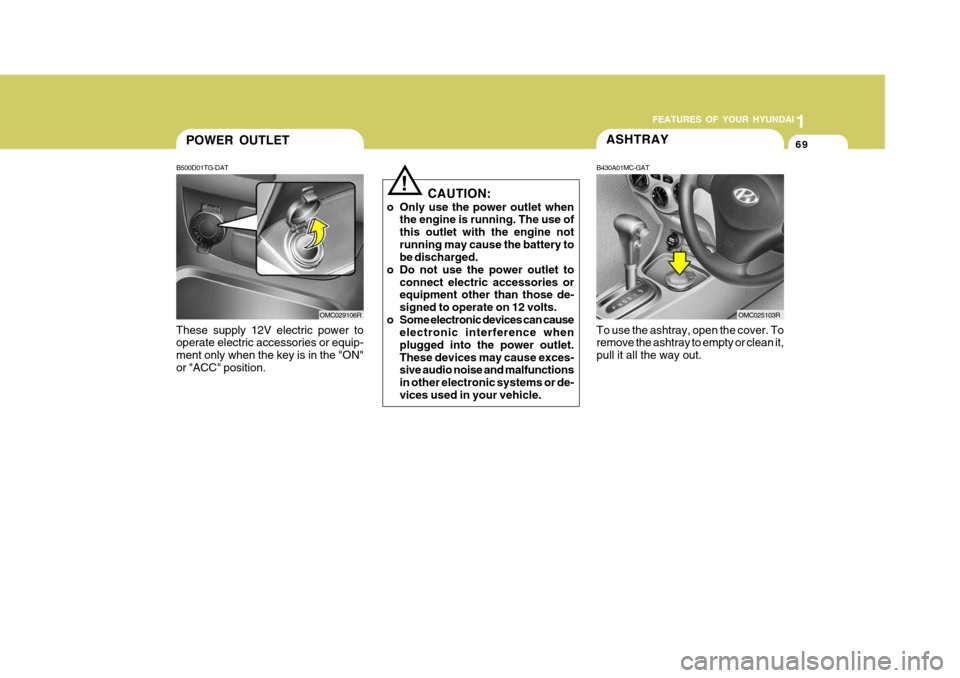
B500D01TG-DAT
These supply 12V electric power to operate electric accessories or equip- ment only when the key is in the "ON"or "ACC" position. OMC029106R
!
CAUTION:
o Only use the power outlet when the engine is running. The use of this outlet with the engine notrunning may cause the battery to be discharged.
o Do not use the power outlet to
connect electric accessories orequipment other than those de- signed to operate on 12 volts.
o Some electronic devices can cause electronic interference whenplugged into the power outlet.These devices may cause exces- sive audio noise and malfunctions in other electronic systems or de-vices used in your vehicle.
ASHTRAY
To use the ashtray, open the cover. To remove the ashtray to empty or clean it, pull it all the way out.
B430A01MC-GAT
OMC025103R
Page 83 of 232
1FEATURES OF YOUR HYUNDAI
72
B460E02TG-GAT Resetting the sunroof Whenever the vehicle battery is discon- nected or discharged, you have to reset your sunroof system as follows:
1. Turn the ignition key to the "ON"position.
2. Press the TILT UP button for more than 1 second to tilt up the sunroof completely when the sunroof is fully closed. Then, release the button.
3. Press and hold the TILT UP button once again until the sunroof has returned to the original position of TILT UP after it is raised a little higher than the maximum TILT UP position. Then, release the button.
4. Press and hold the TILT UP button within 5 seconds until the sunroof is operated as follows; TILT DOWN SLIDE OPEN
SLIDE CLOSEThen, release the button.
! CAUTION:
If the sunroof is not reset, it may not operate properly.
!
!
WARNING:
o Do not close a sunroof if anyone's hands, arms or body are between the sliding glass and the sunroofsash, as this could result in injury.
o Do not place your head or arms
out of the sunroof opening at anytime.
o While the vehicle is moving, al-
ways keep the head, hands andother parts of the body of all occu- pants away from the roof opening. Otherwise, you could be seriouslyinjured if the vehicle stops sud- denly or if the vehicle is involved in an accident. CAUTION:
o Do not open the sunroof in se- verely cold temperature or when itis covered with ice or snow.
o Periodically remove any dirt that may have accumulated on theguide rails.
o Do not press any sunroof control button longer than necessary.Damage to the motor or systemcomponents could occur.
Manual tilt down To close the sunroof, press the SLIDE OPEN button on the overhead consoleand hold it until the sunroof is closed. NOTE: After washing the car or after there is rain, be sure to wipe off any water that is on the sunroof before operat- ing it.
Page 126 of 232
1
FEATURES OF YOUR HYUNDAI
115
1
FEATURES OF YOUR HYUNDAI
115
1
FEATURES OF YOUR HYUNDAI
115
1
FEATURES OF YOUR HYUNDAI
115
!
CAUTION:
o Do not insert warped or poor qual- ity discs into the CD player as damage to the unit may occur.
o Do not insert anything like coins
into the player slot as damage tothe unit may occur.
o Do not place beverages close to
the audio system. The playbackmechanism may be damaged if you spill them.
10. CD SCAN Button
o To playback the first 10 seconds of
each track, press the CD SCAN button more than 1 second.
o To playback the first 10 seconds of
each track in the selected folder,press the CD SCAN button within 1 second. (MP3 CD only)
o Press the CD SCAN button again within 10 sec. when you have reachedthe desired track.
11. FILE SEARCH Knob (TUNE Select Knob)
o You can skip the track by turning the FILE SEARCH knob clockwise or counterclockwise.After selecting the desired track, press the FILE SEARCH knob to playback the track.If you do not press the FILE SEARCH knob within five seconds, the search will stop. 12. DIRECTORY SEARCH
Button
o You can move through the folder by pushing the DIR button to up ( ) anddown ( ). After moving the desired folder, press the FILE SEARCH knob to playbackthe selected folder. If you do not press the FILE SEARCH knob within five seconds, the searchwill stop.
NOTE :
o To assure proper operation of the unit, keep the vehicle interior tem- perature within a normal range by using the vehicle's air condition- ing or heating system.
o When replacing the fuse, replace it with a fuse having the correctcapacity.
o All stored bookmarks are all erased when the car battery is discon-nected or power to the vehicle islost. If this occurs, the bookmarks will have to be reset.
o This equipment is designed to be used only in a 12 volt DC batterysystem with negative ground.
o This unit is made of precisionparts. Do not attempt to disas- semble or adjust any parts.
o When driving your vehicle, be sure
to keep the volume of the unit setlow enough to allow you to hear sounds coming from the outside.
o Do not expose this equipment (in- cluding the speakers and tape) towater or excessive moisture.