Specification Hyundai Accent 2009 Owner's Manual
[x] Cancel search | Manufacturer: HYUNDAI, Model Year: 2009, Model line: Accent, Model: Hyundai Accent 2009Pages: 266, PDF Size: 8.77 MB
Page 1 of 266
F1
All information in the Owner's Manual is current at the time of publication.
However, Hyundai reserves the right to make changes at any time as part of our
policy of continual product improvement may be carried out.
This manual applies to all Hyundai models and includes descriptions and expla-
nations of optional as well as standard equipment. As a result, you may find
material in this manual that does not apply to your specific vehicle.
OWNER'S MANUALA030A01A-AATOperation
Maintenance
Specifications
Page 5 of 266
F5
A040A01A-AAT
FOREWORD
Thank you for choosing Hyundai. We are pleased to welcome you to the growing number of discriminating
people who drive a Hyundai. The advanced engineering and high-quality construction of each Hyundai we
build is something of which we're very proud.
Your Owner's Manual will introduce you to the features and operation of your new Hyundai. It is suggested
that you read it carefully because the information it contains can contribute greatly to the satisfaction you
receive from your new car.
The manufacturer also recommends that all service and maintenance on your car be performed by an
authorized Hyundai dealer. Hyundai dealers are prepared to provide high-quality service, maintenance and
any other assistance that may be required.A050A05A-AAT
HYUNDAI MOTOR AMERICA
Note: Because future owners will also need the information included in this manual, if you sell this Hyundai,
please leave the manual in the vehicle for their use. Thank you.
CAUTION:
Severe engine and transaxle damage may result from the use of poor quality fuels and lubricants that
do not meet Hyundai specifications. You must always use high quality fuels and lubricants that meet
the specifications listed on Page 9-4 in the Vehicle Specifications section of the Owner's Manual and
which also appear in the Service Station Information on the back cover of the Owner's Manual.
Copyright 2008 Hyundai Motor America. All rights reserved. No part of this publication may be reproduced,
stored in any retrieval system or transmitted in any form or by any means without the prior written permission
of Hyundai Motor America.
!
Page 7 of 266
F7
TABLE OF CONTENTS
SECTION
5 1
2
3
4
6
7
8
9
10
FEATURES OF YOUR HYUNDAI
DRIVING YOUR HYUNDAI
WHAT TO DO IN AN EMERGENCY
CORROSION PREVENTION & APPEARANCE CARE
VEHICLE MAINTENANCE REQUIREMENTS
DO-IT-YOURSELF MAINTENANCE
EMISSION CONTROL SYSTEMS
CONSUMER INFORMATION, REPORTING SAFETY DEFECTS &
BINDING ARBITRATION OF WARRANTY CLAIMS
VEHICLE SPECIFICATIONS
INDEX
Page 75 of 266
1
FEATURES OF YOUR HYUNDAI
651
FEATURES OF YOUR HYUNDAI
65
B260G01A-AAT
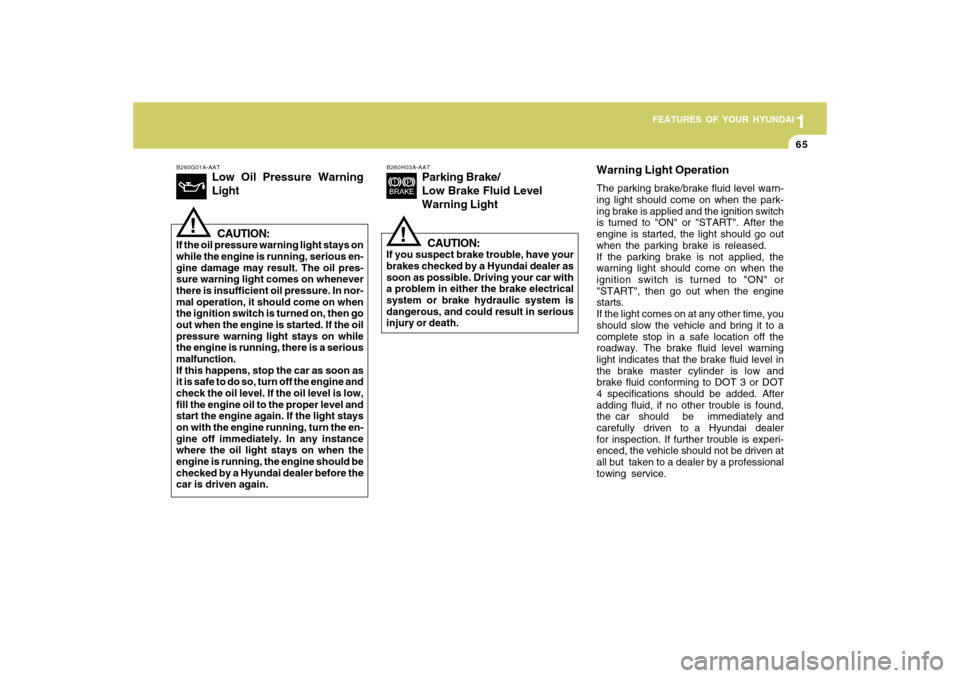
Low Oil Pressure Warning
LightCAUTION:
If the oil pressure warning light stays on
while the engine is running, serious en-
gine damage may result. The oil pres-
sure warning light comes on whenever
there is insufficient oil pressure. In nor-
mal operation, it should come on when
the ignition switch is turned on, then go
out when the engine is started. If the oil
pressure warning light stays on while
the engine is running, there is a serious
malfunction.
If this happens, stop the car as soon as
it is safe to do so, turn off the engine and
check the oil level. If the oil level is low,
fill the engine oil to the proper level and
start the engine again. If the light stays
on with the engine running, turn the en-
gine off immediately. In any instance
where the oil light stays on when the
engine is running, the engine should be
checked by a Hyundai dealer before the
car is driven again.
!
B260H03A-AAT
Parking Brake/
Low Brake Fluid Level
Warning Light
CAUTION:
If you suspect brake trouble, have your
brakes checked by a Hyundai dealer as
soon as possible. Driving your car with
a problem in either the brake electrical
system or brake hydraulic system is
dangerous, and could result in serious
injury or death.
!
Warning Light OperationThe parking brake/brake fluid level warn-
ing light should come on when the park-
ing brake is applied and the ignition switch
is turned to "ON" or "START". After the
engine is started, the light should go out
when the parking brake is released.
If the parking brake is not applied, the
warning light should come on when the
ignition switch is turned to "ON" or
"START", then go out when the engine
starts.
If the light comes on at any other time, you
should slow the vehicle and bring it to a
complete stop in a safe location off the
roadway. The brake fluid level warning
light indicates that the brake fluid level in
the brake master cylinder is low and
brake fluid conforming to DOT 3 or DOT
4 specifications should be added. After
adding fluid, if no other trouble is found,
the car should be immediately and
carefully driven to a Hyundai dealer
for inspection. If further trouble is experi-
enced, the vehicle should not be driven at
all but taken to a dealer by a professional
towing service.
Page 203 of 266
5
VEHICLE MAINTENANCE REQUIREMENTS8
F070H01A-AATo Rear Brake Drums/Linings,
Parking BrakeCheck the rear brake drums and linings
for scoring, burning, leaking fluid, broken
parts, and excessive wear. Inspect the
parking brake system including the park-
ing brake lever and cables. For detailed
service procedures, refer to the Shop
Manual.F070F01A-AATo Brake Hoses and LinesVisually check for proper installation,
chafing, cracks, deterioration and any
leakage. Replace any deteriorated or
damaged parts immediately.
F070G02A-AATo Brake FluidCheck brake fluid level in the brake fluid
reservoir. The level should be between
"MIN" and "MAX" marks on the side of the
reservoir. Use only hydraulic brake fluid
conforming to DOT 3 or DOT 4.F070E06A-AATo Automatic Transaxle FluidThe fluid level should be in the “HOT”
range of the dipstick, after the engine and
transaxle are at normal operating tem-
perature. Check the automatic transaxle
fluid level with the engine running and
the transaxle in neutral, with the parking
brake properly applied. Use HYUNDAI
GENUINE ATF SP III, DIAMOND ATF SP
III, SK ATF SP III or other brands meeting
the SP III specification approved by
Hyundai Motor Co. when adding or chang-
ing fluid. Using the wrong ATF may result
in damage to the ATM.
F070D01A-AATo Manual Transaxle OilInspect the manual transaxle oil accord-
ing to the maintenance schedule.
NOTE:
If the oil level is low, check for possible
leaks before adding oil. Do not overfill.F060E01A-AATo Timing BeltInspect all parts related to the timing belt
for damage and deformation. Replace
any damaged parts immediately.F070C01A-AATo CoolantThe coolant should be changed at the
intervals specified in the maintenance
schedule.
Page 219 of 266
6
DO-IT-YOURSELF MAINTENANCE
14
G140B01A-AATChecking the Air Conditioner Opera-
tion1. Start the engine and let it run at fast
idle for several minutes with the air
conditioner set at the maximum cold
setting.
2. If the air coming out of the in-dash
vents is not cold, have the air condi-
tioning system inspected by your
Hyundai dealer.
CAUTION:
Running the air conditioning system for
extended periods of time with a low
refrigerant level may damage the com-
pressor.
!
!
G120E02A-AATAdding Brake Fluid
WARNING:
Handle brake fluid carefully. It can dam-
age your vision if it gets into your eyes.
Use only DOT 3 or DOT 4 specification
fluid from a sealed container. Do not
allow the fluid can or reservoir to re-
main open any longer than required.
This will avoid entry of dirt and moisture
which can damage the brake system
and cause improper operation.
To add brake fluid, first wipe away any
dirt, then unscrew the fluid reservoir cap.
Slowly pour the recommended fluid into
the reservoir. Do not overfill. Carefully
replace the cap on the reservoir and
tighten.
AIR CONDITIONER CAREG140A01A-AATKeeping the Condenser CleanThe air conditioner condenser (and en-
gine radiator) should be checked periodi-
cally for accumulation of dirt, dead in-
sects, leaves, etc. These can interfere
with maximum cooling efficiency. When
removing such accumulations, brush or
hose them away carefully to avoid bend-
ing the cooling fans.
Page 250 of 266
8
CONSUMER INFORMATION, REPORTING SAFETY DEFECTS & BINDING ARBITRATION OF WARRANTY CLAIMS
12
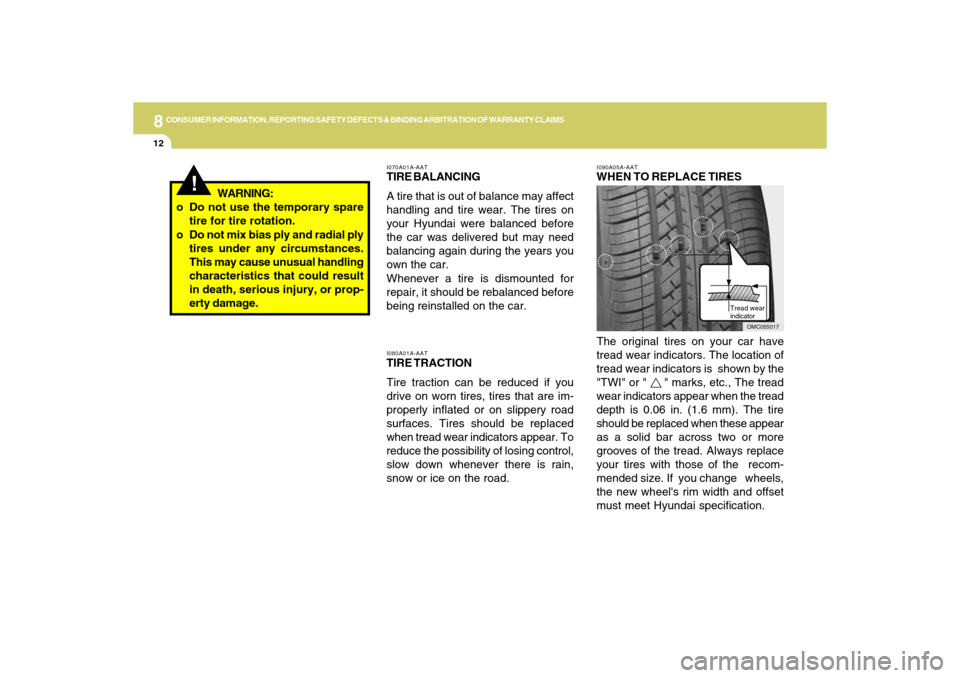
I090A05A-AATWHEN TO REPLACE TIRES
Tread wear
indicator
The original tires on your car have
tread wear indicators. The location of
tread wear indicators is shown by the
"TWI" or " " marks, etc., The tread
wear indicators appear when the tread
depth is 0.06 in. (1.6 mm). The tire
should be replaced when these appear
as a solid bar across two or more
grooves of the tread. Always replace
your tires with those of the recom-
mended size. If you change wheels,
the new wheel's rim width and offset
must meet Hyundai specification.
OMC055017
!
WARNING:
o Do not use the temporary spare
tire for tire rotation.
o Do not mix bias ply and radial ply
tires under any circumstances.
This may cause unusual handling
characteristics that could result
in death, serious injury, or prop-
erty damage.
I070A01A-AATTIRE BALANCING
A tire that is out of balance may affect
handling and tire wear. The tires on
your Hyundai were balanced before
the car was delivered but may need
balancing again during the years you
own the car.
Whenever a tire is dismounted for
repair, it should be rebalanced before
being reinstalled on the car.I080A01A-AATTIRE TRACTION
Tire traction can be reduced if you
drive on worn tires, tires that are im-
properly inflated or on slippery road
surfaces. Tires should be replaced
when tread wear indicators appear. To
reduce the possibility of losing control,
slow down whenever there is rain,
snow or ice on the road.
Page 251 of 266
8
CONSUMER INFORMATION, REPORTING SAFETY DEFECTS & BINDING ARBITRATION OF WARRANTY CLAIMS
13
!
!
!
WARNING:
To reduce the chance or serious or
fatal injuries from an accident
caused by tire failure or loss of
vehicle control:
o Replace tires that are worn, show
uneven wear, or are damaged.
Worn tires can cause loss of brak-
ing effectiveness, steering con-
trol, and traction.
o Do not drive your vehicle with too
little or too much pressure in
your tires. This can lead to un-
even wear and tire failure.
o When replacing tires, never mix
radial and bias-ply tires on the
same car. You must replace all
tires (including the spare) if mov-
ing from radial to bias-ply tires.
o Using tires and wheel other than
the recommended sizes could
cause unusual handling charac-
teristics and poor vehicle con-
trol, resulting in a serious acci-
dent.
I090B02JM-AATTIRE MAINTENANCE
In addition to proper inflation, correct
wheel alignment helps to decrease tire
wear. If you find a tire is worn un-
evenly, have your dealer check the
wheel alignment.
When you have new tires installed,
make sure they are balanced. This will
increase vehicle ride comfort and tire
life. Additionally, a tire shoud always
be rebalanced if it is removed from the
wheel. o Wheels that do not meet Hyundai's
specifications may fit poorly and
result in damage to the vehicle or
unusual handling and poor ve-
hicle control.
o Tires degrade over time, even when
they are not being used. Regard-
less of the remaining tread, it is
recommended that tires tread, It is
recommended that tires generally
be replaced after 6 years of normal
service. Heat caused by not to hot
climates or frequent high loading
Conditions can accelerate the ag-
ing process. Failure to follow this
Warning can result in sudden tire
failure, which could lead to a loss
of control and an accident involv-
ing serious injury or death.
o The ABS works by comparing the
speed of the wheels. Tire size can
affect wheel speed. When replac-
ing tires, all 4 tires must use the
same size originally supplied with
the vehicle. Using tires of a differ-
ent size can cause the ABS (Anti-
lock Brake System) (If Installed)
to work irregularly.WARNING:
WARNING:
o Underinflated or overinflated tires
can cause poor handling, loss of
vehicle control, and sudden tire
failure leading to accidents, inju-
ries, and even death. Always
check tires are properly inflated
before driving. Refer to pages 2-
20 and 8-3 for proper tire pres-
sures and further information.
Page 257 of 266
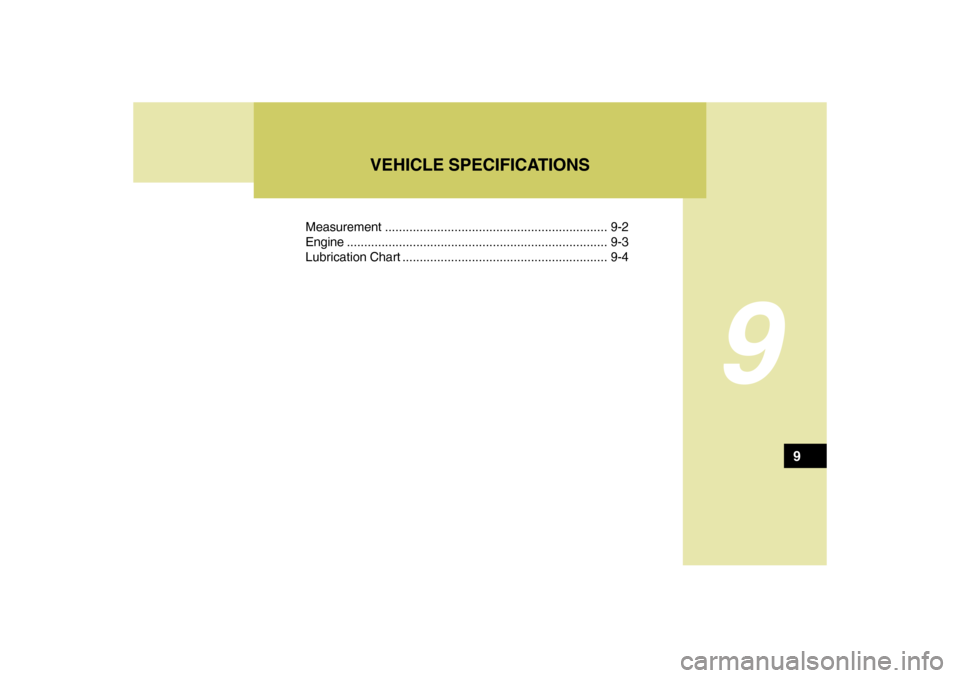
Measurement ................................................................ 9-2
Engine...........................................................................9-3
Lubrication Chart ........................................................... 9-4
VEHICLE SPECIFICATIONS
9
9
Page 258 of 266
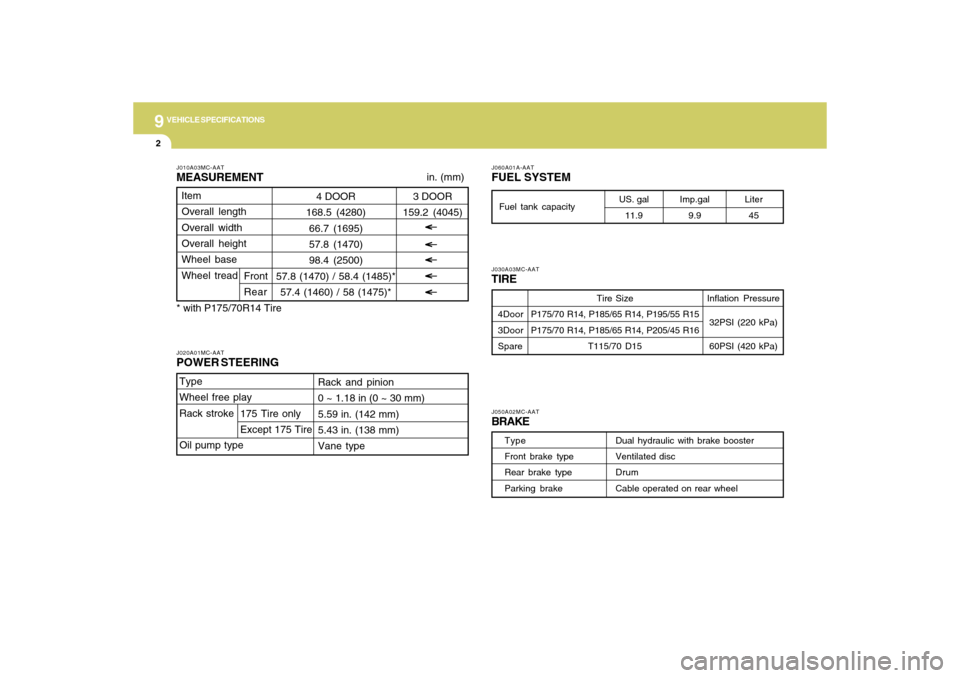
9
VEHICLE SPECIFICATIONS2
Tire Size
P175/70 R14, P185/65 R14, P195/55 R15
P175/70 R14, P185/65 R14, P205/45 R16
T115/70 D15
in. (mm)
Liter
45
Dual hydraulic with brake booster
Ventilated disc
Drum
Cable operated on rear wheel
4Door
3Door
Spare
US. gal
11.9 Fuel tank capacityImp.gal
9.9
Type
Front brake type
Rear brake type
Parking brake
Inflation Pressure
32PSI (220 kPa)
60PSI (420 kPa)
J010A03MC-AATMEASUREMENTJ020A01MC-AATPOWER STEERING
J060A01A-AATFUEL SYSTEMJ050A02MC-AATBRAKEJ030A03MC-AATTIRE
4 DOOR
168.5 (4280)
66.7 (1695)
57.8 (1470)
98.4 (2500)
57.8 (1470) / 58.4 (1485)*
57.4 (1460) / 58 (1475)* Item
Overall length
Overall width
Overall height
Wheel base
Wheel tread
Front
Rear
3 DOOR
159.2 (4045)
Type
Wheel free play
Rack stroke
Oil pump type
Rack and pinion
0 ~ 1.18 in (0 ~ 30 mm)
5.59 in. (142 mm)
5.43 in. (138 mm)
Vane type
175 Tire only
Except 175 Tire
* with P175/70R14 Tire