low beam Hyundai Accent 2010 Owner's Manual
[x] Cancel search | Manufacturer: HYUNDAI, Model Year: 2010, Model line: Accent, Model: Hyundai Accent 2010Pages: 284, PDF Size: 10.23 MB
Page 12 of 284

YOUR VEHICLE AT A GLANCE
F12B255A03MC-GAT INDICATOR SYMBOLS ON THE INSTRUMENT PANEL * More detailed explanations of these items will be found begining on page 1-60.
Turn Signal Indicator Lights
SRS (Airbag) Service Reminder Indicator (If Installed) O/D OFF Indicator Light (Automatic transaxle only) High Beam Indicator Light
Low Oil Pressure Warning Light
ABS Service Reminder Indicator (If Installed)
Door Ajar Warning Light
Parking Brake/Low Brake Fluid Level Warning Light
Charging System Warning Light Fuel Filter Warning Light (Diesel only)
Low Fuel Level Warning Light Diesel Pre-heat Indicator Light (Diesel only)
Malfunction Indicator Light (If Installed)
Immobilizer Warning Light (If Installed)
Passenger's Front Airbag OFF Indicator Light (If Installed)
Trunk Lid/Tail Gate Open Warning Light
Engine Coolant Temperature Warning Light Seat Belt Warning Light
Electronic Power Steering (EPS) System Warning Light (If Installed)
Electronic Stability Program Indicator Lights (If Installed)
120
km/hOverspeed Warning Light (If Installed)
Automatic Transaxle Position Indicator Light (If Installed)
Page 69 of 284
1
FEATURES OF YOUR HYUNDAI
57
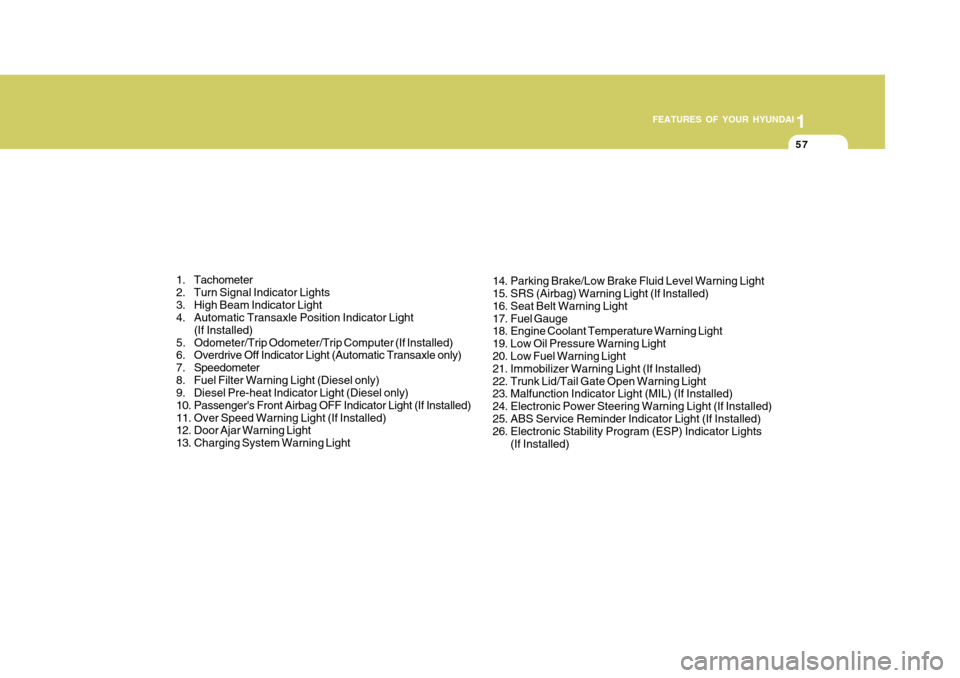
1. Tachometer
2. Turn Signal Indicator Lights
3. High Beam Indicator Light
4. Automatic Transaxle Position Indicator Light (If Installed)
5. Odometer/Trip Odometer/Trip Computer (If Installed)
6. Overdrive Off Indicator Light (Automatic Transaxle only)
7. Speedometer
8. Fuel Filter Warning Light (Diesel only)
9. Diesel Pre-heat Indicator Light (Diesel only)
10. Passenger's Front Airbag OFF Indicator Light (If Installed)
11. Over Speed Warning Light (If Installed)
12. Door Ajar Warning Light
13. Charging System Warning Light 14. Parking Brake/Low Brake Fluid Level Warning Light
15. SRS (Airbag) Warning Light (If Installed)
16. Seat Belt Warning Light
17. Fuel Gauge
18. Engine Coolant Temperature Warning Light
19. Low Oil Pressure Warning Light
20. Low Fuel Warning Light
21. Immobilizer Warning Light (If Installed)
22. Trunk Lid/Tail Gate Open Warning Light
23. Malfunction Indicator Light (MIL) (If Installed)
24. Electronic Power Steering Warning Light (If Installed)
25. ABS Service Reminder Indicator Light (If Installed)
26. Electronic Stability Program (ESP) Indicator Lights
(If Installed)
Page 71 of 284
1
FEATURES OF YOUR HYUNDAI
59
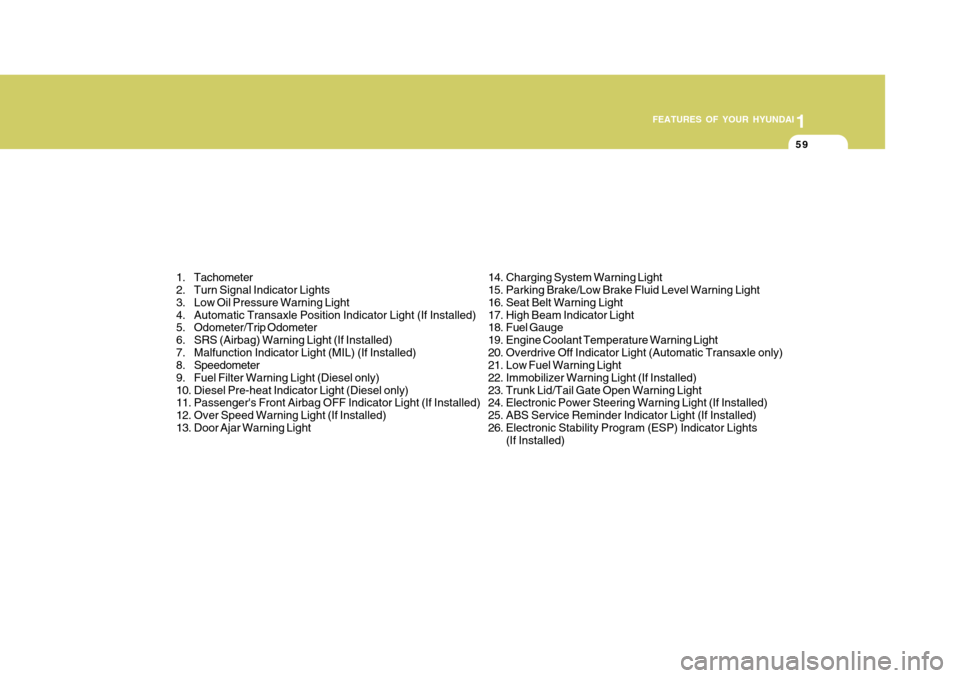
1. Tachometer
2. Turn Signal Indicator Lights
3. Low Oil Pressure Warning Light
4. Automatic Transaxle Position Indicator Light (If Installed)
5. Odometer/Trip Odometer
6. SRS (Airbag) Warning Light (If Installed)
7. Malfunction Indicator Light (MIL) (If Installed)
8. Speedometer
9. Fuel Filter Warning Light (Diesel only)
10. Diesel Pre-heat Indicator Light (Diesel only)
11. Passenger's Front Airbag OFF Indicator Light (If Installed)
12. Over Speed Warning Light (If Installed)
13. Door Ajar Warning Light 14. Charging System Warning Light
15. Parking Brake/Low Brake Fluid Level Warning Light
16. Seat Belt Warning Light
17. High Beam Indicator Light
18. Fuel Gauge
19. Engine Coolant Temperature Warning Light
20. Overdrive Off Indicator Light (Automatic Transaxle only)
21. Low Fuel Warning Light
22. Immobilizer Warning Light (If Installed)
23. Trunk Lid/Tail Gate Open Warning Light
24. Electronic Power Steering Warning Light (If Installed)
25. ABS Service Reminder Indicator Light (If Installed)
26. Electronic Stability Program (ESP) Indicator Lights
(If Installed)
Page 74 of 284
1FEATURES OF YOUR HYUNDAI
62
!
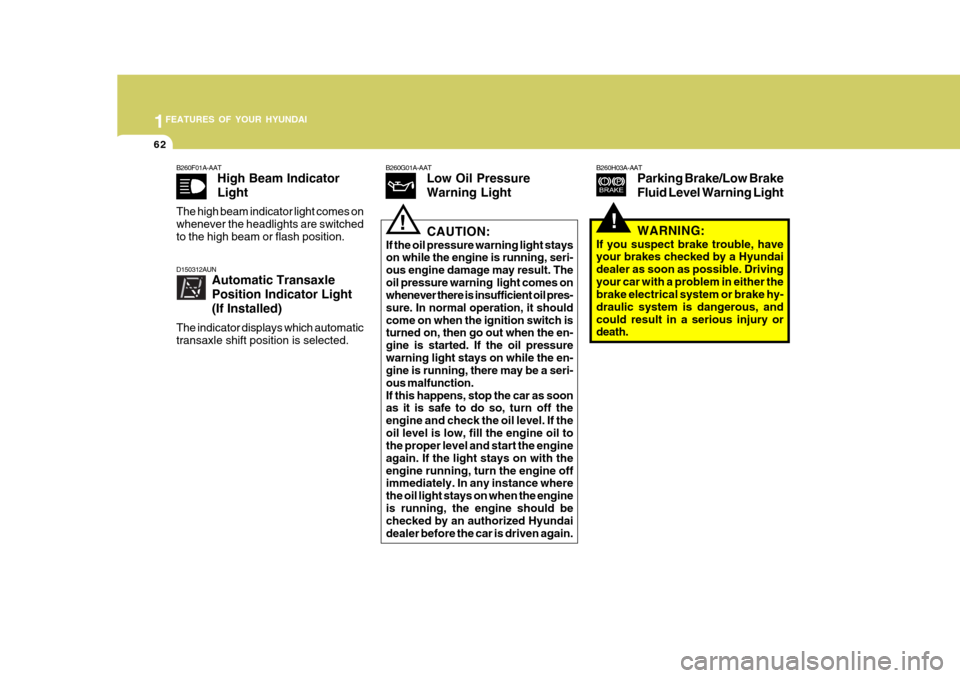
B260H03A-AAT
Parking Brake/Low Brake Fluid Level Warning LightB260G01A-AATLow Oil Pressure Warning Light
!CAUTION:
If the oil pressure warning light stays on while the engine is running, seri- ous engine damage may result. Theoil pressure warning light comes on whenever there is insufficient oil pres- sure. In normal operation, it shouldcome on when the ignition switch is turned on, then go out when the en- gine is started. If the oil pressurewarning light stays on while the en- gine is running, there may be a seri- ous malfunction.If this happens, stop the car as soon
as it is safe to do so, turn off the
engine and check the oil level. If the oil level is low, fill the engine oil to the proper level and start the engine again. If the light stays on with theengine running, turn the engine off immediately. In any instance where the oil light stays on when the engineis running, the engine should be checked by an authorized Hyundai dealer before the car is driven again. WARNING:
If you suspect brake trouble, have your brakes checked by a Hyundai dealer as soon as possible. Drivingyour car with a problem in either the brake electrical system or brake hy- draulic system is dangerous, andcould result in a serious injury or death.
B260F01A-AAT
High Beam Indicator Light
The high beam indicator light comes on whenever the headlights are switchedto the high beam or flash position.
D150312AUN Automatic Transaxle Position Indicator Light(If Installed)
The indicator displays which automatic transaxle shift position is selected.
Page 89 of 284
1
FEATURES OF YOUR HYUNDAI
77
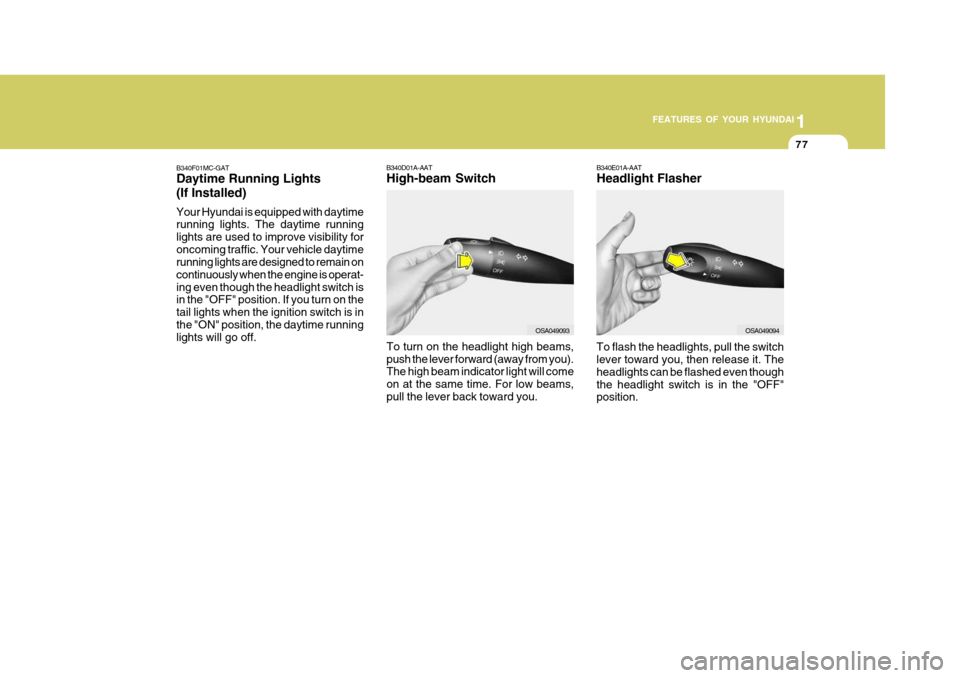
B340E01A-AAT Headlight Flasher To flash the headlights, pull the switch lever toward you, then release it. The headlights can be flashed even thoughthe headlight switch is in the "OFF" position.
B340D01A-AAT High-beam Switch
B340F01MC-GATDaytime Running Lights (If Installed) Your Hyundai is equipped with daytime running lights. The daytime running lights are used to improve visibility foroncoming traffic. Your vehicle daytime running lights are designed to remain on continuously when the engine is operat-ing even though the headlight switch is in the "OFF" position. If you turn on the tail lights when the ignition switch is inthe "ON" position, the daytime running lights will go off.
OSA049094
To turn on the headlight high beams, push the lever forward (away from you). The high beam indicator light will come on at the same time. For low beams,pull the lever back toward you.OSA049093
Page 94 of 284
1FEATURES OF YOUR HYUNDAI
82
Loading condition Switch
position
Driver only Driver + front passenger Full passengers (including driver)Full passengers (including driver) + full trunk loading (or light trailer loading)Driver + full trunk loading (or maximum trailer loading) 0
1 2
3 0
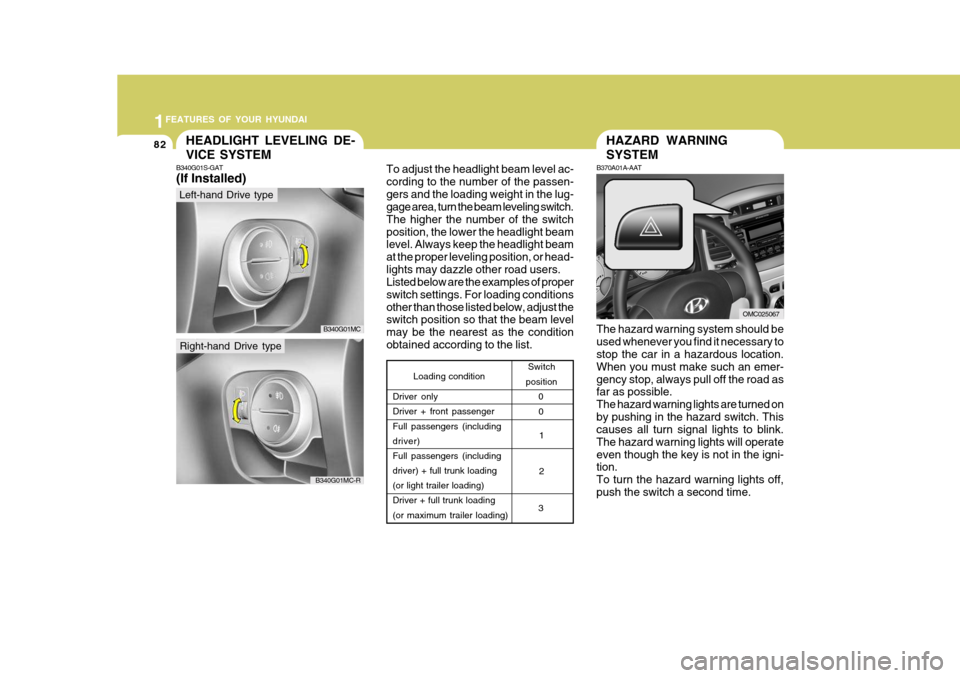
To adjust the headlight beam level ac- cording to the number of the passen-gers and the loading weight in the lug- gage area, turn the beam leveling switch. The higher the number of the switchposition, the lower the headlight beam level. Always keep the headlight beam at the proper leveling position, or head-lights may dazzle other road users. Listed below are the examples of proper switch settings. For loading conditionsother than those listed below, adjust the switch position so that the beam level may be the nearest as the conditionobtained according to the list.
HAZARD WARNING SYSTEM
B370A01A-AAT
The hazard warning system should be used whenever you find it necessary to stop the car in a hazardous location. When you must make such an emer-gency stop, always pull off the road as far as possible. The hazard warning lights are turned onby pushing in the hazard switch. This causes all turn signal lights to blink. The hazard warning lights will operateeven though the key is not in the igni- tion. To turn the hazard warning lights off,push the switch a second time.
OMC025067
HEADLIGHT LEVELING DE- VICE SYSTEM
B340G01S-GAT (If Installed)
Left-hand Drive type
Right-hand Drive type
B340G01MC
B340G01MC-R
Page 101 of 284
1
FEATURES OF YOUR HYUNDAI
89
B460E02TG-GAT Resetting the sunroof Whenever the vehicle battery is discon- nected or discharged, you have to resetyour sunroof system as follows:
1. Turn the ignition key to the "ON" position.
2. Press the TILT UP button for more
than 1 second to tilt up the sunroof completely when the sunroof is fully closed. Then, release the button.
3. Press and hold the TILT UP button once again until the sunroof hasreturned to the original position of TILT UP after it is raised a littlehigher than the maximum TILT UP position. Then, release the button.
4. Press and hold the TILT UP button within 5 seconds until the sunroof isoperated as follows; TILT DOWN � SLIDE OPEN �
SLIDE CLOSEThen, release the button.
! CAUTION:
If the sunroof is not reset, it may not operate properly.
INTERIOR LIGHT
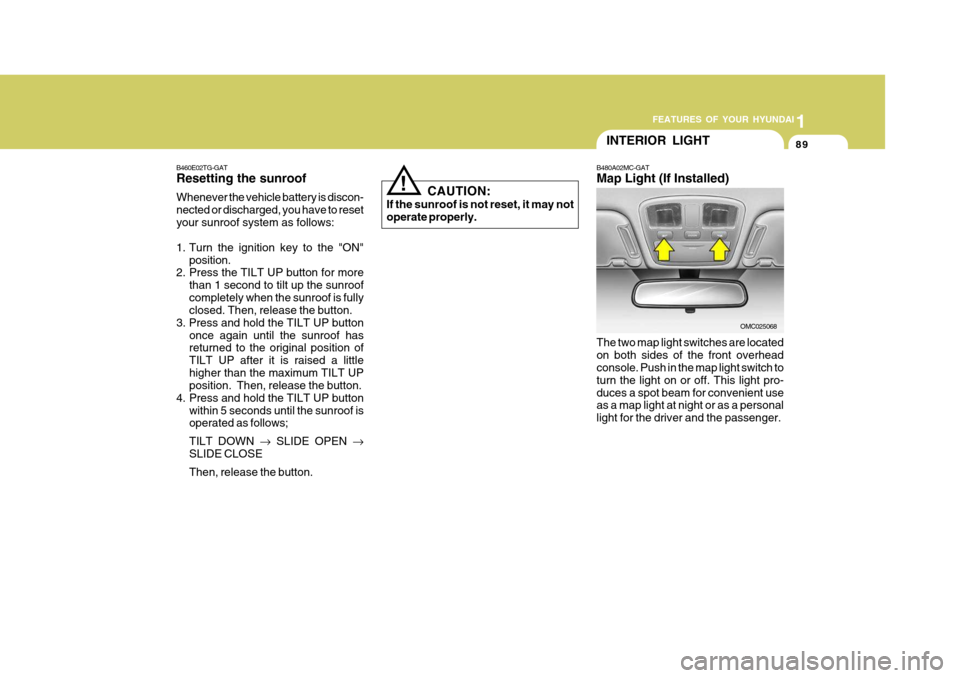
B480A02MC-GAT Map Light (If Installed) The two map light switches are located on both sides of the front overhead console. Push in the map light switch to turn the light on or off. This light pro-duces a spot beam for convenient use as a map light at night or as a personal light for the driver and the passenger.
OMC025068
Page 185 of 284
2
DRIVING YOUR HYUNDAI
23
2
DRIVING YOUR HYUNDAI
23HIGHER SPEED MOTORING
C160K01A-AAT Carry Emergency Equipment Depending on the severity of the weather where you drive your car, you should carry appropriate emergencyequipment. Some of the items you may want to carry include tire chains, tow straps or chains, flashlight, emer-gency flares, sand, a shovel, jumper cables, a window scraper, gloves, ground cloth, coveralls, a blanket, etc.
C160J01A-AAT Don't Let Ice and Snow Accumu- late Underneath Under some conditions, snow and ice can build up under the fenders andinterfere with the steering. When driv- ing in severe winter conditions where this may happen, you should periodi-cally check underneath the car to be sure the movement of the front wheels and the steering components is notobstructed.
C170A01A-AAT Pre-Trip Inspections 1. Tires: Adjust the tire inflation pressures to specification. Low tire inflation pres-sures will result in overheating and possible failure of the tires. Avoid using worn or damaged tireswhich may result in reduced traction or tire failure. NOTE: Never exceed the maximum tire in- flation pressure shown on the tires.
2. Fuel, engine coolant and
engine oil:
High speed travel consumes more fuel than urban motoring. Do not forget tocheck both engine coolant and engine oil. 3. Drive belt: A loose or damaged drive belt may result in overheating of the engine.USE OF LIGHTS
C180A01A-AAT Check your lights regularly for correct operation and always keep them clean. When driving during the day in condi- tions of poor visibility, it is helpful todrive with headlights on low beam. This enables you to be seen as well as to see.
Page 252 of 284
6 DO-IT-YOURSELF MAINTENANCE
26HEADLIGHT AIMING ADJUSTMENT
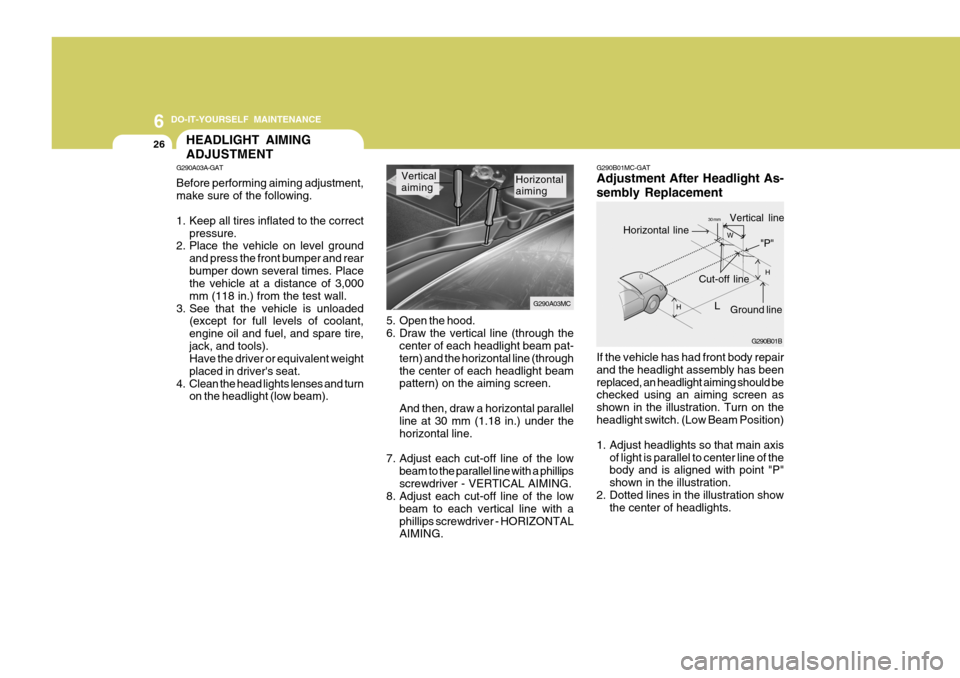
5. Open the hood.
6. Draw the vertical line (through the
center of each headlight beam pat-tern) and the horizontal line (throughthe center of each headlight beam pattern) on the aiming screen. And then, draw a horizontal parallel line at 30 mm (1.18 in.) under the horizontal line.
7. Adjust each cut-off line of the low beam to the parallel line with a phillipsscrewdriver - VERTICAL AIMING.
8. Adjust each cut-off line of the low
beam to each vertical line with aphillips screwdriver - HORIZONTAL AIMING. Horizontal aiming
Vertical aiming
If the vehicle has had front body repair and the headlight assembly has beenreplaced, an headlight aiming should be checked using an aiming screen as shown in the illustration. Turn on theheadlight switch. (Low Beam Position)
1. Adjust headlights so that main axisof light is parallel to center line of the body and is aligned with point "P" shown in the illustration.
2. Dotted lines in the illustration show the center of headlights.
G290B01MC-GAT Adjustment After Headlight As- sembly Replacement
G290A03A-GAT Before performing aiming adjustment, make sure of the following.
1. Keep all tires inflated to the correct
pressure.
2. Place the vehicle on level ground
and press the front bumper and rear bumper down several times. Place the vehicle at a distance of 3,000 mm (118 in.) from the test wall.
3. See that the vehicle is unloaded (except for full levels of coolant,engine oil and fuel, and spare tire,jack, and tools). Have the driver or equivalent weight placed in driver's seat.
4. Clean the head lights lenses and turn on the headlight (low beam). G290B01B
LW
H
H Cut-off line
Ground line
"P"
Horizontal line
Vertical line30 mm
G290A03MC