tow Hyundai Accent 2012 Owner's Manual - RHD (UK. Australia)
[x] Cancel search | Manufacturer: HYUNDAI, Model Year: 2012, Model line: Accent, Model: Hyundai Accent 2012Pages: 367, PDF Size: 25.39 MB
Page 13 of 367
Introduction
6
1
No special run-in period is needed. By
following a few simple precautions for the
first 1,000 km (600 miles) you may add to
the performance, economy and life of
your vehicle.
Do not race the engine.
Whilst driving, keep your engine speed
(rpm, or revolutions per minute)
between 2,000 rpm and 4,000 rpm.
Do not maintain a single speed for long periods of time, either fast or slow.
Varying engine speed is needed to
properly run-in the engine.
Avoid hard stops, except in emergen- cies, to allow the brakes to seat prop-
erly.
Don't let the engine idle longer than 3 minutes at one time.
Don't tow a trailer during the first 2,000 km (1,200 miles) of operation.
VEHICLE RUN-IN PROCESS
Page 27 of 367
39
Safety features of your vehicle
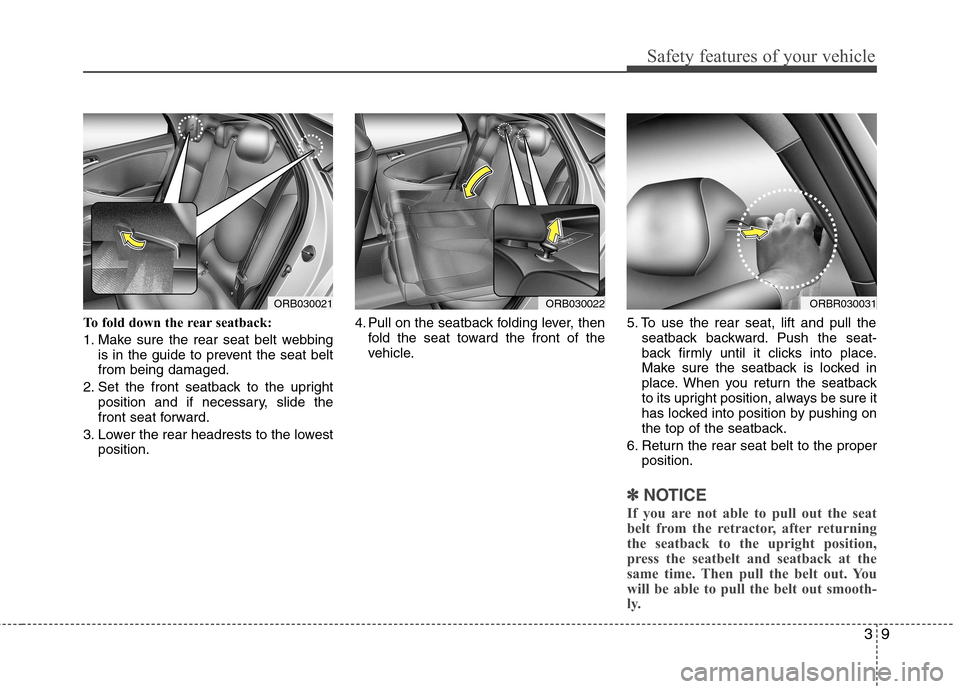
To fold down the rear seatback:
1. Make sure the rear seat belt webbingis in the guide to prevent the seat belt from being damaged.
2. Set the front seatback to the upright position and if necessary, slide the
front seat forward.
3. Lower the rear headrests to the lowest position. 4. Pull on the seatback folding lever, then
fold the seat toward the front of the
vehicle. 5. To use the rear seat, lift and pull the
seatback backward. Push the seat-
back firmly until it clicks into place.
Make sure the seatback is locked in
place. When you return the seatback
to its upright position, always be sure it
has locked into position by pushing on
the top of the seatback.
6. Return the rear seat belt to the proper position.
✽✽ NOTICE
If you are not able to pull out the seat
belt from the retractor, after returning
the seatback to the upright position,
press the seatbelt and seatback at the
same time. Then pull the belt out. You
will be able to pull the belt out smooth-
ly.
ORB030022ORB030021ORBR030031
Page 47 of 367
329
Safety features of your vehicle
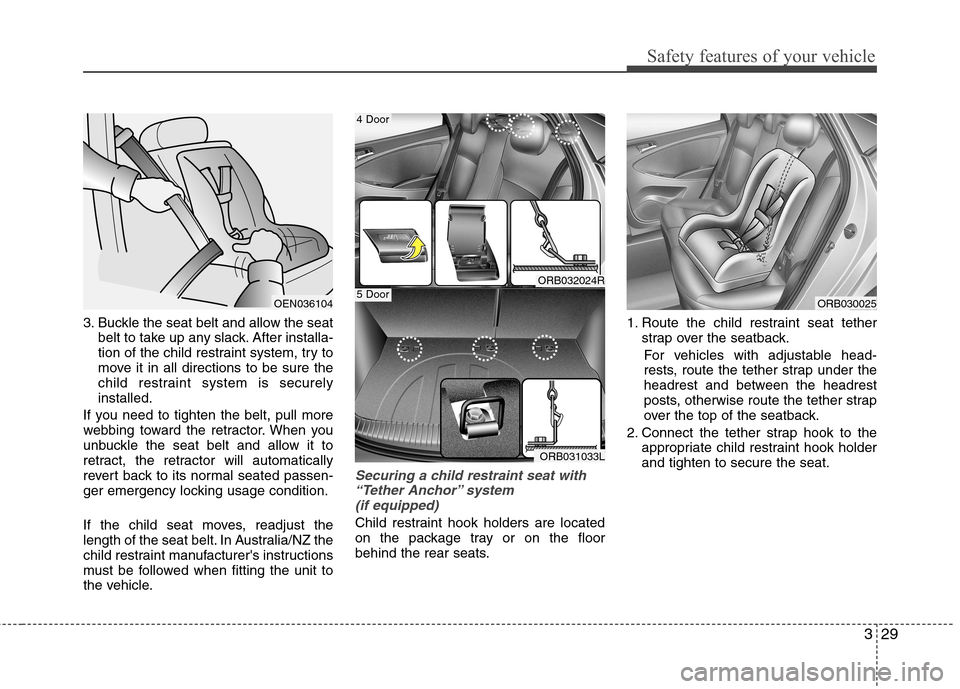
3. Buckle the seat belt and allow the seatbelt to take up any slack. After installa-
tion of the child restraint system, try to
move it in all directions to be sure the
child restraint system is securelyinstalled.
If you need to tighten the belt, pull more
webbing toward the retractor. When you
unbuckle the seat belt and allow it to
retract, the retractor will automatically
revert back to its normal seated passen-
ger emergency locking usage condition.
If the child seat moves, readjust the
length of the seat belt. In Australia/NZ the
child restraint manufacturer's instructions
must be followed when fitting the unit to
the vehicle.
Securing a child restraint seat with “Tether Anchor” system (if equipped)
Child restraint hook holders are located
on the package tray or on the floor
behind the rear seats. 1. Route the child restraint seat tether
strap over the seatback.
For vehicles with adjustable head-
rests, route the tether strap under the
headrest and between the headrest
posts, otherwise route the tether strap
over the top of the seatback.
2. Connect the tether strap hook to the appropriate child restraint hook holderand tighten to secure the seat.
OEN036104
ORB032024R
ORB031033L
4 Door
5 DoorORB030025
Page 69 of 367
351
Safety features of your vehicle
SRS Care
The SRS is virtually maintenance-free
and so there are no parts you can safely
service by yourself. If the SRS air bag
warning light does not illuminate
when you turn the ignition ON, or if it con-
tinuously remains on, have your vehicle
immediately inspected by an authorised
HYUNDAI dealer.
Any work on the SRS system, such as
removing, installing, repairing, or any
work on the steering wheel, the frontpassenger's panel, front seats and roof
rails must be performed by an authorised
HYUNDAI dealer. Improper handling of
the SRS system may result in serious
personal injury.
WARNING
Modification to SRS components or wiring, including the addition
of any kind of badges to the pad
covers or modifications to the
body structure, can adversely
affect SRS performance and lead
to possible injury.
For cleaning the air bag pad cov- ers, use only a soft, dry cloth or
one which has been moistened
with plain water. Solvents or
cleaners could adversely affect
the air bag covers and proper
deployment of the system.
No objects should be placed over
or near the air bag modules on the
steering wheel, instrument panel,
and the front passenger's panel
above the glove box, because any
such object could cause harm if the
vehicle is in a crash severe enough
to cause the air bags to inflate.
(Continued)
(Continued)
If the air bags inflate, they must be replaced by an authorised
HYUNDAI dealer.
Do not tamper with or disconnect SRS wiring, or other components
of the SRS system. Doing so
could result in injury, due to acci-
dental inflation of the air bags or
by rendering the SRS inopera-
tive.
If components of the air bag sys- tem must be discarded, or if the
vehicle must be scrapped, certain
safety precautions must be
observed. An authorised
HYUNDAI dealer knows these
precautions and can give you the
necessary information. Failure to
follow these precautions and pro-cedures could increase the risk
of personal injury.
If your car was flooded and has soaked carpeting or water on the
flooring, you shouldn't try to start
the engine; have the car towed to
an authorised HYUNDAI dealer.
Page 84 of 367
413
Features of your vehicle
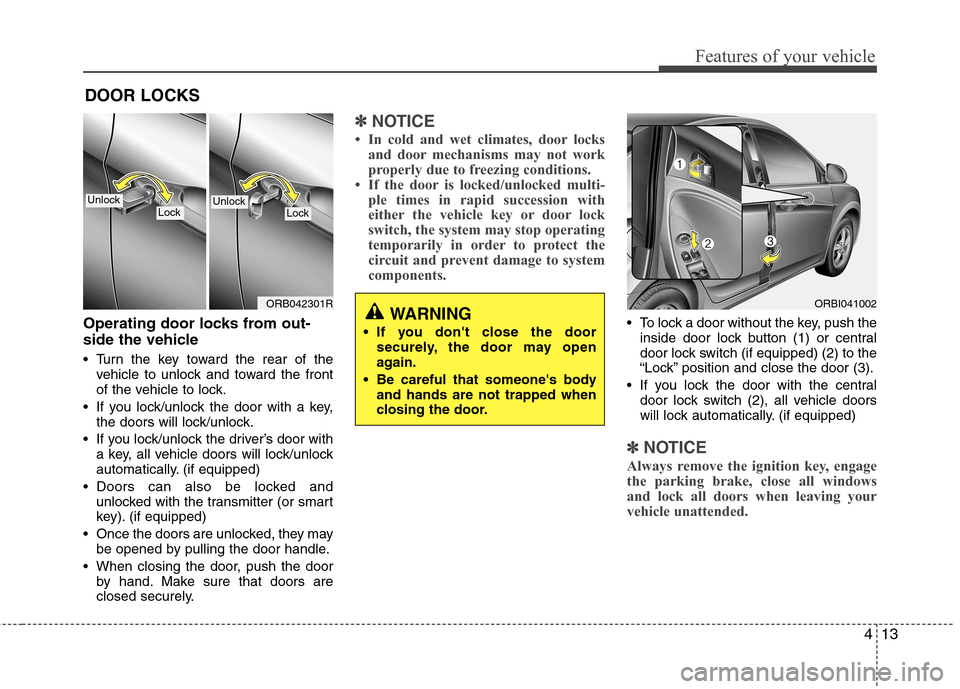
Operating door locks from out-
side the vehicle
Turn the key toward the rear of thevehicle to unlock and toward the front
of the vehicle to lock.
If you lock/unlock the door with a key, the doors will lock/unlock.
If you lock/unlock the driver’s door with a key, all vehicle doors will lock/unlock
automatically. (if equipped)
Doors can also be locked and unlocked with the transmitter (or smart
key). (if equipped)
Once the doors are unlocked, they may be opened by pulling the door handle.
When closing the door, push the door by hand. Make sure that doors are
closed securely.
✽✽ NOTICE
Page 109 of 367
Features of your vehicle
38
4
Inside rearview mirror
Adjust the rearview mirror to centre on
the view through the rear window. Make
this adjustment before you start driving.
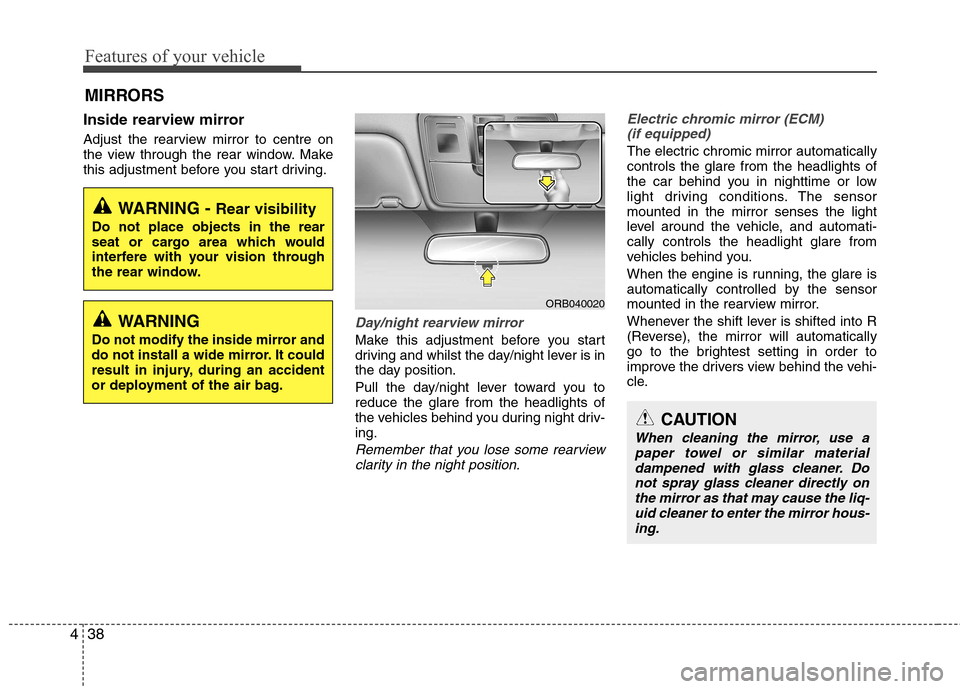
Day/night rearview mirror
Make this adjustment before you start
driving and whilst the day/night lever is in
the day position.
Pull the day/night lever toward you to reduce the glare from the headlights of
the vehicles behind you during night driv-ing.
Remember that you lose some rearview
clarity in the night position.
Electric chromic mirror (ECM)
(if equipped)
The electric chromic mirror automatically controls the glare from the headlights of
the car behind you in nighttime or low
light driving conditions. The sensormounted in the mirror senses the light
level around the vehicle, and automati-cally controls the headlight glare from
vehicles behind you.
When the engine is running, the glare is
automatically controlled by the sensor
mounted in the rearview mirror.
Whenever the shift lever is shifted into R
(Reverse), the mirror will automatically
go to the brightest setting in order to
improve the drivers view behind the vehi-
cle.
MIRRORS
CAUTION
When cleaning the mirror, use a
paper towel or similar material dampened with glass cleaner. Donot spray glass cleaner directly on
the mirror as that may cause the liq- uid cleaner to enter the mirror hous-ing.
WARNING - Rear visibility
Do not place objects in the rear
seat or cargo area which would
interfere with your vision through
the rear window.
ORB040020
WARNING
Do not modify the inside mirror and
do not install a wide mirror. It could
result in injury, during an accident
or deployment of the air bag.
Page 112 of 367
441
Features of your vehicle
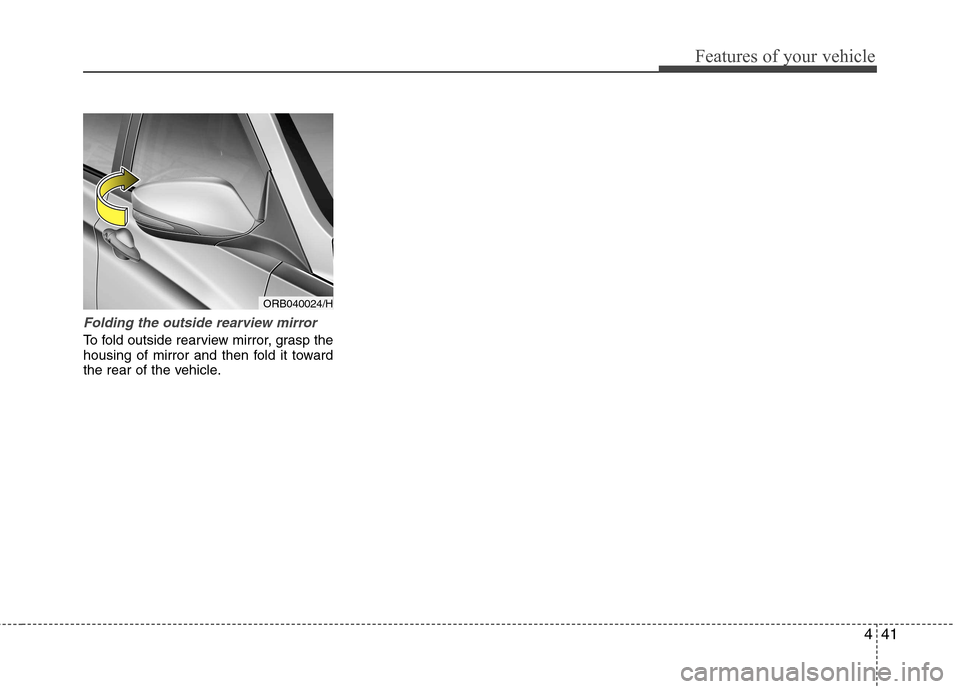
Folding the outside rearview mirror
To fold outside rearview mirror, grasp the
housing of mirror and then fold it toward
the rear of the vehicle.
ORB040024/H
Page 116 of 367
445
Features of your vehicle
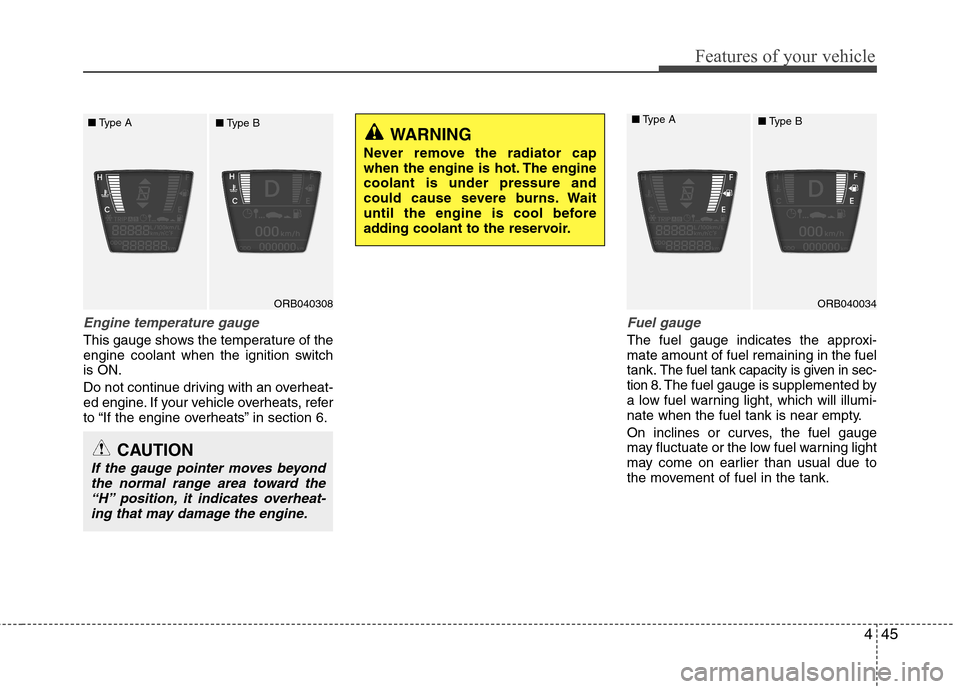
Engine temperature gauge
This gauge shows the temperature of the
engine coolant when the ignition switchis ON.
Do not continue driving with an overheat-
ed engine. If your vehicle overheats, refer
to “If the engine overheats” in section 6.
Fuel gauge
The fuel gauge indicates the approxi- mate amount of fuel remaining in the fueltank.
The fuel tank capacity is given in sec-
tion 8.The fuel gauge is supplemented by
a low fuel warning light, which will illumi-
nate when the fuel tank is near empty.
On inclines or curves, the fuel gauge
may fluctuate or the low fuel warning light
may come on earlier than usual due to
the movement of fuel in the tank.
CAUTION
If the gauge pointer moves beyond
the normal range area toward the
“H” position, it indicates overheat-ing that may damage the engine.
ORB040308
WARNING
Never remove the radiator cap
when the engine is hot. The enginecoolant is under pressure and
could cause severe burns. Wait
until the engine is cool before
adding coolant to the reservoir.■ Type A
■Type B
ORB040034
■
Type A
■Type B
Page 125 of 367
Features of your vehicle
54
4
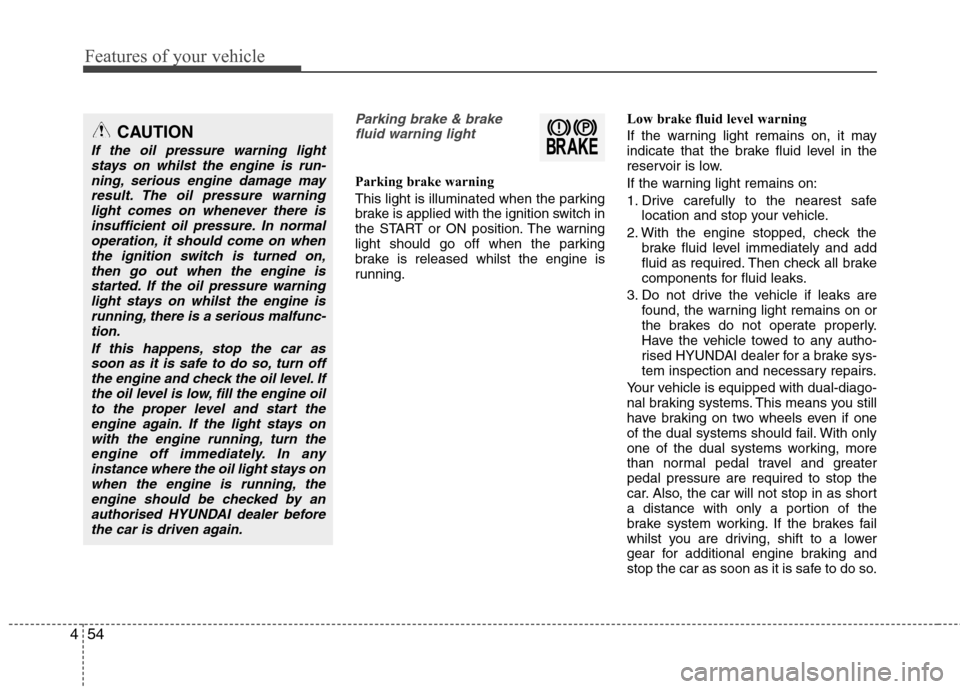
Parking brake & brake
fluid warning light
Parking brake warning
This light is illuminated when the parking
brake is applied with the ignition switch in
the START or ON position. The warning
light should go off when the parking
brake is released whilst the engine is
running. Low brake fluid level warning
If the warning light remains on, it may
indicate that the brake fluid level in the
reservoir is low.
If the warning light remains on:
1. Drive carefully to the nearest safe
location and stop your vehicle.
2. With the engine stopped, check the brake fluid level immediately and add
fluid as required. Then check all brake
components for fluid leaks.
3. Do not drive the vehicle if leaks are found, the warning light remains on or
the brakes do not operate properly.
Have the vehicle towed to any autho-
rised HYUNDAI dealer for a brake sys-
tem inspection and necessary repairs.
Your vehicle is equipped with dual-diago-
nal braking systems. This means you still
have braking on two wheels even if one
of the dual systems should fail. With only
one of the dual systems working, more
than normal pedal travel and greaterpedal pressure are required to stop the
car. Also, the car will not stop in as short
a distance with only a portion of the
brake system working. If the brakes fail
whilst you are driving, shift to a lower
gear for additional engine braking and
stop the car as soon as it is safe to do so.
CAUTION
If the oil pressure warning light stays on whilst the engine is run-
ning, serious engine damage mayresult. The oil pressure warninglight comes on whenever there is insufficient oil pressure. In normal
operation, it should come on whenthe ignition switch is turned on,then go out when the engine is
started. If the oil pressure warninglight stays on whilst the engine isrunning, there is a serious malfunc-tion.
If this happens, stop the car assoon as it is safe to do so, turn off the engine and check the oil level. Ifthe oil level is low, fill the engine oilto the proper level and start the
engine again. If the light stays onwith the engine running, turn theengine off immediately. In any instance where the oil light stays on
when the engine is running, theengine should be checked by an authorised HYUNDAI dealer beforethe car is driven again.
Page 139 of 367
Features of your vehicle
68
4
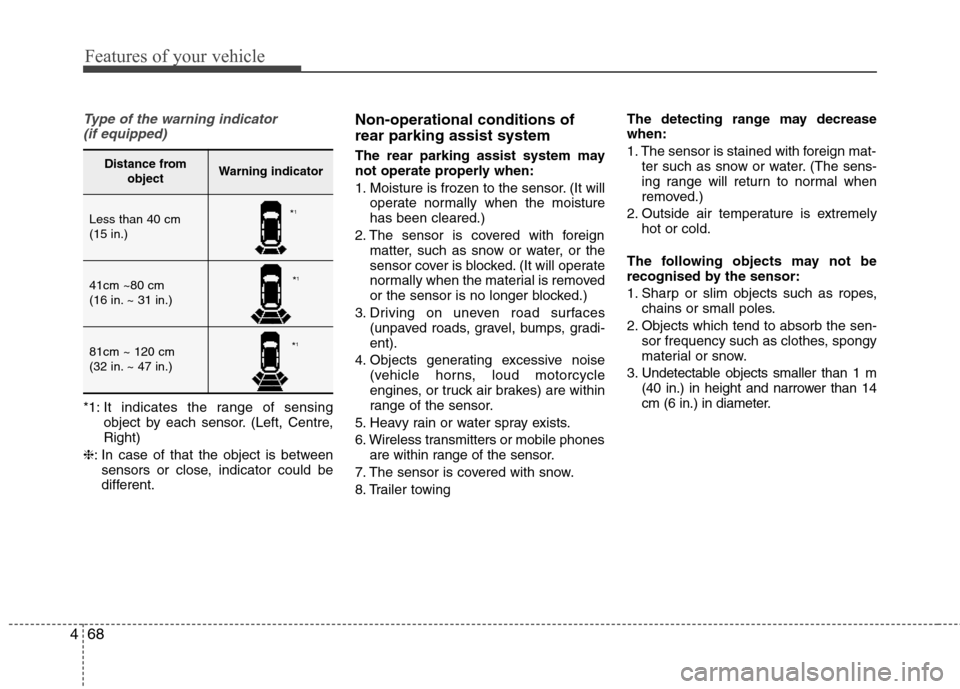
Type of the warning indicator
(if equipped)
*1: It indicates the range of sensing object by each sensor. (Left, Centre, Right)
❈ : In case of that the object is between
sensors or close, indicator could be
different. Non-operational conditions of rear parking assist system
The rear parking assist system may
not operate properly when:
1. Moisture is frozen to the sensor. (It will
operate normally when the moisture has been cleared.)
2. The sensor is covered with foreign matter, such as snow or water, or the
sensor cover is blocked. (It will operate
normally when the material is removed
or the sensor is no longer blocked.)
3. Driving on uneven road surfaces (unpaved roads, gravel, bumps, gradi-ent).
4. Objects generating excessive noise (vehicle horns, loud motorcycle
engines, or truck air brakes) are within
range of the sensor.
5. Heavy rain or water spray exists.
6. Wireless transmitters or mobile phones are within range of the sensor.
7. The sensor is covered with snow.
8. Trailer towing The detecting range may decrease when:
1. The sensor is stained with foreign mat-
ter such as snow or water. (The sens-
ing range will return to normal when
removed.)
2. Outside air temperature is extremely hot or cold.
The following objects may not be
recognised by the sensor:
1. Sharp or slim objects such as ropes, chains or small poles.
2. Objects which tend to absorb the sen- sor frequency such as clothes, spongy
material or snow.
3. Undetectable objects smaller than 1 m (40 in.) in height and narrower than 14
cm (6 in.) in diameter.
Distance from objectWarning indicator
Less than 40 cm (15 in.)
41cm ~80 cm
(16 in. ~ 31 in.)
81cm ~ 120 cm
(32 in. ~ 47 in.)
*1
* 1
* 1