remove seats Hyundai Accent 2017 Owner's Manual
[x] Cancel search | Manufacturer: HYUNDAI, Model Year: 2017, Model line: Accent, Model: Hyundai Accent 2017Pages: 380, PDF Size: 12.45 MB
Page 20 of 380
Safety features of your vehicle
3-4
(Continued)
Luggage and other cargo shouldbe laid flat in the cargo area. If
objects are large, heavy, or must
be piled, they must be secured.
Under no circumstances should
cargo be piled higher than the
seatbacks. Failure to follow these
warnings could result in serious
injury or death in the event of a
sudden stop, collision or rollover.WARNING- Rear seatbacks
The rear seatback must be
securely latched. If not, passen-
gers and objects could be thrown
forward resulting in serious
injury or death in the event of a
sudden stop or collision.
No passenger should ride in the cargo area or sit or lie on folded
seatbacks while the vehicle is
moving. All passengers must be
properly seated in seats and
restrained properly while riding.
When resetting the seatback to the upright position, make sure it
is securely latched by pushing it
forward and rearwards.
To avoid the possibility of burns, do not remove the carpet in the
cargo area. Emission control
devices beneath this floor gener-
ate high temperatures.
(Continued)
WARNING
After adjusting the seat, always
check that it is securely locked into
place by attempting to move the
seat forward or reverse without
using the lock release lever.
Sudden or unexpected movement
of the driver's seat could cause you
to lose control of the vehicle result-
ing in an accident.
WARNING
Do not adjust the seat while wear-ing seat belts. Moving the seat
cushion forward may cause
strong pressure on the abdomen.
Use extreme caution so that hands or other objects are not
caught in the seat mechanisms
while the seat is moving.
Do not put a cigarette lighter on the floor or seat. When you oper-
ate the seat, gas may gush out of
the lighter and cause fire.
Use extreme caution when pick- ing small objects trapped under
the seats or between the seat and
the center console. Your hands
might be cut or injured by the
sharp edges of the seat mecha-
nism.
Page 22 of 380
Safety features of your vehicle
3-6
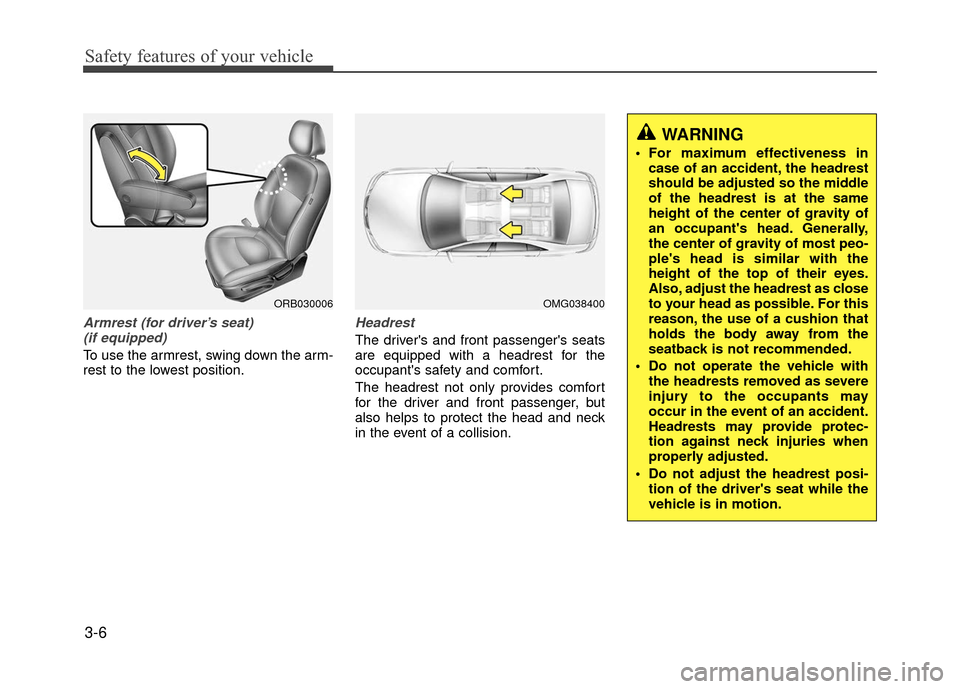
Armrest (for driver’s seat) (if equipped)
To use the armrest, swing down the arm-
rest to the lowest position.
Headrest
The driver's and front passenger's seats
are equipped with a headrest for the
occupant's safety and comfort.
The headrest not only provides comfort
for the driver and front passenger, but
also helps to protect the head and neck
in the event of a collision.
WARNING
For maximum effectiveness in case of an accident, the headrest
should be adjusted so the middle
of the headrest is at the same
height of the center of gravity of
an occupant's head. Generally,
the center of gravity of most peo-
ple's head is similar with the
height of the top of their eyes.
Also, adjust the headrest as close
to your head as possible. For this
reason, the use of a cushion that
holds the body away from the
seatback is not recommended.
Do not operate the vehicle with the headrests removed as severe
injury to the occupants may
occur in the event of an accident.
Headrests may provide protec-
tion against neck injuries when
properly adjusted.
Do not adjust the headrest posi- tion of the driver's seat while the
vehicle is in motion.
OMG038400ORB030006
Page 43 of 380
3-27
Safety features of your vehicle
For safety reasons, we recommend that
the child restraint system be used in the
rear seats.
Since all passenger seat belts move
freely under normal conditions and only
lock under extreme or emergency condi-
tions (emergency locking mode), you
must manually change these seat belts
to the automatic locking mode to secure
a child restraint.
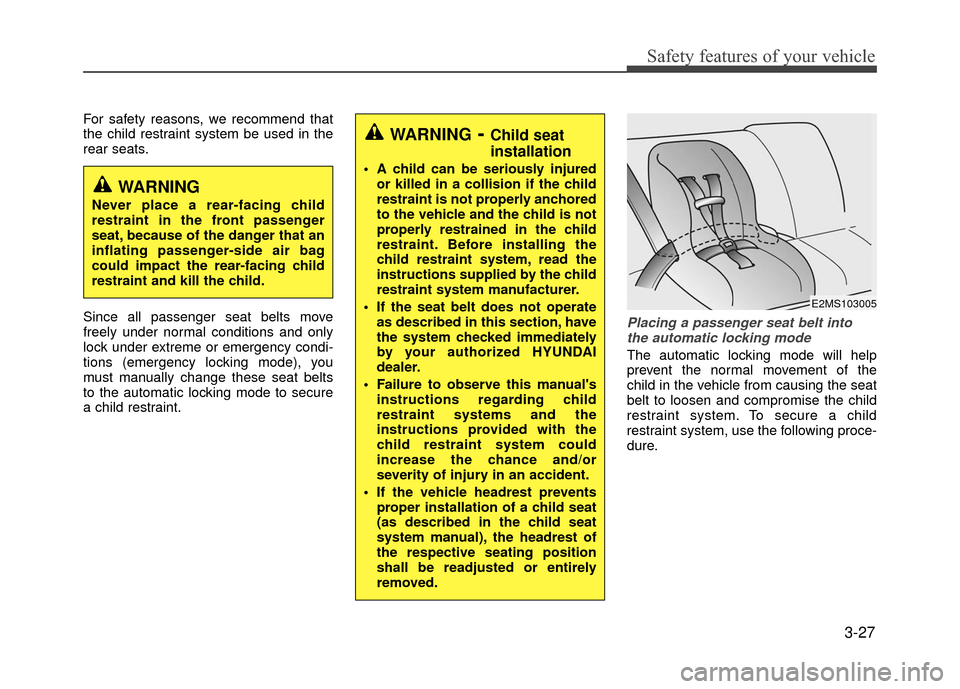
Placing a passenger seat belt intothe automatic locking mode
The automatic locking mode will help
prevent the normal movement of the
child in the vehicle from causing the seat
belt to loosen and compromise the child
restraint system. To secure a child
restraint system, use the following proce-
dure.
WARNING- Child seat
installation
A child can be seriously injured or killed in a collision if the child
restraint is not properly anchored
to the vehicle and the child is not
properly restrained in the child
restraint. Before installing the
child restraint system, read the
instructions supplied by the child
restraint system manufacturer.
If the seat belt does not operate as described in this section, have
the system checked immediately
by your authorized HYUNDAI
dealer.
Failure to observe this manual's instructions regarding child
restraint systems and the
instructions provided with the
child restraint system could
increase the chance and/or
severity of injury in an accident.
If the vehicle headrest prevents proper installation of a child seat
(as described in the child seat
system manual), the headrest of
the respective seating position
shall be readjusted or entirely
removed.
WARNING
Never place a rear-facing child
restraint in the front passenger
seat, because of the danger that an
inflating passenger-side air bag
could impact the rear-facing child
restraint and kill the child.
E2MS103005
Page 45 of 380
3-29
Safety features of your vehicle
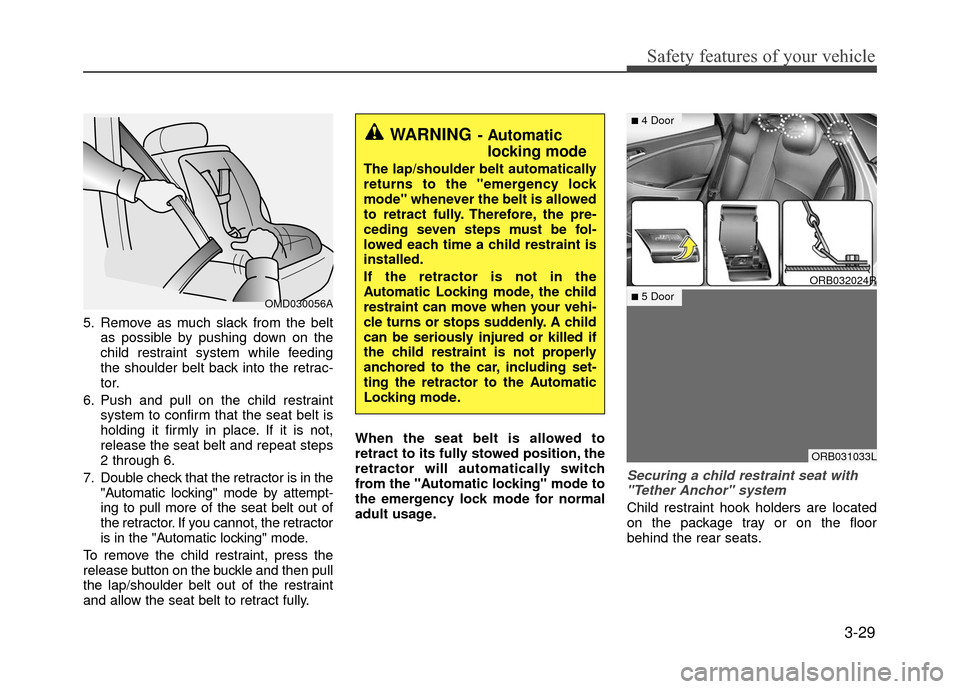
5. Remove as much slack from the beltas possible by pushing down on the
child restraint system while feeding
the shoulder belt back into the retrac-
tor.
6. Push and pull on the child restraint system to confirm that the seat belt is
holding it firmly in place. If it is not,
release the seat belt and repeat steps
2 through 6.
7. Double check that the retractor is in the "Automatic locking" mode by attempt-
ing to pull more of the seat belt out of
the retractor. If you cannot, the retractor
is in the "Automatic locking" mode.
To remove the child restraint, press the
release button on the buckle and then pull
the lap/shoulder belt out of the restraint
and allow the seat belt to retract fully. When the seat belt is allowed to
retract to its fully stowed position, the
retractor will automatically switch
from the "Automatic locking" mode to
the emergency lock mode for normal
adult usage.
Securing a child restraint seat with
"Tether Anchor" system
Child restraint hook holders are located
on the package tray or on the floor
behind the rear seats.
OMD030056A
WARNING- Automatic locking mode
The lap/shoulder belt automatically
returns to the "emergency lock
mode" whenever the belt is allowed
to retract fully. Therefore, the pre-
ceding seven steps must be fol-
lowed each time a child restraint is
installed.
If the retractor is not in the
Automatic Locking mode, the child
restraint can move when your vehi-
cle turns or stops suddenly. A child
can be seriously injured or killed if
the child restraint is not properly
anchored to the car, including set-
ting the retractor to the Automatic
Locking mode.
ORB032024R
ORB031033L
■4 Door
■5 Door
Page 357 of 380
Maintenance
7-74
These should be carried only in proper
containers and any spills or leaks should
be cleaned up, flushed with clean water
and thoroughly dried.
Interior care
Interior general precautions
Prevent chemicals such as perfume, cos-
metic oil, sun cream, hand cleaner, and
air freshener from contacting the interior
parts because they may cause damage
or discoloration. If they do contact the
interior parts, wipe them off immediately.
See the instructions for the proper way to
clean vinyl.
Cleaning the upholstery and interiortrim
Vinyl (if equipped)
Remove dust and loose dirt from vinyl
with a whisk broom or vacuum cleaner.
Clean vinyl surfaces with a vinyl cleaner.
Fabric (if equipped)
Remove dust and loose dirt from fabric
with a whisk broom or vacuum cleaner.
Clean with a mild soap solution recom-
mended for upholstery or carpets.
Remove fresh spots immediately with a
fabric spot cleaner. If fresh spots do not
receive immediate attention, the fabric
can be stained and its color can be
affected. Also, its fire-resistant properties
can be reduced if the material is not
properly maintained.
Leather (if equipped)
Feature of Seat Leather
- Leather is made from the outer skinof an animal, which goes through a
special process to be available for
use. Since it is a natural object, each
part differs in thickness or density.
Wrinkles may appear as a natural result of stretching and shrinking
depending on the temperature and
humidity. - The seat is made of stretchable fabric
to improve comfort.
- The parts contacting the body are curved and the side supporting area
is high which provides driving comfort
and stability.
- Wrinkles may appear naturally from usage. It is not a fault of the products
CAUTION
Never allow water or other liquids to come in contact with electri-cal/electronic components insidethe vehicle as this may damagethem.
When cleaning leather products (steering wheel, seats etc.), useneutral detergents or low alcohol content solutions. If you use highalcohol content solutions oracid/alkaline detergents, the colorof the leather may fade or the sur-face may get stripped off.
CAUTION
Wrinkles or abrasions which appear naturally from usage arenot covered by warranty.
Belts with metallic accessories, zippers or key inside the backpocket may damage the seat fab- ric.
Make sure not to wet the seat. It may change the nature of naturalleather.
Jeans or clothes which could bleach may contaminate the sur-face of the seat covering fabric.
Page 358 of 380
7-75
Maintenance
Caring for the leather seats- Vacuum the seat periodically toremove dust and sand on the seat. It
will prevent abrasion or damage of
the leather and maintain its quality.
- Wipe the natural leather seat cover often with dry or soft cloth.
- Use of proper leather protective may prevent abrasion of the cover and
helps maintain the color. Be sure to
read the instructions and consult a
specialist when using leather coating
or protective agent.
- Light colored (beige, cream beige) leather is easily contaminated and
the stain is noticeable. Clean the
seats frequently.
- Avoid wiping with wet cloth. It may cause the surface to crack.
- Cleaning the leather seats Remove all contaminations instantly.
Refer to instructions below for
removal of each contaminant.
- Cosmetic products (sunscreen, foun- dation, etc.)
Apply cleansing cream on a cloth and
wipe the contaminate spot. Wipe off
the cream with a wet cloth and
remove water with a dry cloth. - Beverages (coffee, soft drink, etc.)
Apply a small amount of neutral
detergent and wipe until contamina-
tions do not smear.
- Oil Remove oil instantly with absorbable
cloth and wipe with stain remover
used only for natural leather.
- Chewing gum Harden the gum with ice and remove
gradually.Cleaning the lap/shoulder belt web-bing
Clean the belt webbing with any mild
soap solution recommended for cleaning
upholstery or carpet. Follow the instruc-
tions provided with the soap. Do not
bleach or re-dye the webbing because
this may weaken it.
Cleaning the interior window glass
If the interior glass surfaces of the vehi-
cle become fogged (that is, covered with
an oily, greasy or waxy film), they should
be cleaned with glass cleaner. Follow the
directions on the glass cleaner container.
CAUTION
Using anything but recommended cleaners and procedures may affectthe fabric’s appearance and fire-resistant properties.
CAUTION
Do not scrape or scratch the insideof the rear window. This may resultin damage to the rear window defroster grid.