Cluster Hyundai Accent 2020 Owner's Manual
[x] Cancel search | Manufacturer: HYUNDAI, Model Year: 2020, Model line: Accent, Model: Hyundai Accent 2020Pages: 445, PDF Size: 42.28 MB
Page 10 of 445
F8
Introduction
"E85" fuel is an alternative fuel com-
prised of 85 percent ethanol and 15
percent gasoline, and is manufac-
tured exclusively for use in Flexible
Fuel Vehicles. "E85" is not compati-
ble with your vehicle. Use of "E85"
may result in poor engine perform-
ance and damage to your vehicle's
engine and fuel system. HYUNDAI
recommends that customers do not
use fuel with an ethanol content
exceeding 15 percent.
To prevent damage to your vehicle’s
engine and fuel system:
Never use gasohol which con-
tains methanol.
Never use gasohol containing
more than 15% ethanol.
Never use leaded fuel or leaded
gasohol.
Never use "E85" fuel.
Your New Vehicle Limited
Warranty does not cover damage
to the fuel system or any perform-
ance problems caused by the use
of "E85" fuel.
Using Fuel Additives (except
Detergent Fuel Additives)
Using fuel additives such as:
- Silicone fuel additive
- Ferrocene (iron-based) fuel additive
- Other metallic-based fuel additives
may result in cylinder misfire, poor
acceleration, engine stalling, dam-
age to the catalyst, or abnormal cor-
rosion, and may cause damage to
the engine resulting in a reduction in
the overall life of the powertrain.
- The Malfunction Indicator Lamp
(MIL) may illuminate.
Damage to the fuel system or per-
formance problem caused by the
use of these fuels or fuel additives
may not be covered by your New
Vehicle Limited Warranty.
Gasoline containing MMT
Some gasoline contains harmful
manganese-based fuel additives
such as
MMT (Methylcyclopentadienyl
Manganese Tricarbonyl
).
HYUNDAI does not recommend the
use of gasoline containing MMT.
This type of fuel can reduce vehicle
performance and affect your emis-
sion control system.
The malfunction indicator lamp on
the cluster may come on.
Detergent Fuel Additives
HYUNDAI recommends that you use
good quality gasolines treated with
detergent additives such as TOP TIER
Detergent Gasoline, which help pre-
vent deposit formation in the engine.
These gasolines will help the engine
run cleaner and enhance performance
of the Emission Control System. For
more information on TOP TIER
Detergent Gasoline, please go to the
website (www
.toptiergas.com).
NOTICE
NOTICE
HCa HMA FOREWORD.QXP 1/5/2018 9:27 AM Page 8
Page 18 of 445
I-5
Instrument Cluster...........................................................3-51
Gauges and Meters .....................................................3-53
Instrument Cluster Control .........................................3-52
LCD Display Messages ..............................................3-68
Transmission shift indicator .......................................3-56
Warning and Indicator Lights.....................................3-58
Instrument Panel Overview ..............................................1-5
Interior Features ............................................................3-123
Clock ........................................................................3-127
Clothes Hanger .........................................................3-127
Cup Holder ...............................................................3-123
Floor Mat Anchor(s) .................................................3-128
Luggage Net Holder .................................................3-128
Power Outlet.............................................................3-125
Sunvisor ....................................................................3-124
Interior Overview..............................................................1-4
Jump Starting ....................................................................6-4LCD Display ...................................................................3-72
LCD Display Control .................................................3-72
LCD Display Modes ..................................................3-72
Light bulbs ......................................................................7-61
Headlamp, Position lamp, Fog lamp,
Daytime Running Light, Turn Signal Lamp and
Side Marker .............................................................7-61
High Mounted Stop Lamp Replacement....................7-70
License Plate Light Bulb Replacement ......................7-70
Rear Combination Light Bulb Replacement ..............7-67
Side Repeater Lamp Replacement .............................7-67
Lighting ...........................................................................3-85
Exterior Lights............................................................3-85
Interior Lights.............................................................3-90
Welcome System ........................................................3-91
Maintenance services ........................................................7-4
Owner Maintenance Precautions..................................7-4
Owner's Responsibility.................................................7-4
Manual Climate Control System ....................................3-95
Heating and Air Conditioning ....................................3-96
System Maintenance ................................................3-102
System Operation .....................................................3-100
I
Index
J
L
M
HCa HMA INDEX.qxp 4/9/2019 3:13 PM Page 5
Page 26 of 445
I IN
NS
ST
TR
RU
UM
ME
EN
NT
T
P
PA
AN
NE
EL
L
O
OV
VE
ER
RV
VI
IE
EW
W
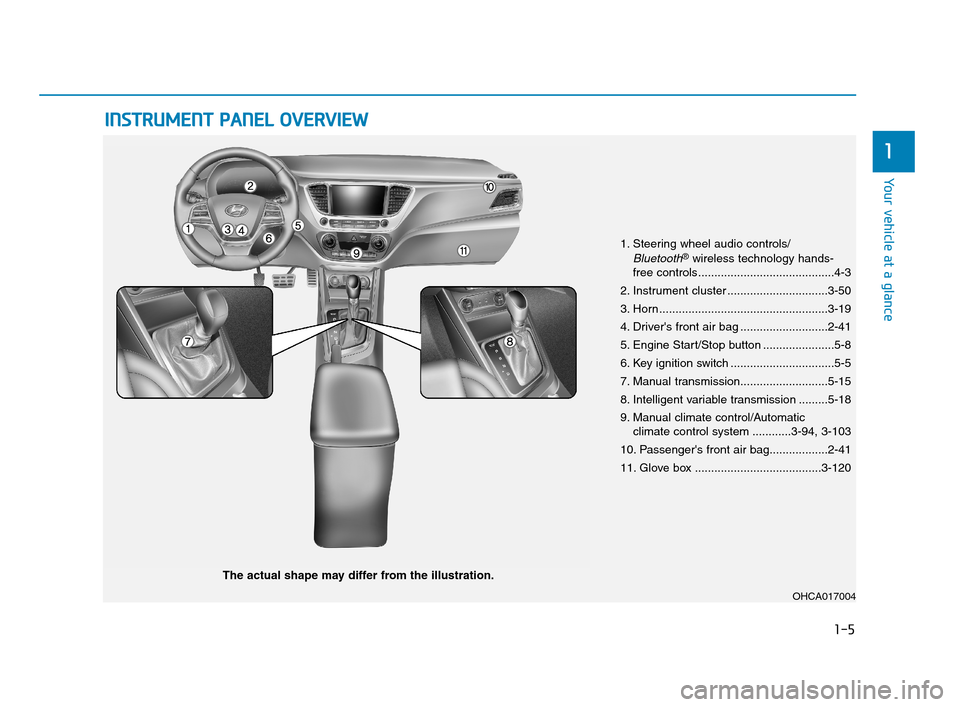
The actual shape may differ from the illustration.
1-5
Your vehicle at a glance
1
1. Steering wheel audio controls/
Bluetooth®wireless technology hands-
free controls..........................................4-3
2. Instrument cluster ...............................3-50
3. Horn....................................................3-19
4. Driver's front air bag ...........................2-41
5. Engine Start/Stop button ......................5-8
6. Key ignition switch ................................5-5
7. Manual transmission...........................5-15
8. Intelligent variable transmission .........5-18
9. Manual climate control/Automatic
climate control system ............3-94, 3-103
10. Passenger's front air bag..................2-41
11. Glove box .......................................3-120
OHCA017004
HCa HMA 1.qxp 4/9/2019 2:54 PM Page 5
Page 75 of 445
2-48
Safety system of your vehicle
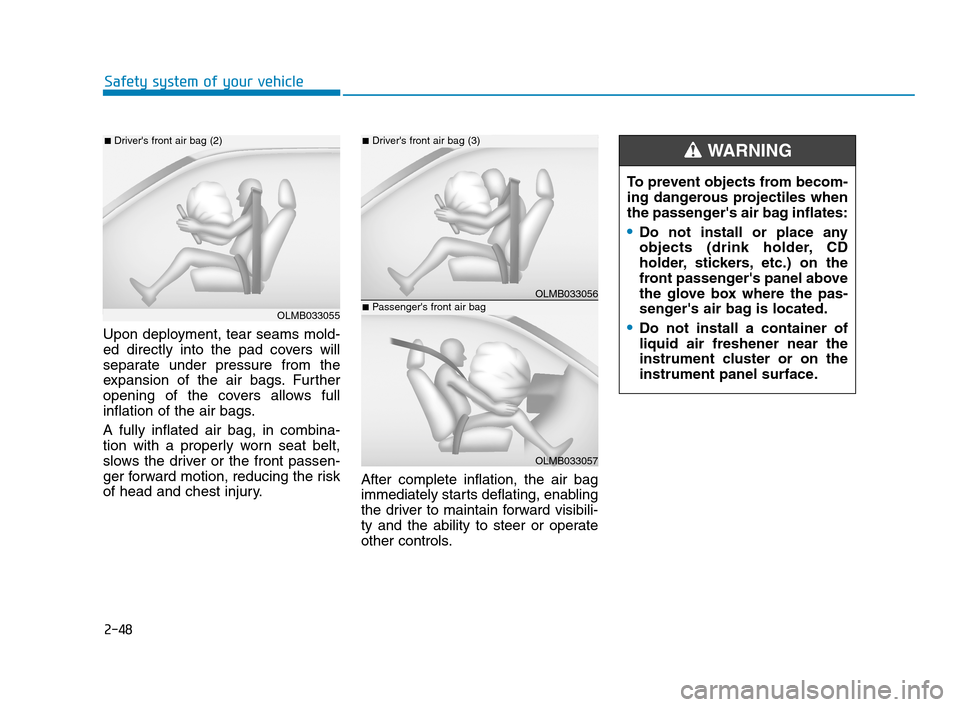
Upon deployment, tear seams mold-
ed directly into the pad covers will
separate under pressure from the
expansion of the air bags. Further
opening of the covers allows full
inflation of the air bags.
A fully inflated air bag, in combina-
tion with a properly worn seat belt,
slows the driver or the front passen-
ger forward motion, reducing the risk
of head and chest injury.After complete inflation, the air bag
immediately starts deflating, enabling
the driver to maintain forward visibili-
ty and the ability to steer or operate
other controls.
OLMB033055
■Driver's front air bag (2)
OLMB033056
■Driver's front air bag (3)
OLMB033057
■Passenger's front air bag
To prevent objects from becom-
ing dangerous projectiles when
the passenger's air bag inflates:
Do not install or place any
objects (drink holder, CD
holder, stickers, etc.) on the
front passenger's panel above
the glove box where the pas-
senger's air bag is located.
Do not install a container of
liquid air freshener near the
instrument cluster or on the
instrument panel surface.
WARNING
HCa HMA 2.QXP 5/7/2018 12:02 PM Page 48
Page 89 of 445
Convenient features of your vehicle
Accessing Your Vehicle .........................................3-3
Remote Key.........................................................................3-3
Smart Key ............................................................................3-6
Immobilizer System .........................................................3-11
Door Locks ............................................................3-12
Operating Door Locks from Outside the Vehicle ....3-12
Operating door locks from inside the vehicle .........3-13
Auto Door Lock/Unlock Features ...............................3-16
Child-Protector Rear Door Locks ...............................3-16
Theft-Alarm System ............................................3-17
Steering Wheel .....................................................3-17
Electric Power Steering (EPS) .....................................3-17
Tilt Steering / Telescope Steering ..............................3-18
Heated steering wheel ...................................................3-19
Horn ....................................................................................3-19
Mirrors ...................................................................3-20
Inside Rearview Mirror ..................................................3-20
Side View Mirrors ...........................................................3-28
Windows ................................................................3-32
Power Windows ...............................................................3-32
Manual windows ..............................................................3-35
Sunroof..................................................................3-36
Sunroof opening and closing .......................................3-37
Sliding the sunroof .........................................................3-37
Tilting the sunroof ..........................................................3-37
Sunshade ...........................................................................3-38
Resetting the sunroof ....................................................3-38
Exterior Features .................................................3-41
Hood ...................................................................................3-41
Trunk ..................................................................................3-42
Smart Trunk ......................................................................3-44
Fuel Filler Door ................................................................3-48
Instrument Cluster ...............................................3-51
Instrument Cluster Control............................................3-52
Gauges and Meters ........................................................3-53
Transmission shift indicator .........................................3-56
Warning and Indicator Lights .......................................3-58
LCD Display Messages ...................................................3-68
LCD Display ...........................................................3-72
LCD Display Control ........................................................3-72
LCD Display Modes .........................................................3-72
Trip Computer .......................................................3-77
Type A ................................................................................3-77
Type B ................................................................................3-81
3
HCa HMA 3a(~84).qxp 4/9/2019 2:58 PM Page 1
Page 92 of 445
3-4
Unlocking
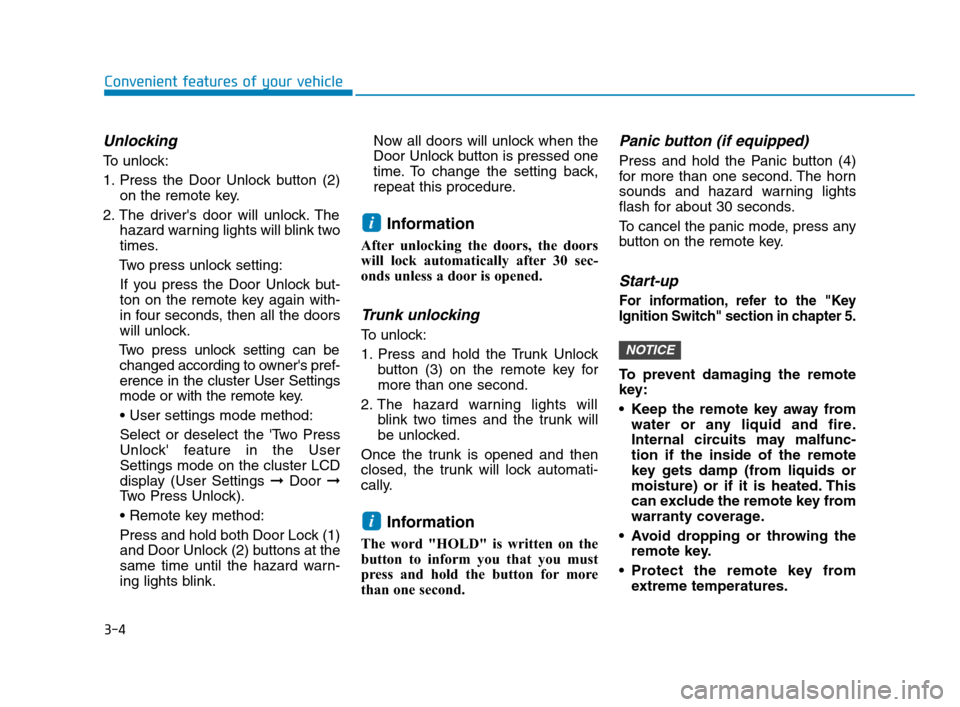
To unlock:
1. Press the Door Unlock button (2)
on the remote key.
2. The driver's door will unlock. The
hazard warning lights will blink two
times.
Two press unlock setting:
If you press the Door Unlock but-
ton on the remote key again with-
in four seconds, then all the doors
will unlock.
Two press unlock setting can be
changed according to owner's pref-
erence in the cluster User Settings
mode or with the remote key.
• User settings mode method:
Select or deselect the 'Two Press
Unlock' feature in the User
Settings mode on the cluster LCD
display (User Settings ➞Door ➞
Two Press Unlock).
Press and hold both Door Lock (1)
and Door Unlock (2) buttons at the
same time until the hazard warn-
ing lights blink.Now all doors will unlock when the
Door Unlock button is pressed one
time. To change the setting back,
repeat this procedure.
Information
After unlocking the doors, the doors
will lock automatically after 30 sec-
onds unless a door is opened.
Trunk unlocking
To unlock:
1. Press and hold the Trunk Unlock
button (3) on the remote key for
more than one second.
2. The hazard warning lights will
blink two times and the trunk will
be unlocked.
Once the trunk is opened and then
closed, the trunk will lock automati-
cally.
Information
The word "HOLD" is written on the
button to inform you that you must
press and hold the button for more
than one second.
Panic button (if equipped)
Press and hold the Panic button (4)
for more than one second. The horn
sounds and hazard warning lights
flash for about 30 seconds.
To cancel the panic mode, press any
button on the remote key.
Start-up
For information, refer to the "Key
Ignition Switch" section in chapter 5.
To prevent damaging the remote
key:
• Keep the remote key away from
water or any liquid and fire.
Internal circuits may malfunc-
tion if the inside of the remote
key gets damp (from liquids or
moisture) or if it is heated. This
can exclude the remote key from
warranty coverage.
Avoid dropping or throwing the
remote key.
Protect the remote key from
extreme temperatures.
NOTICE
i
i
Convenient features of your vehicle
HCa HMA 3a(~84).qxp 4/9/2019 2:58 PM Page 4
Page 96 of 445
3-8
Convenient features of your vehicle
3. The driver's door will unlock. The
hazard warning lights will blink two
times.
Two press unlock setting:
If you press the driver's outside
door handle button or Door Unlock
button on the smart key again
within four seconds, then all the
doors will unlock.
Two press unlock setting can be
changed according to owner's
preference in the cluster User
Settings mode or with the smart
key.
Select or deselect the 'Two Press
Unlock' feature in the User
Settings mode on the cluster LCD
display (User Settings ➞Door ➞
Two Press Unlock).
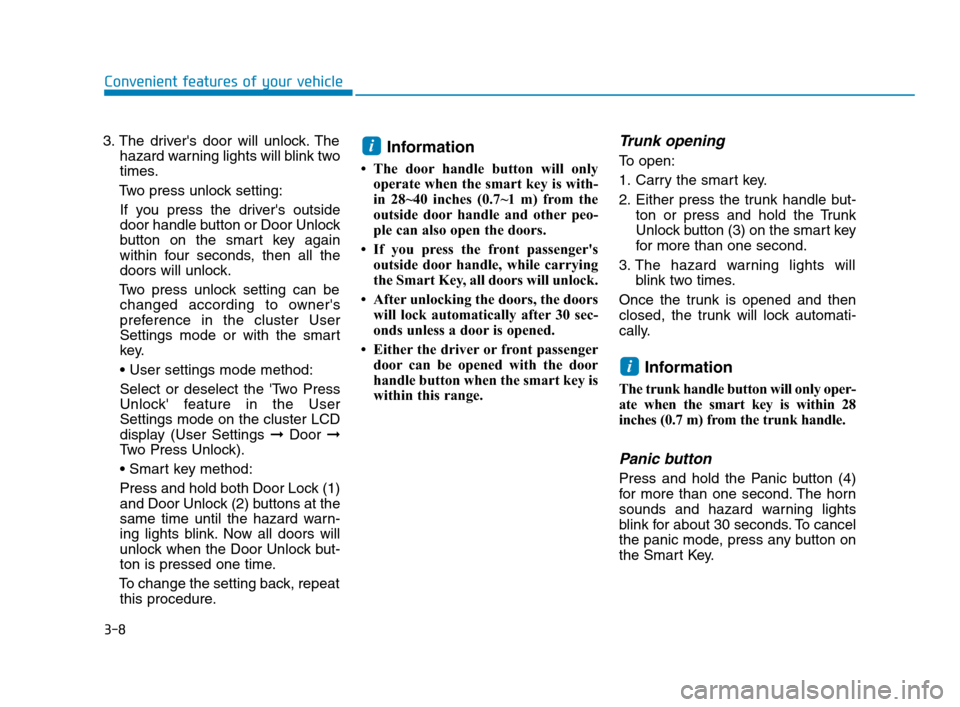
Press and hold both Door Lock (1)
and Door Unlock (2) buttons at the
same time until the hazard warn-
ing lights blink. Now all doors will
unlock when the Door Unlock but-
ton is pressed one time.
To change the setting back, repeat
this procedure.
Information
• The door handle button will only
operate when the smart key is with-
in 28~40 inches (0.7~1 m) from the
outside door handle and other peo-
ple can also open the doors.
• If you press the front passenger's
outside door handle, while carrying
the Smart Key, all doors will unlock.
• After unlocking the doors, the doors
will lock automatically after 30 sec-
onds unless a door is opened.
• Either the driver or front passenger
door can be opened with the door
handle button when the smart key is
within this range.
Trunk opening
To open:
1. Carry the smart key.
2. Either press the trunk handle but-
ton or press and hold the Trunk
Unlock button (3) on the smart key
for more than one second.
3. The hazard warning lights will
blink two times.
Once the trunk is opened and then
closed, the trunk will lock automati-
cally.
Information
The trunk handle button will only oper-
ate when the smart key is within 28
inches (0.7 m) from the trunk handle.
Panic button
Press and hold the Panic button (4)
for more than one second. The horn
sounds and hazard warning lights
blink for about 30 seconds. To cancel
the panic mode, press any button on
the Smart Key.
i
i
HCa HMA 3a(~84).qxp 4/9/2019 2:58 PM Page 8
Page 101 of 445
3-13
Convenient features of your vehicle
3
Once the doors are unlocked, they
may be opened by pulling the door
handle.
When closing the door, push the
door by hand. Make sure that doors
are closed securely.
Information
• In cold and wet climates, door lock
and door mechanisms may not work
properly due to freezing conditions.
• If the door is locked/unlocked multi-
ple times in rapid succession with
either the vehicle key or door lock
switch, the system may stop operat-
ing temporarily in order to protect
the circuit and prevent damage to
system components.
• Two press unlock setting can be
changed in the User Settings mode
on the cluster.
Information
If the electrical power to door lock
switch is not operating (ex. dead car
battery) and the trunk is closed you
will not be able to open the trunk until
power is restored.
Operating door locks from
inside the vehicle
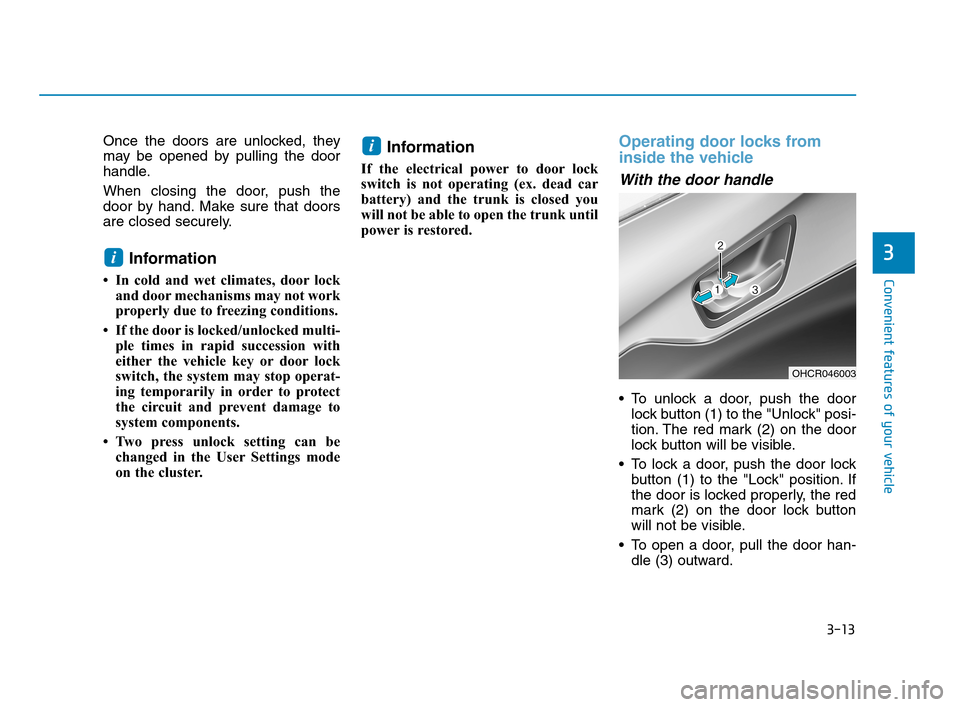
With the door handle
To unlock a door, push the door
lock button (1) to the "Unlock" posi-
tion. The red mark (2) on the door
lock button will be visible.
To lock a door, push the door lock
button (1) to the "Lock" position. If
the door is locked properly, the red
mark (2) on the door lock button
will not be visible.
To open a door, pull the door han-
dle (3) outward.
i
i
OHCR046003
HCa HMA 3a(~84).qxp 4/9/2019 2:59 PM Page 13
Page 104 of 445
3-16
Convenient features of your vehicle
Auto Door Lock/Unlock Features
Impact sensing door unlock
(if equipped)
All doors will be automatically
unlocked when an impact causes the
air bags to deploy.
Speed sensing door lock
(if equipped)
All doors will be automatically locked
(when set on cluster) when vehicle
speed exceeds 9 mph (15 km/h).
All of the doors will be automatically
unlocked after the vehicle is turned off.
You can activate or deactivate the
Auto Door Lock/Unlock features from
the User Settings mode on the LCD
display.
For more information, refer to the
"LCD Display" section in this
chapter.
Child-Protector Rear Door Locks
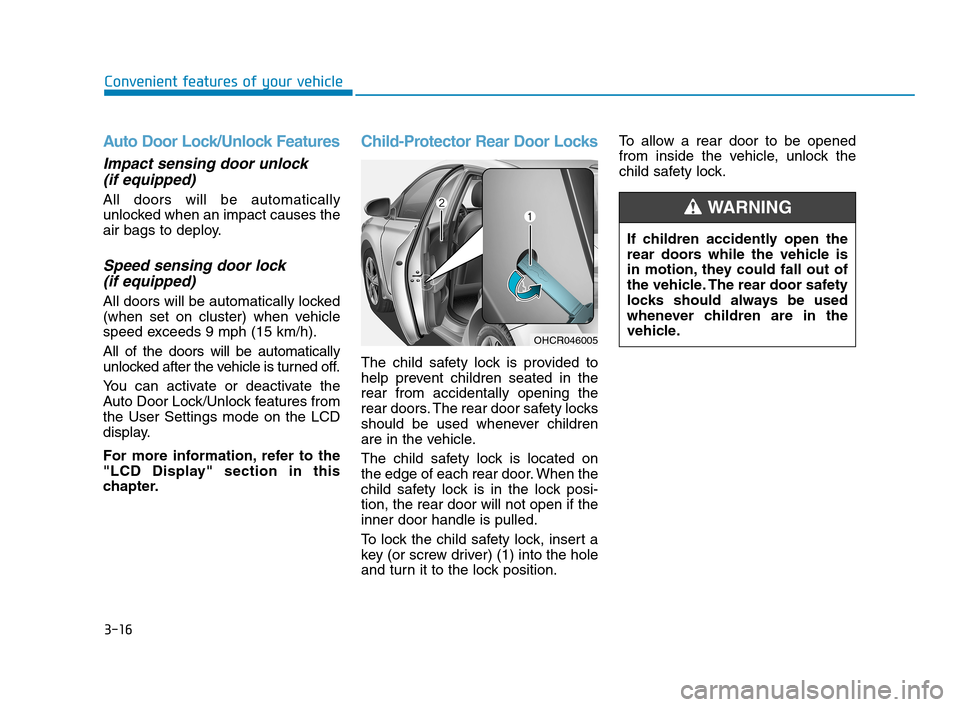
The child safety lock is provided to
help prevent children seated in the
rear from accidentally opening the
rear doors. The rear door safety locks
should be used whenever children
are in the vehicle.
The child safety lock is located on
the edge of each rear door. When the
child safety lock is in the lock posi-
tion, the rear door will not open if the
inner door handle is pulled.
To lock the child safety lock, insert a
key (or screw driver) (1) into the hole
and turn it to the lock position.To allow a rear door to be opened
from inside the vehicle, unlock the
child safety lock.
OHCR046005
If children accidently open the
rear doors while the vehicle is
in motion, they could fall out of
the vehicle. The rear door safety
locks should always be used
whenever children are in the
vehicle.
WARNING
HCa HMA 3a(~84).qxp 4/9/2019 2:59 PM Page 16
Page 105 of 445
3-17
Convenient features of your vehicle
3
This system helps to protect your vehi-
cle and valuables. The horn will sound
and the hazard warning lights will blink
continuously if any of the following
occur:
- A door is opened without using the
remote key or smart key.
- The trunk is opened without using
the remote key or smart key.
- The engine hood is opened.
The alarm continues for 30 seconds,
then the system resets. To turn off the
alarm, unlock the doors with the
remote key or smart key.
The Theft Alarm System automatically
sets 30 seconds after you lock the
doors and the trunk. For the system to
activate, you must lock the doors and
the trunk from outside the vehicle with
the remote key or smart key or by
pressing the button on the outside of
the door handle with the smart key in
your possession.
The hazard warning lights will blink
and the chime will sound once to indi-
cate the system is armed.
Once the security system is set, open-
ing any door, the trunk, or the hood
without using the remote key or smart
key will cause the alarm to activate.The Theft Alarm System will not set if
the hood, the trunk, or any door is not
fully closed. If the system will not set,
check the hood, the trunk, or the doors
are fully closed.
Do not attempt to alter this system or
add other devices to it.
Information
• Do not lock the doors until all pas-
sengers have left the vehicle. If the
remaining passenger leaves the
vehicle when the system is armed,
the alarm will be activated.
• If the vehicle is not disarmed with the
remote key or smart key, open the
doors by using the mechanical key
and place the ignition switch in the
ON position (for remote key) or start
the engine (for smart key) by direct-
ly pressing the ignition switch with
the smart key.
• If the system is disarmed by unlock-
ing the vehicle, but neither a door or
the trunk is opened within 30 sec-
onds, the doors will relock and the
system will rearm automatically.
Electric Power Steering (EPS)
The system assists you with steering
the vehicle. If the vehicle is turned off
or if the power steering system
becomes inoperative, you may still
steer the vehicle, but it will require
increased steering effort.
Should you notice any change in the
effort required to steer during normal
vehicle operation, have the system
checked by an authorized HYUNDAI
dealer.
i
T TH
HE
EF
FT
T-
-A
AL
LA
AR
RM
M
S
SY
YS
ST
TE
EM
MS
ST
TE
EE
ER
RI
IN
NG
G
W
WH
HE
EE
EL
L
If the Electric Power Steering
System does not operate nor-
mally, the warning light ( ) will
illuminate on the instrument
cluster. You may steer the vehi-
cle, but it will require increased
steering efforts. Take your vehi-
cle to an authorized HYUNDAI
dealer and have the system
checked as soon as possible.
CAUTION
HCa HMA 3a(~84).qxp 4/9/2019 2:59 PM Page 17