fuse Hyundai Azera 2006 Owner's Manual
[x] Cancel search | Manufacturer: HYUNDAI, Model Year: 2006, Model line: Azera, Model: Hyundai Azera 2006Pages: 307, PDF Size: 12.62 MB
Page 13 of 307
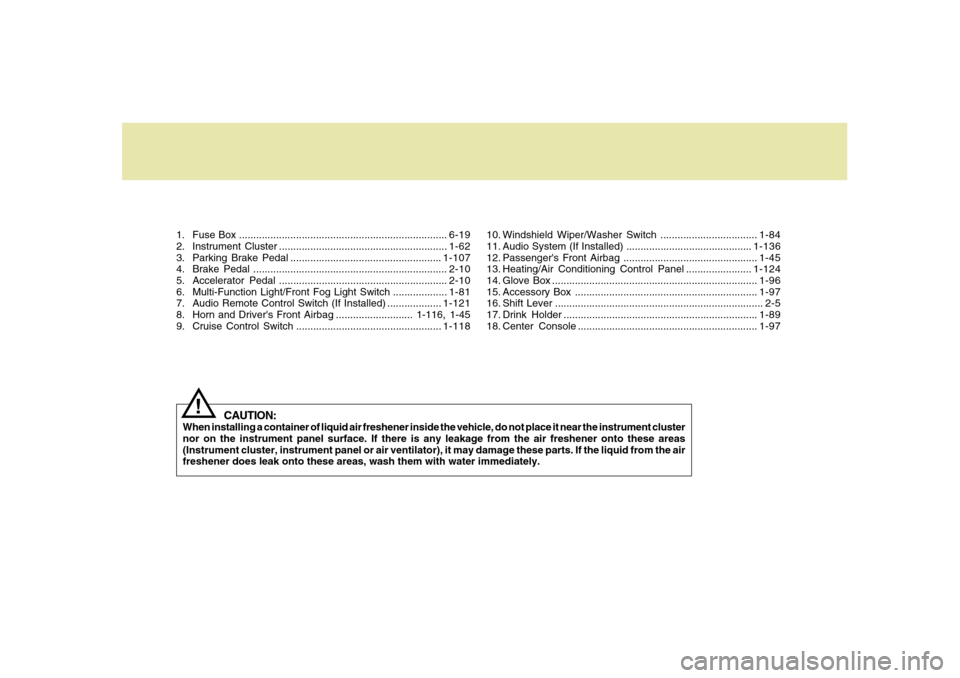
1. Fuse Box .........................................................................6-19
2. Instrument Cluster ...........................................................1-62
3. Parking Brake Pedal .....................................................1-107
4. Brake Pedal ....................................................................2-10
5. Accelerator Pedal ...........................................................2-10
6. Multi-Function Light/Front Fog Light Switch ...................1-81
7. Audio Remote Control Switch (If Installed) ...................1-121
8. Horn and Driver's Front Airbag ........................... 1-116, 1-45
9. Cruise Control Switch ...................................................1-118
CAUTION:
When installing a container of liquid air freshener inside the vehicle, do not place it near the instrument cluster
nor on the instrument panel surface. If there is any leakage from the air freshener onto these areas
(Instrument cluster, instrument panel or air ventilator), it may damage these parts. If the liquid from the air
freshener does leak onto these areas, wash them with water immediately.
!
10. Windshield Wiper/Washer Switch ..................................1-84
11. Audio System (If Installed) ............................................1-136
12. Passenger's Front Airbag ...............................................1-45
13. Heating/Air Conditioning Control Panel .......................1-124
14. Glove Box ........................................................................1-96
15. Accessory Box ................................................................1-97
16. Shift Lever ......................................................................... 2-5
17. Drink Holder ....................................................................1-89
18. Center Console ...............................................................1-97
Page 65 of 307
1
FEATURES OF YOUR HYUNDAI
51
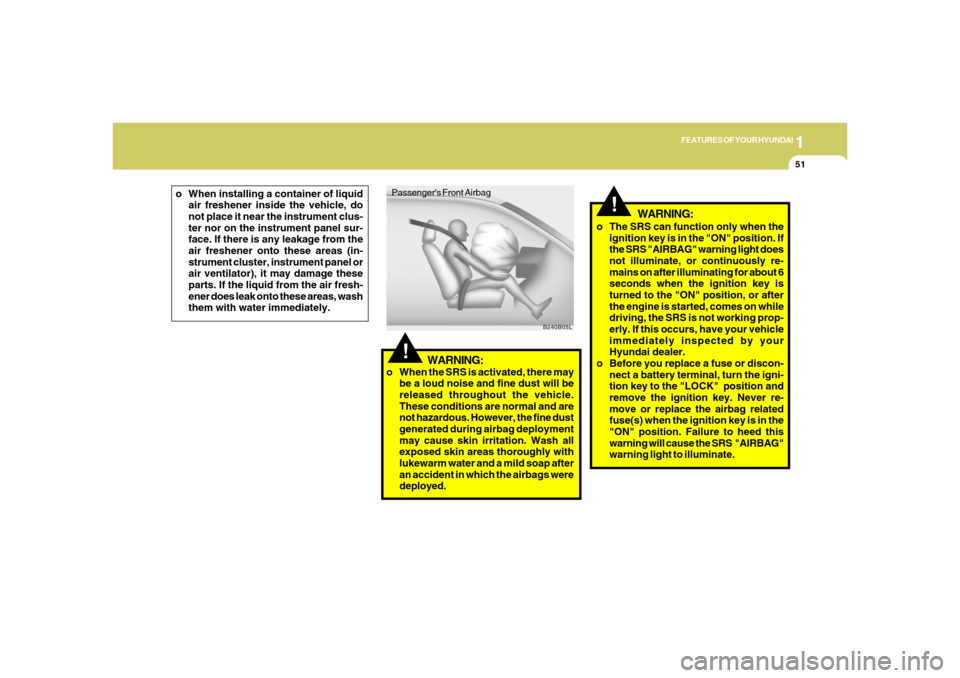
!Passenger's Front Airbag
B240B05L
!
o The SRS can function only when the
ignition key is in the "ON" position. If
the SRS "AIRBAG" warning light does
not illuminate, or continuously re-
mains on after illuminating for about 6
seconds when the ignition key is
turned to the "ON" position, or after
the engine is started, comes on while
driving, the SRS is not working prop-
erly. If this occurs, have your vehicle
immediately inspected by your
Hyundai dealer.
o Before you replace a fuse or discon-
nect a battery terminal, turn the igni-
tion key to the "LOCK" position and
remove the ignition key. Never re-
move or replace the airbag related
fuse(s) when the ignition key is in the
"ON" position. Failure to heed this
warning will cause the SRS "AIRBAG"
warning light to illuminate. o When installing a container of liquid
air freshener inside the vehicle, do
not place it near the instrument clus-
ter nor on the instrument panel sur-
face. If there is any leakage from the
air freshener onto these areas (in-
strument cluster, instrument panel or
air ventilator), it may damage these
parts. If the liquid from the air fresh-
ener does leak onto these areas, wash
them with water immediately.
WARNING:
o When the SRS is activated, there may
be a loud noise and fine dust will be
released throughout the vehicle.
These conditions are normal and are
not hazardous. However, the fine dust
generated during airbag deployment
may cause skin irritation. Wash all
exposed skin areas thoroughly with
lukewarm water and a mild soap after
an accident in which the airbags were
deployed.
WARNING:
Page 95 of 307
1
FEATURES OF YOUR HYUNDAI
81
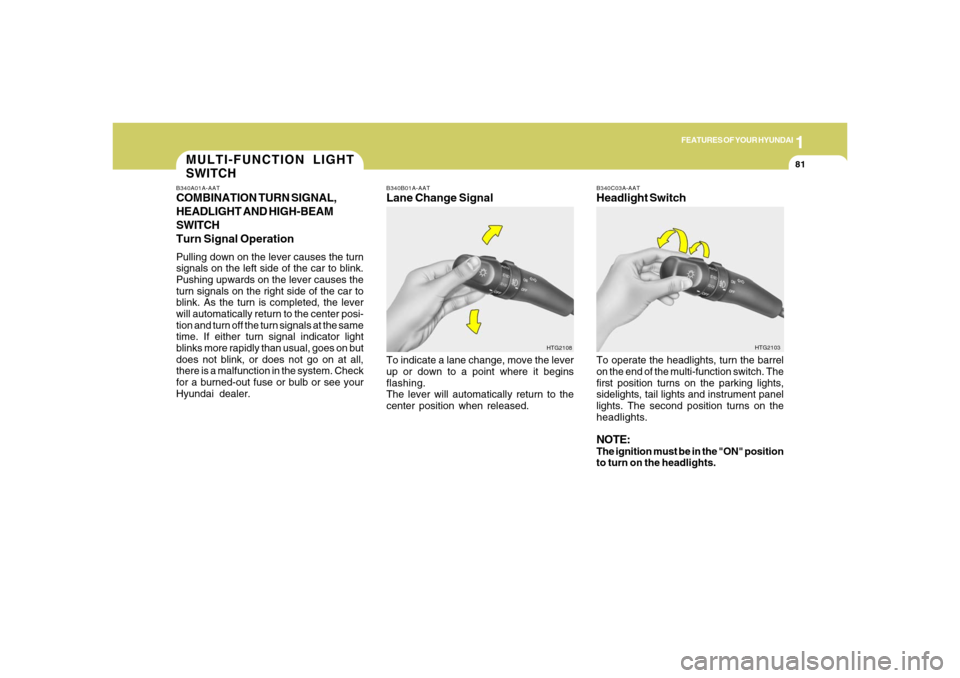
B340B01A-AATLane Change SignalTo indicate a lane change, move the lever
up or down to a point where it begins
flashing.
The lever will automatically return to the
center position when released.
B340C03A-AATHeadlight SwitchTo operate the headlights, turn the barrel
on the end of the multi-function switch. The
first position turns on the parking lights,
sidelights, tail lights and instrument panel
lights. The second position turns on the
headlights.NOTE:The ignition must be in the "ON" position
to turn on the headlights.
HTG2108HTG2103
MULTI-FUNCTION LIGHT
SWITCHB340A01A-AATCOMBINATION TURN SIGNAL,
HEADLIGHT AND HIGH-BEAM
SWITCH
Turn Signal OperationPulling down on the lever causes the turn
signals on the left side of the car to blink.
Pushing upwards on the lever causes the
turn signals on the right side of the car to
blink. As the turn is completed, the lever
will automatically return to the center posi-
tion and turn off the turn signals at the same
time. If either turn signal indicator light
blinks more rapidly than usual, goes on but
does not blink, or does not go on at all,
there is a malfunction in the system. Check
for a burned-out fuse or bulb or see your
Hyundai dealer.
Page 156 of 307
1FEATURES OF YOUR HYUNDAI
142
!
CAUTION:
o Do not insert warped or poor quality
discs into the CD player as damage to
the unit may occur.
o Do not insert anything like coins into
the player slot as damage to the unit
may occur.
o Do not place beverages close to the
audio system. The playback mecha-
nism may be damaged if you spill
them.
o Do not impact on the audio system, or
the playback mechanism could be
damaged.
o Driving on the off-roads or other vi-
brations may skip your compact disc.
Do not use the audio system on off-
roads as the discs could be scratched
and damaged.
o Do not grip or pull out the disc with
your hand while the disc is being pulled
into the unit by the self loading mecha-
nism. These can cause disc scratch-
ing to occur or trouble in the compact
disc player.
NOTE:o To assure proper operation of the
unit, keep the vehicle interior tem-
perature within a normal range by
using the vehicle’s air conditioning or
heating system.
o When replacing the fuse, replace it
with a fuse having the correct capac-
ity.
o The bookmarks are all erased when
the car battery is disconnected or
power off. Therefore, all data will have
to be set again if this should occur.
o This equipment is designed to be used
only in a 12 volt DC battery system
with negative ground.
o This unit is made of precision parts.
Do not attempt to disassemble or
adjust any parts.
o When driving your vehicle, be sure to
keep the volume of the unit set low
enough to allow you to hear sounds
coming from the outside.
o Do not expose this equipment (includ-
ing the speakers and tape) to water or
excessive moisture.o Avoid using home-made CD-Record-
able or CD-Rewritable discs as the
player may not operate properly. When
using the compact disc player, genu-
ine CDs are recommended.
Page 161 of 307
1
FEATURES OF YOUR HYUNDAI
1471
FEATURES OF YOUR HYUNDAI
147
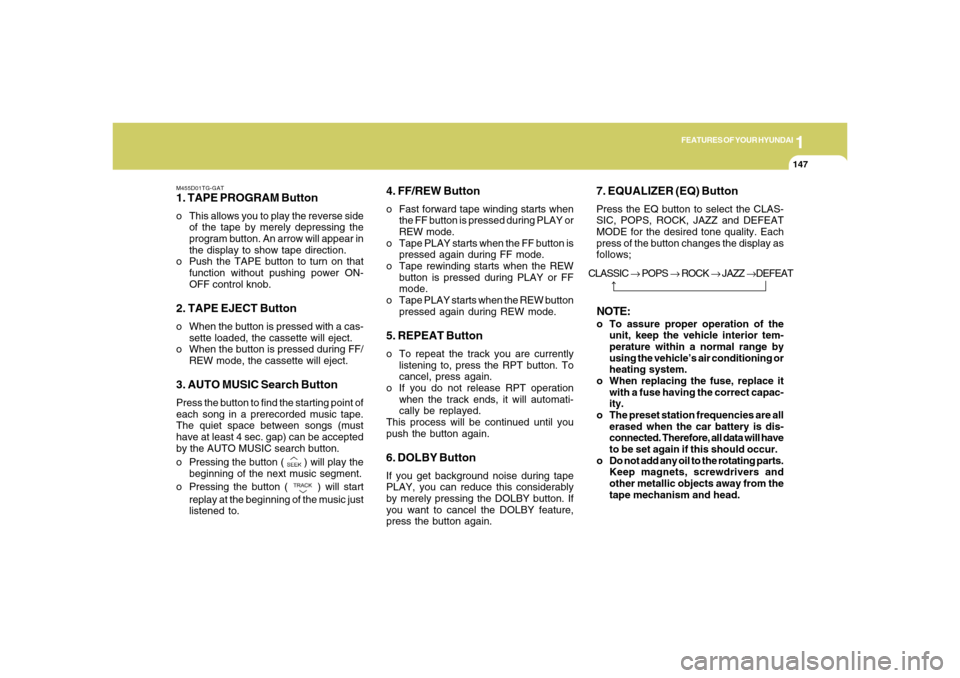
M455D01TG-GAT1. TAPE PROGRAM Buttono This allows you to play the reverse side
of the tape by merely depressing the
program button. An arrow will appear in
the display to show tape direction.
o Push the TAPE button to turn on that
function without pushing power ON-
OFF control knob.2. TAPE EJECT Buttono When the button is pressed with a cas-
sette loaded, the cassette will eject.
o When the button is pressed during FF/
REW mode, the cassette will eject.3. AUTO MUSIC Search ButtonPress the button to find the starting point of
each song in a prerecorded music tape.
The quiet space between songs (must
have at least 4 sec. gap) can be accepted
by the AUTO MUSIC search button.
o Pressing the button (
) will play the
beginning of the next music segment.
o Pressing the button (
) will start
replay at the beginning of the music just
listened to.
4. FF/REW Buttono Fast forward tape winding starts when
the FF button is pressed during PLAY or
REW mode.
o Tape PLAY starts when the FF button is
pressed again during FF mode.
o Tape rewinding starts when the REW
button is pressed during PLAY or FF
mode.
o Tape PLAY starts when the REW button
pressed again during REW mode.5. REPEAT Buttono To repeat the track you are currently
listening to, press the RPT button. To
cancel, press again.
o If you do not release RPT operation
when the track ends, it will automati-
cally be replayed.
This process will be continued until you
push the button again.6. DOLBY ButtonIf you get background noise during tape
PLAY, you can reduce this considerably
by merely pressing the DOLBY button. If
you want to cancel the DOLBY feature,
press the button again.
7. EQUALIZER (EQ) ButtonPress the EQ button to select the CLAS-
SIC, POPS, ROCK, JAZZ and DEFEAT
MODE for the desired tone quality. Each
press of the button changes the display as
follows;NOTE:o To assure proper operation of the
unit, keep the vehicle interior tem-
perature within a normal range by
using the vehicle’s air conditioning or
heating system.
o When replacing the fuse, replace it
with a fuse having the correct capac-
ity.
o The preset station frequencies are all
erased when the car battery is dis-
connected. Therefore, all data will have
to be set again if this should occur.
o Do not add any oil to the rotating parts.
Keep magnets, screwdrivers and
other metallic objects away from the
tape mechanism and head. CLASSIC → POPS → ROCK → JAZZ →DEFEAT
Page 166 of 307
1FEATURES OF YOUR HYUNDAI
152
!
12. CHANGE DIRECTORY(DIR) But-
tono You can move through the folder by
pushing the DIR button to up (
) and
down (
).
After moving the desired folder, press the
FILE SEARCH knob to playback the first
file in the selected folder.
If you do not press the FILE SEARCH knob
within 5 seconds, the folder searching
function will be released.
It is not operated in single folder.
NOTE:o To assure proper operation of the
unit, keep the vehicle interior tem-
perature within a normal range by
using the vehicle’s air conditioning or
heating system.
o When replacing the fuse, replace it
with a fuse having the correct capac-
ity.
o The bookmarks are all erased when
the car battery is disconnected or
power off. Therefore, all data will have
to be set again if this should occur.o This equipment is designed to be used
only in a 12 volt DC battery system
with negative ground.
o This unit is made of precision parts.
Do not attempt to disassemble or ad-
just any parts.
o When driving your vehicle, be sure to
keep the volume of the unit set low
enough to allow you to hear sounds
coming from the outside.
o Do not expose this equipment (includ-
ing the speakers and tape) to water or
excessive moisture.
CAUTION:
o Do not insert warped or poor quality
discs into the CD player as damage to
the unit may occur.
o Do not insert anything like coins into
the player slot as damage to the unit
may occur.
o Do not place beverages close to the
audio system. The playback mecha-
nism may be damaged if you spill
them.o Do not impact on the audio system, or
the playback mechanism could be
damaged.
o Driving on the off-roads or other vi-
brations may skip your compact disc.
Do not use the audio system on off-
roads as the discs could be scratched
and damaged.
o Do not grip or pull out the disc with
your hand while the disc is being pulled
into the unit by the self loading mecha-
nism. These can cause disc scratch-
ing to occur or trouble in the compact
disc player.
o Avoid home-made using CD-Record-
able or CD-Rewritable discs as the
player may not operate properly. When
using the compact disc player, genu-
ine CDs are recommended.
Page 176 of 307
1FEATURES OF YOUR HYUNDAI
162
10. REPEAT (RPT) Buttono To repeat the track you are currently
listening to, press the RPT button. To
cancel, press it again. If it pressed for
more than one second, it will be re-
peated all tracks within currently played
CD.
o To repeat the music within currently
played folder, press the RPT button for
more than one second. Then it will be
repeated in sequential order within the
currently played folder. To cancel, press
it again. (MP3 CD only)
o If you do not release RPT operation
when the track ends, it will automati-
cally be replayed. This process will be
continued until you push the button
again.11. RANDOM (RDM) Buttono For listen to the music in random order,
press the RDM Button with beep sound
for more than one second. To cancel,
press it again.o For listen to the music within the cur-
rently played folder in random order,
press the RDM Button within one sec-
ond. To cancel, press it again within one
second. If it pressed for more than one
second, it will be played all in random
order within currently played CD (MP3
CD only).
12. DISC UP/DOWN Buttono By pressing "DISC
"/"DISC
" while
CD changer is playing, you can move to
the previews/next disc and playback
automatically begins.
o If any of the slots does not contain a CD,
your car audio will skip empty slot and
plays only slot that contains a CD. When
switching CD’s, the LCD displays the
selected CD’s number.
13. FILE SEARCH Knob
(TUNE SELECT Knob)o You can move through the track by
turning the FILE SEARCH knob clock-
wise or counterclockwise.
o After moving the desired file, press the
FILE SEARCH knob to playback in the
selected file.o If you do not press the FILE SEARCH
knob within five seconds, the file search-
ing function will be released.
14. CHANGE DIRECTORY(DIR) But-
tono You can move through the folder by
pushing the DIR button to up (
) and
down (
).
o After moving the desired folder, press
the FILE SEARCH knob to play back in
the the selected folder.
If you do not press the FILE SEARCH
knob within 5 seconds, the folder search-
ing function will be released. It is not
operated in a single folder.
NOTE:o To assure proper operation of the
unit, keep the vehicle interior tem-
perature within a normal range by
using the vehicle’s air conditioning or
heating system.
o When replacing the fuse, replace it
with a fuse having the correct capac-
ity.
Page 238 of 307
6
Engine Compartment .................................................... 6-2
General Checks ............................................................ 6-3
Maintenance Precautions ............................................. 6-4
Checking the Engine Oil ............................................... 6-4
Checking and Changing the Engine Coolant ................ 6-6
Spark Plugs .................................................................. 6-8
Changing the Air Cleaner Filter ..................................... 6-8
Windshield Wiper Blades .............................................. 6-9
Checking the Transaxle Fluid (Automatic)..................6-13
Checking the Brakes ..................................................6-15
Air Conditioning Care..................................................6-16
Changing the Air Conditioner Filter .............................6-17
Checking Parking Brake Pedal ...................................6-18
Checking and Replacing Fuses..................................6-19
Checking the Battery..................................................6-21
Power Steering Fluid Level .........................................6-23
Replacement of Light Bulbs ........................................6-24
Bulb Wattages.............................................................6-32
Fuse Panel Description...............................................6-33
DO-IT-YOURSELF MAINTENANCE
6
Page 239 of 307
6
DO-IT-YOURSELF MAINTENANCE
2
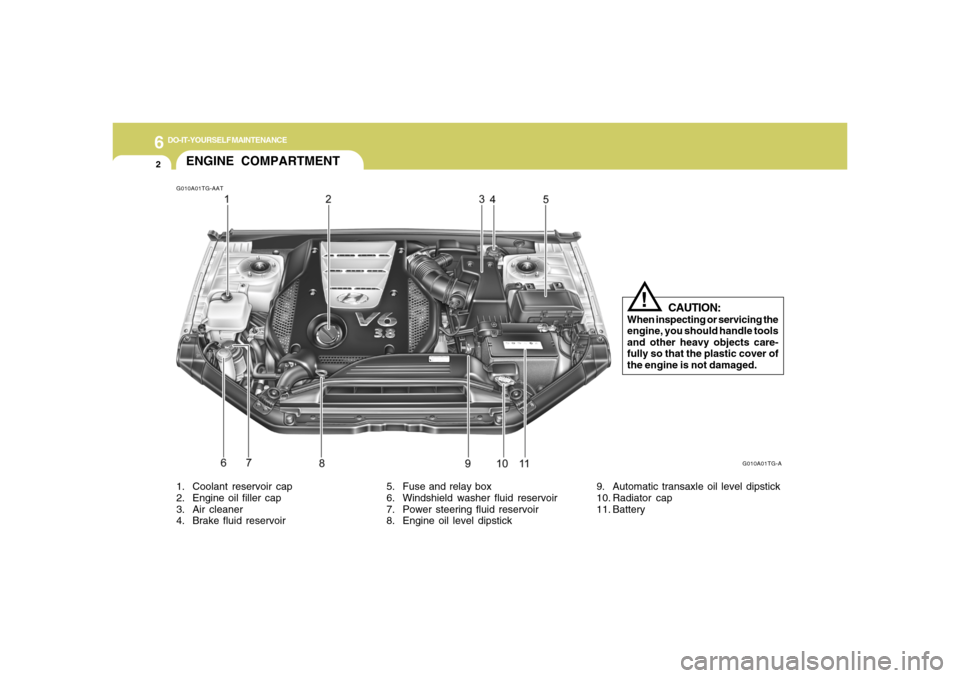
G010A01TG-AATENGINE COMPARTMENT
G010A01TG-A
CAUTION:
When inspecting or servicing the
engine, you should handle tools
and other heavy objects care-
fully so that the plastic cover of
the engine is not damaged.
!
1. Coolant reservoir cap
2. Engine oil filler cap
3. Air cleaner
4. Brake fluid reservoir5. Fuse and relay box
6. Windshield washer fluid reservoir
7. Power steering fluid reservoir
8. Engine oil level dipstick9. Automatic transaxle oil level dipstick
10. Radiator cap
11. Battery
Page 256 of 307
6
DO-IT-YOURSELF MAINTENANCE
19
!
CAUTION:
When replacing a fusible link, never use
anything but a new fusible link with the
same or lower amperage rating. Never
use a piece of wire or a higher-rated
fusible link. This could result in serious
damage and create a fire hazard.
G200B01NF-AATReplacing Accessory Fuse
G200B01TG-A
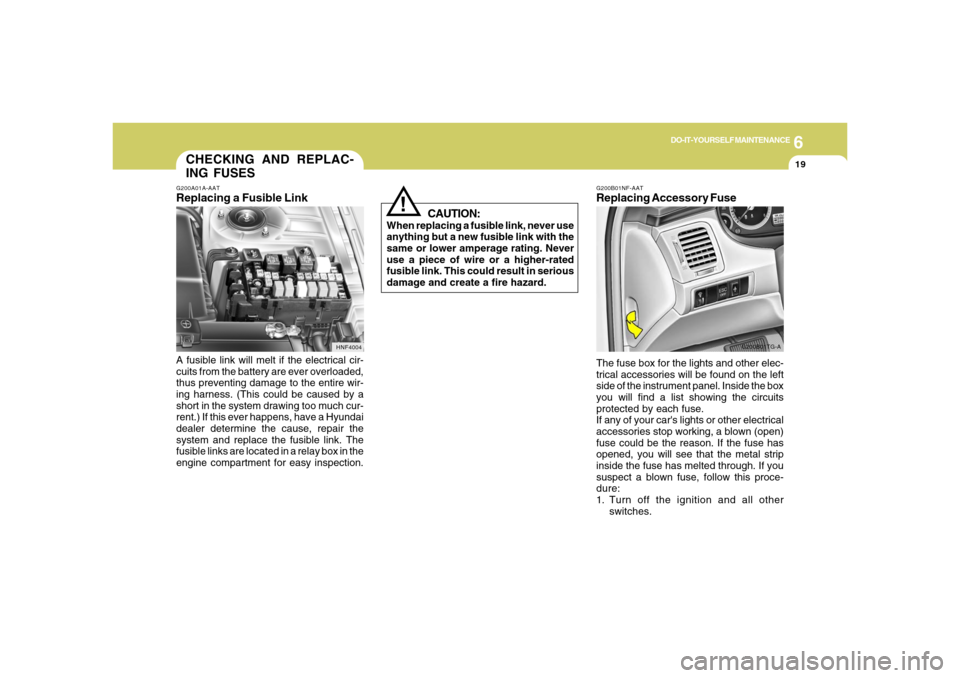
The fuse box for the lights and other elec-
trical accessories will be found on the left
side of the instrument panel. Inside the box
you will find a list showing the circuits
protected by each fuse.
If any of your car's lights or other electrical
accessories stop working, a blown (open)
fuse could be the reason. If the fuse has
opened, you will see that the metal strip
inside the fuse has melted through. If you
suspect a blown fuse, follow this proce-
dure:
1. Turn off the ignition and all other
switches.
G200A01A-AATReplacing a Fusible LinkA fusible link will melt if the electrical cir-
cuits from the battery are ever overloaded,
thus preventing damage to the entire wir-
ing harness. (This could be caused by a
short in the system drawing too much cur-
rent.) If this ever happens, have a Hyundai
dealer determine the cause, repair the
system and replace the fusible link. The
fusible links are located in a relay box in the
engine compartment for easy inspection.
HNF4004
CHECKING AND REPLAC-
ING FUSES