rear view mirror Hyundai Azera 2008 Owner's Manual
[x] Cancel search | Manufacturer: HYUNDAI, Model Year: 2008, Model line: Azera, Model: Hyundai Azera 2008Pages: 345, PDF Size: 14.61 MB
Page 36 of 345
1FEATURES OF YOUR HYUNDAI22
NOTE:o If the battery has been recharged or
disconnected, the driving position
memory will be lost.
o The buzzer sounds 10 times if there is
a malfunction of the integrated
memory system. Have the I.M.S
checked by an authorized Hyundai
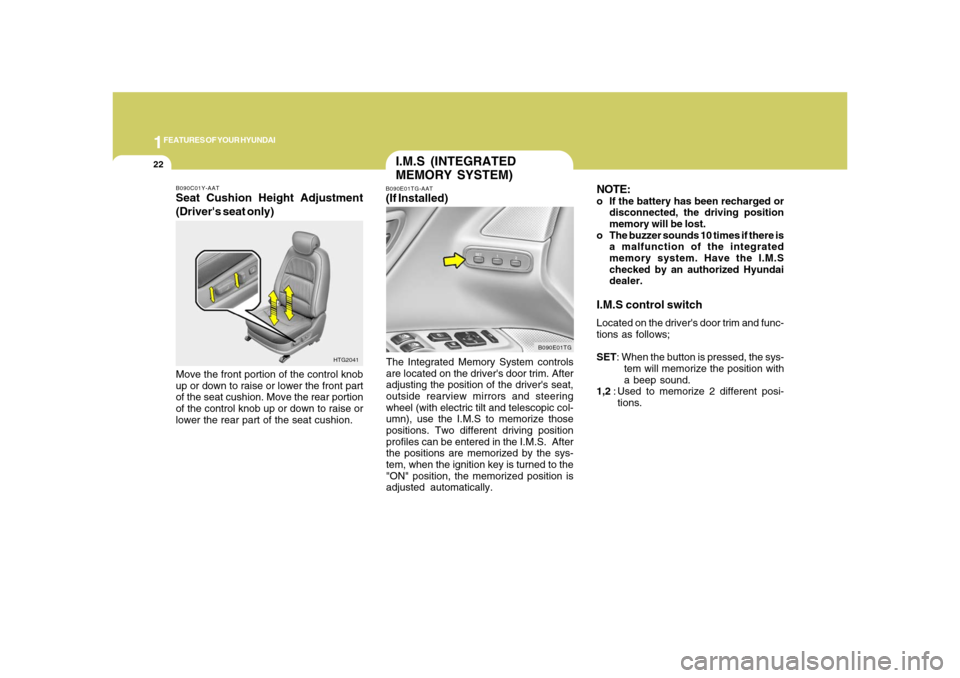
dealer.I.M.S control switchLocated on the driver's door trim and func-
tions as follows;
SET: When the button is pressed, the sys-
tem will memorize the position with
a beep sound.
1,2 : Used to memorize 2 different posi-
tions.
I.M.S (INTEGRATED
MEMORY SYSTEM)B090E01TG-AAT(If Installed)The Integrated Memory System controls
are located on the driver's door trim. After
adjusting the position of the driver's seat,
outside rearview mirrors and steering
wheel (with electric tilt and telescopic col-
umn), use the I.M.S to memorize those
positions. Two different driving position
profiles can be entered in the I.M.S. After
the positions are memorized by the sys-
tem, when the ignition key is turned to the
"ON" position, the memorized position is
adjusted automatically.
B090E01TG B090C01Y-AAT
Seat Cushion Height Adjustment
(Driver's seat only)Move the front portion of the control knob
up or down to raise or lower the front part
of the seat cushion. Move the rear portion
of the control knob up or down to raise or
lower the rear part of the seat cushion.
HTG2041
Page 37 of 345
1
FEATURES OF YOUR HYUNDAI
23
!
CAUTION:
In the following conditions, the I.M.S will
not memorize a position.
1. When the "1" or "2" button is not
pushed within five seconds.
2. When the seat is being adjusted.
3. When the key is not in the "ON" posi-
tion.
4. When the shift lever is positioned in
other than "P" position.To memorize a position1. Place the shift lever into "P" while the
ignition switch is ON.
2. Adjust the driver's seat, outside rear-
view mirrors and steering wheel (with
electric tilt and telescopic column) to the
desired position.
3. Push the "SET" button on the I.M.S until
the signal beeps.
4. Within five seconds, push button "1" or
"2" until the signal beeps twice. The
beep sounds mean that the positions
are memorized in the I.M.S.
!
To activate the memorized position1. Place the shift lever into "P" while the
ignition switch is ON.
2. When you push button "1" or "2", the
driving position will be automatically
adjusted to the position recorded for
that button.
CAUTION:
In the following conditions, the I.M.S will
not activate.
1. When the key is in the "OFF" positon.
2. When the vehicle is running above
1.86 MPH (3 km/h).
3. When the seat is being adjusted.
4. When the shift lever is positioned in
other than "P" position.
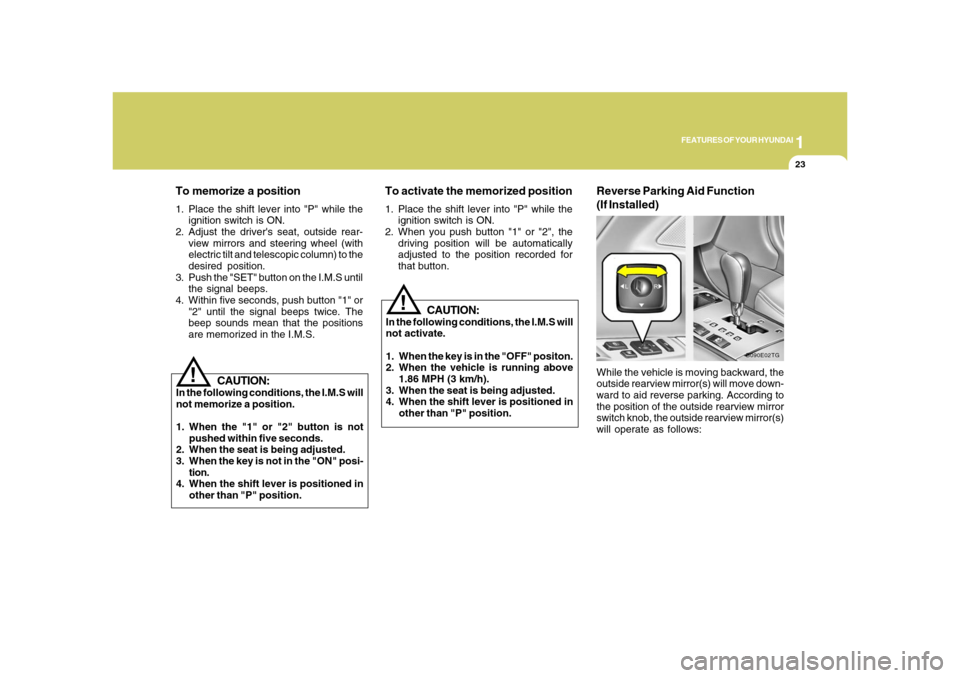
Reverse Parking Aid Function
(If Installed)While the vehicle is moving backward, the
outside rearview mirror(s) will move down-
ward to aid reverse parking. According to
the position of the outside rearview mirror
switch knob, the outside rearview mirror(s)
will operate as follows:
B090E02TG
Page 38 of 345
1FEATURES OF YOUR HYUNDAI24
!
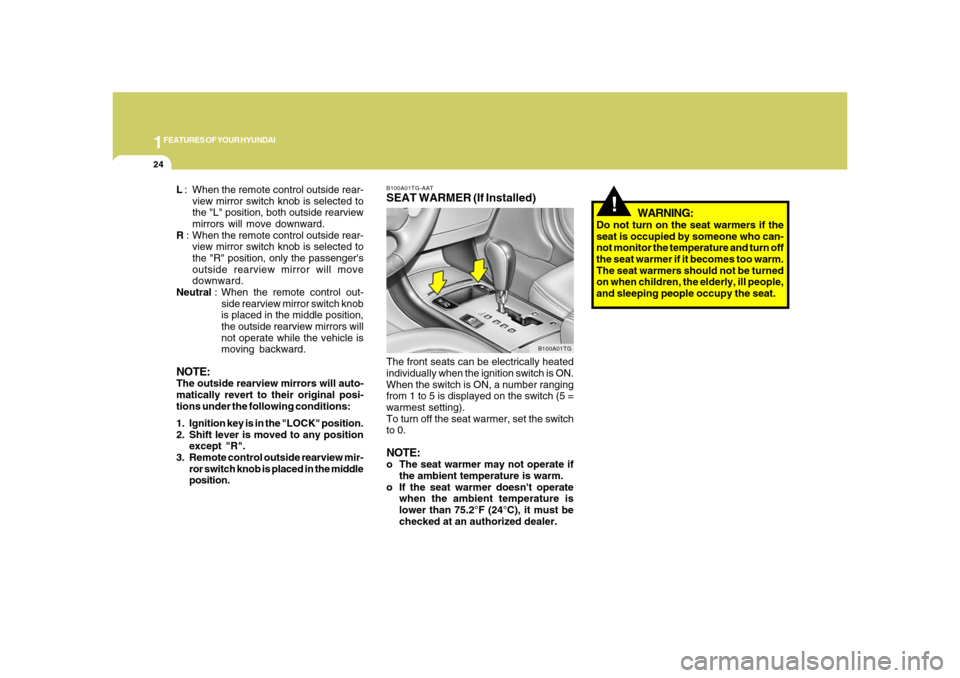
B100A01TG-AATSEAT WARMER (If Installed)The front seats can be electrically heated
individually when the ignition switch is ON.
When the switch is ON, a number ranging
from 1 to 5 is displayed on the switch (5 =
warmest setting).
To turn off the seat warmer, set the switch
to 0.NOTE:o The seat warmer may not operate if
the ambient temperature is warm.
o If the seat warmer doesn't operate
when the ambient temperature is
lower than 75.2°F (24°C), it must be
checked at an authorized dealer.
B100A01TG
WARNING:
Do not turn on the seat warmers if the
seat is occupied by someone who can-
not monitor the temperature and turn off
the seat warmer if it becomes too warm.
The seat warmers should not be turned
on when children, the elderly, ill people,
and sleeping people occupy the seat. L : When the remote control outside rear-
view mirror switch knob is selected to
the "L" position, both outside rearview
mirrors will move downward.
R : When the remote control outside rear-
view mirror switch knob is selected to
the "R" position, only the passenger's
outside rearview mirror will move
downward.
Neutral : When the remote control out-
side rearview mirror switch knob
is placed in the middle position,
the outside rearview mirrors will
not operate while the vehicle is
moving backward.
NOTE:The outside rearview mirrors will auto-
matically revert to their original posi-
tions under the following conditions:
1. Ignition key is in the "LOCK" position.
2. Shift lever is moved to any position
except "R".
3. Remote control outside rearview mir-
ror switch knob is placed in the middle
position.
Page 111 of 345
1
FEATURES OF YOUR HYUNDAI
97
B500B01NF-GATIlluminated Glove BoxOpening the glove box will automatically
turn on the light when the multi-function
switch is turned to the first position.NOTE:Information about use of the trunk lid
control button located in the glove box is
located in the trunk lid section.
B541A01TG
!STORAGE BOXB500A01TG-AATGLOVE BOX
WARNING:To avoid the possibility of injury in case
of an accident or a sudden stop, the
glove box door should be kept closed
when the car is in motion.
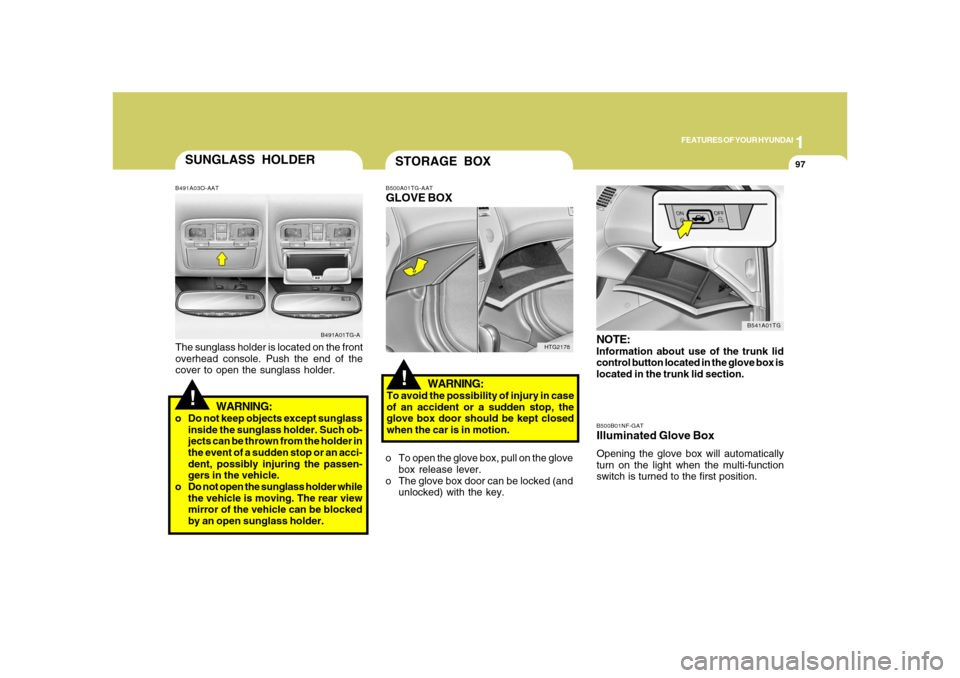
o To open the glove box, pull on the glove
box release lever.
o The glove box door can be locked (and
unlocked) with the key.
HTG2178
SUNGLASS HOLDER!
B491A03O-AATThe sunglass holder is located on the front
overhead console. Push the end of the
cover to open the sunglass holder.
WARNING:
o Do not keep objects except sunglass
inside the sunglass holder. Such ob-
jects can be thrown from the holder in
the event of a sudden stop or an acci-
dent, possibly injuring the passen-
gers in the vehicle.
o Do not open the sunglass holder while
the vehicle is moving. The rear view
mirror of the vehicle can be blocked
by an open sunglass holder.
B491A01TG-A
Page 113 of 345
1
FEATURES OF YOUR HYUNDAI
99
CAUTION:
If the mirror is jammed with ice, do not
adjust the mirror by force. Use an ap-
proved spray de-icer (not radiator anti-
freeze) to release the frozen mecha-
nism or move the vehicle to a warm
place and allow the ice to melt.
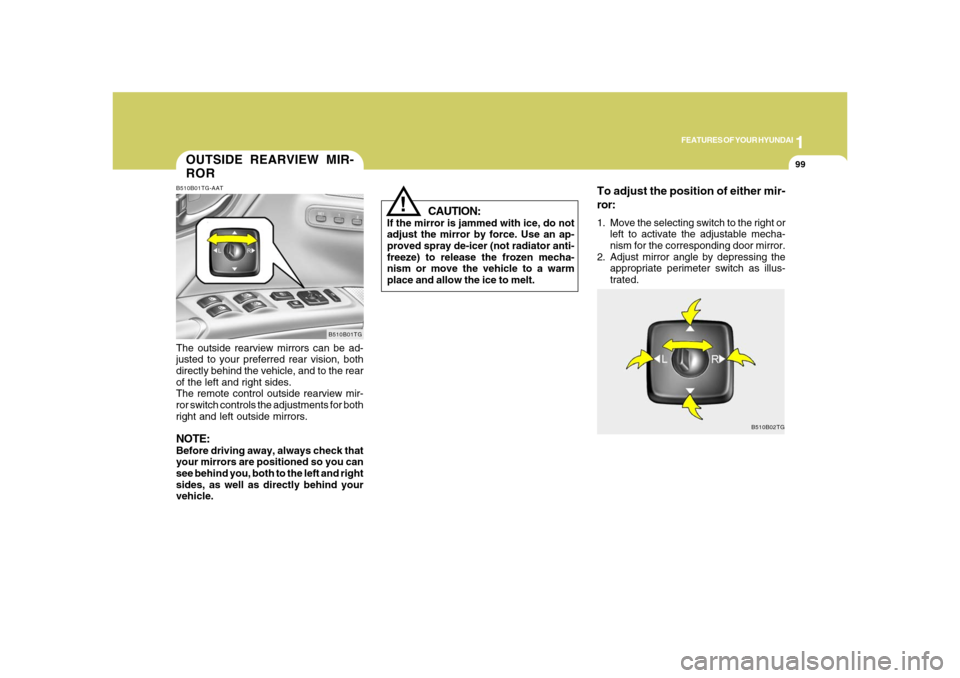
To adjust the position of either mir-
ror:1. Move the selecting switch to the right or
left to activate the adjustable mecha-
nism for the corresponding door mirror.
2. Adjust mirror angle by depressing the
appropriate perimeter switch as illus-
trated.
!
B510B02TG
OUTSIDE REARVIEW MIR-
RORB510B01TG-AATThe outside rearview mirrors can be ad-
justed to your preferred rear vision, both
directly behind the vehicle, and to the rear
of the left and right sides.
The remote control outside rearview mir-
ror switch controls the adjustments for both
right and left outside mirrors.NOTE:Before driving away, always check that
your mirrors are positioned so you can
see behind you, both to the left and right
sides, as well as directly behind your
vehicle.
B510B01TG
Page 114 of 345
1FEATURES OF YOUR HYUNDAI
100
!
CAUTION:
o Do not operate the switch continu-
ously for an unnecessary length of
time.
o Scraping ice from the mirror face could
cause permanent damage. To remove
any ice, use a sponge, soft cloth or
approved de-icer.
!
WARNING:
Be careful when judging the size or dis-
tance of any object seen in the passen-
ger side rearview mirror. It is a convex
mirror with a curved surface, and any
objects seen in this mirror are closer
than they appear.
B510C01TG-AATFOLDING THE OUTSIDE REARVIEW
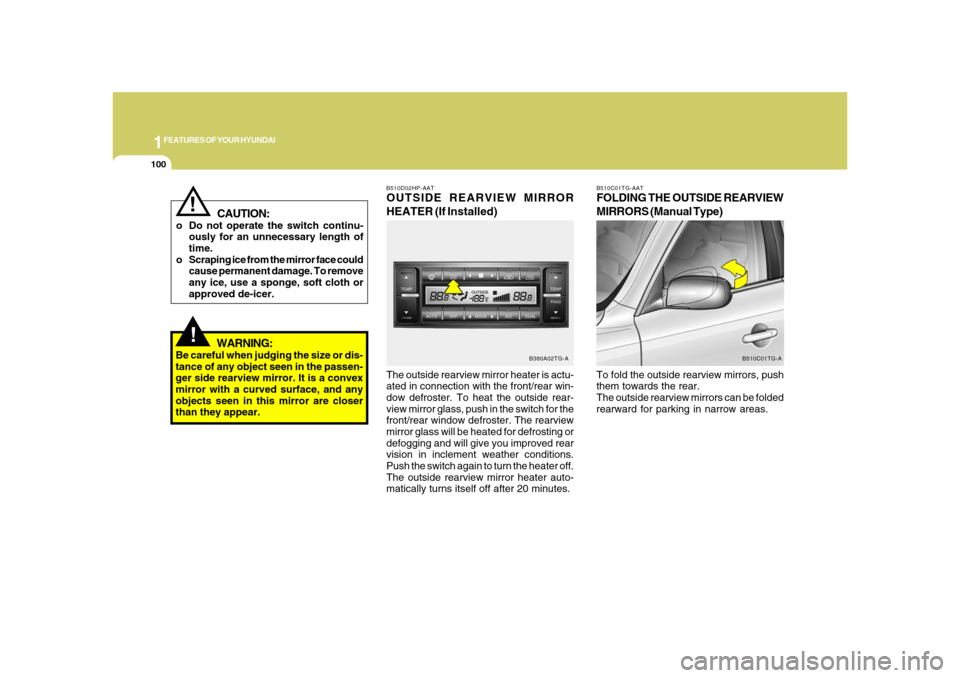
MIRRORS (Manual Type)To fold the outside rearview mirrors, push
them towards the rear.
The outside rearview mirrors can be folded
rearward for parking in narrow areas.
B510C01TG-A
The outside rearview mirror heater is actu-
ated in connection with the front/rear win-
dow defroster. To heat the outside rear-
view mirror glass, push in the switch for the
front/rear window defroster. The rearview
mirror glass will be heated for defrosting or
defogging and will give you improved rear
vision in inclement weather conditions.
Push the switch again to turn the heater off.
The outside rearview mirror heater auto-
matically turns itself off after 20 minutes.B510D02HP-AATOUTSIDE REARVIEW MIRROR
HEATER (If Installed)
B380A02TG-A
Page 115 of 345
1
FEATURES OF YOUR HYUNDAI
101
!
WARNING:
Do not adjust or fold the outside rearview
mirrors while the vehicle is moving. This
could result in loss of control, and an
accident causing death, serious injury
or property damage.
CAUTION:
If the mirror is jammed with ice, do not
adjust the mirror by force. Use an ap-
proved spray de-icer (not radiator anti-
freeze) to release the frozen mecha-
nism or move the vehicle to a warm
place and allow the ice to melt.
!
!
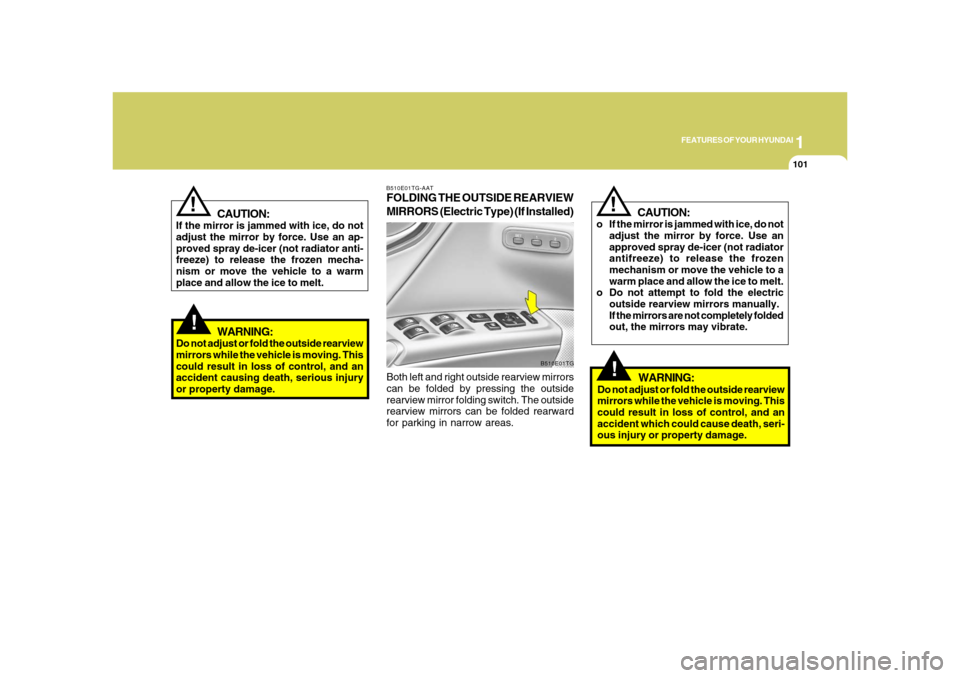
B510E01TG-AATFOLDING THE OUTSIDE REARVIEW
MIRRORS (Electric Type) (If Installed)Both left and right outside rearview mirrors
can be folded by pressing the outside
rearview mirror folding switch. The outside
rearview mirrors can be folded rearward
for parking in narrow areas.
B510E01TG
CAUTION:
o If the mirror is jammed with ice, do not
adjust the mirror by force. Use an
approved spray de-icer (not radiator
antifreeze) to release the frozen
mechanism or move the vehicle to a
warm place and allow the ice to melt.
o Do not attempt to fold the electric
outside rearview mirrors manually.
If the mirrors are not completely folded
out, the mirrors may vibrate.
!
WARNING:
Do not adjust or fold the outside rearview
mirrors while the vehicle is moving. This
could result in loss of control, and an
accident which could cause death, seri-
ous injury or property damage.
Page 116 of 345
1FEATURES OF YOUR HYUNDAI
102
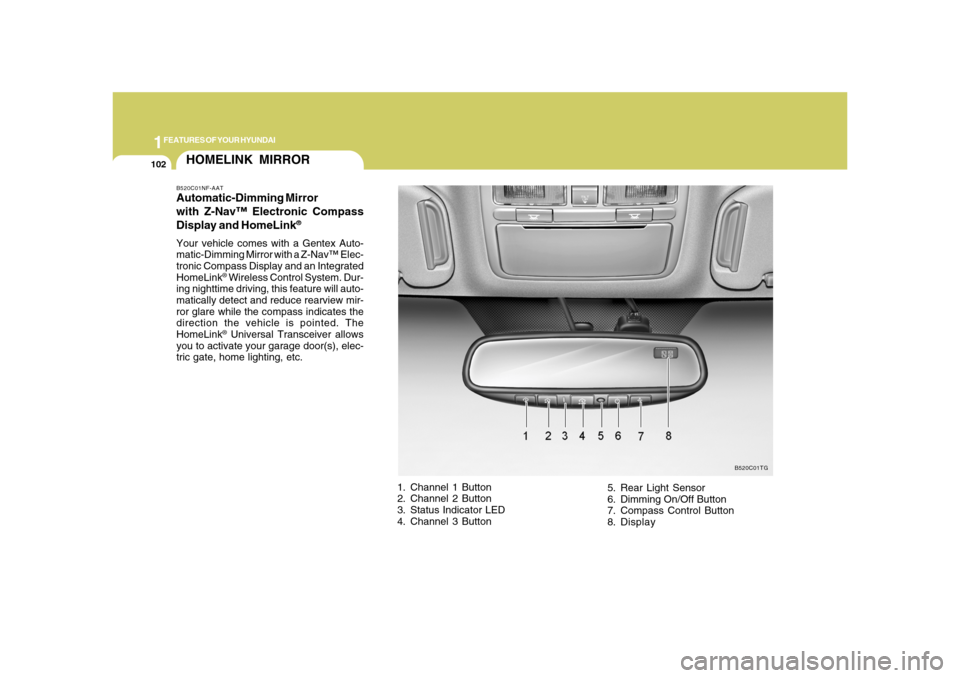
HOMELINK MIRRORB520C01NF-AATAutomatic-Dimming Mirror
with Z-Nav™ Electronic Compass
Display and HomeLink
®
Your vehicle comes with a Gentex Auto-
matic-Dimming Mirror with a Z-Nav™ Elec-
tronic Compass Display and an Integrated
HomeLink
® Wireless Control System. Dur-
ing nighttime driving, this feature will auto-
matically detect and reduce rearview mir-
ror glare while the compass indicates the
direction the vehicle is pointed. The
HomeLink® Universal Transceiver allows
you to activate your garage door(s), elec-
tric gate, home lighting, etc.
1. Channel 1 Button
2. Channel 2 Button
3. Status Indicator LED
4. Channel 3 Button5. Rear Light Sensor
6. Dimming On/Off Button
7. Compass Control Button
8. Display
B520C01TG
Page 117 of 345
1
FEATURES OF YOUR HYUNDAI
103
Automatic-Dimming Night Vision
Safety™ (NVS
®) Mirror
The NVS
® Mirror in your vehicle is the most
advanced way to reduce annoying glare in
the rearview mirror during any driving situ-
ation. For more information regarding
NVS
® mirrors and other applications,
please refer to the Gentex website:
www.gentex.com.
CAUTION:
The NVS
® Mirror automatically reduces
glare during driving conditions based
upon light levels monitored in front of the
vehicle and from the rear of the vehicle.
These light sensors are visible through
openings in the front and rear of the
mirror case. Any object that would ob-
struct either light sensor will degrade
the automatic dimming control feature.
!
Automatic-Dimming Function
Your mirror will automatically dim upon
detecting glare from the vehicles traveling
behind you. The auto-dimming function
can be controlled by the Dimming ON/OFF
Button:
1. Pressing the
button turns the auto-
dimming function OFF which is indi-
cated by the green Status Indicator LED
turning off.
2. Pressing the button again turns the
auto-dimming function ON which is in-
dicated by the green Status Indicator
LED turning on.
NOTE:The mirror defaults to the "ON" position
each time the vehicle is started.Compass Function
The Compass can be turned ON and OFF
and will remember the last state when the
ignition is cycled. To turn the display
feature ON/OFF:
1. Press and release the button to turn
the display feature OFF.
2. Press and release the button again
to turn the display back ON.
Additional options can be set with press
and hold sequences of the button and
are detailed below.
There is a difference between magnetic
north and true north. The compass in the
mirror can compensate for this difference
when it knows the Magnetic Zone in which
it is operating. This is set either by the
dealer or by the user. The operating Zone
Numbers for North America are shown in
the figure on the following section.
Z-Nav™ Compass DisplayThe NVS™ Mirror in your vehicle is also
equipped with a Z-Nav™ Compass that
shows the vehicle Compass heading in
the Display Window using the 8 basic
cardinal headings (N, NE, E, SE, etc.).
Page 342 of 345

10
INDEX
5
Scheduled maintenance .................................................. 5-4
Service requirements ........................................................ 5-2
Maintenance Precautions.................................................... 6-4
Mirrors
Homelink mirror ............................................................1-102
Outside rearview .............................................................1-99
Outside rearview mirror folding switch ........................1-101
Outside rearview mirror heater ....................................1-100
O
Odometer............................................................................1-75
Outside Rearview Mirror ....................................................1-99
P
Parking Brake ...................................................................1-108
Checking parking brake pedal .......................................6-18
Power Adjustable Pedals ..................................................2-10
Power Outlets .....................................................................1-89
Power Steering Fluid Level ...............................................6-23
R
Rear Seat ...........................................................................1-25
Armrest ..........................................................................1-117
Folding rear seatbacks ...................................................1-25
Rear seatback safety lock ..............................................1-26
Warning...........................................................................1-26Rear Window Curtain ......................................................1-118
Rear Window Defroster Switch .........................................1-87
Reporting Safety Defects ...................................................8-16
S
Seat.....................................................................................1-18
Front ................................................................................1-19
Rear.................................................................................1-25
Seat Belts ...........................................................................1-27
3-Point system ................................................................1-30
Adjusting your seat belt ..................................................1-31
Care of seat belts ...........................................................1-28
Pre-tensioner seat belt ...................................................1-40
Precautions.....................................................................1-27
Seatback Pocket ................................................................1-91
Speedometer......................................................................1-75
Starting Procedure ............................................................... 2-5
Steering Wheel Tilt & Telescopic ....................................1-118
Stereo Sound System ......................................................1-135
Sun Visor ..........................................................................1-115
Sunglass Holder ................................................................1-97
Sunroof...............................................................................1-91
T
Tachometer.........................................................................1-74
Theft-Alarm System ............................................................1-11