buttons Hyundai Azera 2015 Owner's Manual
[x] Cancel search | Manufacturer: HYUNDAI, Model Year: 2015, Model line: Azera, Model: Hyundai Azera 2015Pages: 473, PDF Size: 11.92 MB
Page 85 of 473
Features of your vehicle
8 4
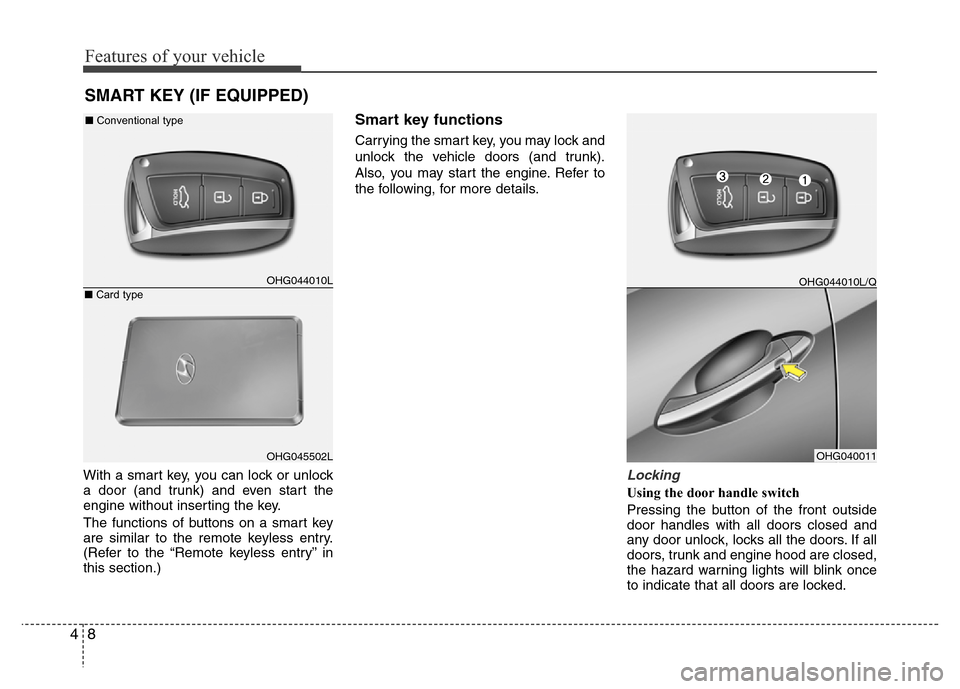
With a smart key, you can lock or unlock
a door (and trunk) and even start the
engine without inserting the key.
The functions of buttons on a smart key
are similar to the remote keyless entry.
(Refer to the “Remote keyless entry” in
this section.)
Smart key functions
Carrying the smart key, you may lock and
unlock the vehicle doors (and trunk).
Also, you may start the engine. Refer to
the following, for more details.
Locking
Using the door handle switch
Pressing the button of the front outside
door handles with all doors closed and
any door unlock, locks all the doors. If all
doors, trunk and engine hood are closed,
the hazard warning lights will blink once
to indicate that all doors are locked.
SMART KEY (IF EQUIPPED)
OHG044010L
OHG045502LOHG040011 ■Conventional type
■Card type
OHG044010L/Q
Page 86 of 473
49
Features of your vehicle
Also, the outside rearview mirror will auto-
matically fold if the outside rearview mirror
folding switch is in the AUTO position (if
equipped).
However, if any door, trunk or engine hood
remains open, the hazard warning lights will
not operate. If all doors, trunk and engine
hood are closed after the lock button is
pressed, the hazard warning lights will blink
once.
The button will only operate when the smart
key is within 0.7~1 m (28~40 in.) from the
outside door handle. If you want to make
sure that a door has locked or not, you
should check the door lock button inside the
vehicle or pull the outside door handle.
Even though you press the outside door
handle buttons, the doors will not lock and
the chime will sound for 3 seconds if any of
following occur:
• The smart key is in the vehicle.
• The ignition switch is in ACC or ON
position.
• Any door except the trunk is open.
Using the button on the smart key
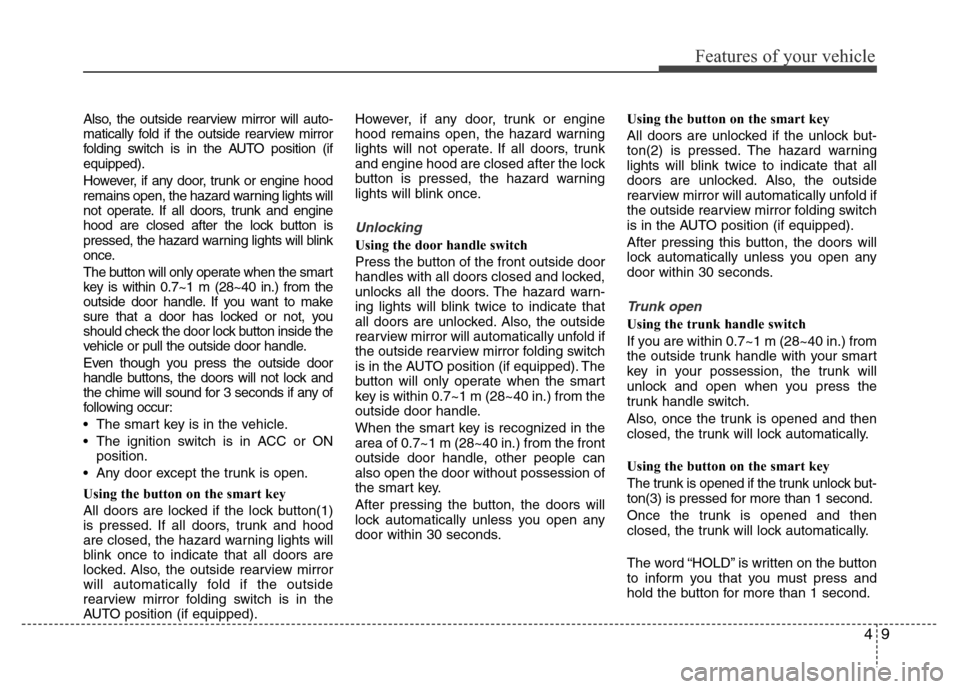
All doors are locked if the lock button(1)
is pressed. If all doors, trunk and hood
are closed, the hazard warning lights will
blink once to indicate that all doors are
locked. Also, the outside rearview mirror
will automatically fold if the outside
rearview mirror folding switch is in the
AUTO position (if equipped).However, if any door, trunk or engine
hood remains open, the hazard warning
lights will not operate. If all doors, trunk
and engine hood are closed after the lock
button is pressed, the hazard warning
lights will blink once.
Unlocking
Using the door handle switch
Press the button of the front outside door
handles with all doors closed and locked,
unlocks all the doors. The hazard warn-
ing lights will blink twice to indicate that
all doors are unlocked. Also, the outside
rearview mirror will automatically unfold if
the outside rearview mirror folding switch
is in the AUTO position (if equipped). The
button will only operate when the smart
key is within 0.7~1 m (28~40 in.) from the
outside door handle.
When the smart key is recognized in the
area of 0.7~1 m (28~40 in.) from the front
outside door handle, other people can
also open the door without possession of
the smart key.
After pressing the button, the doors will
lock automatically unless you open any
door within 30 seconds.Using the button on the smart key
All doors are unlocked if the unlock but-
ton(2) is pressed. The hazard warning
lights will blink twice to indicate that all
doors are unlocked. Also, the outside
rearview mirror will automatically unfold if
the outside rearview mirror folding switch
is in the AUTO position (if equipped).
After pressing this button, the doors will
lock automatically unless you open any
door within 30 seconds.
Trunk open
Using the trunk handle switch
If you are within 0.7~1 m (28~40 in.) from
the outside trunk handle with your smart
key in your possession, the trunk will
unlock and open when you press the
trunk handle switch.
Also, once the trunk is opened and then
closed, the trunk will lock automatically.
Using the button on the smart key
The trunk is opened if the trunk unlock but-
ton(3) is pressed for more than 1 second.
Once the trunk is opened and then
closed, the trunk will lock automatically.
The word “HOLD” is written on the button
to inform you that you must press and
hold the button for more than 1 second.
Page 118 of 473
441
Features of your vehicle
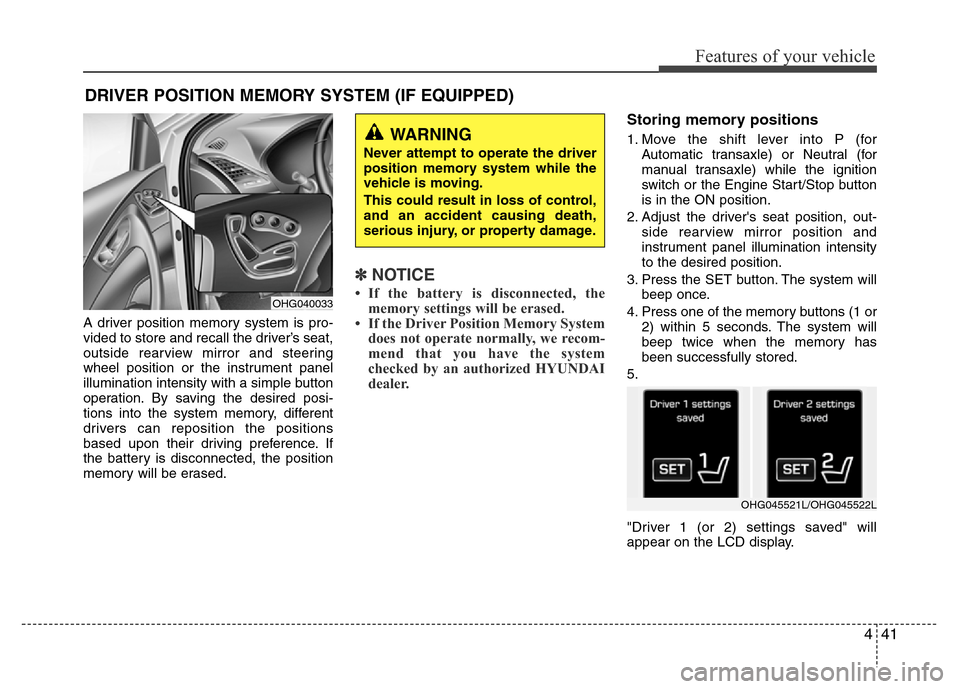
A driver position memory system is pro-
vided to store and recall the driver’s seat,
outside rearview mirror and steering
wheel position or the instrument panel
illumination intensity with a simple button
operation. By saving the desired posi-
tions into the system memory, different
drivers can reposition the positions
based upon their driving preference. If
the battery is disconnected, the position
memory will be erased.
✽NOTICE
• If the battery is disconnected, the
memory settings will be erased.
• If the Driver Position Memory System
does not operate normally, we recom-
mend that you have the system
checked by an authorized HYUNDAI
dealer.
Storing memory positions
1. Move the shift lever into P (for
Automatic transaxle) or Neutral (for
manual transaxle) while the ignition
switch or the Engine Start/Stop button
is in the ON position.
2. Adjust the driver's seat position, out-
side rearview mirror position and
instrument panel illumination intensity
to the desired position.
3. Press the SET button. The system will
beep once.
4. Press one of the memory buttons (1 or
2) within 5 seconds. The system will
beep twice when the memory has
been successfully stored.
5.
"Driver 1 (or 2) settings saved" will
appear on the LCD display.
DRIVER POSITION MEMORY SYSTEM (IF EQUIPPED)
WARNING
Never attempt to operate the driver
position memory system while the
vehicle is moving.
This could result in loss of control,
and an accident causing death,
serious injury, or property damage.
OHG040033
OHG045521L/OHG045522L
Page 119 of 473
Features of your vehicle
42 4
Recalling memory position
1. Move the shift lever into P (for
Automatic transaxle) or Neutral (for
manual transaxle) while the ignition
switch or the Engine Start/Stop button
is in the ON position.
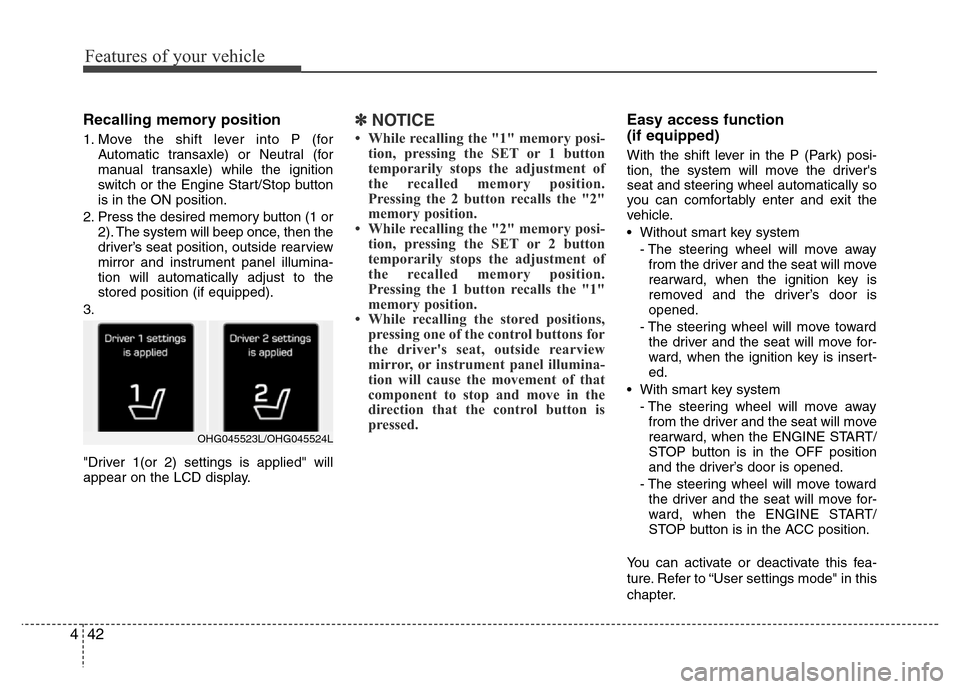
2. Press the desired memory button (1 or
2). The system will beep once, then the
driver’s seat position, outside rearview
mirror and instrument panel illumina-
tion will automatically adjust to the
stored position (if equipped).
3.
"Driver 1(or 2) settings is applied" will
appear on the LCD display.
✽NOTICE
• While recalling the "1" memory posi-
tion, pressing the SET or 1 button
temporarily stops the adjustment of
the recalled memory position.
Pressing the 2 button recalls the "2"
memory position.
• While recalling the "2" memory posi-
tion, pressing the SET or 2 button
temporarily stops the adjustment of
the recalled memory position.
Pressing the 1 button recalls the "1"
memory position.
• While recalling the stored positions,
pressing one of the control buttons for
the driver's seat, outside rearview
mirror, or instrument panel illumina-
tion will cause the movement of that
component to stop and move in the
direction that the control button is
pressed.
Easy access function
(if equipped)
With the shift lever in the P (Park) posi-
tion, the system will move the driver's
seat and steering wheel automatically so
you can comfortably enter and exit the
vehicle.
• Without smart key system
- The steering wheel will move away
from the driver and the seat will move
rearward, when the ignition key is
removed and the driver’s door is
opened.
- The steering wheel will move toward
the driver and the seat will move for-
ward, when the ignition key is insert-
ed.
• With smart key system
- The steering wheel will move away
from the driver and the seat will move
rearward, when the ENGINE START/
STOP button is in the OFF position
and the driver’s door is opened.
- The steering wheel will move toward
the driver and the seat will move for-
ward, when the ENGINE START/
STOP button is in the ACC position.
You can activate or deactivate this fea-
ture. Refer to “User settings mode" in this
chapter.
OHG045523L/OHG045524L
Page 131 of 473
Features of your vehicle
54 4
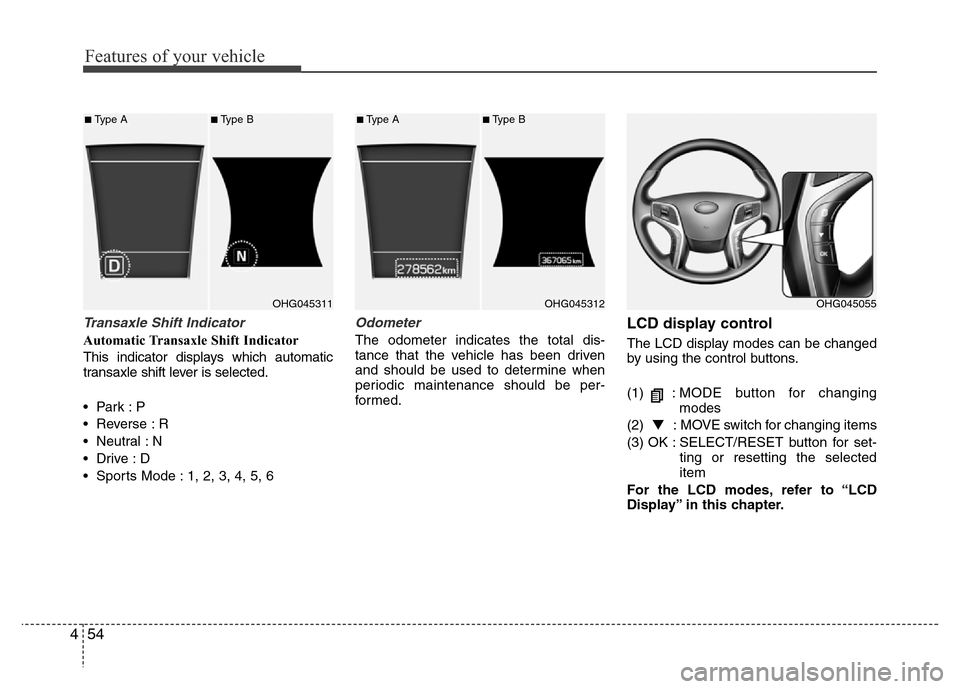
Transaxle Shift Indicator
Automatic Transaxle Shift Indicator
This indicator displays which automatic
transaxle shift lever is selected.
•Park :P
• Reverse : R
• Neutral : N
•Drive :D
• Sports Mode : 1, 2, 3, 4, 5, 6
Odometer
The odometer indicates the total dis-
tance that the vehicle has been driven
and should be used to determine when
periodic maintenance should be per-
formed.
LCD display control
The LCD display modes can be changed
by using the control buttons.
(1) :MODE button for changing
modes
(2) ▼: MOVE switch for changing items
(3) OK : SELECT/RESET button for set-
ting or resetting the selected
item
For the LCD modes, refer to “LCD
Display” in this chapter.
OHG045055OHG045311
■Type A■Type B
OHG045312
■Type A■Type B
Page 197 of 473
Features of your vehicle
120 4
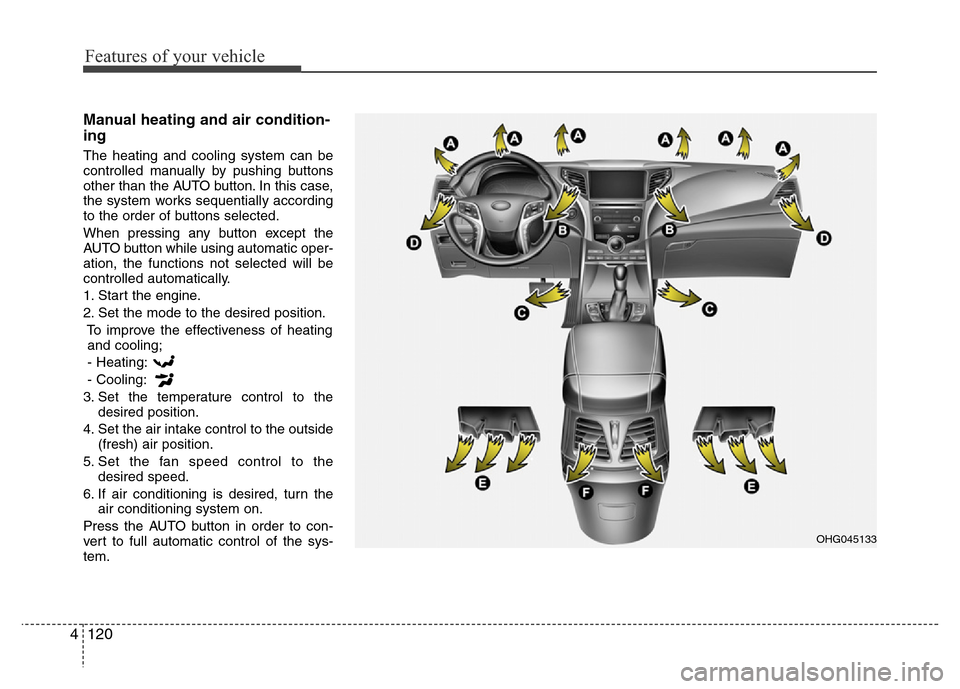
Manual heating and air condition-
ing
The heating and cooling system can be
controlled manually by pushing buttons
other than the AUTO button. In this case,
the system works sequentially according
to the order of buttons selected.
When pressing any button except the
AUTO button while using automatic oper-
ation, the functions not selected will be
controlled automatically.
1. Start the engine.
2. Set the mode to the desired position.
To improve the effectiveness of heating
and cooling;
- Heating:
- Cooling:
3. Set the temperature control to the
desired position.
4. Set the air intake control to the outside
(fresh) air position.
5. Set the fan speed control to the
desired speed.
6. If air conditioning is desired, turn the
air conditioning system on.
Press the AUTO button in order to con-
vert to full automatic control of the sys-
tem.
OHG045133
Page 221 of 473
Features of your vehicle
144 4
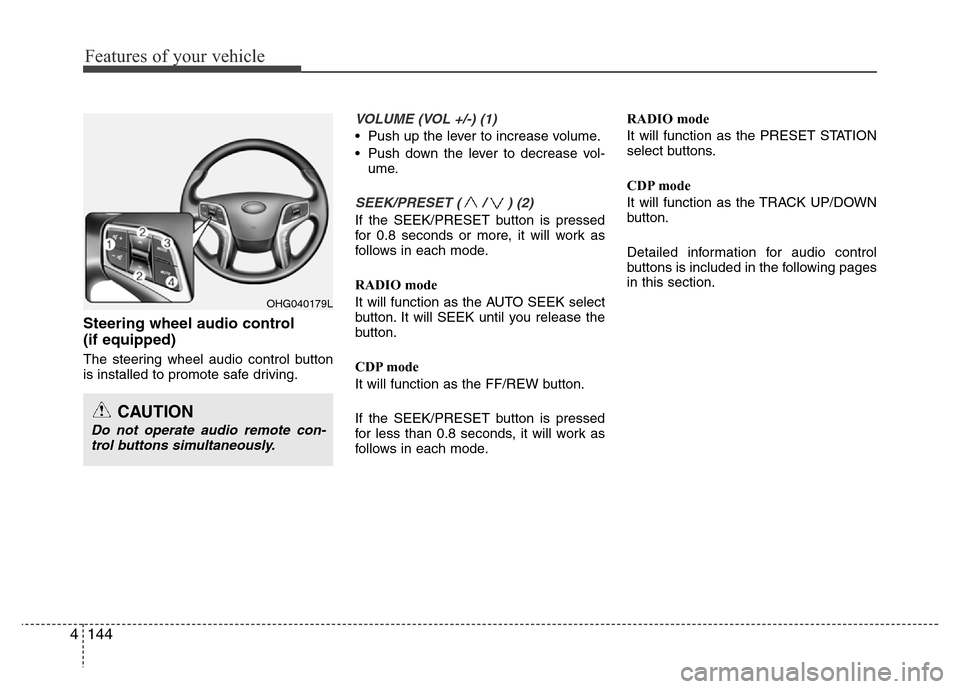
Steering wheel audio control
(if equipped)
The steering wheel audio control button
is installed to promote safe driving.
VOLUME (VOL +/-) (1)
• Push up the lever to increase volume.
• Push down the lever to decrease vol-
ume.
SEEK/PRESET ( / ) (2)
If the SEEK/PRESET button is pressed
for 0.8 seconds or more, it will work as
follows in each mode.
RADIO mode
It will function as the AUTO SEEK select
button. It will SEEK until you release the
button.
CDP mode
It will function as the FF/REW button.
If the SEEK/PRESET button is pressed
for less than 0.8 seconds, it will work as
follows in each mode.RADIO mode
It will function as the PRESET STATION
select buttons.
CDP mode
It will function as the TRACK UP/DOWN
button.
Detailed information for audio control
buttons is included in the following pages
in this section.
OHG040179L
CAUTION
Do not operate audio remote con-
trol buttons simultaneously.
Page 241 of 473
![Hyundai Azera 2015 Owners Manual RADIO MODE
Basic Mode Screen
(1) Mode Display
Displays currently operating mode.
(2) Frequency
Displays the current frequency.
(3) Preset
Displays currently playing preset number
[1] ~ [6].
(4) MENU
D Hyundai Azera 2015 Owners Manual RADIO MODE
Basic Mode Screen
(1) Mode Display
Displays currently operating mode.
(2) Frequency
Displays the current frequency.
(3) Preset
Displays currently playing preset number
[1] ~ [6].
(4) MENU
D](/img/35/14466/w960_14466-240.png)
RADIO MODE
Basic Mode Screen
(1) Mode Display
Displays currently operating mode.
(2) Frequency
Displays the current frequency.
(3) Preset
Displays currently playing preset number
[1] ~ [6].
(4) MENU
Displays Radio menus.(5) Preset Display
Displays saved presets.
(6) A.Store
Automatically saves frequencies with
superior reception to Preset buttons.
4164
Features of your vehicle
Page 243 of 473
Features of your vehicle
166 4
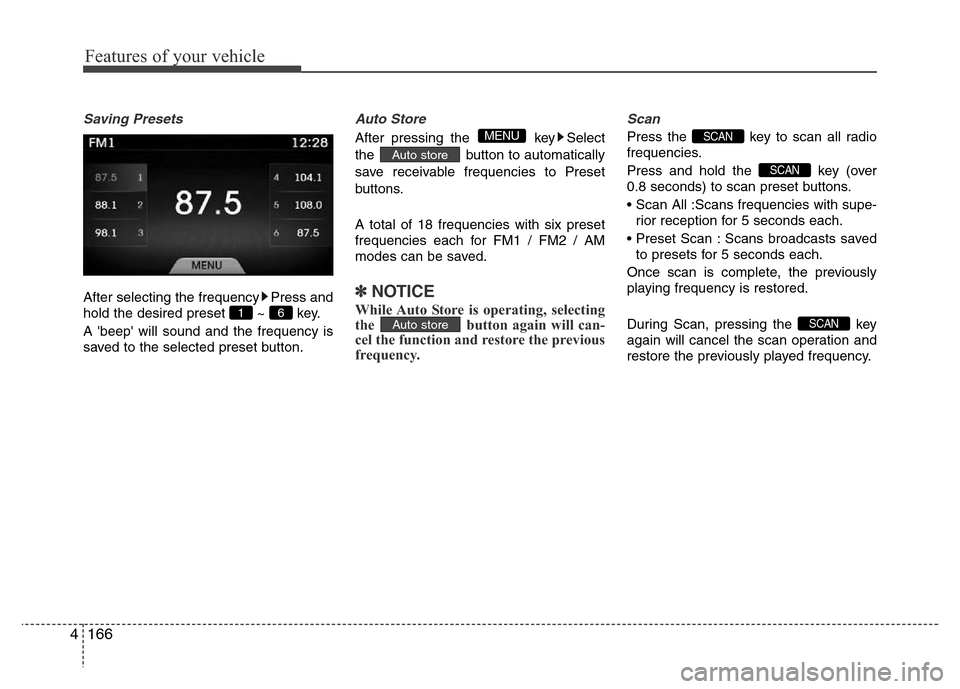
Saving Presets
After selecting the frequency Press and
hold the desired preset ~ key.
A 'beep' will sound and the frequency is
saved to the selected preset button.
Auto Store
After pressing the key Select
the button to automatically
save receivable frequencies to Preset
buttons.
A total of 18 frequencies with six preset
frequencies each for FM1 / FM2 / AM
modes can be saved.
✽NOTICE
While Auto Store is operating, selecting
the button again will can-
cel the function and restore the previous
frequency.
Scan
Press the key to scan all radio
frequencies.
Press and hold the key (over
0.8 seconds) to scan preset buttons.
• Scan All :Scans frequencies with supe-
rior reception for 5 seconds each.
• Preset Scan : Scans broadcasts saved
to presets for 5 seconds each.
Once scan is complete, the previously
playing frequency is restored.
During Scan, pressing the key
again will cancel the scan operation and
restore the previously played frequency.
SCAN
SCAN
SCAN
Auto store
Auto store
MENU
6 1