power steering Hyundai Azera 2015 Owner's Manual
[x] Cancel search | Manufacturer: HYUNDAI, Model Year: 2015, Model line: Azera, Model: Hyundai Azera 2015Pages: 473, PDF Size: 11.92 MB
Page 14 of 473
Your vehicle at a glance
4 2
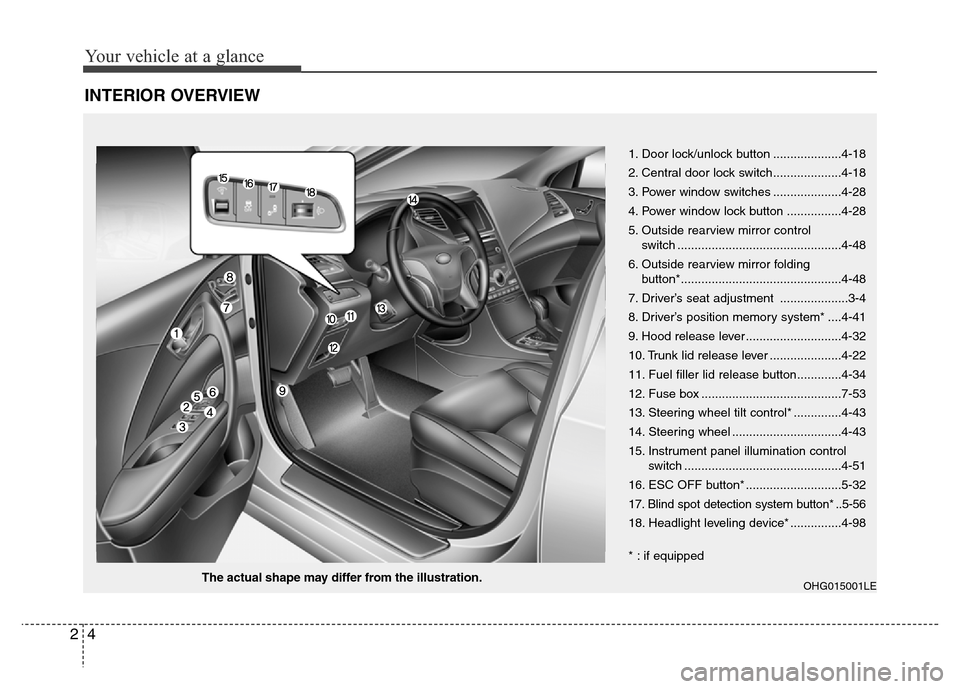
INTERIOR OVERVIEW
OHG015001LEThe actual shape may differ from the illustration.1. Door lock/unlock button ....................4-18
2. Central door lock switch....................4-18
3. Power window switches ....................4-28
4. Power window lock button ................4-28
5. Outside rearview mirror control
switch ................................................4-48
6. Outside rearview mirror folding
button*...............................................4-48
7. Driver’s seat adjustment ....................3-4
8. Driver’s position memory system* ....4-41
9. Hood release lever ............................4-32
10. Trunk lid release lever .....................4-22
11. Fuel filler lid release button.............4-34
12. Fuse box .........................................7-53
13. Steering wheel tilt control* ..............4-43
14. Steering wheel ................................4-43
15. Instrument panel illumination control
switch ..............................................4-51
16. ESC OFF button* ............................5-32
17. Blind spot detection system button* ..5-56
18. Headlight leveling device* ...............4-98
* : if equipped
Page 16 of 473
Your vehicle at a glance
6 2
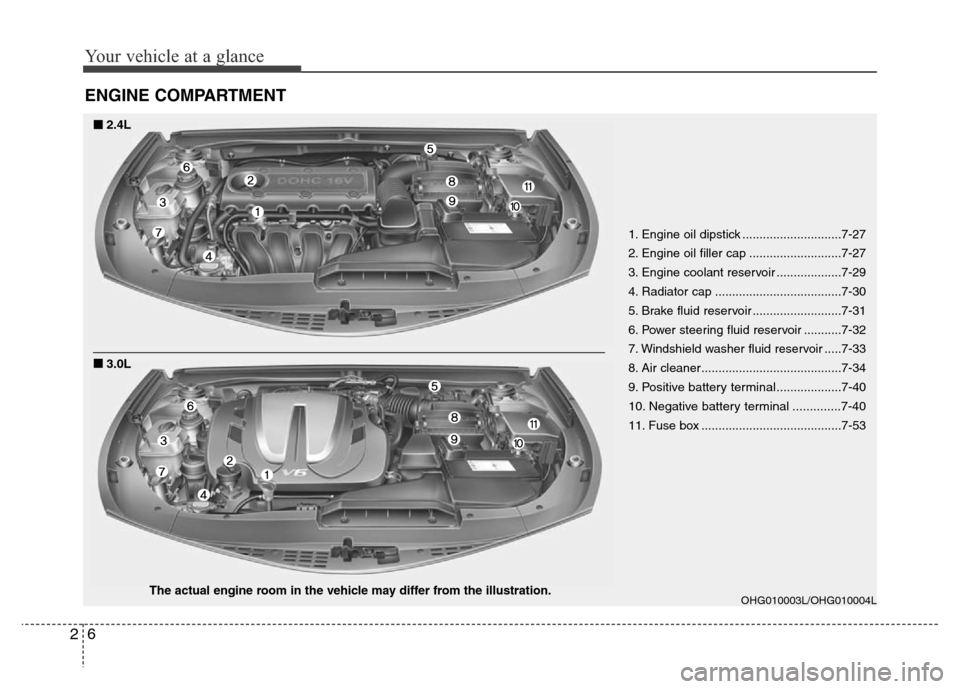
ENGINE COMPARTMENT
OHG010003L/OHG010004L
■■2.4L
■3.0L
The actual engine room in the vehicle may differ from the illustration.1. Engine oil dipstick .............................7-27
2. Engine oil filler cap ...........................7-27
3. Engine coolant reservoir ...................7-29
4. Radiator cap .....................................7-30
5. Brake fluid reservoir ..........................7-31
6. Power steering fluid reservoir ...........7-32
7. Windshield washer fluid reservoir .....7-33
8. Air cleaner.........................................7-34
9.
Positive battery terminal...................7-40
10. Negative battery terminal ..............7-40
11. Fuse box .........................................7-53
Page 21 of 473
35
Safety features of your vehicle
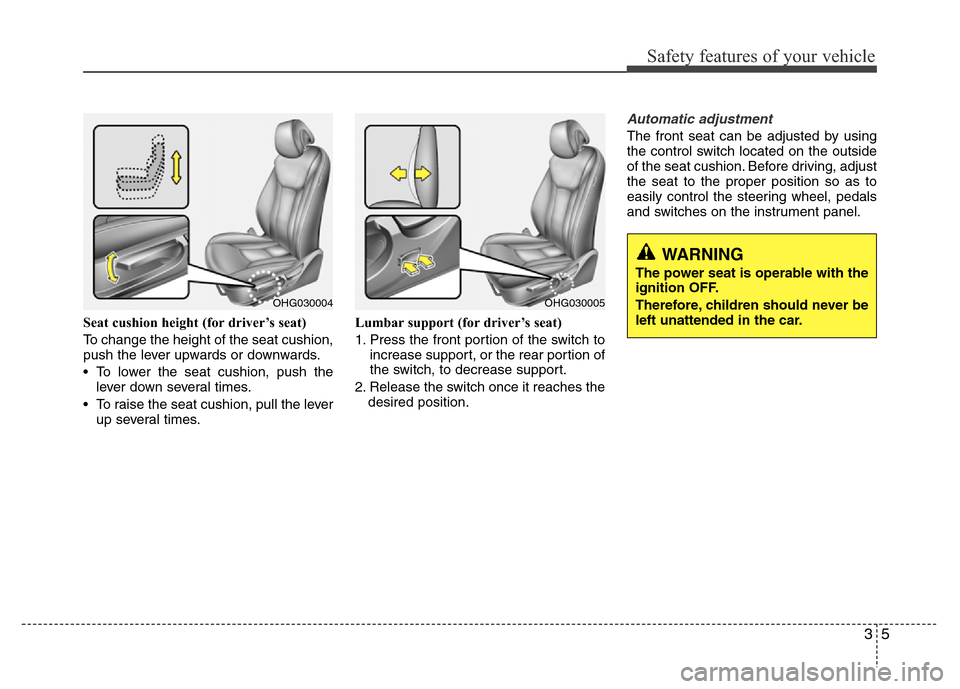
Seat cushion height (for driver’s seat)
To change the height of the seat cushion,
push the lever upwards or downwards.
• To lower the seat cushion, push the
lever down several times.
• To raise the seat cushion, pull the lever
up several times.Lumbar support (for driver’s seat)
1. Press the front portion of the switch to
increase support, or the rear portion of
the switch, to decrease support.
2. Release the switch once it reaches the
desired position.
Automatic adjustment
The front seat can be adjusted by using
the control switch located on the outside
of the seat cushion. Before driving, adjust
the seat to the proper position so as to
easily control the steering wheel, pedals
and switches on the instrument panel.
WARNING
The power seat is operable with the
ignition OFF.
Therefore, children should never be
left unattended in the car.
OHG030004OHG030005
Page 120 of 473
443
Features of your vehicle
Power steering
Power steering uses energy from the
engine to assist you in steering the vehi-
cle. If the engine is off or if the power
steering system becomes inoperative,
the vehicle may still be steered, but it will
require increased steering effort.
Should you notice any change in the
effort required to steer during normal
vehicle operation, we recommend that
the system be checked by an authorized
HYUNDAI dealer.
✽NOTICE
If the power steering drive belt breaks
or if the power steering pump malfunc-
tions, the steering effort will greatly
increase.
✽NOTICE
If the vehicle is parked for extended
periods outside in cold weather (below -
10°C/14°F), the power steering may
require increased effort when the engine
is first started. This is caused by
increased fluid viscosity due to the cold
weather and does not indicate a mal-
function.
When this happens, increase the engine
RPM by depressing accelerator until the
RPM reaches 1,500 rpm then release or
let the engine idle for two or three min-
utes to warm up the fluid.
Tilt steering
Tilt steering allows you to adjust the
steering wheel before you drive. You can
also raise it to give your legs more room
when you exit and enter the vehicle.
The steering wheel should be positioned
so that it is comfortable for you to drive,
while permitting you to see the instru-
ment panel warning lights and gauges.
STEERING WHEEL
CAUTION
Never hold the steering wheel
against a stop (extreme right or left
turn) for more than 5 seconds with
the engine running. Holding the
steering wheel for more than 5 sec-
onds in either position may cause
damage to the power steering
pump.
WARNING
• Never adjust the angle of the
steering wheel while driving. You
may lose steering control and
cause severe personal injury,
death or accidents.
• After adjusting, push the steering
wheel both up and down to be
certain it is locked in position.
Page 143 of 473
Features of your vehicle
66 4
✽NOTICE
• If the vehicle is not on level ground or
the battery power has been interrupt-
ed, the distance to empty function
may not operate correctly.
• The distance to empty may differ
from the actual driving distance as it
is an estimate of the available driving
distance.
• The trip computer may not register
additional fuel if less than 6 liters (1.6
gallons) of fuel are added to the vehi-
cle.
• The fuel economy and distance to
empty may vary significantly based
on driving conditions, driving habits,
and condition of the vehicle.
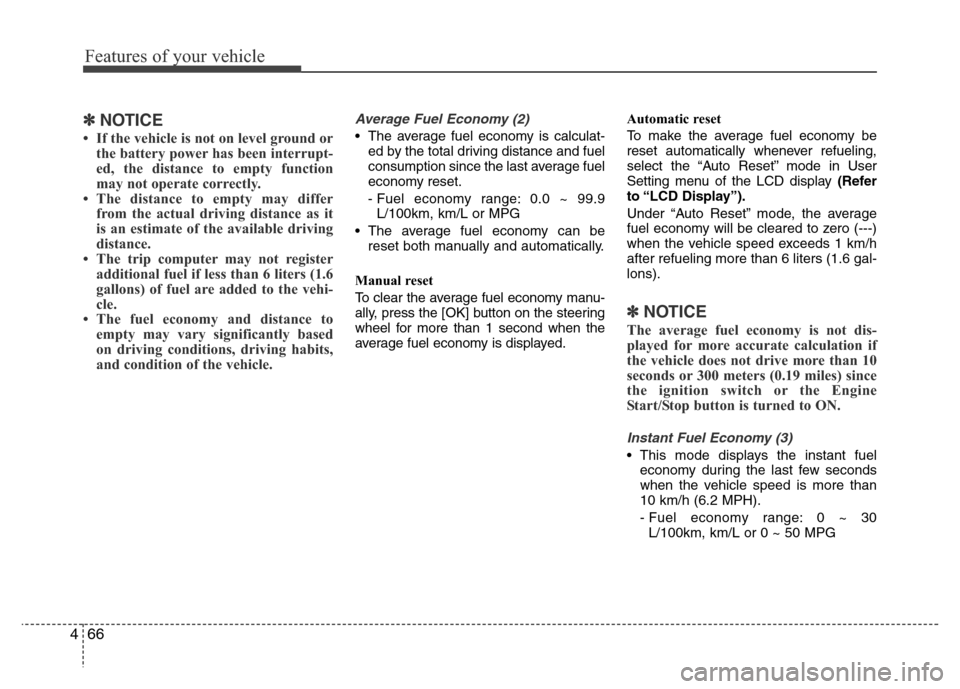
Average Fuel Economy (2)
• The average fuel economy is calculat-
ed by the total driving distance and fuel
consumption since the last average fuel
economy reset.
- Fuel economy range: 0.0 ~ 99.9
L/100km, km/L or MPG
• The average fuel economy can be
reset both manually and automatically.
Manual reset
To clear the average fuel economy manu-
ally, press the [OK] button on the steering
wheel for more than 1 second when the
average fuel economy is displayed.Automatic reset
To make the average fuel economy be
reset automatically whenever refueling,
select the “Auto Reset” mode in User
Setting menu of the LCD display (Refer
to “LCD Display”).
Under “Auto Reset” mode, the average
fuel economy will be cleared to zero (---)
when the vehicle speed exceeds 1 km/h
after refueling more than 6 liters (1.6 gal-
lons).
✽NOTICE
The average fuel economy is not dis-
played for more accurate calculation if
the vehicle does not drive more than 10
seconds or 300 meters (0.19 miles) since
the ignition switch or the Engine
Start/Stop button is turned to ON.
Instant Fuel Economy (3)
• This mode displays the instant fuel
economy during the last few seconds
when the vehicle speed is more than
10 km/h (6.2 MPH).
- Fuel economy range: 0 ~ 30
L/100km, km/L or 0 ~ 50 MPG
Page 216 of 473
4139
Features of your vehicle
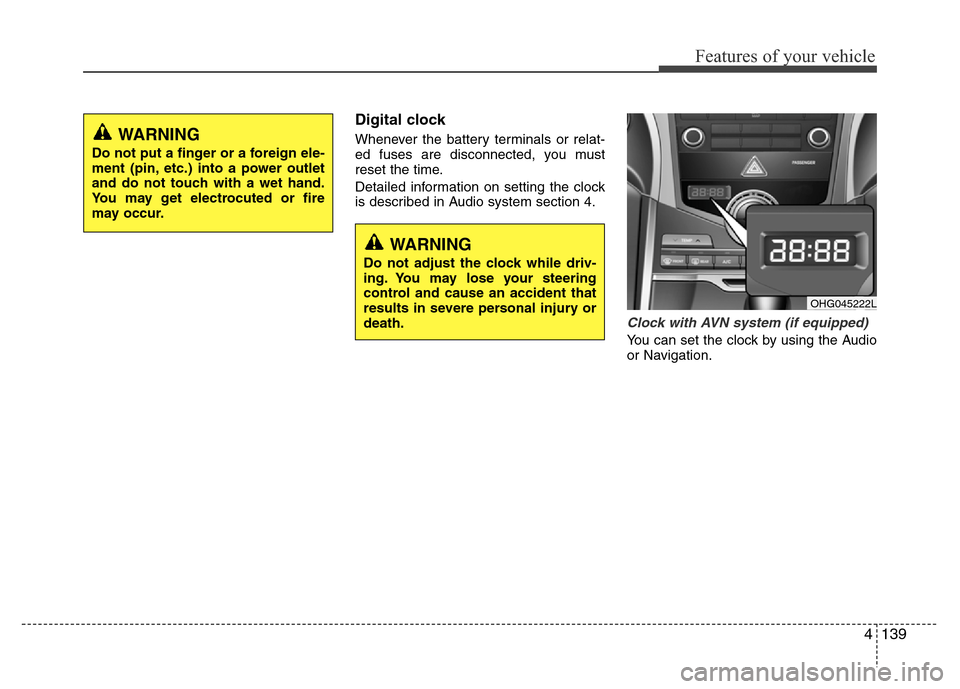
Digital clock
Whenever the battery terminals or relat-
ed fuses are disconnected, you must
reset the time.
Detailed information on setting the clock
is described in Audio system section 4.
Clock with AVN system (if equipped)
You can set the clock by using the Audio
or Navigation.
OHG045222L
WARNING
Do not adjust the clock while driv-
ing. You may lose your steering
control and cause an accident that
results in severe personal injury or
death.
WARNING
Do not put a finger or a foreign ele-
ment (pin, etc.) into a power outlet
and do not touch with a wet hand.
You may get electrocuted or fire
may occur.
Page 239 of 473
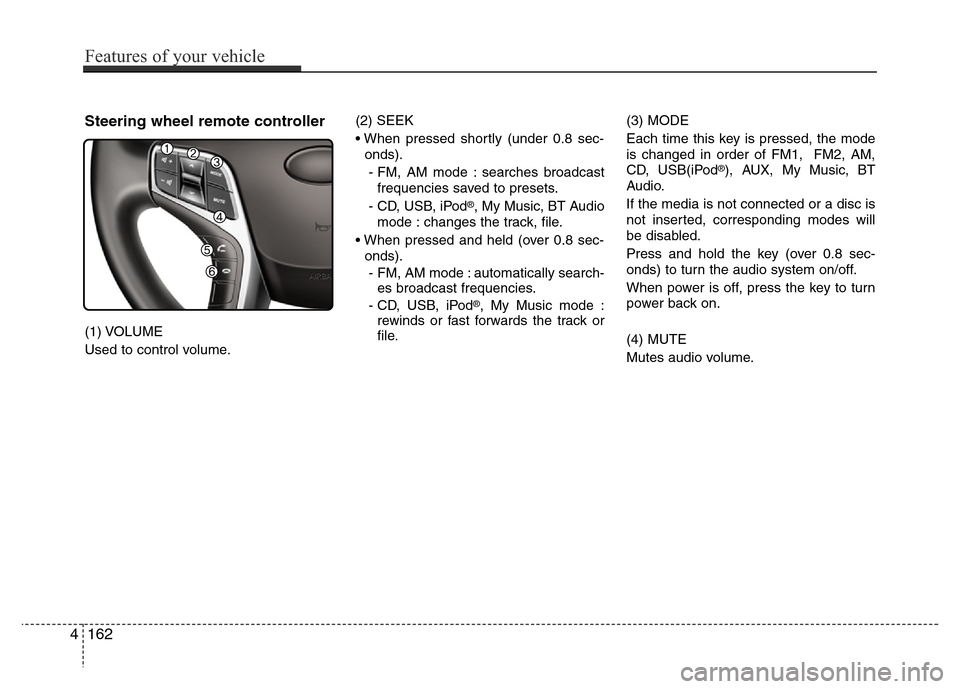
Steering wheel remote controller
(1) VOLUME
Used to control volume.(2) SEEK
• When pressed shortly (under 0.8 sec-
onds).
- FM, AM mode : searches broadcast
frequencies saved to presets.
- CD, USB, iPod
®, My Music, BT Audio
mode : changes the track, file.
• When pressed and held (over 0.8 sec-
onds).
- FM, AM mode : automatically search-
es broadcast frequencies.
- CD, USB, iPod
®, My Music mode :
rewinds or fast forwards the track or
file.(3) MODE
Each time this key is pressed, the mode
is changed in order of FM1, FM2, AM,
CD, USB(iPod
®), AUX, My Music, BT
Audio.
If the media is not connected or a disc is
not inserted, corresponding modes will
be disabled.
Press and hold the key (over 0.8 sec-
onds) to turn the audio system on/off.
When power is off, press the key to turn
power back on.
(4) MUTE
Mutes audio volume.
4162
Features of your vehicle
Page 290 of 473
57
Driving your vehicle
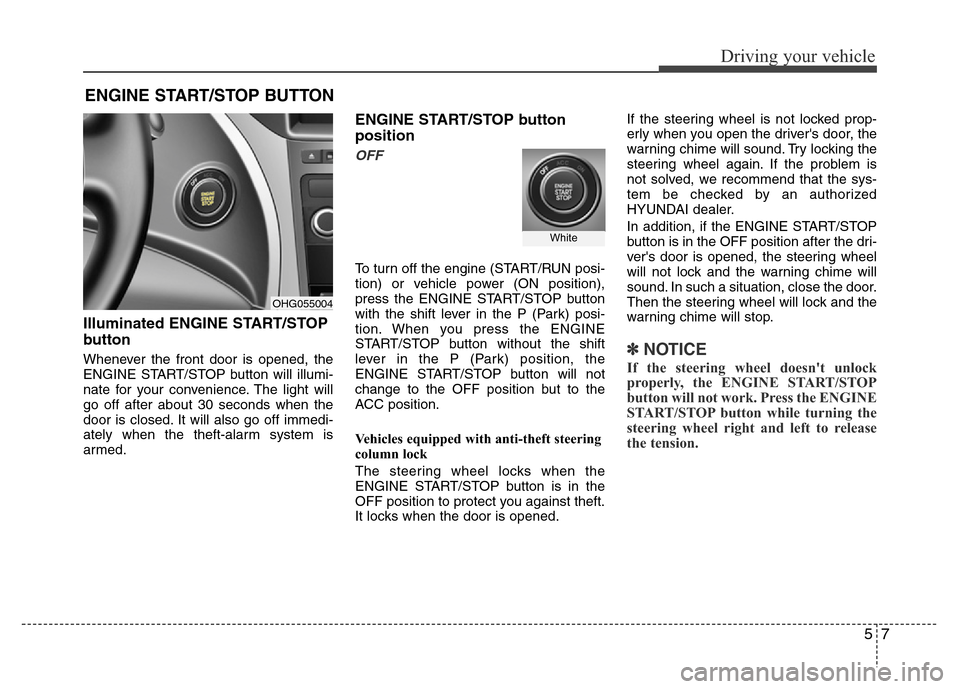
Illuminated ENGINE START/STOP
button
Whenever the front door is opened, the
ENGINE START/STOP button will illumi-
nate for your convenience. The light will
go off after about 30 seconds when the
door is closed. It will also go off immedi-
ately when the theft-alarm system is
armed.
ENGINE START/STOP button
position
OFF
To turn off the engine (START/RUN posi-
tion) or vehicle power (ON position),
press the ENGINE START/STOP button
with the shift lever in the P (Park) posi-
tion. When you press the ENGINE
START/STOP button without the shift
lever in the P (Park) position, the
ENGINE START/STOP button will not
change to the OFF position but to the
ACC position.
Vehicles equipped with anti-theft steering
column lock
The steering wheel locks when the
ENGINE START/STOP button is in the
OFF position to protect you against theft.
It locks when the door is opened.If the steering wheel is not locked prop-
erly when you open the driver's door, the
warning chime will sound. Try locking the
steering wheel again. If the problem is
not solved, we recommend that the sys-
tem be checked by an authorized
HYUNDAI dealer.
In addition, if the ENGINE START/STOP
button is in the OFF position after the dri-
ver's door is opened, the steering wheel
will not lock and the warning chime will
sound. In such a situation, close the door.
Then the steering wheel will lock and the
warning chime will stop.
✽ NOTICE
If the steering wheel doesn't unlock
properly, the ENGINE START/STOP
button will not work. Press the ENGINE
START/STOP button while turning the
steering wheel right and left to release
the tension.
ENGINE START/STOP BUTTON
OHG055004
White
Page 291 of 473
Driving your vehicle
8 5
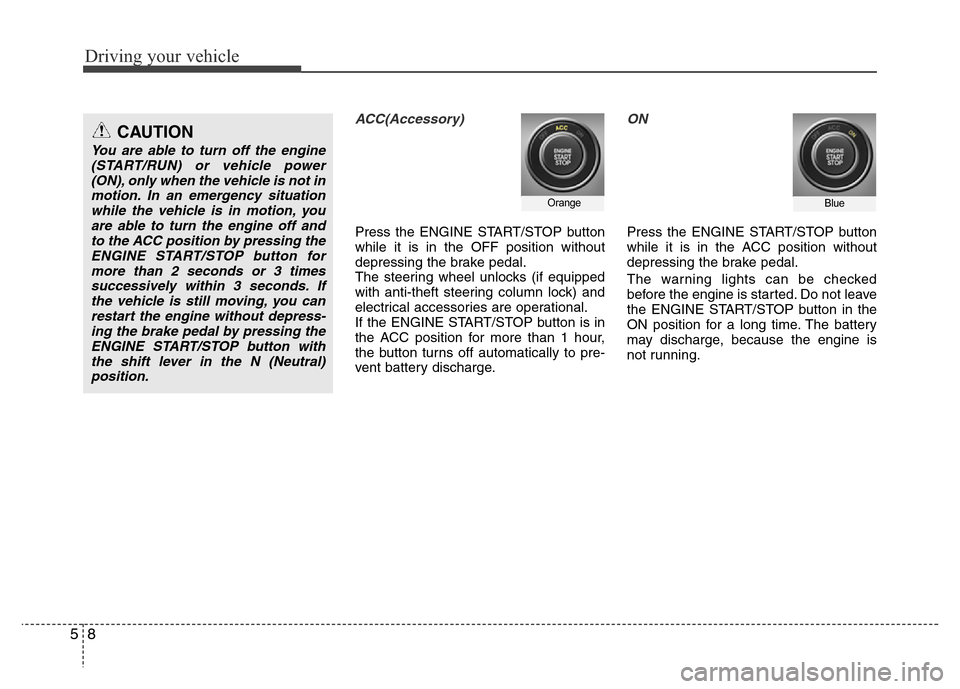
ACC(Accessory)
Press the ENGINE START/STOP button
while it is in the OFF position without
depressing the brake pedal.
The steering wheel unlocks (if equipped
with anti-theft steering column lock) and
electrical accessories are operational.
If the ENGINE START/STOP button is in
the ACC position for more than 1 hour,
the button turns off automatically to pre-
vent battery discharge.
ON
Press the ENGINE START/STOP button
while it is in the ACC position without
depressing the brake pedal.
The warning lights can be checked
before the engine is started. Do not leave
the ENGINE START/STOP button in the
ON position for a long time. The battery
may discharge, because the engine is
not running.
OrangeBlue
CAUTION
You are able to turn off the engine
(START/RUN) or vehicle power
(ON), only when the vehicle is not in
motion. In an emergency situation
while the vehicle is in motion, you
are able to turn the engine off and
to the ACC position by pressing the
ENGINE START/STOP button for
more than 2 seconds or 3 times
successively within 3 seconds. If
the vehicle is still moving, you can
restart the engine without depress-
ing the brake pedal by pressing the
ENGINE START/STOP button with
the shift lever in the N (Neutral)
position.
Page 301 of 473
Driving your vehicle
18 5
Power brakes
Your vehicle has power-assisted brakes
that adjust automatically through normal
usage.
In the event that the power-assisted
brakes lose power because of a stalled
engine or some other reason, you can
still stop your vehicle by applying greater
force to the brake pedal than you nor-
mally would. The stopping distance, how-
ever, will be longer.
When the engine is not running, the
reserve brake power is partially depleted
each time the brake pedal is applied. Do
not pump the brake pedal when the
power assist has been interrupted.
Pump the brake pedal only when neces-
sary to maintain steering control on slip-
pery surfaces.
BRAKE SYSTEM
WARNING- Brakes
• Do not drive with your foot rest-
ing on the brake pedal. This will
create abnormal high brake tem-
peratures, excessive brake lining
and pad wear, and increased
stopping distances.
• When descending a long or steep
hill, shift to a lower gear and
avoid continuous application of
the brakes. Continuous brake
application will cause the brakes
to overheat and could result in a
temporary loss of braking per-
formance.
• Wet brakes may impair the vehi-
cle’s ability to safely slow down;
the vehicle may also pull to one
side when the brakes are applied.
Applying the brakes lightly will
indicate whether they have been
affected in this way. Always test
your brakes in this fashion after
driving through deep water. To
dry the brakes, apply them lightly
while maintaining a safe forward
speed until brake performance
returns to normal.
(Continued)
(Continued)
• Always, confirm the position of
the brake and accelerator pedal
before driving. If you don't check
the position of the accelerator
and brake pedal before driving,
you may depress the accelerator
instead of the brake pedal. It may
cause a serious accident.