low beam Hyundai Azera 2016 Owner's Manual
[x] Cancel search | Manufacturer: HYUNDAI, Model Year: 2016, Model line: Azera, Model: Hyundai Azera 2016Pages: 521, PDF Size: 16.54 MB
Page 158 of 521
Features of your vehicle
78
4
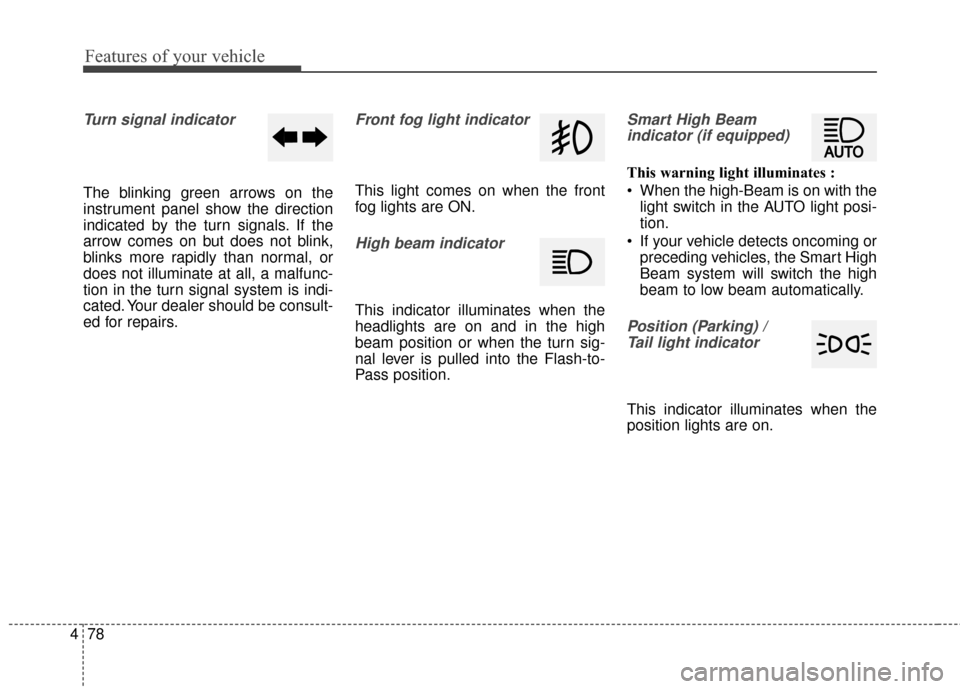
Turn signal indicator
The blinking green arrows on the
instrument panel show the direction
indicated by the turn signals. If the
arrow comes on but does not blink,
blinks more rapidly than normal, or
does not illuminate at all, a malfunc-
tion in the turn signal system is indi-
cated. Your dealer should be consult-
ed for repairs.
Front fog light indicator
This light comes on when the front
fog lights are ON.
High beam indicator
This indicator illuminates when the
headlights are on and in the high
beam position or when the turn sig-
nal lever is pulled into the Flash-to-
Pass position.
Smart High Beam
indicator (if equipped)
This warning light illuminates :
When the high-Beam is on with the light switch in the AUTO light posi-
tion.
If your vehicle detects oncoming or preceding vehicles, the Smart High
Beam system will switch the high
beam to low beam automatically.
Position (Parking) / Tail light indicator
This indicator illuminates when the
position lights are on.
Page 183 of 521
4103
Features of your vehicle
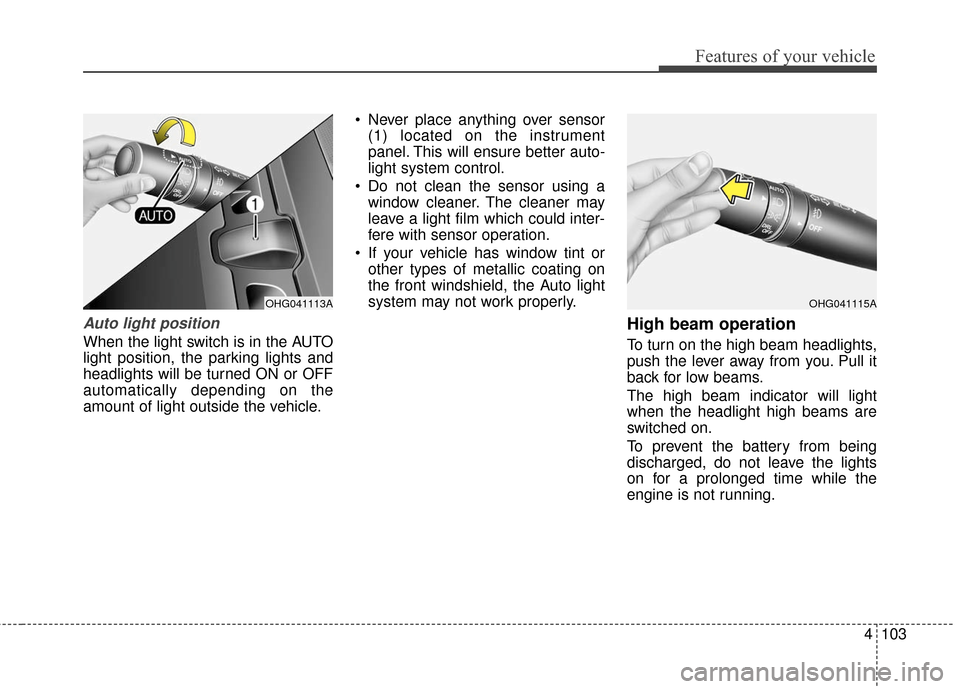
Auto light position
When the light switch is in the AUTO
light position, the parking lights and
headlights will be turned ON or OFF
automatically depending on the
amount of light outside the vehicle. Never place anything over sensor
(1) located on the instrument
panel. This will ensure better auto-
light system control.
Do not clean the sensor using a window cleaner. The cleaner may
leave a light film which could inter-
fere with sensor operation.
If your vehicle has window tint or other types of metallic coating on
the front windshield, the Auto light
system may not work properly.
High beam operation
To turn on the high beam headlights,
push the lever away from you. Pull it
back for low beams.
The high beam indicator will light
when the headlight high beams are
switched on.
To prevent the battery from being
discharged, do not leave the lights
on for a prolonged time while the
engine is not running.
OHG041115AOHG041113A
Page 184 of 521
Features of your vehicle
104
4
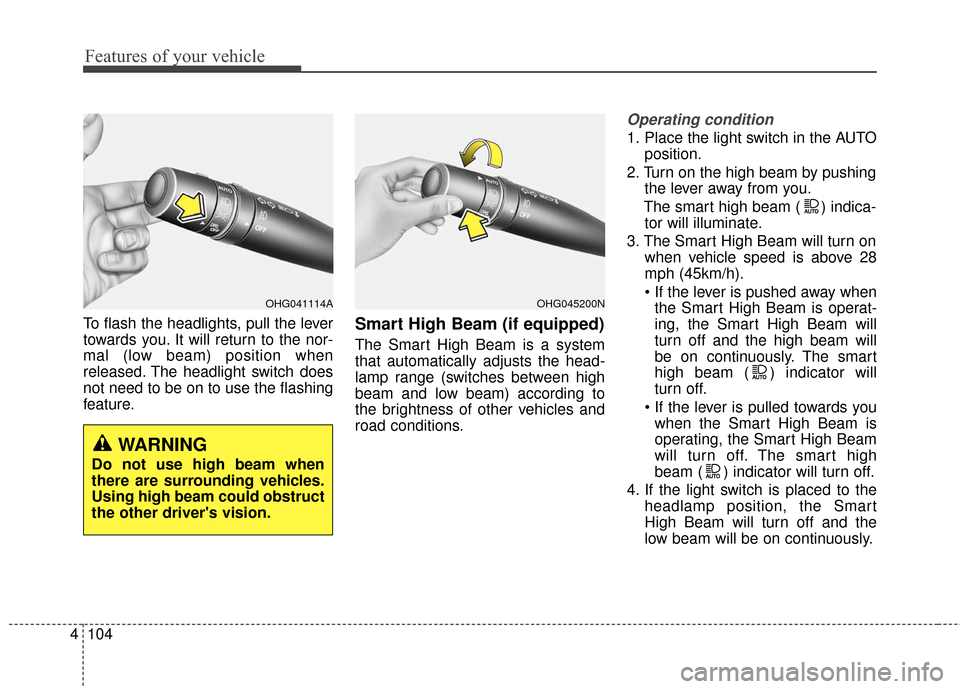
To flash the headlights, pull the lever
towards you. It will return to the nor-
mal (low beam) position when
released. The headlight switch does
not need to be on to use the flashing
feature.Smart High Beam (if equipped)
The Smart High Beam is a system
that automatically adjusts the head-
lamp range (switches between high
beam and low beam) according to
the brightness of other vehicles and
road conditions.
Operating condition
1. Place the light switch in the AUTO
position.
2. Turn on the high beam by pushing the lever away from you.
The smart high beam ( ) indica- tor will illuminate.
3. The Smart High Beam will turn on when vehicle speed is above 28
mph (45km/h).
the Smart High Beam is operat-
ing, the Smart High Beam will
turn off and the high beam will
be on continuously. The smart
high beam ( ) indicator will
turn off.
when the Smart High Beam is
operating, the Smart High Beam
will turn off. The smart high
beam ( ) indicator will turn off.
4. If the light switch is placed to the headlamp position, the Smart
High Beam will turn off and the
low beam will be on continuously.
WARNING
Do not use high beam when
there are surrounding vehicles.
Using high beam could obstruct
the other driver's vision.
OHG041114AOHG045200N
Page 185 of 521
4105
Features of your vehicle
The high beam switches to low beam
in the below conditions.
- When the Smart High Beam is off.
- When the light switch is not in theAUTO position.
- When the headlamp is detected from the on-coming vehicle.
- When the tail lamp is detected from the front vehicle.
- When the surrounding is bright enough high beams are not need-
ed.
- When streetlights or other lights are detected.
- When vehicle speed is below 22 mph (35 km/h).
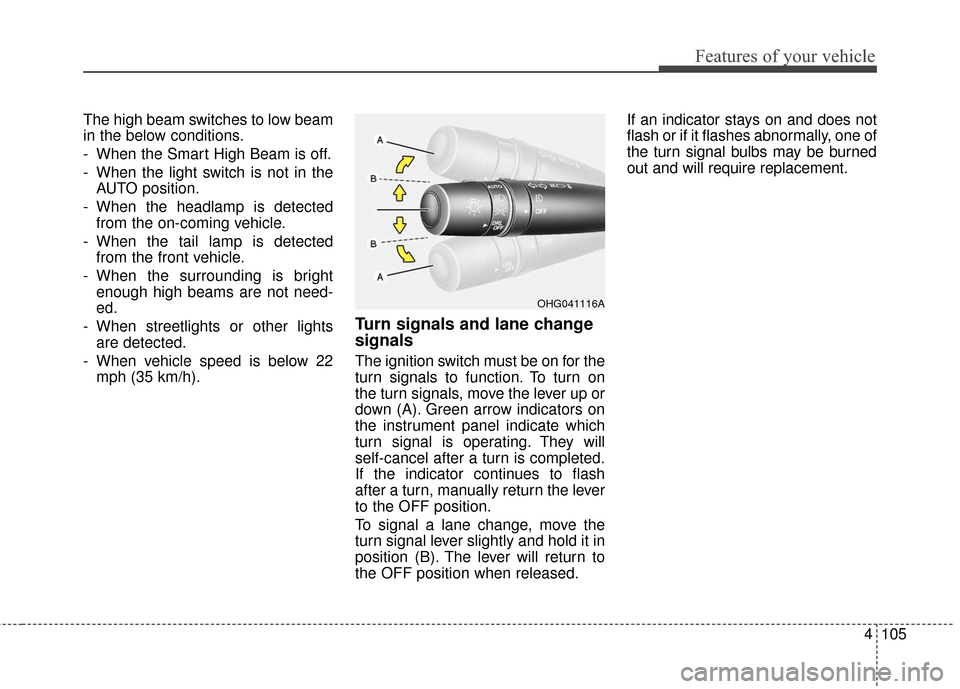
Turn signals and lane change
signals
The ignition switch must be on for the
turn signals to function. To turn on
the turn signals, move the lever up or
down (A). Green arrow indicators on
the instrument panel indicate which
turn signal is operating. They will
self-cancel after a turn is completed.
If the indicator continues to flash
after a turn, manually return the lever
to the OFF position.
To signal a lane change, move the
turn signal lever slightly and hold it in
position (B). The lever will return to
the OFF position when released. If an indicator stays on and does not
flash or if it flashes abnormally, one of
the turn signal bulbs may be burned
out and will require replacement.
OHG041116A
Page 481 of 521
Maintenance
64
7
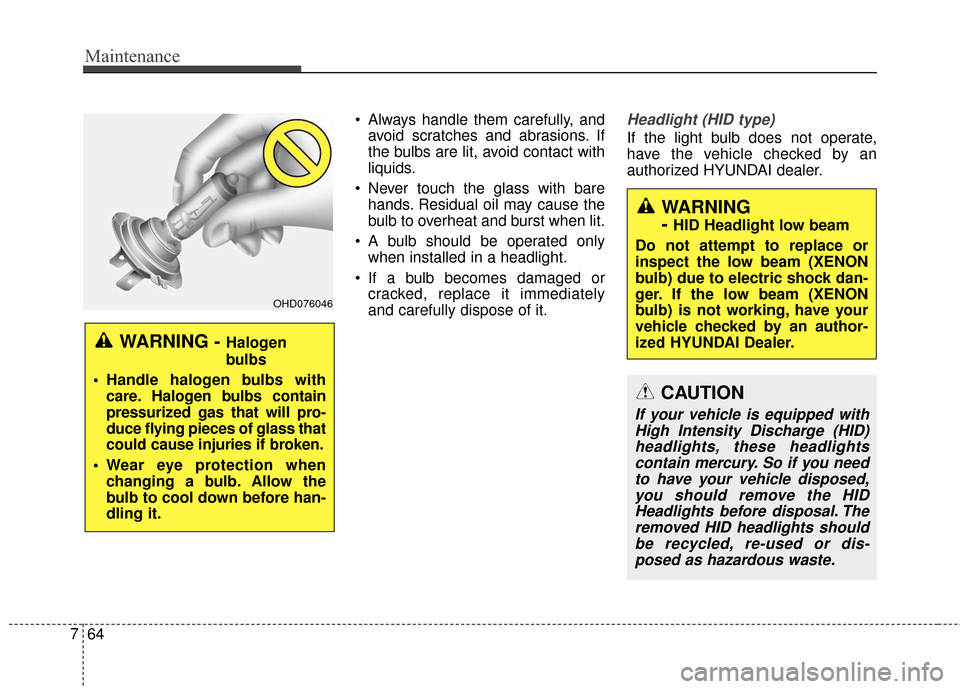
Always handle them carefully, and
avoid scratches and abrasions. If
the bulbs are lit, avoid contact with
liquids.
Never touch the glass with bare hands. Residual oil may cause the
bulb to overheat and burst when lit.
A bulb should be operated only when installed in a headlight.
If a bulb becomes damaged or cracked, replace it immediately
and carefully dispose of it.Headlight (HID type)
If the light bulb does not operate,
have the vehicle checked by an
authorized HYUNDAI dealer.
OHD076046
WARNING
-
HID Headlight low beam
Do not attempt to replace or
inspect the low beam (XENON
bulb) due to electric shock dan-
ger. If the low beam (XENON
bulb) is not working, have your
vehicle checked by an author-
ized HYUNDAI Dealer.
WARNING - Halogen
bulbs
Handle halogen bulbs with care. Halogen bulbs contain
pressurized gas that will pro-
duce flying pieces of glass that
could cause injuries if broken.
Wear eye protection when changing a bulb. Allow the
bulb to cool down before han-
dling it.
CAUTION
If your vehicle is equipped withHigh Intensity Discharge (HID)headlights, these headlightscontain mercury. So if you needto have your vehicle disposed,you should remove the HIDHeadlights before disposal. Theremoved HID headlights shouldbe recycled, re-used or dis-posed as hazardous waste.
Page 482 of 521
765
Maintenance
HID lamps have superior perform-
ance vs. halogen bulbs. HID lamps
are estimated by the manufacturer to
last twice as long or longer than
halogen bulbs depending on their
frequency of use. They will probably
require replacement at some point in
the life of the vehicle. Cycling the
headlamps on and off more than typ-
ical use will shorten HID lamps life.
HID lamps do not fail in the same
manner as halogen incandescent
lamps. If a headlamp goes out after a
period of operation but will immedi-
ately relight when the headlamp
switch is cycled it is likely the HID
lamp needs to be replaced. HID light-
ing components are more complex
than conventional halogen bulbs and
thus have higher replacement cost.
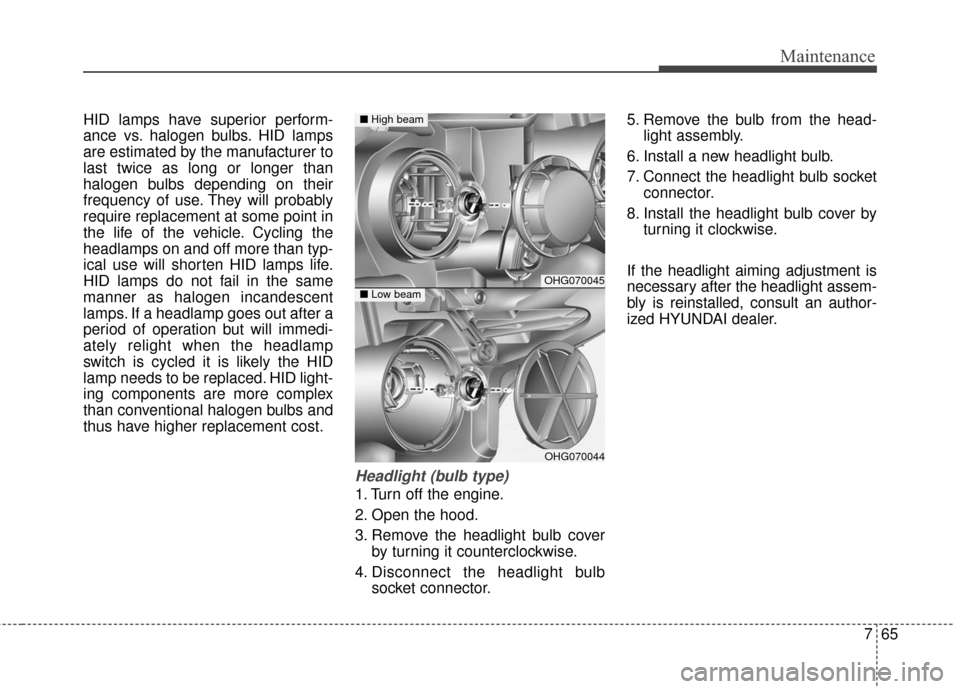
Headlight (bulb type)
1. Turn off the engine.
2. Open the hood.
3. Remove the headlight bulb coverby turning it counterclockwise.
4. Disconnect the headlight bulb socket connector. 5. Remove the bulb from the head-
light assembly.
6. Install a new headlight bulb.
7. Connect the headlight bulb socket connector.
8. Install the headlight bulb cover by turning it clockwise.
If the headlight aiming adjustment is
necessary after the headlight assem-
bly is reinstalled, consult an author-
ized HYUNDAI dealer.
OHG070045
OHG070044
■ High beam
■Low beam
Page 516 of 521
I7
Index
LabelAir bag warning label................................................3-60
Refrigerant label ..........................................................8-8
Tire sidewall labeling ................................................7-43
Tire specification and pressure label ..........................8-8
Vehicle certification label............................................8-7
Jack label ..................................................................6-20
Lane departure warning system (LDWS) ......................5-65
LCD display ..................................................................4-63 LCD modes ..............................................................4-63
Trip computer mode ..................................................4-64
Turn By Turn (TBT) mode........................................4-65
LDWS Mode ............................................................4-65
A/V mode ..................................................................4-65
Information mode ......................................................4-66
LCD display warnings and indicators ..........................4-77
Light bulbs ....................................................................7-63\
Headlight, position light, turn signal light,front fog light bulb replacement ............................7-63
High mounted stop light replacement ......................7-69
Interior light bulb replacement..................................7-70
License plate light bulb replacement ........................7-69
Rear combination light bulb replacement ................7-67
Side repeater light bulb replacement ........................7-67 Lighting........................................................................\
4-100
Battery saver function ............................................4-100
Auto light position ..................................................4-103
Daytime running light (DRL) ................................4-101
Front fog light ........................................................4-106
Lighting control Headlight (Headlamp) escort function ....................4-101
Headlight (Headlamp) welcome function ..............4-101
Headlight position ..................................................4-102
High beam operation ..............................................4-103
Parking light position ..............................................4-102
Smart High Beam ....................................................4-104
Turn signals and lane change signals ......................4-105
Lower anchor ................................................................3-34
Lubricants and capacities ................................................8-5
Maintenance Explanation of scheduled maintenance items ..........7-20
Maintenance services ..................................................7-4
Maintenance under severe usage conditions ............7-19
Normal maintenance schedule ....................................7-9
Owner maintenance ....................................................7-6
Scheduled maintenance service ..................................7-8
Tire maintenance ......................................................7-42
L
M