mirror Hyundai Azera 2017 Owner's Manual
[x] Cancel search | Manufacturer: HYUNDAI, Model Year: 2017, Model line: Azera, Model: Hyundai Azera 2017Pages: 520, PDF Size: 16.33 MB
Page 6 of 520
1
2
3
4
5
6
7
8I
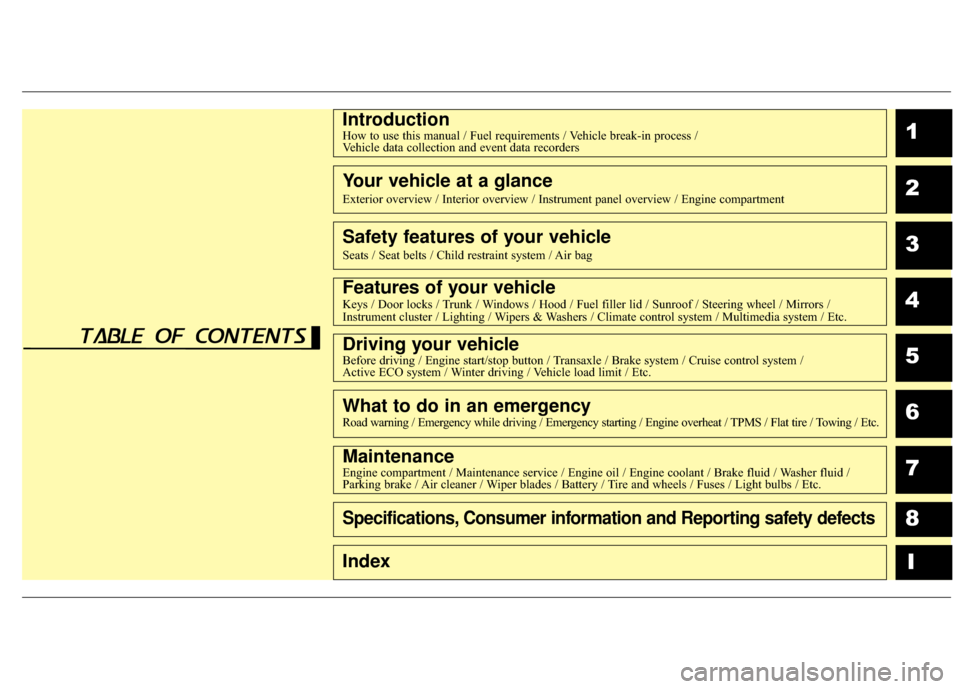
IntroductionHow to use this manual / Fuel requirements / Vehicle break-in process / Vehicle data collection and event data recorders
Your vehicle at a glance
Exterior overview / Interior overview / Instrument panel overview / Engi\
ne compartment
Safety features of your vehicle
Seats / Seat belts / Child restraint system / Air bag
Features of your vehicleKeys / Door locks / Trunk / Windows / Hood / Fuel filler lid / Sunroof / Steering wheel / Mirrors /
Instrument cluster / Lighting / Wipers & Washers / Climate control system / Multimedia system / Etc.
Driving your vehicleBefore driving / Engine start/stop button / Transaxle / Brake system / Cruise control system /
Active ECO system / Winter driving / Vehicle load limit / Etc.
What to do in an emergencyRoad warning / Emergency while driving / Emergency starting / Engine overheat / TPMS / Flat tire / Towing / Etc.
MaintenanceEngine compartment / Maintenance service / Engine oil / Engine coolant /\
Brake fluid / Washer fluid /
Parking brake / Air cleaner / Wiper blades / Battery / Tire and wheels / Fuses / Light bulbs / Etc.
Specifications, Consumer information and Reporting safety defects
Index
table of contents
Page 15 of 520
Your vehicle at a glance
22
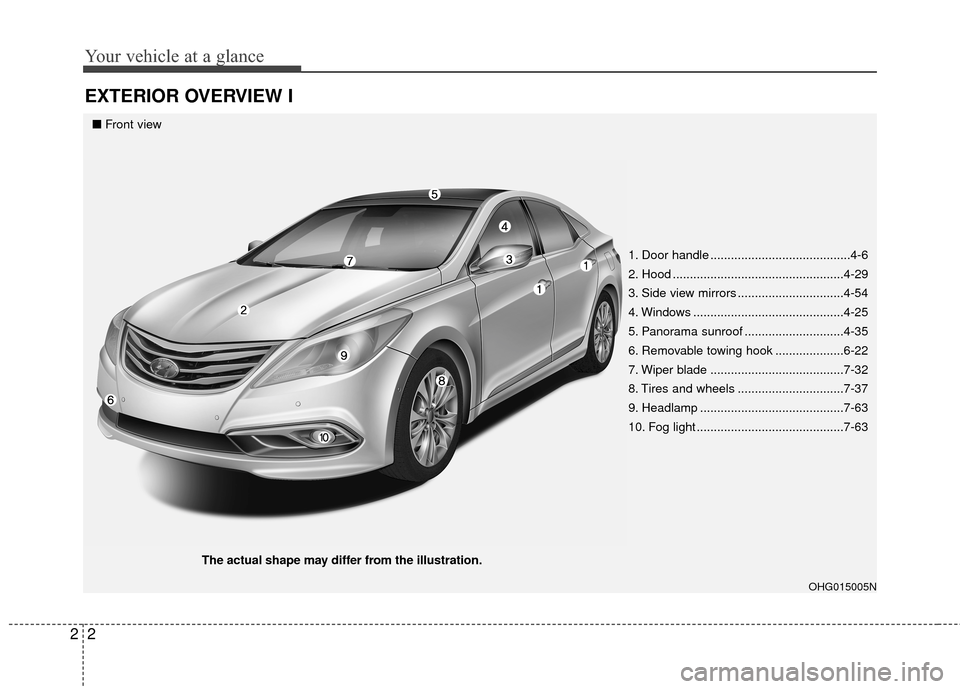
EXTERIOR OVERVIEW I
OHG015005N
■Front view
The actual shape may differ from the illustration. 1. Door handle .........................................4-6
2. Hood ..................................................4-29
3. Side view mirrors ...............................4-54
4. Windows ............................................4-25
5. Panorama sunroof .............................4-35
6. Removable towing hook ....................6-22
7. Wiper blade .......................................7-32
8. Tires and wheels ...............................7-37
9. Headlamp ..........................................7-63
10. Fog light ...........................................7-63
Page 17 of 520
Your vehicle at a glance
42
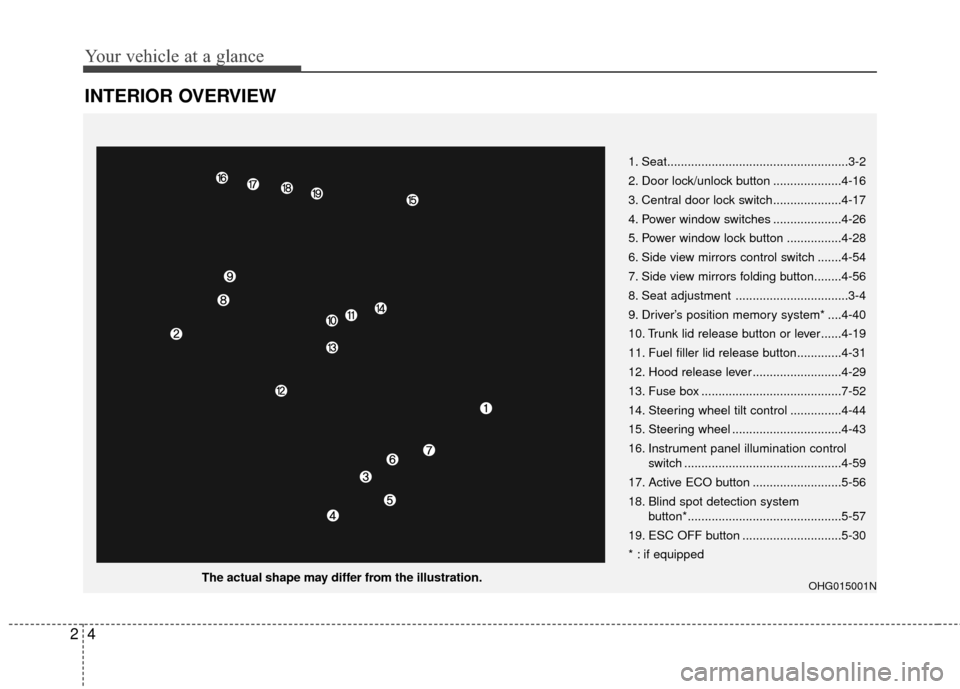
INTERIOR OVERVIEW
The actual shape may differ from the illustration.1. Seat.....................................................3-2
2. Door lock/unlock button ....................4-16
3. Central door lock switch....................4-17
4. Power window switches ....................4-26
5. Power window lock button ................4-28
6. Side view mirrors control switch .......4-54
7. Side view mirrors folding button........4-56
8. Seat adjustment .................................3-4
9. Driver’s position memory system* ....4-40
10. Trunk lid release button or lever......4-19
11. Fuel filler lid release button.............4-31
12. Hood release lever ..........................4-29
13. Fuse box .........................................7-52
14. Steering wheel tilt control ...............4-44
15. Steering wheel ................................4-43
16. Instrument panel illumination control
switch ..............................................4-59
17. Active ECO button ..........................5-56
18. Blind spot detection system button*.............................................5-57
19. ESC OFF button .............................5-30
* : if equippedOHG015001N
Page 80 of 520
Features of your vehicle
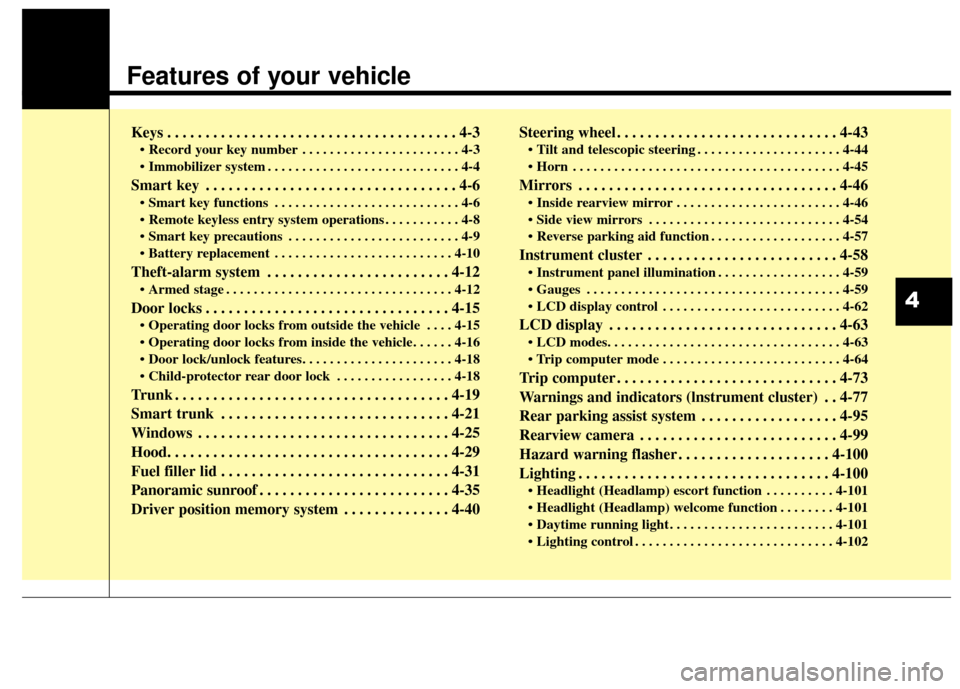
Keys . . . . . . . . . . . . . . . . . . . . . . . . . . . . . . . . . . . . \
. . 4-3
• Record your key number . . . . . . . . . . . . . . . . . . . . . . . 4-3
. . . . . . . . . . . . . . . . . . . . . . . . . . . . 4-4
Smart key . . . . . . . . . . . . . . . . . . . . . . . . . . . . . . . . . 4-6
. . . . . . . . . . . . . . . . . . . . . . . . . . . 4-6
. . . . . . . . . . . 4-8
. . . . . . . . . . . . . . . . . . . . . . . . . 4-9
. . . . . . . . . . . . . . . . . . . . . . . . . . 4-10
Theft-alarm system . . . . . . . . . . . . . . . . . . . . . . . . 4-12
. . . . . . . . . . . . . . . . . . . . . . . . . . . . . . . . . 4-12
Door locks . . . . . . . . . . . . . . . . . . . . . . . . . . . . . . . . 4-15
. . . . 4-15
. . . . . . . . . . . . . . . . . 4-18
Trunk . . . . . . . . . . . . . . . . . . . . . . . . . . . . . . . . . . . . \
4-19
Smart trunk . . . . . . . . . . . . . . . . . . . . . . . . . . . . . . 4-21
Windows . . . . . . . . . . . . . . . . . . . . . . . . . . . . . . . . . 4-25
Hood. . . . . . . . . . . . . . . . . . . . . . . . . . . . . . . . . . . . \
. 4-29
Fuel filler lid . . . . . . . . . . . . . . . . . . . . . . . . . . . . . . 4-31
Panoramic sunroof . . . . . . . . . . . . . . . . . . . . . . . . . 4-35
Driver position memory system . . . . . . . . . . . . . . 4-40Steering wheel . . . . . . . . . . . . . . . . . . . . . . . . . . . . . 4-43
. . . . . . . . . . . . . . . . . . . . . 4-44
. . . . . . . . . . . . . . . . . . . . . . . . . . . . . . . . . . . . \
. . . 4-45
Mirrors . . . . . . . . . . . . . . . . . . . . . . . . . . . . . . . . . . 4-46\
. . . . . . . . . . . . . . . . . . . . . . . . 4-46
. . . . . . . . . . . . . . . . . . . . . . . . . . . . 4-54
. . . . . . . . . . . . . . . . . . . 4-57
Instrument cluster . . . . . . . . . . . . . . . . . . . . . . . . . 4-58
. . . . . . . . . . . . . . . . . . 4-59
. . . . . . . . . . . . . . . . . . . . . . . . . . . . . . . . . . . . \
. 4-59
. . . . . . . . . . . . . . . . . . . . . . . . . . 4-62
LCD display . . . . . . . . . . . . . . . . . . . . . . . . . . . . . . 4-63
. . . . . . . . . . . . . . . . . . . . . . . . . . 4-64
Trip computer . . . . . . . . . . . . . . . . . . . . . . . . . . . . . 4-73
Warnings and indicators (lnstrument cluster) . . 4-77
Rear parking assist system . . . . . . . . . . . . . . . . . . 4-95
Rearview camera . . . . . . . . . . . . . . . . . . . . . . . . . . 4-99
Hazard warning flasher . . . . . . . . . . . . . . . . . . . . 4-100
Lighting . . . . . . . . . . . . . . . . . . . . . . . . . . . . . . . . . 4-100
. . . . . . . . . . 4-101
. . . . . . . . 4-101
. . . . . . . . . . . . . . . . . . . . . . . . 4-101
. . . . . . . . . . . . . . . . . . . . . . . . . . . . . 4-102
4
Page 119 of 520
Features of your vehicle
40
4
The driver position memory system
stores and recalls the driver's seat,
outside mirror, and steering wheel
positions, as well as the instrument
panel illumination intensity. By saving
the desired positions, different driv-
ers can recall different settings
according to their preference. If the
battery is disconnected, the memory
will be erased.
Storing positions into memory
using the buttons on the door
Storing driver’s seat positions
1. Move the shift lever into P while
the Engine Start/Stop button is in
the ON position.
2. Adjust the driver’s seat, outside mirrors, steering wheel position
and instrument panel illumination.
3. Press the SET button on the con- trol panel. The system will beep
once.
4. Press one of the memory buttons (1 or 2) within 5 seconds after
pressing the SET button. The sys-
tem will beep twice when memory
has been successfully stored.
DRIVER POSITION MEMORY SYSTEM (IF EQUIPPED)
OHG040033
WARNING
Never attempt to operate thedriver position memory system
while the vehicle is moving.
This could result in loss of
control, and an accident caus-
ing death, serious injury, or
property damage.
Do not adjust the seat while wearing seat belts. Moving the
seat cushion forward may
cause strong pressure on the
abdomen.
Page 120 of 520
441
Features of your vehicle
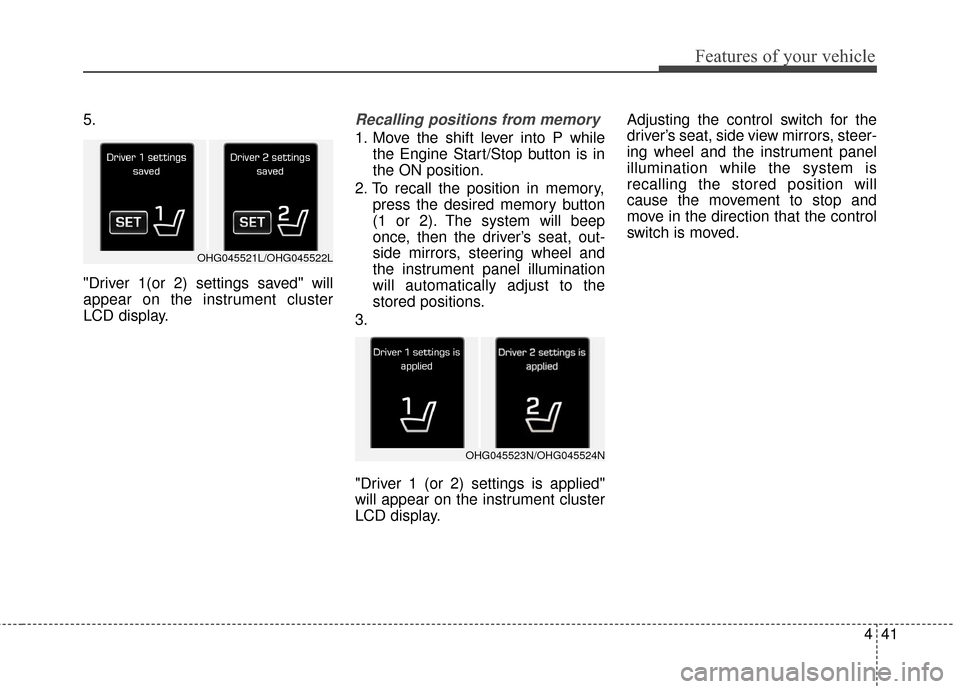
5.
"Driver 1(or 2) settings saved" will
appear on the instrument cluster
LCD display.Recalling positions from memory
1. Move the shift lever into P whilethe Engine Start/Stop button is in
the ON position.
2. To recall the position in memory, press the desired memory button
(1 or 2). The system will beep
once, then the driver’s seat, out-
side mirrors, steering wheel and
the instrument panel illumination
will automatically adjust to the
stored positions.
3.
"Driver 1 (or 2) settings is applied"
will appear on the instrument cluster
LCD display. Adjusting the control switch for the
driver’s seat, side view mirrors, steer-
ing wheel and the instrument panel
illumination while the system is
recalling the stored position will
cause the movement to stop and
move in the direction that the control
switch is moved.
OHG045521L/OHG045522L
OHG045523N/OHG045524N
Page 125 of 520
Features of your vehicle
46
4
Inside rearview mirror
Adjust the rearview mirror so that the
center view through the rear window
is seen. Make this adjustment before
you start driving.
Do not place objects in the rear seat
or cargo area which would interfere
with your vision through the rear win-
dow.
Electric chromic mirror (ECM)
with HomeLink®system and
compass
Your vehicle may be equipped with a
Gentex Automatic-Dimming Mirror
with a Z-Nav™ Electronic Compass
Display and an Integrated
HomeLink
®Wireless Control
System. During nighttime driving,
this feature will automatically detect
and reduce rearview mirror glare
while the compass indicates the
direction the vehicle is pointed. The
HomeLink
®Universal Transceiver
allows you to activate your garage
door(s), electric gate, home lighting,
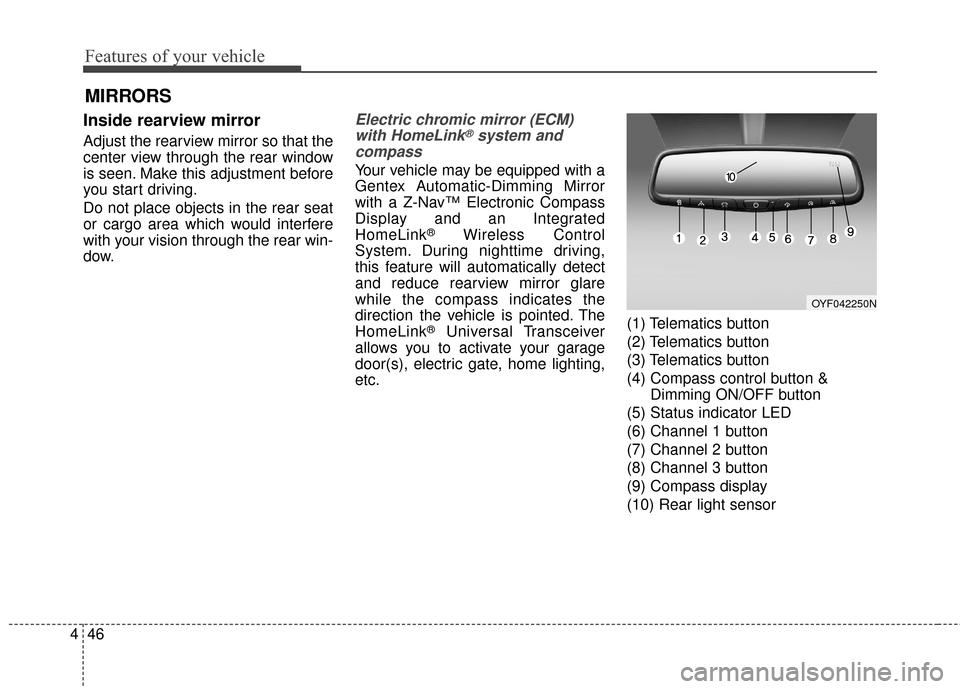
etc. (1) Telematics button
(2) Telematics button
(3) Telematics button
(4) Compass control button &
Dimming ON/OFF button
(5) Status indicator LED
(6) Channel 1 button
(7) Channel 2 button
(8) Channel 3 button
(9) Compass display
(10) Rear light sensor
MIRRORS
OYF042250N
Page 126 of 520
447
Features of your vehicle
Automatic-Dimming Night Vision
Safety™ (NVS®) Mirror
The NVS®Mirror in your vehicle is
the most advanced way to reduce
annoying glare in the rearview mirror
during any driving situation. For more
information regarding NVS
®mirrors
and other applications, please refer
to the Gentex website:
www.gentex.com
✽ ✽ NOTICE
The NVS®Mirror automatically
reduces glare during driving condi-
tions based upon light levels moni-
tored in front of the vehicle and
from the rear of the vehicle. These
light sensors are visible through
openings in the front and rear of the
mirror case. Any object that
obstructs either light sensor will
degrade the automatic dimming
control feature.
Automatic-dimming function
Your mirror will automatically dim
upon detecting glare from the vehi-
cles traveling behind you. The auto-
dimming function can be controlled
by the Dimming ON/OFF button:
1. Pressing and holding the button
for 3 seconds turns the autodim-
ming function OFF which is indi-
cated by the green Status
Indicator LED turning off.
2. Pressing and holding the button for 3 seconds again turns the
auto-dimming function ON which
is indicated by the green Status
Indicator LED turning on.
The mirror defaults to the ON posi-
tion each time the vehicle is started. Z-Nav™ Compass Display
The NVS™ Mirror in your vehicle is
also equipped with a Z-Nav™
Compass that shows the vehicle
Compass heading in the Display
Window using the 8 basic cardinal
headings (N, NE, E, SE, etc.).
Page 127 of 520
Features of your vehicle
48
4
Compass function
The Compass can be turned ON and
OFF and will remember the last state
when the ignition is cycled. To turn
the display feature ON/OFF:
1. Press and release the button
within 1 second to turn the display
feature OFF.
2. Press and release the button again within 1 second to turn the
display back ON.
Additional options can be set with
press and hold sequences of the
button and are detailed below.
There is a difference between mag-
netic north and true north. The com-
pass in the mirror can compensate
for this difference when it knows the
Magnetic Zone in which it is operat-
ing. This is set either by the dealer or
by the user. The operating Zone
Numbers for North America are
shown in the figure on the following
section.
B520C05NF
Page 133 of 520
Features of your vehicle
54
4
NVS®is a registered trademark and
Z-Nav™ is a trademark of the Gentex
Corporation, Zeeland, Michigan.
HomeLink
®is a registered trademark
owned by Johnson Controls,
Incorporated, Milwaukee, Wisconsin.
Side view mirrors
Be sure to adjust mirror angles
before driving.
Your vehicle is equipped with both
left-hand and right-hand side view
mirrors. The mirrors can be adjusted
remotely with the remote switch. The
mirror heads can be folded back to
prevent damage during an automatic
car wash or when passing through a
narrow street.
The right side view mirrors is convex.
Objects seen in the mirror are closer
than they appear.
Use your interior rearview mirror or
direct observation to determine the
actual distance of following vehicles
when changing lanes.CAUTION -Rearview
mirror
Do not scrape ice off the mirror face; this may damage the sur-face of the glass. If ice shouldrestrict movement of the mirror,do not force the mirror foradjustment. To remove ice, usea deicer spray, or a sponge orsoft cloth with very warm water.
WARNING - Mirror
adjustment
Do not adjust or fold the side
view mirrors while the vehicle is
moving. This could result in
loss of control, and an accident
which could cause death, seri-
ous injury or property damage.