fuel cap HYUNDAI COUPE 2012 Owners Manual
[x] Cancel search | Manufacturer: HYUNDAI, Model Year: 2012, Model line: COUPE, Model: HYUNDAI COUPE 2012Pages: 391, PDF Size: 6.88 MB
Page 10 of 391
13
Introduction
A020101BEN-EU
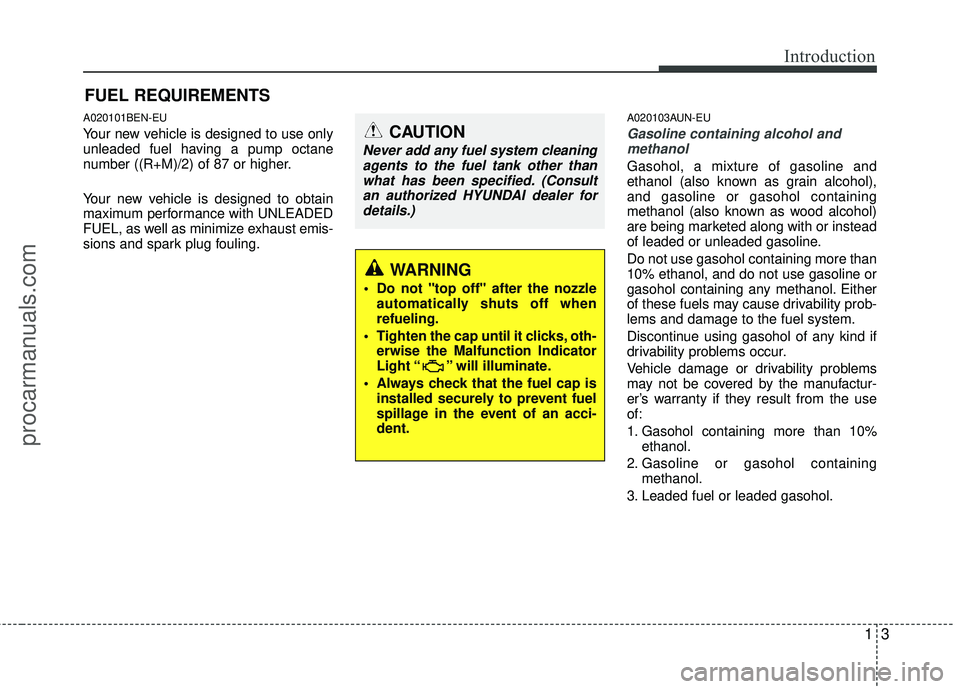
Your new vehicle is designed to use only
unleaded fuel having a pump octane
number ((R+M)/2) of 87 or higher.
Your new vehicle is designed to obtain
maximum performance with UNLEADED
FUEL, as well as minimize exhaust emis-
sions and spark plug fouling.
A020103AUN-EU
Gasoline containing alcohol andmethanol
Gasohol, a mixture of gasoline and
ethanol (also known as grain alcohol),
and gasoline or gasohol containing
methanol (also known as wood alcohol)
are being marketed along with or instead
of leaded or unleaded gasoline.
Do not use gasohol containing more than
10% ethanol, and do not use gasoline or
gasohol containing any methanol. Either
of these fuels may cause drivability prob-
lems and damage to the fuel system.
Discontinue using gasohol of any kind if
drivability problems occur.
Vehicle damage or drivability problems
may not be covered by the manufactur-
er’s warranty if they result from the use
of:
1. Gasohol containing more than 10% ethanol.
2. Gasoline or gasohol containing methanol.
3. Leaded fuel or leaded gasohol.
FUEL REQUIREMENTS
CAUTION
Never add any fuel system cleaning agents to the fuel tank other thanwhat has been specified. (Consultan authorized HYUNDAI dealer fordetails.)
WARNING
• Do not "top off" after the nozzle automatically shuts off when
refueling.
Tighten the cap until it clicks, oth- erwise the Malfunction Indicator
Light “ ” will illuminate.
Always check that the fuel cap is installed securely to prevent fuel
spillage in the event of an acci-
dent.
procarmanuals.com
Page 102 of 391
425
Features of your vehicle
D100100AUN
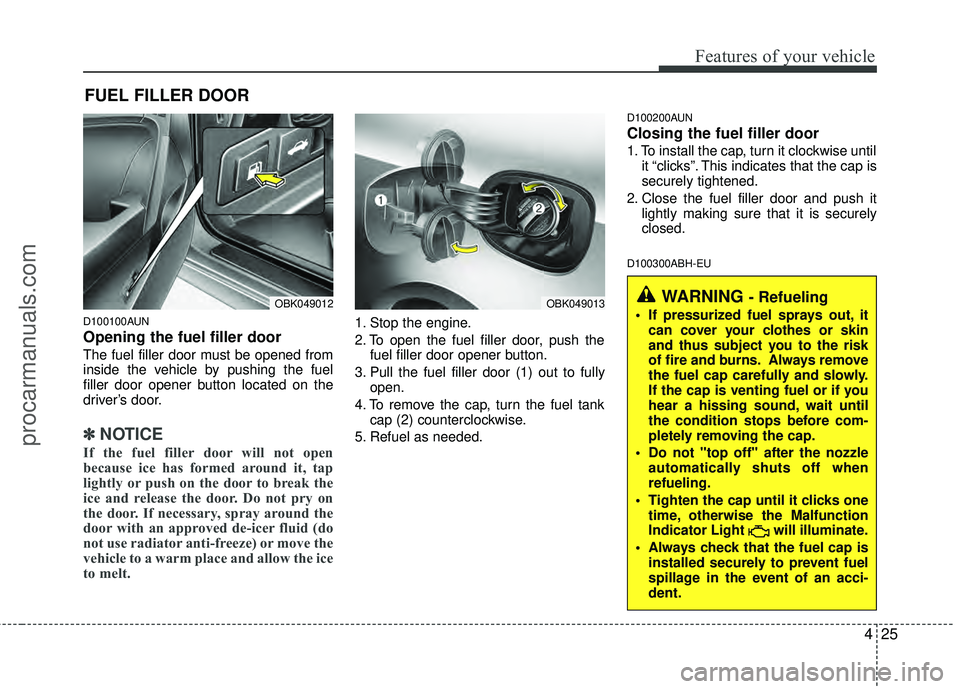
Opening the fuel filler door
The fuel filler door must be opened from
inside the vehicle by pushing the fuel
filler door opener button located on the
driver’s door.
✽ ✽NOTICE
If the fuel filler door will not open
because ice has formed around it, tap
lightly or push on the door to break the
ice and release the door. Do not pry on
the door. If necessary, spray around the
door with an approved de-icer fluid (do
not use radiator anti-freeze) or move the
vehicle to a warm place and allow the ice
to melt.
1. Stop the engine.
2. To open the fuel filler door, push the
fuel filler door opener button.
3. Pull the fuel filler door (1) out to fully open.
4. To remove the cap, turn the fuel tank cap (2) counterclockwise.
5. Refuel as needed.
D100200AUN
Closing the fuel filler door
1. To install the cap, turn it clockwise until it “clicks”. This indicates that the cap is
securely tightened.
2. Close the fuel filler door and push it lightly making sure that it is securely
closed.
D100300ABH-EU
FUEL FILLER DOOR
WARNING - Refueling
If pressurized fuel sprays out, itcan cover your clothes or skin
and thus subject you to the risk
of fire and burns. Always remove
the fuel cap carefully and slowly.
If the cap is venting fuel or if you
hear a hissing sound, wait until
the condition stops before com-
pletely removing the cap.
Do not "top off" after the nozzle automatically shuts off when
refueling.
Tighten the cap until it clicks one time, otherwise the Malfunction
Indicator Light will illuminate.
Always check that the fuel cap is installed securely to prevent fuel
spillage in the event of an acci-
dent.OBK049012OBK049013
procarmanuals.com
Page 103 of 391
Features of your vehicle
26
4
(Continued)
Use only approved portable plas-
tic fuel containers designed to
carry and store gasoline.
Do not use cellular phones while refueling. Electric current and/or
electronic interference from cel-
lular phones can potentially
ignite fuel vapors causing a fire.
When refueling, always shut the engine off. Sparks produced by
electrical components related to
the engine can ignite fuel vapors
causing a fire. Once refueling is
complete, check to make sure the
filler cap and filler door are
securely closed, before starting
the engine.
DO NOT use matches or a lighter and DO NOT SMOKE or leave a lit
cigarette in your vehicle while at
a gas station especially during
refueling. Automotive fuel is
highly flammable and can, when
ignited, result in fire.
(Continued)(Continued)
Do not get back into a vehicleonce you have begun refueling
since you can generate static
electricity by touching, rubbing
or sliding against any item or fab-
ric (polyester, satin, nylon, etc.)
capable of producing static elec-
tricity. Static electricity discharge
can ignite fuel vapors resulting in
rapid burning. If you must re-
enter the vehicle, you should
once again eliminate potentially
dangerous static electricity dis-
charge by touching a metal part
of the vehicle, away from the fuel
filler neck, nozzle or other gaso-
line source.
When using an approved portable fuel container, be sure to
place the container on the
ground prior to refueling. Static
electricity discharge from the
container can ignite fuel vapors
causing a fire. Once refueling has
begun, contact with the vehicle
should be maintained until the
filling is complete.
(Continued)WARNING - Refueling dan-
gers
Automotive fuels are flammable
materials. When refueling, please
note the following guidelines care-
fully. Failure to follow these guide-
lines may result in severe personal
injury, severe burns or death by fire
or explosion.
Read and follow all warningsposted at the gas station facility.
Before refueling, note the loca- tion of the Emergency Gasoline
Shut-Off, if available, at the gas
station facility.
Before touching the fuel nozzle, you should eliminate potentially
dangerous static electricity dis-
charge by touching another metal
part of the vehicle, a safe dis-
tance away from the fuel filler
neck, nozzle, or other gas source.
(Continued)
procarmanuals.com
Page 104 of 391
427
Features of your vehicle
D100500ABH
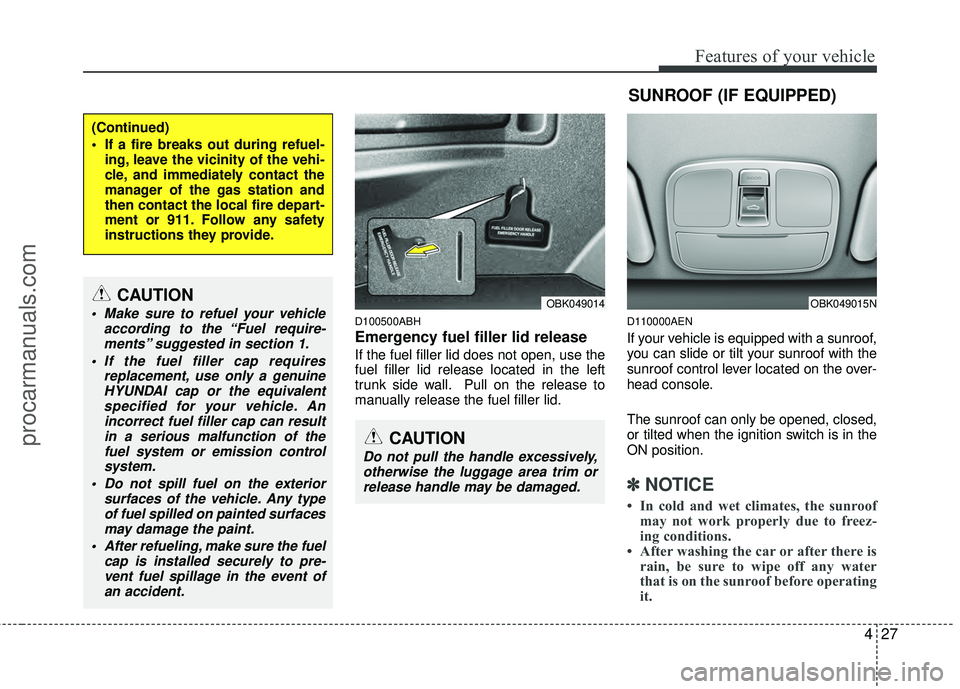
Emergency fuel filler lid release
If the fuel filler lid does not open, use the
fuel filler lid release located in the left
trunk side wall. Pull on the release to
manually release the fuel filler lid.
D110000AEN
If your vehicle is equipped with a sunroof,
you can slide or tilt your sunroof with the
sunroof control lever located on the over-
head console.
The sunroof can only be opened, closed,
or tilted when the ignition switch is in the
ON position.
✽ ✽NOTICE
• In cold and wet climates, the sunroof
may not work properly due to freez-
ing conditions.
• After washing the car or after there is rain, be sure to wipe off any water
that is on the sunroof before operating
it.
(Continued)
If a fire breaks out during refuel-
ing, leave the vicinity of the vehi-
cle, and immediately contact the
manager of the gas station and
then contact the local fire depart-
ment or 911. Follow any safety
instructions they provide.
CAUTION
Make sure to refuel your vehicle according to the “Fuel require-ments” suggested in section 1.
If the fuel filler cap requires replacement, use only a genuineHYUNDAI cap or the equivalentspecified for your vehicle. Anincorrect fuel filler cap can resultin a serious malfunction of the fuel system or emission controlsystem.
Do not spill fuel on the exterior surfaces of the vehicle. Any typeof fuel spilled on painted surfacesmay damage the paint.
After refueling, make sure the fuel cap is installed securely to pre-vent fuel spillage in the event ofan accident.
CAUTION
Do not pull the handle excessively,otherwise the luggage area trim orrelease handle may be damaged.
SUNROOF (IF EQUIPPED)
OBK049015NOBK049014
procarmanuals.com
Page 122 of 391
445
Features of your vehicle
D150204BBH
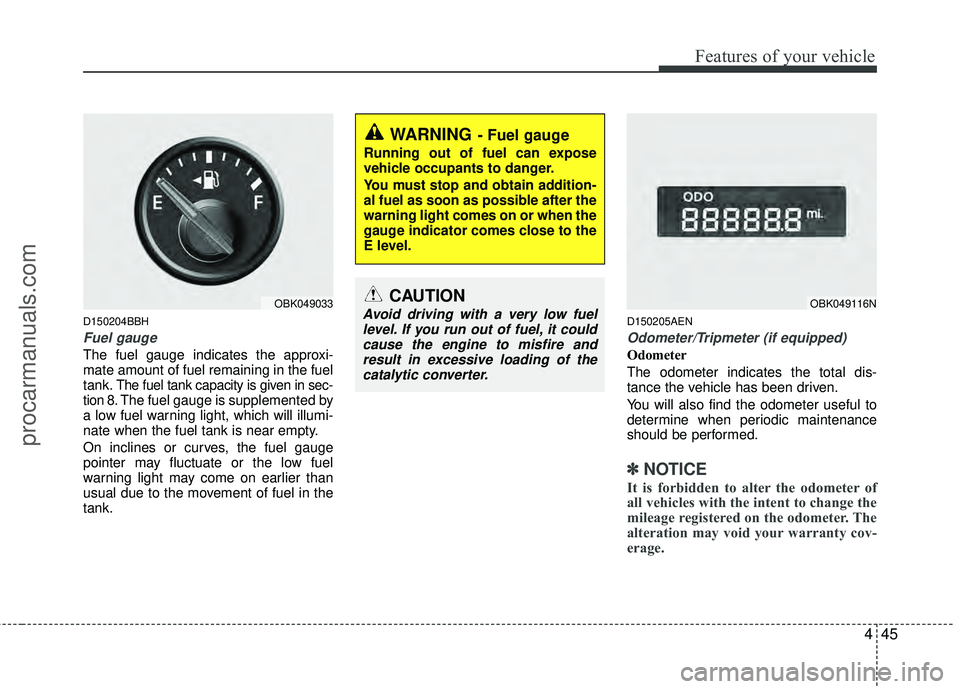
Fuel gauge
The fuel gauge indicates the approxi-
mate amount of fuel remaining in the fuel
tank.
The fuel tank capacity is given in sec-
tion 8.The fuel gauge is supplemented by
a low fuel warning light, which will illumi-
nate when the fuel tank is near empty.
On inclines or curves, the fuel gauge
pointer may fluctuate or the low fuel
warning light may come on earlier than
usual due to the movement of fuel in the
tank.
D150205AEN
Odometer/Tripmeter (if equipped)
Odometer
The odometer indicates the total dis-
tance the vehicle has been driven.
You will also find the odometer useful to
determine when periodic maintenance
should be performed.
✽ ✽ NOTICE
It is forbidden to alter the odometer of
all vehicles with the intent to change the
mileage registered on the odometer. The
alteration may void your warranty cov-
erage.
WARNING- Fuel gauge
Running out of fuel can expose
vehicle occupants to danger.
You must stop and obtain addition-
al fuel as soon as possible after the
warning light comes on or when the
gauge indicator comes close to the
E level.
CAUTION
Avoid driving with a very low fuel
level. If you run out of fuel, it could cause the engine to misfire andresult in excessive loading of the catalytic converter.OBK049033OBK049116N
procarmanuals.com
Page 276 of 391
549
Driving your vehicle
E150200ABH
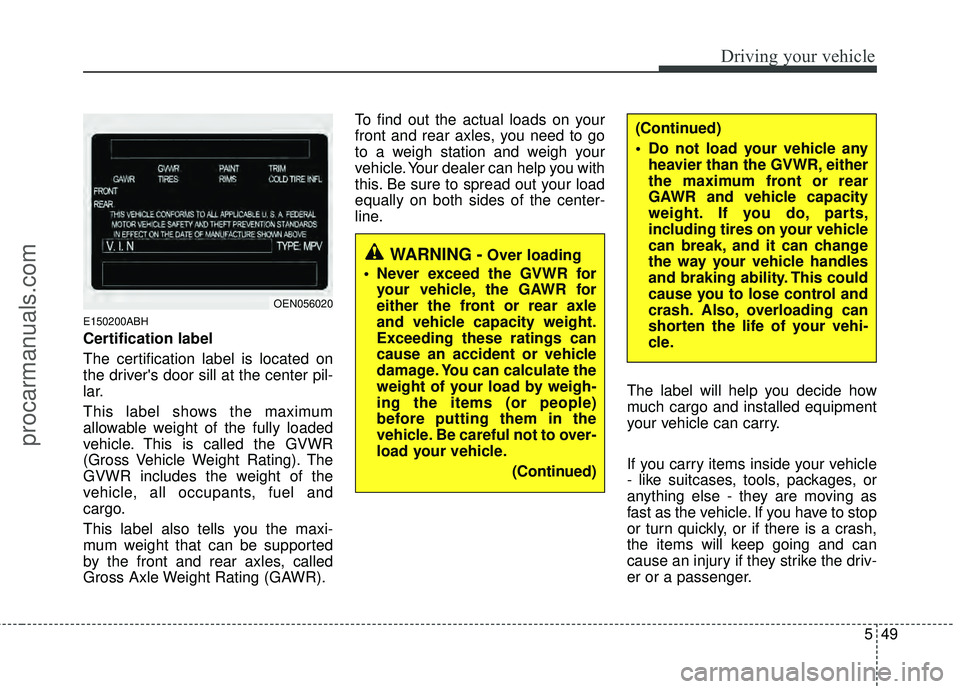
Certification label
The certification label is located on
the driver's door sill at the center pil-
lar.
This label shows the maximum
allowable weight of the fully loaded
vehicle. This is called the GVWR
(Gross Vehicle Weight Rating). The
GVWR includes the weight of the
vehicle, all occupants, fuel and
cargo.
This label also tells you the maxi-
mum weight that can be supported
by the front and rear axles, called
Gross Axle Weight Rating (GAWR).To find out the actual loads on your
front and rear axles, you need to go
to a weigh station and weigh your
vehicle. Your dealer can help you with
this. Be sure to spread out your load
equally on both sides of the center-
line.
The label will help you decide how
much cargo and installed equipment
your vehicle can carry.
If you carry items inside your vehicle
- like suitcases, tools, packages, or
anything else - they are moving as
fast as the vehicle. If you have to stop
or turn quickly, or if there is a crash,
the items will keep going and can
cause an injury if they strike the driv-
er or a passenger.
OEN056020
WARNING -Over loading
Never exceed the GVWR for your vehicle, the GAWR for
either the front or rear axle
and vehicle capacity weight.
Exceeding these ratings can
cause an accident or vehicle
damage. You can calculate the
weight of your load by weigh-
ing the items (or people)
before putting them in the
vehicle. Be careful not to over-
load your vehicle.
(Continued)
(Continued)
Do not load your vehicle anyheavier than the GVWR, either
the maximum front or rear
GAWR and vehicle capacity
weight. If you do, parts,
including tires on your vehicle
can break, and it can change
the way your vehicle handles
and braking ability. This could
cause you to lose control and
crash. Also, overloading can
shorten the life of your vehi-
cle.
procarmanuals.com
Page 278 of 391
551
Driving your vehicle
E160000ABH
This section will guide you in the proper
loading of your vehicle, to keep your
loaded vehicle weight within its design
rating capability. Properly loading your
vehicle will provide maximum return of
the vehicle design performance. Before
loading your vehicle, familiarize yourself
with the following terms for determining
your vehicle's weight ratings, from the
vehicle's specifications and the certifica-
tion label:
E160100AUN
Base curb weight
This is the weight of the vehicle including
a full tank of fuel and all standard equip-
ment. It does not include passengers,
cargo, or optional equipment.
E160200AUN
Vehicle curb weight
This is the weight of your new vehicle
when you picked it up from your dealer
plus any aftermarket equipment.
E160300AUN
Cargo weight
This figure includes all weight added to
the Base Curb Weight, including cargo
and optional equipment.
E160400AUN
GAW (Gross axle weight)
This is the total weight placed on each
axle (front and rear) - including vehicle
curb weight and all payload.
E160500AUN
GAWR (Gross axle weight rating)
This is the maximum allowable weight
that can be carried by a single axle (front
or rear). These numbers are shown on
the certification label.
The total load on each axle must never
exceed its GAWR.
E160600AUN
GVW (Gross vehicle weight)
This is the Base Curb Weight plus actual
Cargo Weight plus passengers.
E160700AUN
GVWR (Gross vehicle weight rating)
This is the maximum allowable weight of
the fully loaded vehicle (including all
options, equipment, passengers and
cargo). The GVWR is shown on the cer-
tification label located on the driver’s (or
front passenger’s) door sill.
E160800AUN
Overloading
VEHICLE WEIGHT
WARNING - Vehicle weight
The gross axle weight rating
(GAWR) and the gross vehicle
weight rating (GVWR) for your vehi-
cle are on the certification label
attached to the driver's door.
Exceeding these ratings can cause
an accident or vehicle damage. You
can calculate the weight of your
load by weighing the items (and
people) before putting them in the
vehicle. Be careful not to overload
your vehicle.
procarmanuals.com
Page 311 of 391
79
Maintenance
DESCRIPTION
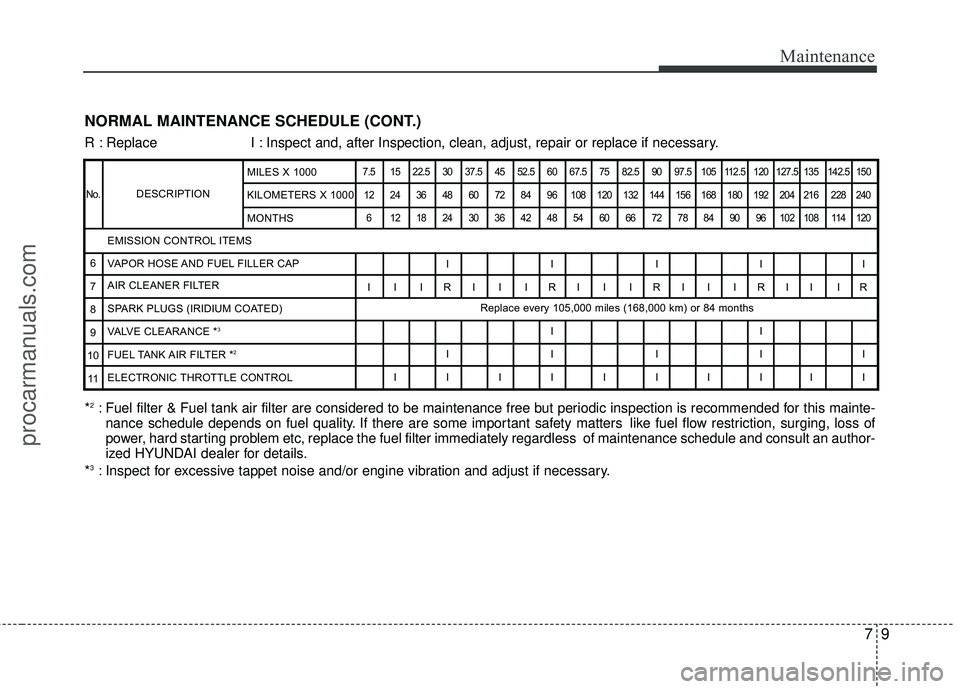
7.5 15 22.5 30 37.5 45 52.5 60 67.5 75 82.5 90 97.5 105 112.5 120 127.5 135 142.5 15012 24 36 48 60 72 84 96 108 120 132 144 156 168 180 192 204 216 228 240 6 121824303642485460667278849096102108114120
IIIII
I I IRI I IRI I IRI I IRII IR Replace every 105,000 miles (168,000 km) or 84 months
II
IIIII
IIIIIIIIII
EMISSION CONTROL ITEMS
VAPOR HOSE AND FUEL FILLER CAP
AIR CLEANER FILTER
SPARK PLUGS (IRIDIUM COATED)
VALVE CLEARANCE *
3
FUEL TANK AIR FILTER *2
ELECTRONIC THROTTLE CONTROL
No.
6
7
8
9
10 11 MILES X 1000
KILOMETERS X 1000
MONTHS
*2: Fuel filter & Fuel tank air filter are considered to be maintenance free\
but periodic inspection is recommended for this mainte-
nance schedule depends on fuel quality. If there are some important safety matters like fuel flow restriction, surging, loss of
power, hard starting problem etc, replace the fuel filter immediately regardless of maintenance schedul\
e and consult an author -
ized HYUNDAI dealer for details.
*
3: Inspect for excessive tappet noise and/or engine vibration and adjust if necessary.
NORMAL MAINTENANCE SCHEDULE (CONT.)
R : Replace I : Inspect and, after Inspection, clean, adjust, repair or replace if neces\
sary.
procarmanuals.com
Page 316 of 391
Maintenance
14
7
G050600AUN
Vapor hose and fuel filler cap
The vapor hose and fuel filler cap should
be inspected at those intervals specified
in the maintenance schedule. Make sure
that a new vapor hose or fuel filler cap is
correctly replaced.
G050700AUN
Vacuum crankcase ventilation
hoses (if equipped)
Inspect the surface of hoses for evidence
of heat and/or mechanical damage. Hard
and brittle rubber, cracking, tears, cuts,
abrasions, and excessive swelling indi-
cate deterioration. Particular attention
should be paid to examine those hose
surfaces nearest to high heat sources,
such as the exhaust manifold.
Inspect the hose routing to assure that
the hoses do not come in contact with
any heat source, sharp edges or moving
component which might cause heat dam-
age or mechanical wear. Inspect all hose
connections, such as clamps and cou-
plings, to make sure they are secure, and
that no leaks are present. Hoses should
be replaced immediately if there is any
evidence of deterioration or damage.
G050800AEN
Air cleaner filter
A Genuine HYUNDAI air cleaner filter is
recommended when the filter is
replaced.
G050900AUN
Spark plugs
Make sure to install new spark plugs of
the correct heat range.
G051000AEN
Valve clearance
Inspect excessive valve noise and/or
engine vibration and adjust if necessary.
An authorized HYUNDAI dealer should
perform the operation.
G051100AUN
Cooling system
Check cooling system components, such
as radiator, coolant reservoir, hoses and
connections for leakage and damage.
Replace any damaged parts.
G051200AUN
Coolant
The coolant should be changed at the
intervals specified in the maintenance
schedule.
G051300ABK
Manual transmission fluid
(if equipped)
Inspect the manual transmission fluid
according to the maintenance schedule.
G051400ABK
Automatic transmission fluid
(if equipped)
Inspect the automatic transmission fluid
according to the maintenance schedule.
G051500AUN
Brake hoses and lines
Visually check for proper installation,
chafing, cracks, deterioration and any
leakage. Replace any deteriorated or
damaged parts immediately.
procarmanuals.com
Page 345 of 391

743
Maintenance
G201100ABH
Tire terminology and definitions
Air Pressure: The amount of air
inside the tire pressing outward on
the tire. Air pressure is expressed in
pounds per square inch (psi) or kilo-
pascal (kPa).
Accessory Weight: This means the
combined weight of optional acces-
sories. Some examples of optional
accessories are, automatic transmis-
sion, power seats, and air condition-
ing.
Aspect Ratio : The relationship of a
tire's height to its width.
Belt: A rubber coated layer of cords
that is located between the plies and
the tread. Cords may be made from
steel or other reinforcing materials.
Bead: The tire bead contains steel
wires wrapped by steel cords that
hold the tire onto the rim.
Bias Ply Tire : A pneumatic tire in
which the plies are laid at alternate
angles less than 90 degrees to the
centerline of the tread. Cold Tire Pressure: The amount of
air pressure in a tire, measured in
pounds per square inch (psi) or kilo-
pascals (kPa) before a tire has built
up heat from driving.
Curb Weight: This means the weight
of a motor vehicle with standard and
optional equipment including the
maximum capacity of fuel, oil and
coolant, but without passengers and
cargo.
DOT Markings: A code molded into
the sidewall of a tire signifying that
the tire is in compliance with the U.S.
Department of Transportation motor
vehicle safety standards. The DOT
code includes the Tire Identification
Number (TIN), an alphanumeric des-
ignator which can also identify the
tire manufacturer, production plant,
brand and date of production.
GVWR: Gross Vehicle Weight Rating
GAWR FRT: Gross Axle Weight
Rating for the Front Axle.
GAWR RR: Gross Axle Weight
Rating for the Rear axle.Intended Outboard Sidewall
: The
side of an asymmetrical tire, that
must always face outward when
mounted on a vehicle.
Kilopascal (kPa): The metric unit for
air pressure.
Load Index: An assigned number
ranging from 1 to 279 that corre-
sponds to the load carrying capacity
of a tire.
Maximum Inflation Pressure : The
maximum air pressure to which a
cold tire may be inflated. The maxi-
mum air pressure is molded onto the
sidewall.
Maximum Load Rating : The load
rating for a tire at the maximum per-
missible inflation pressure for that
tire.
Maximum Loaded Vehicle Weight:
The sum of curb weight; accessory
weight; vehicle capacity weight; and
production options weight.
Normal Occupant Weight: The
number of occupants a vehicle is
designed to seat multiplied by 150
pounds (68 kg).
procarmanuals.com