ESP Hyundai Elantra 2003 Owner's Manual
[x] Cancel search | Manufacturer: HYUNDAI, Model Year: 2003, Model line: Elantra, Model: Hyundai Elantra 2003Pages: 172, PDF Size: 2.82 MB
Page 3 of 172
A010A02A-AAT
WARRANTIES FOR YOUR HYUNDAI VEHICLE WARRANTIES FOR YOUR HYUNDAI VEHICLEWARRANTIES FOR YOUR HYUNDAI VEHICLE WARRANTIES FOR YOUR HYUNDAI VEHICLE
WARRANTIES FOR YOUR HYUNDAI VEHICLE
o New Vehicle 60 Months/60,000 Miles Limited Warranty
o New Vehicle 120 Months/100,000 Miles Limited Powertrain Warranty (first owner only)
o Anti-Perforation Limited Warranty
o Emission Defect Warranty - Federal Vehicle
o California Emission Control System Warranty (if applicable)
o Emission Performance Warranty - Federal Vehicle
o Replacement Parts and Accessories Limited Warranty
NOTE:
Detailed warranty information is provided in your Hyundai Owner's Handbook.
A020A01A-AAT
RESPONSIBILITY FOR MAINTENANCE RESPONSIBILITY FOR MAINTENANCERESPONSIBILITY FOR MAINTENANCE RESPONSIBILITY FOR MAINTENANCE
RESPONSIBILITY FOR MAINTENANCE
The maintenance requirements for your new Hyundai are found in Section 5. As the owner,
it is your responsibility to see that all maintenance operations specified by the manufacturer
are carried out at the appropriate intervals. When the vehicle is used in severe driving
conditions, more frequent maintenance is required for some operations. Maintenance
requirements for severe operating conditions are also included in Section 5.
Page 11 of 172
FEATURES OF YOUR HYUNDAI FEATURES OF YOUR HYUNDAIFEATURES OF YOUR HYUNDAI FEATURES OF YOUR HYUNDAI
FEATURES OF YOUR HYUNDAI
1- 2
B030A01A-AAT
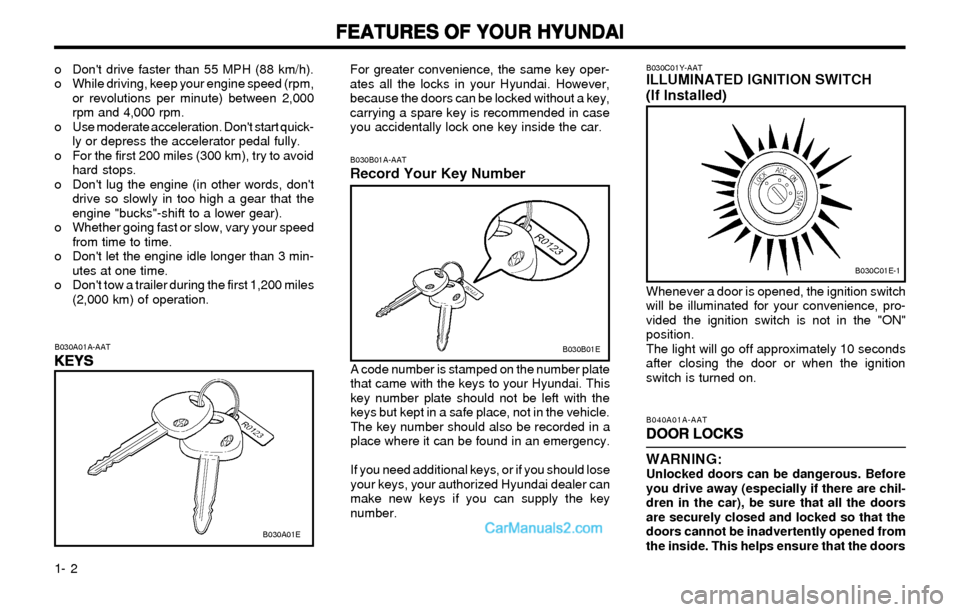
KEYS KEYSKEYS KEYS
KEYS
For greater convenience, the same key oper-
ates all the locks in your Hyundai. However,
because the doors can be locked without a key,
carrying a spare key is recommended in case
you accidentally lock one key inside the car.
B030B01A-AATRecord Your Key Number
A code number is stamped on the number plate
that came with the keys to your Hyundai. This
key number plate should not be left with the
keys but kept in a safe place, not in the vehicle.
The key number should also be recorded in a
place where it can be found in an emergency.
If you need additional keys, or if you should lose
your keys, your authorized Hyundai dealer can
make new keys if you can supply the key
number.
B040A01A-AAT
DOOR LOCKS DOOR LOCKSDOOR LOCKS DOOR LOCKS
DOOR LOCKS
WARNING:
Unlocked doors can be dangerous. Before
you drive away (especially if there are chil-
dren in the car), be sure that all the doors
are securely closed and locked so that the
doors cannot be inadvertently opened from
the inside. This helps ensure that the doors o Don't drive faster than 55 MPH (88 km/h).
o While driving, keep your engine speed (rpm,
or revolutions per minute) between 2,000
rpm and 4,000 rpm.
o Use moderate acceleration. Don't start quick-
ly or depress the accelerator pedal fully.
o For the first 200 miles (300 km), try to avoid
hard stops.
o Don't lug the engine (in other words, don't
drive so slowly in too high a gear that the
engine "bucks"-shift to a lower gear).
o Whether going fast or slow, vary your speed
from time to time.
o Don't let the engine idle longer than 3 min-
utes at one time.
o Don't tow a trailer during the first 1,200 miles
(2,000 km) of operation.
B030A01E
B030B01E
B030C01Y-AATILLUMINATED IGNITION SWITCH
(If Installed)
Whenever a door is opened, the ignition switch
will be illuminated for your convenience, pro-
vided the ignition switch is not in the "ON"
position.
The light will go off approximately 10 seconds
after closing the door or when the ignition
switch is turned on.
B030C01E-1
Page 55 of 172
FEATURES OF YOUR HYUNDAI FEATURES OF YOUR HYUNDAIFEATURES OF YOUR HYUNDAI FEATURES OF YOUR HYUNDAI
FEATURES OF YOUR HYUNDAI
1- 46
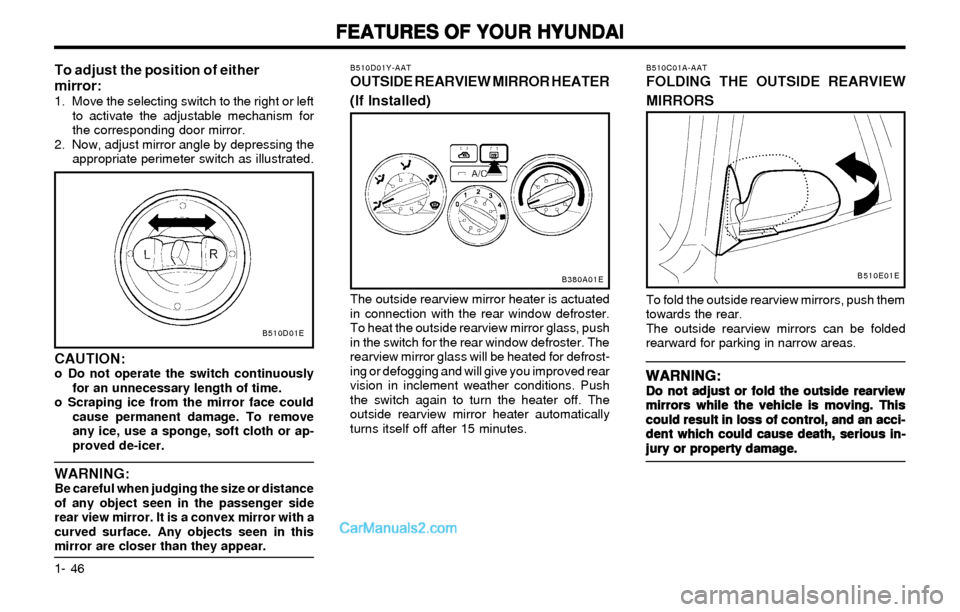
B510C01A-AATFOLDING THE OUTSIDE REARVIEW
MIRRORS
To fold the outside rearview mirrors, push them
towards the rear.
The outside rearview mirrors can be folded
rearward for parking in narrow areas.
WARNING: WARNING:WARNING: WARNING:
WARNING:Do not adjust or fold the outside rearview Do not adjust or fold the outside rearviewDo not adjust or fold the outside rearview Do not adjust or fold the outside rearview
Do not adjust or fold the outside rearview
mirrors while the vehicle is moving. This mirrors while the vehicle is moving. Thismirrors while the vehicle is moving. This mirrors while the vehicle is moving. This
mirrors while the vehicle is moving. This
could result in loss of control, and an acci- could result in loss of control, and an acci-could result in loss of control, and an acci- could result in loss of control, and an acci-
could result in loss of control, and an acci-
dent which could cause death, serious in- dent which could cause death, serious in-dent which could cause death, serious in- dent which could cause death, serious in-
dent which could cause death, serious in-
jury or property damage. jury or property damage.jury or property damage. jury or property damage.
jury or property damage.
B510D01Y-AATOUTSIDE REARVIEW MIRROR HEATER
(If Installed)
The outside rearview mirror heater is actuated
in connection with the rear window defroster.
To heat the outside rearview mirror glass, push
in the switch for the rear window defroster. The
rearview mirror glass will be heated for defrost-
ing or defogging and will give you improved rear
vision in inclement weather conditions. Push
the switch again to turn the heater off. The
outside rearview mirror heater automatically
turns itself off after 15 minutes.
B380A01EB510E01E
CAUTION:o Do not operate the switch continuously
for an unnecessary length of time.
o Scraping ice from the mirror face could
cause permanent damage. To remove
any ice, use a sponge, soft cloth or ap-
proved de-icer.
WARNING:Be careful when judging the size or distance
of any object seen in the passenger side
rear view mirror. It is a convex mirror with a
curved surface. Any objects seen in this
mirror are closer than they appear.
B510D01E
To adjust the position of either
mirror:
1. Move the selecting switch to the right or left
to activate the adjustable mechanism for
the corresponding door mirror.
2. Now, adjust mirror angle by depressing the
appropriate perimeter switch as illustrated.
Page 78 of 172
FEATURES OF YOUR HYUNDAI FEATURES OF YOUR HYUNDAIFEATURES OF YOUR HYUNDAI FEATURES OF YOUR HYUNDAI
FEATURES OF YOUR HYUNDAI
1- 69
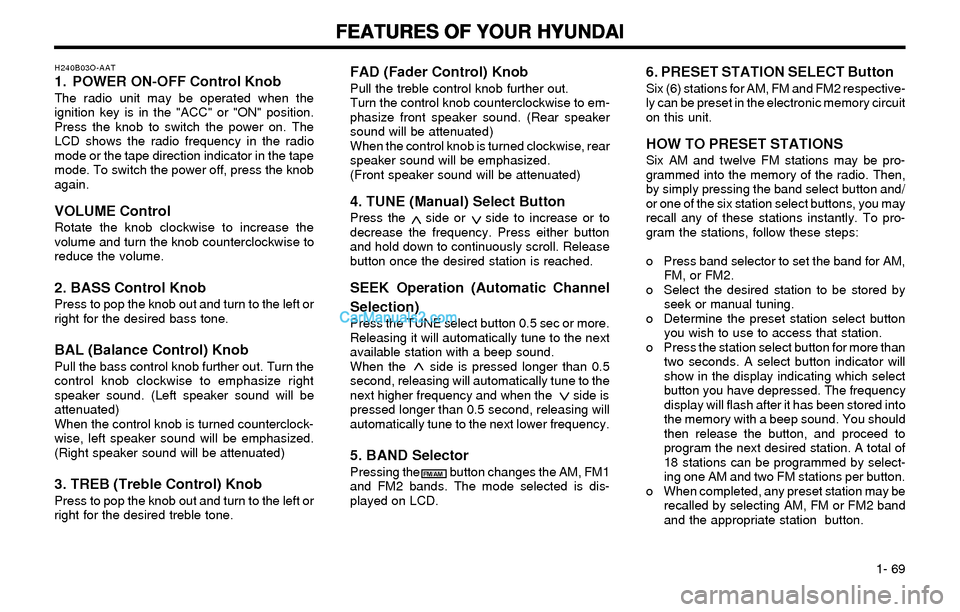
FAD (Fader Control) KnobPull the treble control knob further out.
Turn the control knob counterclockwise to em-
phasize front speaker sound. (Rear speaker
sound will be attenuated)
When the control knob is turned clockwise, rear
speaker sound will be emphasized.
(Front speaker sound will be attenuated)
4. TUNE (Manual) Select ButtonPress the side or side to increase or to
decrease the frequency. Press either button
and hold down to continuously scroll. Release
button once the desired station is reached.
SEEK Operation (Automatic Channel
Selection)
Press the TUNE select button 0.5 sec or more.
Releasing it will automatically tune to the next
available station with a beep sound.
When the side is pressed longer than 0.5
second, releasing will automatically tune to the
next higher frequency and when the side is
pressed longer than 0.5 second, releasing will
automatically tune to the next lower frequency.
5. BAND SelectorPressing the button changes the AM, FM1
and FM2 bands. The mode selected is dis-
played on LCD.
6. PRESET STATION SELECT ButtonSix (6) stations for AM, FM and FM2 respective-
ly can be preset in the electronic memory circuit
on this unit.
HOW TO PRESET STATIONSSix AM and twelve FM stations may be pro-
grammed into the memory of the radio. Then,
by simply pressing the band select button and/
or one of the six station select buttons, you may
recall any of these stations instantly. To pro-
gram the stations, follow these steps:
o Press band selector to set the band for AM,
FM, or FM2.
o Select the desired station to be stored by
seek or manual tuning.
o Determine the preset station select button
you wish to use to access that station.
o Press the station select button for more than
two seconds. A select button indicator will
show in the display indicating which select
button you have depressed. The frequency
display will flash after it has been stored into
the memory with a beep sound. You should
then release the button, and proceed to
program the next desired station. A total of
18 stations can be programmed by select-
ing one AM and two FM stations per button.
o When completed, any preset station may be
recalled by selecting AM, FM or FM2 band
and the appropriate station button.
H240B03O-AAT1. POWER ON-OFF Control KnobThe radio unit may be operated when the
ignition key is in the "ACC" or "ON" position.
Press the knob to switch the power on. The
LCD shows the radio frequency in the radio
mode or the tape direction indicator in the tape
mode. To switch the power off, press the knob
again.
VOLUME ControlRotate the knob clockwise to increase the
volume and turn the knob counterclockwise to
reduce the volume.
2. BASS Control KnobPress to pop the knob out and turn to the left or
right for the desired bass tone.
BAL (Balance Control) KnobPull the bass control knob further out. Turn the
control knob clockwise to emphasize right
speaker sound. (Left speaker sound will be
attenuated)
When the control knob is turned counterclock-
wise, left speaker sound will be emphasized.
(Right speaker sound will be attenuated)
3. TREB (Treble Control) KnobPress to pop the knob out and turn to the left or
right for the desired treble tone.
FM/AM
Page 83 of 172
FEATURES OF YOUR HYUNDAI FEATURES OF YOUR HYUNDAIFEATURES OF YOUR HYUNDAI FEATURES OF YOUR HYUNDAI
FEATURES OF YOUR HYUNDAI
1- 74
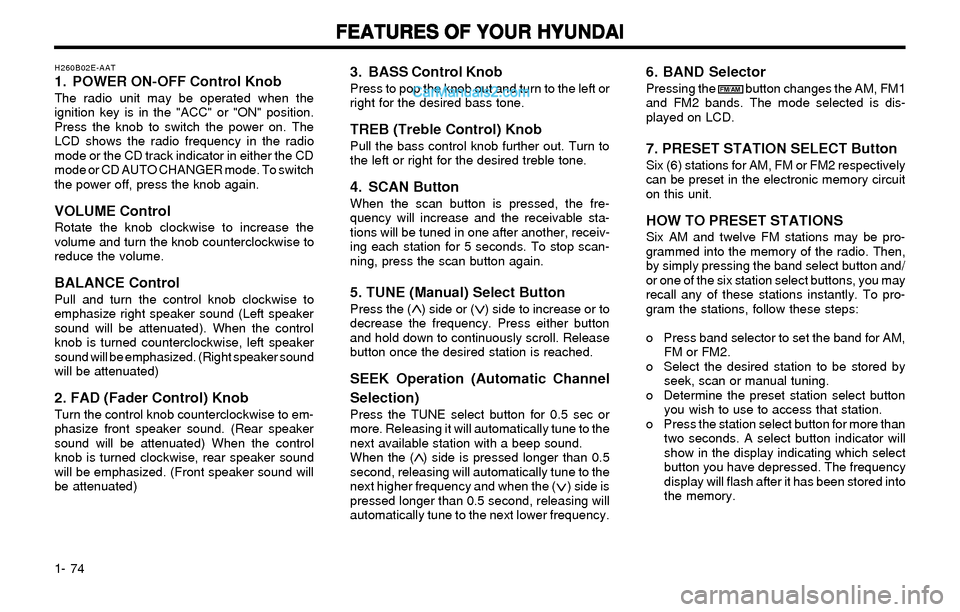
3. BASS Control KnobPress to pop the knob out and turn to the left or
right for the desired bass tone.
TREB (Treble Control) KnobPull the bass control knob further out. Turn to
the left or right for the desired treble tone.
4. SCAN ButtonWhen the scan button is pressed, the fre-
quency will increase and the receivable sta-
tions will be tuned in one after another, receiv-
ing each station for 5 seconds. To stop scan-
ning, press the scan button again.
5. TUNE (Manual) Select ButtonPress the ( ) side or ( ) side to increase or to
decrease the frequency. Press either button
and hold down to continuously scroll. Release
button once the desired station is reached.
SEEK Operation (Automatic Channel
Selection)
Press the TUNE select button for 0.5 sec or
more. Releasing it will automatically tune to the
next available station with a beep sound.
When the ( ) side is pressed longer than 0.5
second, releasing will automatically tune to the
next higher frequency and when the ( ) side is
pressed longer than 0.5 second, releasing will
automatically tune to the next lower frequency.
6. BAND SelectorPressing the button changes the AM, FM1
and FM2 bands. The mode selected is dis-
played on LCD.
7. PRESET STATION SELECT ButtonSix (6) stations for AM, FM or FM2 respectively
can be preset in the electronic memory circuit
on this unit.
HOW TO PRESET STATIONSSix AM and twelve FM stations may be pro-
grammed into the memory of the radio. Then,
by simply pressing the band select button and/
or one of the six station select buttons, you may
recall any of these stations instantly. To pro-
gram the stations, follow these steps:
o Press band selector to set the band for AM,
FM or FM2.
o Select the desired station to be stored by
seek, scan or manual tuning.
o Determine the preset station select button
you wish to use to access that station.
o Press the station select button for more than
two seconds. A select button indicator will
show in the display indicating which select
button you have depressed. The frequency
display will flash after it has been stored into
the memory.
H260B02E-AAT1. POWER ON-OFF Control KnobThe radio unit may be operated when the
ignition key is in the "ACC" or "ON" position.
Press the knob to switch the power on. The
LCD shows the radio frequency in the radio
mode or the CD track indicator in either the CD
mode or CD AUTO CHANGER mode. To switch
the power off, press the knob again.
VOLUME ControlRotate the knob clockwise to increase the
volume and turn the knob counterclockwise to
reduce the volume.
BALANCE ControlPull and turn the control knob clockwise to
emphasize right speaker sound (Left speaker
sound will be attenuated). When the control
knob is turned counterclockwise, left speaker
sound will be emphasized. (Right speaker sound
will be attenuated)
2. FAD (Fader Control) KnobTurn the control knob counterclockwise to em-
phasize front speaker sound. (Rear speaker
sound will be attenuated) When the control
knob is turned clockwise, rear speaker sound
will be emphasized. (Front speaker sound will
be attenuated)
FM/AM
Page 90 of 172
FEATURES OF YOUR HYUNDAI FEATURES OF YOUR HYUNDAIFEATURES OF YOUR HYUNDAI FEATURES OF YOUR HYUNDAI
FEATURES OF YOUR HYUNDAI
1- 81
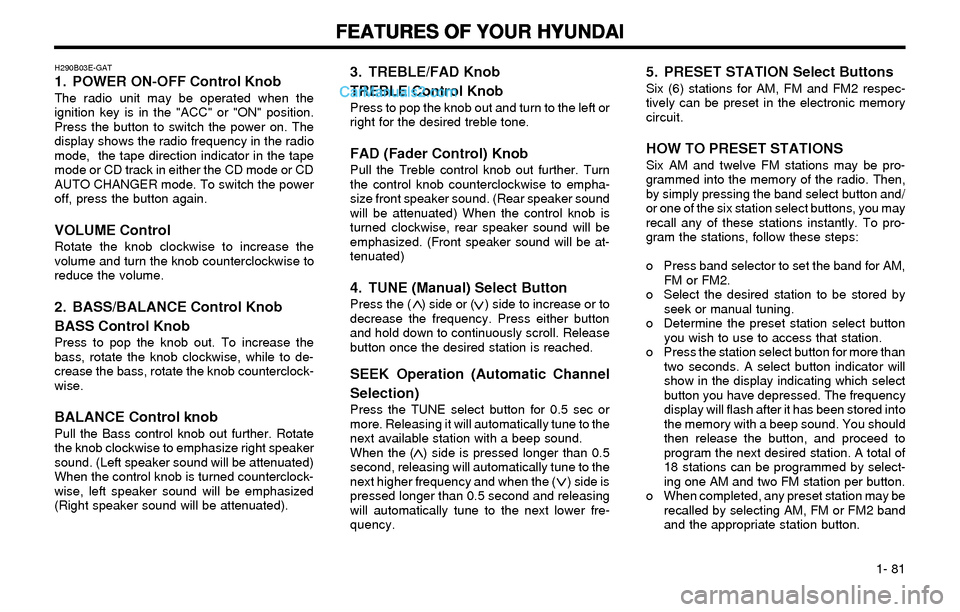
H290B03E-GAT1. POWER ON-OFF Control KnobThe radio unit may be operated when the
ignition key is in the "ACC" or "ON" position.
Press the button to switch the power on. The
display shows the radio frequency in the radio
mode, the tape direction indicator in the tape
mode or CD track in either the CD mode or CD
AUTO CHANGER mode. To switch the power
off, press the button again.
VOLUME ControlRotate the knob clockwise to increase the
volume and turn the knob counterclockwise to
reduce the volume.
2. BASS/BALANCE Control Knob
BASS Control Knob
Press to pop the knob out. To increase the
bass, rotate the knob clockwise, while to de-
crease the bass, rotate the knob counterclock-
wise.
BALANCE Control knobPull the Bass control knob out further. Rotate
the knob clockwise to emphasize right speaker
sound. (Left speaker sound will be attenuated)
When the control knob is turned counterclock-
wise, left speaker sound will be emphasized
(Right speaker sound will be attenuated).
3. TREBLE/FAD Knob
TREBLE Control Knob
Press to pop the knob out and turn to the left or
right for the desired treble tone.
FAD (Fader Control) KnobPull the Treble control knob out further. Turn
the control knob counterclockwise to empha-
size front speaker sound. (Rear speaker sound
will be attenuated) When the control knob is
turned clockwise, rear speaker sound will be
emphasized. (Front speaker sound will be at-
tenuated)
4. TUNE (Manual) Select ButtonPress the ( ) side or ( ) side to increase or to
decrease the frequency. Press either button
and hold down to continuously scroll. Release
button once the desired station is reached.
SEEK Operation (Automatic Channel
Selection)
Press the TUNE select button for 0.5 sec or
more. Releasing it will automatically tune to the
next available station with a beep sound.
When the ( ) side is pressed longer than 0.5
second, releasing will automatically tune to the
next higher frequency and when the ( ) side is
pressed longer than 0.5 second and releasing
will automatically tune to the next lower fre-
quency.
5. PRESET STATION Select ButtonsSix (6) stations for AM, FM and FM2 respec-
tively can be preset in the electronic memory
circuit.
HOW TO PRESET STATIONSSix AM and twelve FM stations may be pro-
grammed into the memory of the radio. Then,
by simply pressing the band select button and/
or one of the six station select buttons, you may
recall any of these stations instantly. To pro-
gram the stations, follow these steps:
o Press band selector to set the band for AM,
FM or FM2.
o Select the desired station to be stored by
seek or manual tuning.
o Determine the preset station select button
you wish to use to access that station.
o Press the station select button for more than
two seconds. A select button indicator will
show in the display indicating which select
button you have depressed. The frequency
display will flash after it has been stored into
the memory with a beep sound. You should
then release the button, and proceed to
program the next desired station. A total of
18 stations can be programmed by select-
ing one AM and two FM station per button.
o When completed, any preset station may be
recalled by selecting AM, FM or FM2 band
and the appropriate station button.
Page 106 of 172
DRIVING YOUR HYUNDAI DRIVING YOUR HYUNDAIDRIVING YOUR HYUNDAI DRIVING YOUR HYUNDAI
DRIVING YOUR HYUNDAI
2- 5
C090B01E
C090A02Y-AAT
AUTOMATIC TRANSAXLE AUTOMATIC TRANSAXLEAUTOMATIC TRANSAXLE AUTOMATIC TRANSAXLE
AUTOMATIC TRANSAXLE
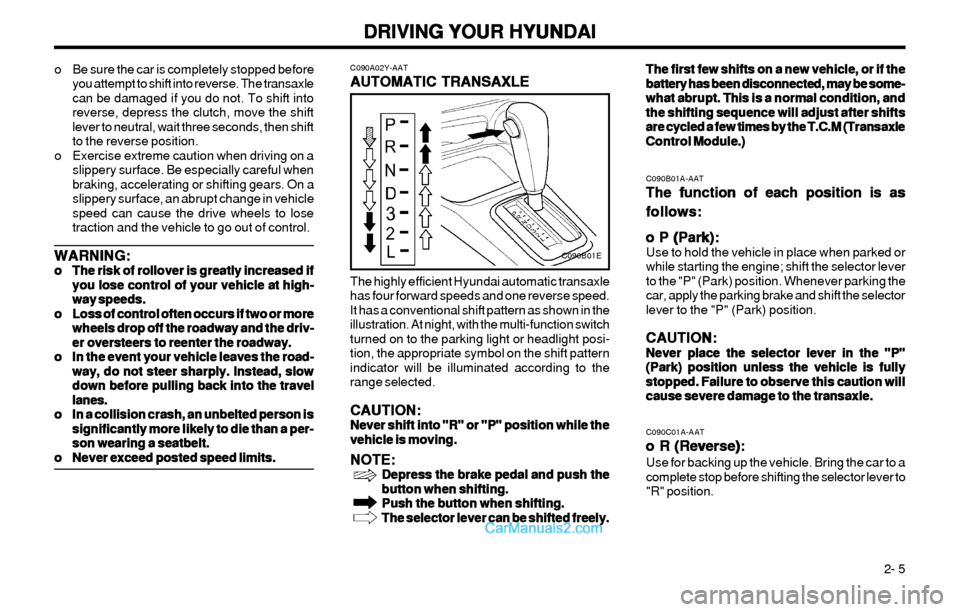
The highly efficient Hyundai automatic transaxle
has four forward speeds and one reverse speed.
It has a conventional shift pattern as shown in the
illustration. At night, with the multi-function switch
turned on to the parking light or headlight posi-
tion, the appropriate symbol on the shift pattern
indicator will be illuminated according to the
range selected.
CAUTION: CAUTION:CAUTION: CAUTION:
CAUTION:Never shift into "R" or "P" position while the Never shift into "R" or "P" position while theNever shift into "R" or "P" position while the Never shift into "R" or "P" position while the
Never shift into "R" or "P" position while the
vehicle is moving. vehicle is moving.vehicle is moving. vehicle is moving.
vehicle is moving.
NOTE: NOTE:NOTE: NOTE:
NOTE:Depress the brake pedal and push the Depress the brake pedal and push theDepress the brake pedal and push the Depress the brake pedal and push the
Depress the brake pedal and push the
button when shifting. button when shifting.button when shifting. button when shifting.
button when shifting.
Push the button when shifting. Push the button when shifting.Push the button when shifting. Push the button when shifting.
Push the button when shifting.
The selector lever can be shifted freely. The selector lever can be shifted freely.The selector lever can be shifted freely. The selector lever can be shifted freely.
The selector lever can be shifted freely.
C090B01A-AAT
The function of each position is as The function of each position is asThe function of each position is as The function of each position is as
The function of each position is as
follows: follows:follows: follows:
follows:
o P (Park): o P (Park):o P (Park): o P (Park):
o P (Park):
Use to hold the vehicle in place when parked or
while starting the engine; shift the selector lever
to the "P" (Park) position. Whenever parking the
car, apply the parking brake and shift the selector
lever to the "P" (Park) position.
CAUTION: CAUTION:CAUTION: CAUTION:
CAUTION:Never place the selector lever in the "P" Never place the selector lever in the "P"Never place the selector lever in the "P" Never place the selector lever in the "P"
Never place the selector lever in the "P"
(Park) position unless the vehicle is fully (Park) position unless the vehicle is fully(Park) position unless the vehicle is fully (Park) position unless the vehicle is fully
(Park) position unless the vehicle is fully
stopped. Failure to observe this caution will stopped. Failure to observe this caution willstopped. Failure to observe this caution will stopped. Failure to observe this caution will
stopped. Failure to observe this caution will
cause severe damage to the transaxle. cause severe damage to the transaxle.cause severe damage to the transaxle. cause severe damage to the transaxle.
cause severe damage to the transaxle.
C090C01A-AAT
o R (Reverse): o R (Reverse):o R (Reverse): o R (Reverse):
o R (Reverse):Use for backing up the vehicle. Bring the car to a
complete stop before shifting the selector lever to
"R" position.The first few shifts on a new vehicle, or if the The first few shifts on a new vehicle, or if theThe first few shifts on a new vehicle, or if the The first few shifts on a new vehicle, or if the
The first few shifts on a new vehicle, or if the
battery has been disconnected, may be some- battery has been disconnected, may be some-battery has been disconnected, may be some- battery has been disconnected, may be some-
battery has been disconnected, may be some-
what abrupt. This is a normal condition, and what abrupt. This is a normal condition, andwhat abrupt. This is a normal condition, and what abrupt. This is a normal condition, and
what abrupt. This is a normal condition, and
the shifting sequence will adjust after shifts the shifting sequence will adjust after shiftsthe shifting sequence will adjust after shifts the shifting sequence will adjust after shifts
the shifting sequence will adjust after shifts
are cycled a few times by the T.C.M (Transaxle are cycled a few times by the T.C.M (Transaxleare cycled a few times by the T.C.M (Transaxle are cycled a few times by the T.C.M (Transaxle
are cycled a few times by the T.C.M (Transaxle
Control Module.) Control Module.)Control Module.) Control Module.)
Control Module.) o Be sure the car is completely stopped before
you attempt to shift into reverse. The transaxle
can be damaged if you do not. To shift into
reverse, depress the clutch, move the shift
lever to neutral, wait three seconds, then shift
to the reverse position.
o Exercise extreme caution when driving on a
slippery surface. Be especially careful when
braking, accelerating or shifting gears. On a
slippery surface, an abrupt change in vehicle
speed can cause the drive wheels to lose
traction and the vehicle to go out of control.
WARNING: WARNING:WARNING: WARNING:
WARNING:o oo o
o
The risk of rollover is greatly increased if The risk of rollover is greatly increased ifThe risk of rollover is greatly increased if The risk of rollover is greatly increased if
The risk of rollover is greatly increased if
you lose control of your vehicle at high- you lose control of your vehicle at high-you lose control of your vehicle at high- you lose control of your vehicle at high-
you lose control of your vehicle at high-
way speeds. way speeds.way speeds. way speeds.
way speeds.
o oo o
o
Loss of control often occurs if two or more Loss of control often occurs if two or moreLoss of control often occurs if two or more Loss of control often occurs if two or more
Loss of control often occurs if two or more
wheels drop off the roadway and the driv- wheels drop off the roadway and the driv-wheels drop off the roadway and the driv- wheels drop off the roadway and the driv-
wheels drop off the roadway and the driv-
er oversteers to reenter the roadway. er oversteers to reenter the roadway.er oversteers to reenter the roadway. er oversteers to reenter the roadway.
er oversteers to reenter the roadway.
o oo o
o
In the event your vehicle leaves the road- In the event your vehicle leaves the road-In the event your vehicle leaves the road- In the event your vehicle leaves the road-
In the event your vehicle leaves the road-
way, do not steer sharply. Instead, slow way, do not steer sharply. Instead, slowway, do not steer sharply. Instead, slow way, do not steer sharply. Instead, slow
way, do not steer sharply. Instead, slow
down before pulling back into the travel down before pulling back into the traveldown before pulling back into the travel down before pulling back into the travel
down before pulling back into the travel
lanes. lanes.lanes. lanes.
lanes.
o oo o
o
In a collision crash, an unbelted person is In a collision crash, an unbelted person isIn a collision crash, an unbelted person is In a collision crash, an unbelted person is
In a collision crash, an unbelted person is
significantly more likely to die than a per- significantly more likely to die than a per-significantly more likely to die than a per- significantly more likely to die than a per-
significantly more likely to die than a per-
son wearing a seatbelt. son wearing a seatbelt.son wearing a seatbelt. son wearing a seatbelt.
son wearing a seatbelt.
o oo o
o
Never exceed posted speed limits. Never exceed posted speed limits.Never exceed posted speed limits. Never exceed posted speed limits.
Never exceed posted speed limits.
Page 108 of 172
DRIVING YOUR HYUNDAI DRIVING YOUR HYUNDAIDRIVING YOUR HYUNDAI DRIVING YOUR HYUNDAI
DRIVING YOUR HYUNDAI
2- 7 o Driving through water may get the brakes
wet. They can also get wet when the car is
washed. Wet brakes can be dangerous! Your
car will not stop as quickly if the brakes are
wet. Wet brakes may cause the car to pull to
one side. To dry the brakes, apply the brakes
lightly until the braking action returns to nor-
mal, taking care to keep the car under control
at all times. If the braking action does not
return to normal, stop as soon as it is safe to
do so and call your Hyundai dealer for assis-
tance.
o Don't coast down hills with the car out of gear.
This is extremely hazardous. Keep the car in
gear at all times, use the brakes to slow down,
then shift to a lower gear so that engine
braking will help you maintain a safe speed.
o Don't "ride" the brake pedal. Resting your foot
on the brake pedal while driving can be dan-
gerous because it can result in the brakes
overheating and losing their effectiveness. It
also increases the wear of the brake compo-
nents.
o If a tire goes flat while you are driving, apply
the brakes gently and keep the car pointed
straight ahead while you slow down. When
you are moving slowly enough for it to be safe
to do so, pull off the road and stop in a safe
place.
o If your car is equipped with an automatic
transaxle, don't let your car creep forward. To
avoid creeping forward, keep your foot on the
brake pedal when the car is stopped.
C130A01A-AAT
GOOD BRAKING PRACTICES GOOD BRAKING PRACTICESGOOD BRAKING PRACTICES GOOD BRAKING PRACTICES
GOOD BRAKING PRACTICES
WARNING: WARNING:WARNING: WARNING:
WARNING:
Nothing should be carried on top of the shelf Nothing should be carried on top of the shelfNothing should be carried on top of the shelf Nothing should be carried on top of the shelf
Nothing should be carried on top of the shelf
panel behind the rear seat. If there were an panel behind the rear seat. If there were anpanel behind the rear seat. If there were an panel behind the rear seat. If there were an
panel behind the rear seat. If there were an
accident or a sudden stop, such objects could accident or a sudden stop, such objects couldaccident or a sudden stop, such objects could accident or a sudden stop, such objects could
accident or a sudden stop, such objects could
move forward and cause damage to the ve- move forward and cause damage to the ve-move forward and cause damage to the ve- move forward and cause damage to the ve-
move forward and cause damage to the ve-
hicle or injure the occupants. hicle or injure the occupants.hicle or injure the occupants. hicle or injure the occupants.
hicle or injure the occupants.
o After being parked, check to be sure the
parking brake is not engaged and that the
parking brake indicator light is out before
driving away. gentle slope, it is recommended that the over-
drive switch be turned off. Turn the overdrive
switch back on immediately afterward.
WARNING: WARNING:WARNING: WARNING:
WARNING:o oo o
o
The risk of rollover is greatly increased if The risk of rollover is greatly increased ifThe risk of rollover is greatly increased if The risk of rollover is greatly increased if
The risk of rollover is greatly increased if
you lose control of your vehicle at high- you lose control of your vehicle at high-you lose control of your vehicle at high- you lose control of your vehicle at high-
you lose control of your vehicle at high-
way speeds. way speeds.way speeds. way speeds.
way speeds.
o oo o
o
Loss of control often occurs if two or more Loss of control often occurs if two or moreLoss of control often occurs if two or more Loss of control often occurs if two or more
Loss of control often occurs if two or more
wheels drop off the roadway and the driver wheels drop off the roadway and the driverwheels drop off the roadway and the driver wheels drop off the roadway and the driver
wheels drop off the roadway and the driver
oversteers to reenter the roadway. oversteers to reenter the roadway.oversteers to reenter the roadway. oversteers to reenter the roadway.
oversteers to reenter the roadway.
o oo o
o
In the event your vehicle leaves the road- In the event your vehicle leaves the road-In the event your vehicle leaves the road- In the event your vehicle leaves the road-
In the event your vehicle leaves the road-
way, do not steer sharply. Instead, slow way, do not steer sharply. Instead, slowway, do not steer sharply. Instead, slow way, do not steer sharply. Instead, slow
way, do not steer sharply. Instead, slow
down before pulling back into the travel down before pulling back into the traveldown before pulling back into the travel down before pulling back into the travel
down before pulling back into the travel
lanes. lanes.lanes. lanes.
lanes.
o oo o
o
In a collision crash, an unbelted person is In a collision crash, an unbelted person isIn a collision crash, an unbelted person is In a collision crash, an unbelted person is
In a collision crash, an unbelted person is
significantly more likely to die than a per- significantly more likely to die than a per-significantly more likely to die than a per- significantly more likely to die than a per-
significantly more likely to die than a per-
son wearing a seatbelt. son wearing a seatbelt.son wearing a seatbelt. son wearing a seatbelt.
son wearing a seatbelt.
o oo o
o
Never exceed posted speed limits. Never exceed posted speed limits.Never exceed posted speed limits. Never exceed posted speed limits.
Never exceed posted speed limits.
C090N03A-AAT
Good Driving Practices Good Driving PracticesGood Driving Practices Good Driving Practices
Good Driving Practiceso Never move the gear selector lever from "P"
or "N" to any other position with the acceler-
ator pedal depressed.
o Never move the gear selector lever into "P"
when the vehicle is in motion.
o Be sure the car is completely stopped before
you attempt to shift into "R".
o Never take the car out of gear and coast down
a hill. This may be extremely hazardous.
Always leave the car in gear when moving.
o Do not "ride" the brakes. This can cause them
to overheat and malfunction. Instead, when
you are driving down a long hill, slow down
and shift to a lower gear. When you do this,
engine braking will help slow the car.
o Slow down before shifting to a lower gear.
Otherwise, the lower gear may not be en-
gaged.
o Always use the parking brake. Do not depend
on placing the transaxle in "P" to keep the car
from moving.
o Exercise extreme caution when driving on a
slippery surface. Be especially careful when
braking, accelerating or shifting gears. On a
slippery surface, an abrupt change in vehicle
speed can cause the drive wheels to lose
traction and the vehicle to go out of control.
o Turn the overdrive switch on for good fuel
economy and smooth driving. If engine brak-
ing is needed in the "D" range or if repeated
upshifting and downshifting between the 3rd
and 4th gear is needed when climbing a
Page 110 of 172
DRIVING YOUR HYUNDAI DRIVING YOUR HYUNDAIDRIVING YOUR HYUNDAI DRIVING YOUR HYUNDAI
DRIVING YOUR HYUNDAI
2- 9
C300B01E-GAT
TCS ON/OFF Mode TCS ON/OFF ModeTCS ON/OFF Mode TCS ON/OFF Mode
TCS ON/OFF ModeIn the TCS ON mode, the indicator in the instru-
ment cluster will not be illuminated.
To switch the TCS OFF mode, press the TCS
switch . And the SLIP control will be deactivated
and the TCS indicator in the instrument cluster
will be illuminated.
SLIP Control SLIP ControlSLIP Control SLIP Control
SLIP ControlLimits the drive wheels from spinning exces-
sively during starting or while making accelerat-
ed turns on slippery roads to avoid losing the
driving force of the front wheels.
Driving hints Driving hintsDriving hints Driving hints
Driving hintsTCS does not actively apply brakes. Be sure to
decelerate the car sufficiently before entering
curves.
CAUTION: CAUTION:CAUTION: CAUTION:
CAUTION:When the TCS indicator blinks, SLIP control When the TCS indicator blinks, SLIP controlWhen the TCS indicator blinks, SLIP control When the TCS indicator blinks, SLIP control
When the TCS indicator blinks, SLIP control
has been activated. It also means that the has been activated. It also means that thehas been activated. It also means that the has been activated. It also means that the
has been activated. It also means that the
road is slippery or your car is accelerating road is slippery or your car is acceleratingroad is slippery or your car is accelerating road is slippery or your car is accelerating
road is slippery or your car is accelerating
excessively. In this situation, release foot excessively. In this situation, release footexcessively. In this situation, release foot excessively. In this situation, release foot
excessively. In this situation, release foot
pressure from the accelerator pedal and main- pressure from the accelerator pedal and main-pressure from the accelerator pedal and main- pressure from the accelerator pedal and main-
pressure from the accelerator pedal and main-
tain moderate speed. tain moderate speed.tain moderate speed. tain moderate speed.
tain moderate speed.
WARNING: WARNING:WARNING: WARNING:
WARNING:Traction control is only a driving aid; all Traction control is only a driving aid; allTraction control is only a driving aid; all Traction control is only a driving aid; all
Traction control is only a driving aid; all
normal precautions for driving in inclement normal precautions for driving in inclementnormal precautions for driving in inclement normal precautions for driving in inclement
normal precautions for driving in inclement
weather and on slippery driving surfaces weather and on slippery driving surfacesweather and on slippery driving surfaces weather and on slippery driving surfaces
weather and on slippery driving surfaces
should be observed. should be observed.should be observed. should be observed.
should be observed.
C300D02L-GAT
Indicator and Warning Indicator and WarningIndicator and Warning Indicator and Warning
Indicator and WarningThe indicator should illuminate when the ignition
key is turned to "ON" or "START", but should go
out after three seconds.
If the indicator does not illuminate, have it checked
by an authorized Hyundai dealer.
Should there be any unusual conditions in the
device, TCS illuminates as a warning.
If TCS illuminates, pull your car to a safe place
and stop the engine.
Then, start the engine again to check if the TCS
indicator goes out.
If the indicator remains lit even after the engine
has been started, have your car checked by an
authorized Hyundai dealer.
NOTE: NOTE:NOTE: NOTE:
NOTE:1) 1)1) 1)
1)
Turn off the engine. Then restart the en- Turn off the engine. Then restart the en-Turn off the engine. Then restart the en- Turn off the engine. Then restart the en-
Turn off the engine. Then restart the en-
gine, and the TCS mode will automatically gine, and the TCS mode will automaticallygine, and the TCS mode will automatically gine, and the TCS mode will automatically
gine, and the TCS mode will automatically
turn "ON". turn "ON".turn "ON". turn "ON".
turn "ON".
2) 2)2) 2)
2)
When the traction control is operating When the traction control is operatingWhen the traction control is operating When the traction control is operating
When the traction control is operating
properly, you can feel a slight pulsation in properly, you can feel a slight pulsation inproperly, you can feel a slight pulsation in properly, you can feel a slight pulsation in
properly, you can feel a slight pulsation in
the vehicle. This is only the effect of brake the vehicle. This is only the effect of brakethe vehicle. This is only the effect of brake the vehicle. This is only the effect of brake
the vehicle. This is only the effect of brake
control and indicates nothing unusual. control and indicates nothing unusual.control and indicates nothing unusual. control and indicates nothing unusual.
control and indicates nothing unusual.
3) 3)3) 3)
3)
When the engine starts, a click is heard When the engine starts, a click is heardWhen the engine starts, a click is heard When the engine starts, a click is heard
When the engine starts, a click is heard
from the engine compartment; however, from the engine compartment; however,from the engine compartment; however, from the engine compartment; however,
from the engine compartment; however,
this is only the sound of traction control this is only the sound of traction controlthis is only the sound of traction control this is only the sound of traction control
this is only the sound of traction control
being checked. being checked.being checked. being checked.
being checked.
4) 4)4) 4)
4)
When moving out of the mud or fresh When moving out of the mud or freshWhen moving out of the mud or fresh When moving out of the mud or fresh
When moving out of the mud or fresh
snow, pressing the accelerator pedal may snow, pressing the accelerator pedal maysnow, pressing the accelerator pedal may snow, pressing the accelerator pedal may
snow, pressing the accelerator pedal may
not cause the engine speed to increase. not cause the engine speed to increase.not cause the engine speed to increase. not cause the engine speed to increase.
not cause the engine speed to increase.NOTE: NOTE:NOTE: NOTE:
NOTE:1) 1)1) 1)
1)
When TCS illuminates, traction control is When TCS illuminates, traction control isWhen TCS illuminates, traction control is When TCS illuminates, traction control is
When TCS illuminates, traction control is
automatically deactivated for safety. automatically deactivated for safety.automatically deactivated for safety. automatically deactivated for safety.
automatically deactivated for safety.
2) 2)2) 2)
2)
This warning function is not provided when This warning function is not provided whenThis warning function is not provided when This warning function is not provided when
This warning function is not provided when
the driver selects the TCS-OFF mode. the driver selects the TCS-OFF mode.the driver selects the TCS-OFF mode. the driver selects the TCS-OFF mode.
the driver selects the TCS-OFF mode.
C140A01A-AAT
DRIVING FOR ECONOMY DRIVING FOR ECONOMYDRIVING FOR ECONOMY DRIVING FOR ECONOMY
DRIVING FOR ECONOMYYou can save fuel and get more miles from your
car if you follow these suggestions:
o Drive smoothly. Accelerate at a moderate
rate. Don't make "jack-rabbit" starts or full-
throttle shifts and maintain a steady cruising
speed. Don't race between stoplights. Try to
adjust your speed to that of the other traffic so
you don't have to change speeds unneces-
sarily. Avoid heavy traffic whenever possible.
Always maintain a safe distance from other
vehicles so you can avoid unnecessary brak-
ing. This also reduces brake wear.
o Drive at a moderate speed. The faster you
drive, the more fuel your car uses. Driving at
a moderate speed, especially on the high-
way, is one of the most effective ways to
reduce fuel consumption.
o Don't "ride" the brake or clutch pedal. This
can increase fuel consumption and also in-
crease wear on these components. In addi-
tion, driving with your foot resting on the brake
pedal may cause the brakes to overheat,
which reduces their effectiveness and may
lead to more serious consequences.
Page 111 of 172
DRIVING YOUR HYUNDAI DRIVING YOUR HYUNDAIDRIVING YOUR HYUNDAI DRIVING YOUR HYUNDAI
DRIVING YOUR HYUNDAI
2- 10
C160C01A-AATUse High Quality Ethylene Glycol Use High Quality Ethylene GlycolUse High Quality Ethylene Glycol Use High Quality Ethylene Glycol
Use High Quality Ethylene Glycol
Coolant CoolantCoolant Coolant
Coolant
Your Hyundai is delivered with high quality ethyl-
ene glycol coolant in the cooling system. It is the
only type of coolant that should be used because
it helps prevent corrosion in the cooling system,
lubricates the water pump and prevents freezing.
Be sure to replace or replenish your coolant in
C150A01A-AAT
SMOOTH CORNERING SMOOTH CORNERINGSMOOTH CORNERING SMOOTH CORNERING
SMOOTH CORNERINGAvoid braking or gear changing in corners, espe-
cially when roads are wet. Ideally, corners should
always be taken under gentle acceleration. If you
follow these suggestions, tire wear will be held to
a minimum.
C160A01A-AAT
WINTER DRIVING WINTER DRIVINGWINTER DRIVING WINTER DRIVING
WINTER DRIVINGThe more severe weather conditions of winter
result in greater wear and other problems. To
minimize the problems of winter driving, you
should follow these suggestions:
C160B01A-AAT
Snowy or Icy Conditions Snowy or Icy ConditionsSnowy or Icy Conditions Snowy or Icy Conditions
Snowy or Icy ConditionsTo drive your vehicle in deep snow, it may be
necessary to use snow tires or to install tire
chains on your tires. If snow tires are needed, it
is necessary to select tires equivalent in size and
type to the original equipment tires. Failure to do
so may adversely affect the safety and handling
of your car. Speeding, rapid acceleration, sud-
den brake applications, and sharp turns are
potentially very hazardous practices.
During deceleration, use engine braking to the
fullest extent. Sudden brake applications on
snowy or icy roads may cause skids to occur.
You need to keep sufficient distance between the
vehicle in front and your vehicle. Also, apply the
brake gently. It should be noted that installing tire
chains on the tire will provide a greater driving
force, but will not prevent side skids.
NOTE: NOTE:NOTE: NOTE:
NOTE:Tire chains are not legal in all states. Check Tire chains are not legal in all states. CheckTire chains are not legal in all states. Check Tire chains are not legal in all states. Check
Tire chains are not legal in all states. Check
state laws before fitting tire chains. state laws before fitting tire chains.state laws before fitting tire chains. state laws before fitting tire chains.
state laws before fitting tire chains. o Remember, your Hyundai does not require
extended warm-up. As soon as the engine is
running smoothly, you can drive away. In
very cold weather, however, give your engine
a slightly longer warm-up period.
o Don't "lug" or "over-rev" the engine. Lugging
is driving too slowly in too high a gear result-
ing in the engine bucking. If this happens, shift
to a lower gear. Over-revving is racing the
engine beyond its safe limit. This can be
avoided by shifting at the recommended
speeds.
o Use your air conditioning sparingly. The air
conditioning system is operated by engine
power so your fuel economy is reduced when
you use it. o Take care of your tires. Keep them inflated to
the recommended pressure. Incorrect infla-
tion, either too much or too little, results in
unnecessary tire wear. Check the tire pres-
sures at least once a month.
o Be sure that the wheels are aligned correctly.
Improper alignment can result from hitting
curbs or driving too fast over irregular surfac-
es. Poor alignment causes faster tire wear
and may also result in other problems as well
as greater fuel consumption.
o Keep your car in good condition. For better
fuel economy and reduced maintenance
costs, maintain your car in accordance with
the maintenance schedule in Section 5. If you
drive your car in severe conditions, more
frequent maintenance is required (see Sec-
tion 5 for details).
o Keep your car clean. For maximum service,
your Hyundai should be kept clean and free of
corrosive materials. It is especially important
that mud, dirt, ice, etc. not be allowed to
accumulate on the underside of the car. This
extra weight can result in increased fuel con-
sumption and also contribute to corrosion.
o Travel lightly. Don't carry unnecessary weight
in your car. Weight reduces fuel economy.
o Don't let the engine idle longer than neces-
sary. If you are waiting (and not in traffic), turn
off your engine and restart only when you're
ready to go.