fuel cap Hyundai Elantra 2003 Owner's Manual
[x] Cancel search | Manufacturer: HYUNDAI, Model Year: 2003, Model line: Elantra, Model: Hyundai Elantra 2003Pages: 172, PDF Size: 2.82 MB
Page 10 of 172
FEATURES OF YOUR HYUNDAI FEATURES OF YOUR HYUNDAIFEATURES OF YOUR HYUNDAI FEATURES OF YOUR HYUNDAI
FEATURES OF YOUR HYUNDAI
1- 1
1. 1.1. 1.
1.
FEA FEAFEA FEA
FEA
TURES OF TURES OFTURES OF TURES OF
TURES OF
Y YY Y
Y
OUR HYUND OUR HYUNDOUR HYUND OUR HYUND
OUR HYUND
AI AIAI AI
AI
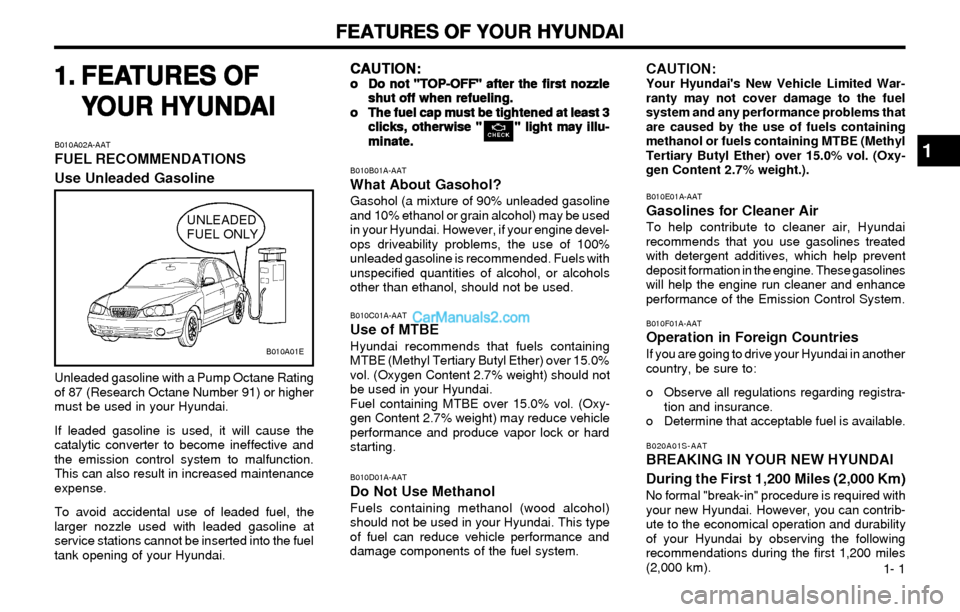
UNLEADED
FUEL ONLY
B020A01S-AATBREAKING IN YOUR NEW HYUNDAI
During the First 1,200 Miles (2,000 Km)
No formal "break-in" procedure is required with
your new Hyundai. However, you can contrib-
ute to the economical operation and durability
of your Hyundai by observing the following
recommendations during the first 1,200 miles
(2,000 km).
B010A02A-AAT
FUEL RECOMMENDATIONS
Use Unleaded GasolineCAUTION: CAUTION:CAUTION: CAUTION:
CAUTION:
o oo o
o
Do not "TOP-OFF" after the first nozzle Do not "TOP-OFF" after the first nozzleDo not "TOP-OFF" after the first nozzle Do not "TOP-OFF" after the first nozzle
Do not "TOP-OFF" after the first nozzle
shut off when refueling. shut off when refueling.shut off when refueling. shut off when refueling.
shut off when refueling.
o oo o
o
The fuel cap must be tightened at least 3 The fuel cap must be tightened at least 3The fuel cap must be tightened at least 3 The fuel cap must be tightened at least 3
The fuel cap must be tightened at least 3
clicks, otherwise " " light may illu- clicks, otherwise " " light may illu-clicks, otherwise " " light may illu- clicks, otherwise " " light may illu-
clicks, otherwise " " light may illu-
minate. minate.minate. minate.
minate.
Unleaded gasoline with a Pump Octane Rating
of 87 (Research Octane Number 91) or higher
must be used in your Hyundai.
If leaded gasoline is used, it will cause the
catalytic converter to become ineffective and
the emission control system to malfunction.
This can also result in increased maintenance
expense.
To avoid accidental use of leaded fuel, the
larger nozzle used with leaded gasoline at
service stations cannot be inserted into the fuel
tank opening of your Hyundai.
B010B01A-AATWhat About Gasohol?Gasohol (a mixture of 90% unleaded gasoline
and 10% ethanol or grain alcohol) may be used
in your Hyundai. However, if your engine devel-
ops driveability problems, the use of 100%
unleaded gasoline is recommended. Fuels with
unspecified quantities of alcohol, or alcohols
other than ethanol, should not be used.
B010C01A-AATUse of MTBE
Hyundai recommends that fuels containing
MTBE (Methyl Tertiary Butyl Ether) over 15.0%
vol. (Oxygen Content 2.7% weight) should not
be used in your Hyundai.
Fuel containing MTBE over 15.0% vol. (Oxy-
gen Content 2.7% weight) may reduce vehicle
performance and produce vapor lock or hard
starting.
B010D01A-AATDo Not Use Methanol
Fuels containing methanol (wood alcohol)
should not be used in your Hyundai. This type
of fuel can reduce vehicle performance and
damage components of the fuel system.
CAUTION:Your Hyundai's New Vehicle Limited War-
ranty may not cover damage to the fuel
system and any performance problems that
are caused by the use of fuels containing
methanol or fuels containing MTBE (Methyl
Tertiary Butyl Ether) over 15.0% vol. (Oxy-
gen Content 2.7% weight.).
B010F01A-AATOperation in Foreign Countries
If you are going to drive your Hyundai in another
country, be sure to:
o Observe all regulations regarding registra-
tion and insurance.
o Determine that acceptable fuel is available.
B010E01A-AATGasolines for Cleaner AirTo help contribute to cleaner air, Hyundai
recommends that you use gasolines treated
with detergent additives, which help prevent
deposit formation in the engine. These gasolines
will help the engine run cleaner and enhance
performance of the Emission Control System.
B010A01E
1
Page 41 of 172
FEATURES OF YOUR HYUNDAI FEATURES OF YOUR HYUNDAIFEATURES OF YOUR HYUNDAI FEATURES OF YOUR HYUNDAI
FEATURES OF YOUR HYUNDAI
1- 32
B260N01A-AATMalfunction Indicator Light
This light illuminates when there is a malfunc-
tion of an exhaust gas related component, and
the system is not functioning properly so that
the exhaust gas regulation values are not sat-
isfied. This light will also illuminate when the
ignition key is turned to the "ON" position, and
will go out in a few seconds. If it illuminates
while driving, or does not illuminate when the
ignition key is turned to the "ON" position, take
your car to your nearest authorized Hyundai
dealer and have the system checked.
B270A01A-AATBRAKE PAD WEAR WARNING SOUND BRAKE PAD WEAR WARNING SOUNDBRAKE PAD WEAR WARNING SOUND BRAKE PAD WEAR WARNING SOUND
BRAKE PAD WEAR WARNING SOUNDThe front disc brake pads have wear indicators
that should make a high-pitched squealing or
scraping noise when new pads are needed.
The sound may come and go or be heard all the
time when the vehicle is moving. It may also be
heard when the brake pedal is pushed down
firmly. Expensive rotor damage will result if the
worn pads are not replaced. See your Hyundai
dealer immediately.
B260Q01E-GATCruise Indicator (If Installed)
The cruise indicator light in the instrument
cluster is illuminated when the cruise control
main switch on the end of the barrel is pushed.
The indicator light does not illuminate when the
cruise control main switch is pushed a second
time.
Information on the use of cruise control may be
found on page 1-52.
B260A01B-GATFront Fog Indicator Light
(If Installed)
Front fog indicator light comes on whenever the
fog light switch is on.
B280B01E
B280A01E
Without Trip Computer
With Trip Computer
CRUISE
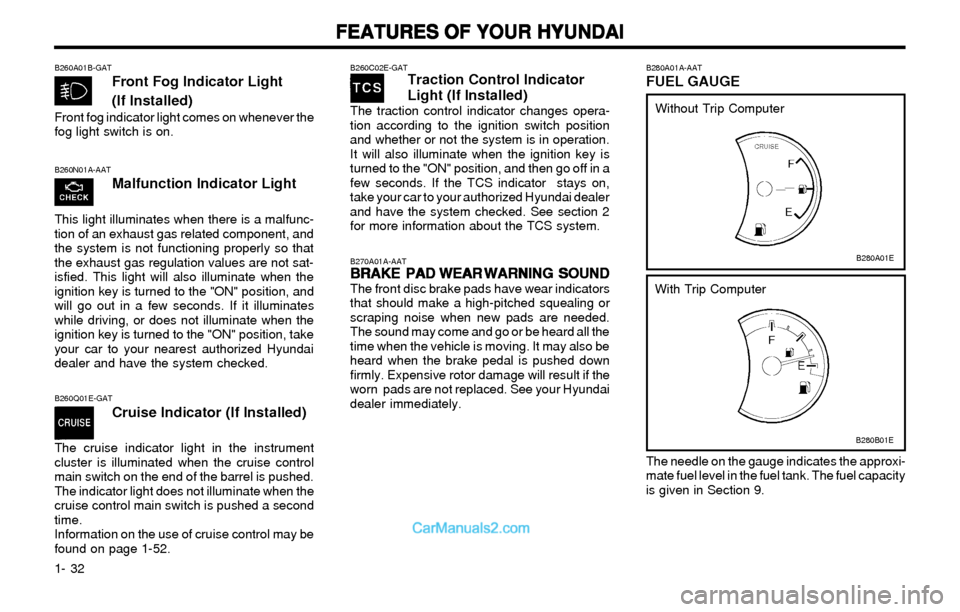
B280A01A-AATFUEL GAUGE
The needle on the gauge indicates the approxi-
mate fuel level in the fuel tank. The fuel capacity
is given in Section 9.
B260C02E-GATTraction Control Indicator
Light (If Installed)
The traction control indicator changes opera-
tion according to the ignition switch position
and whether or not the system is in operation.
It will also illuminate when the ignition key is
turned to the "ON" position, and then go off in a
few seconds. If the TCS indicator stays on,
take your car to your authorized Hyundai dealer
and have the system checked. See section 2
for more information about the TCS system.
Page 58 of 172
FEATURES OF YOUR HYUNDAI FEATURES OF YOUR HYUNDAIFEATURES OF YOUR HYUNDAI FEATURES OF YOUR HYUNDAI
FEATURES OF YOUR HYUNDAI
1- 49
WARNING: WARNING:WARNING: WARNING:
WARNING:o oo o
o
The fuel cap must be tightened at least 3 The fuel cap must be tightened at least 3The fuel cap must be tightened at least 3 The fuel cap must be tightened at least 3
The fuel cap must be tightened at least 3
clicks, otherwise light will illuminate. clicks, otherwise light will illuminate.clicks, otherwise light will illuminate. clicks, otherwise light will illuminate.
clicks, otherwise light will illuminate.
o oo o
o
Gasoline vapors are dangerous. Before Gasoline vapors are dangerous. BeforeGasoline vapors are dangerous. Before Gasoline vapors are dangerous. Before
Gasoline vapors are dangerous. Before
refueling, always stop the engine and refueling, always stop the engine andrefueling, always stop the engine and refueling, always stop the engine and
refueling, always stop the engine and
never allow sparks or open flames near never allow sparks or open flames nearnever allow sparks or open flames near never allow sparks or open flames near
never allow sparks or open flames near
the filler area. If you need to replace the the filler area. If you need to replace thethe filler area. If you need to replace the the filler area. If you need to replace the
the filler area. If you need to replace the
filler cap, use a genuine Hyundai re- filler cap, use a genuine Hyundai re-filler cap, use a genuine Hyundai re- filler cap, use a genuine Hyundai re-
filler cap, use a genuine Hyundai re-
placement part. placement part.placement part. placement part.
placement part.
o oo o
o
If you open the fuel filler cap during high If you open the fuel filler cap during highIf you open the fuel filler cap during high If you open the fuel filler cap during high
If you open the fuel filler cap during high
ambient temperatures, a slight "pres- ambient temperatures, a slight "pres-ambient temperatures, a slight "pres- ambient temperatures, a slight "pres-
ambient temperatures, a slight "pres-
sure sound" may be heard. This is nor- sure sound" may be heard. This is nor-sure sound" may be heard. This is nor- sure sound" may be heard. This is nor-
sure sound" may be heard. This is nor-
mal and not a cause for concern. mal and not a cause for concern.mal and not a cause for concern. mal and not a cause for concern.
mal and not a cause for concern.
Whenever you open the fuel filler cap, Whenever you open the fuel filler cap,Whenever you open the fuel filler cap, Whenever you open the fuel filler cap,
Whenever you open the fuel filler cap,
turn it slowly. turn it slowly.turn it slowly. turn it slowly.
turn it slowly.
o oo o
o
Make sure the fuel filler cap is replaced and Make sure the fuel filler cap is replaced andMake sure the fuel filler cap is replaced and Make sure the fuel filler cap is replaced and
Make sure the fuel filler cap is replaced and
securely seated after fueling. Failure to securely seated after fueling. Failure tosecurely seated after fueling. Failure to securely seated after fueling. Failure to
securely seated after fueling. Failure to
replace or fully seat the fuel filler cap will replace or fully seat the fuel filler cap willreplace or fully seat the fuel filler cap will replace or fully seat the fuel filler cap will
replace or fully seat the fuel filler cap will
result in fuel vapors escaping into the atmo- result in fuel vapors escaping into the atmo-result in fuel vapors escaping into the atmo- result in fuel vapors escaping into the atmo-
result in fuel vapors escaping into the atmo-
sphere and the MIL indicator sphere and the MIL indicator sphere and the MIL indicator sphere and the MIL indicator
sphere and the MIL indicator
illu illuillu illu
illu
- -- -
-
minating. minating.minating. minating.
minating.
B560B01E
B560A02S-AAT
REMOTE FUEL-FILLER LID RELEASE REMOTE FUEL-FILLER LID RELEASEREMOTE FUEL-FILLER LID RELEASE REMOTE FUEL-FILLER LID RELEASE
REMOTE FUEL-FILLER LID RELEASE
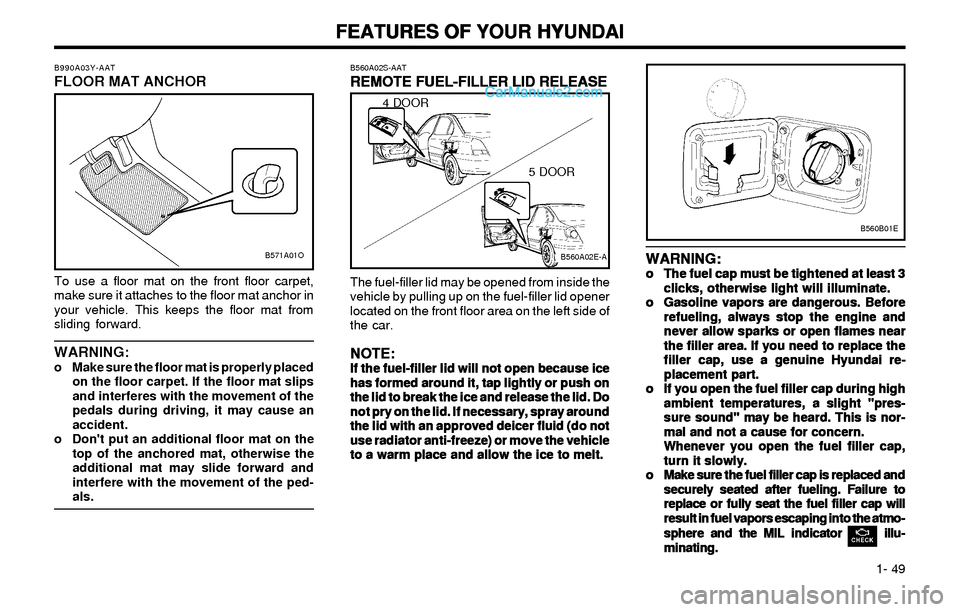
The fuel-filler lid may be opened from inside the
vehicle by pulling up on the fuel-filler lid opener
located on the front floor area on the left side of
the car.
NOTE: NOTE:NOTE: NOTE:
NOTE:If the fuel-filler lid will not open because ice If the fuel-filler lid will not open because iceIf the fuel-filler lid will not open because ice If the fuel-filler lid will not open because ice
If the fuel-filler lid will not open because ice
has formed around it, tap lightly or push on has formed around it, tap lightly or push onhas formed around it, tap lightly or push on has formed around it, tap lightly or push on
has formed around it, tap lightly or push on
the lid to break the ice and release the lid. Do the lid to break the ice and release the lid. Dothe lid to break the ice and release the lid. Do the lid to break the ice and release the lid. Do
the lid to break the ice and release the lid. Do
not pry on the lid. If necessary, spray around not pry on the lid. If necessary, spray aroundnot pry on the lid. If necessary, spray around not pry on the lid. If necessary, spray around
not pry on the lid. If necessary, spray around
the lid with an approved deicer fluid (do not the lid with an approved deicer fluid (do notthe lid with an approved deicer fluid (do not the lid with an approved deicer fluid (do not
the lid with an approved deicer fluid (do not
use radiator anti-freeze) or move the vehicle use radiator anti-freeze) or move the vehicleuse radiator anti-freeze) or move the vehicle use radiator anti-freeze) or move the vehicle
use radiator anti-freeze) or move the vehicle
to a warm place and allow the ice to melt. to a warm place and allow the ice to melt.to a warm place and allow the ice to melt. to a warm place and allow the ice to melt.
to a warm place and allow the ice to melt.
B560A02E-A
4 DOOR
5 DOOR
B571A01O B990A03Y-AAT
FLOOR MAT ANCHOR
To use a floor mat on the front floor carpet,
make sure it attaches to the floor mat anchor in
your vehicle. This keeps the floor mat from
sliding forward.
WARNING:o Make sure the floor mat is properly placed
on the floor carpet. If the floor mat slips
and interferes with the movement of the
pedals during driving, it may cause an
accident.
o Don't put an additional floor mat on the
top of the anchored mat, otherwise the
additional mat may slide forward and
interfere with the movement of the ped-
als.
Page 131 of 172

VEHICLE MAINTENANCE REQUIREMENTS VEHICLE MAINTENANCE REQUIREMENTSVEHICLE MAINTENANCE REQUIREMENTS VEHICLE MAINTENANCE REQUIREMENTS
VEHICLE MAINTENANCE REQUIREMENTS
5-3 Note:
*1 - IN CASE OF REMOVING INJECTOR FOR INSPECTION, INSULATOR AND O-RING OF INJECTOR SHOULD BE CHANGED
WITH NEW ONE.
*2 - REPLACE EVERY 100,000 MILES OR 10 YEARS
F030A01A-AAT
SCHEDULED MAINTENANCE SCHEDULED MAINTENANCESCHEDULED MAINTENANCE SCHEDULED MAINTENANCE
SCHEDULED MAINTENANCEThe following maintenance services must be performed to ensure good emission control and performance. Keep receipts for all vehicle emission services
to protect your emission warranty. Where both mileage and time are shown, the frequency of service is determined by whichever occurs first.
F030B04E-AATR :Replace I : Inspect and, after inspection, clean, adjust, repair or replace if necessary.
DESCRIPTION
EMISSION CONTROL ITEMS
ENGINE OIL AND FILTER
FUEL FILTER
FUEL LINES, FUEL HOSES AND CONNECTIONS
INSULATOR OF FUEL INJECTOR (2.0 L SULEV Only)
VACUUM AND CRANKCASE VENTILATION HOSES
VAPOR HOSE AND FUEL FILLER CAP
AIR CLEANER FILTER
SPARK PLUGS
VALVE CLEARANCE No.
1
2
3
4
5
6
7
8MILES X 1000
KILOMETERS X 1000
MONTHS7.5
12
6
R15
24
12
R22.5
36
18
R30
48
24
R
I
I*
1
I
R37.5
60
30
R45
72
36
R52.5
84
42
R
R
I60
96
48
R
I
R
I
R
R
I67.5
108
54
R75
120
60
R82.5
132
66
R90
144
72
R
I
I*
1
I
R97.5
156
78
R105
168
84
R
R
I112.5
180
90
R120
192
96
R
I
R
I
R
R
I127.5
204
102
R135
216
108
R142.5
228
114
R150
240
120
R
I
I*
1
I
R
PLATINUM COATED (2.0L)
IRIDIUM COATED (2.0L SULEV)
See Note *2
Page 134 of 172

VEHICLE MAINTENANCE REQUIREMENTS VEHICLE MAINTENANCE REQUIREMENTSVEHICLE MAINTENANCE REQUIREMENTS VEHICLE MAINTENANCE REQUIREMENTS
VEHICLE MAINTENANCE REQUIREMENTS
5- 6
F060A01A-AAT
EXPLANATION OF SCHEDULED EXPLANATION OF SCHEDULEDEXPLANATION OF SCHEDULED EXPLANATION OF SCHEDULED
EXPLANATION OF SCHEDULED
MAINTENANCE ITEMS MAINTENANCE ITEMSMAINTENANCE ITEMS MAINTENANCE ITEMS
MAINTENANCE ITEMS
F060M01A-AAT
o oo o
o
Engine Oil and Filter Engine Oil and FilterEngine Oil and Filter Engine Oil and Filter
Engine Oil and FilterThe engine oil and filter should be changed at
the intervals specified in the maintenance
schedule. If the car is being driven in severe
conditions, more frequent oil and filter changes
are required.
F060C01A-AAT
o oo o
o
Fuel Filter Fuel FilterFuel Filter Fuel Filter
Fuel FilterA clogged filter can limit the speed at which the
vehicle may be driven, damage the emission
system and cause hard starting. If an exces-
sive amount of foreign matter accumulates in
the fuel tank, the filter may require replace-
ment more frequently.
After installing a new filter, run the engine for
several minutes, and check for leaks at the
connections. Fuel filters should be installed by
trained technicians.
F060B01A-AAT
o oo o
o
Drive Belts Drive BeltsDrive Belts Drive Belts
Drive BeltsInspect all drive belts for evidence of cuts,
cracks, excessive wear or oil saturation and
replace if necessary. Drive belts should be
checked periodically for proper tension and
adjusted as necessary.
F060D01A-AATo oo o
o
Fuel Lines, Fuel Hoses and Fuel Lines, Fuel Hoses andFuel Lines, Fuel Hoses and Fuel Lines, Fuel Hoses and
Fuel Lines, Fuel Hoses and
Connections ConnectionsConnections Connections
Connections
Check the fuel lines, fuel hoses and connec-
tions for leakage and damage. Have a trained
technician replace any damaged or leaking
parts immediately.
F060G01A-AAT
o oo o
o
Vapor Hose and Fuel Filler Cap Vapor Hose and Fuel Filler CapVapor Hose and Fuel Filler Cap Vapor Hose and Fuel Filler Cap
Vapor Hose and Fuel Filler CapThe vapor hose and fuel filler cap should be
inspected at those intervals specified in the
maintenance schedule. Make sure that a new
vapor hose or fuel filler cap is correctly re-
placed.
F060F01A-AATo oo o
o
Vacuum, Crankcase Vacuum, CrankcaseVacuum, Crankcase Vacuum, Crankcase
Vacuum, Crankcase
Ventilation Hoses Ventilation HosesVentilation Hoses Ventilation Hoses
Ventilation Hoses
Inspect the surface of hoses for evidence of
heat and/or mechanical damage. Hard and
brittle rubber, cracking, tears, cuts, abra-
sions, and excessive swelling indicate dete-
rioration. Particular attention should be paid to
examine those hose surfaces nearest to high
heat sources, such as the exhaust manifold.
Inspect the hose routing to assure that the
hoses do not come in contact with any heat
source, sharp edges or moving component
which might cause heat damage or mechani-
cal wear. Inspect all hose connections, such
as clamps and couplings, to make sure they
are secure, and that no leaks are present.
Hoses should be replaced immediately if there
is any evidence of deterioration or damage.
F060H01A-AAT
o Air cleaner filter o Air cleaner filtero Air cleaner filter o Air cleaner filter
o Air cleaner filterA Genuine Hyundai air cleaner filter is recom-
mended when the filter is replaced.
F060J01A-AAT
o Spark plugs o Spark plugso Spark plugs o Spark plugs
o Spark plugsMake sure to install new spark plugs of the
correct heat range.
F060E01A-AAT
o oo o
o
Timing belt Timing beltTiming belt Timing belt
Timing beltInspect all parts related to the timing belt for
damage and deformation. Replace any dam-
aged parts immediately.
F070C01A-AAT
o Engine coolant o Engine coolanto Engine coolant o Engine coolant
o Engine coolantThe coolant should be changed at the
intervals specified in the maintenance sched-
ule.
F060N02E-AAT
o oo o
o
Valve Clearance Valve ClearanceValve Clearance Valve Clearance
Valve ClearanceInspect excessive valve noise and/or engine
vibration and adjust if necessary. A qualified
technician should perform the operation.
Page 140 of 172
DO-IT-YOURSELF MAINTENANCE DO-IT-YOURSELF MAINTENANCEDO-IT-YOURSELF MAINTENANCE DO-IT-YOURSELF MAINTENANCE
DO-IT-YOURSELF MAINTENANCE
6-4
G030B02A
G030C01A-AAT
To Check the Oil Level To Check the Oil LevelTo Check the Oil Level To Check the Oil Level
To Check the Oil Level
G030D01A-AAT
Adding Oil Adding OilAdding Oil Adding Oil
Adding Oil
Wait a minute, then remove the dipstick, wipe it
off, fully reinsert the dipstick and withdraw it
again. Then note the highest level the oil has
reached on the dipstick. It should be between
the upper ("FULL") and lower ("LOW") range.
If the oil level is close to or below the "LOW"
mark, add oil until it reaches the "FULL" mark.
To add oil:
1. Remove the oil filler cap by turning it counter-
clockwise.
2. Add oil, then check the level again. Do not
overfill.
3. Replace the cap by turning it clockwise.
The distance between the "FULL" and "LOW"
marks is equal to about 1 quart of oil.
G030C01E-1
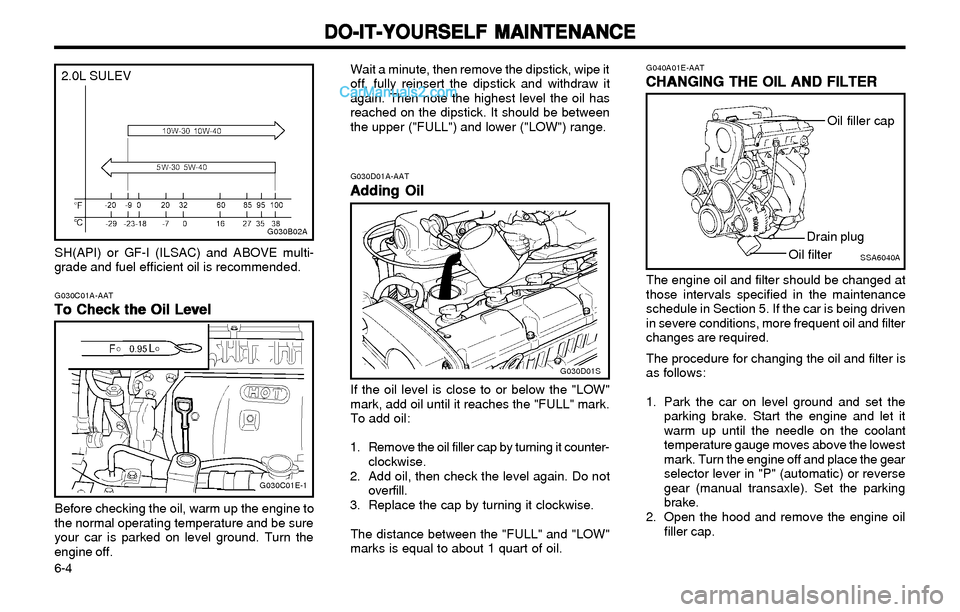
SH(API) or GF-I (ILSAC) and ABOVE multi-
grade and fuel efficient oil is recommended.
G040A01E-AAT
CHANGING THE OIL AND FILTER CHANGING THE OIL AND FILTERCHANGING THE OIL AND FILTER CHANGING THE OIL AND FILTER
CHANGING THE OIL AND FILTER
The engine oil and filter should be changed at
those intervals specified in the maintenance
schedule in Section 5. If the car is being driven
in severe conditions, more frequent oil and filter
changes are required.
The procedure for changing the oil and filter is
as follows:
1. Park the car on level ground and set the
parking brake. Start the engine and let it
warm up until the needle on the coolant
temperature gauge moves above the lowest
mark. Turn the engine off and place the gear
selector lever in "P" (automatic) or reverse
gear (manual transaxle). Set the parking
brake.
2. Open the hood and remove the engine oil
filler cap.
SSA6040A
Oil filler cap
Drain plug
Oil filter 2.0L SULEV
Before checking the oil, warm up the engine to
the normal operating temperature and be sure
your car is parked on level ground. Turn the
engine off.
G030D01S
Page 143 of 172

DO-IT-YOURSELF MAINTENANCE DO-IT-YOURSELF MAINTENANCEDO-IT-YOURSELF MAINTENANCE DO-IT-YOURSELF MAINTENANCE
DO-IT-YOURSELF MAINTENANCE
6-7
CHAMPION
NGKRC10PYP4
PFR5N-11
IFR5G-11 Your engine was originally equipped with plati-
num or iridium-tipped spark plugs.
Platinum or iridium-tipped spark plugs will last
longer than conventional type spark plugs and
can be identified by blue lines (platinum only)
on the ceramic shell.NOTE: NOTE:NOTE: NOTE:
NOTE:Do not clean or regap platinum or iridium- Do not clean or regap platinum or iridium-Do not clean or regap platinum or iridium- Do not clean or regap platinum or iridium-
Do not clean or regap platinum or iridium-
tipped spark plugs. tipped spark plugs.tipped spark plugs. tipped spark plugs.
tipped spark plugs.
G050D04E
5. Start the engine, top off the radiator with
water and then add engine coolant to the
reservoir until the level is between "LOW"
and "FULL".
6. Replace the radiator and reservoir caps and
check to be sure the drain cocks are fully
closed and not leaking.
WARNING: WARNING:WARNING: WARNING:
WARNING:The cooling fan is controlled by engine cool- The cooling fan is controlled by engine cool-The cooling fan is controlled by engine cool- The cooling fan is controlled by engine cool-
The cooling fan is controlled by engine cool-
ant temperature and may sometimes oper- ant temperature and may sometimes oper-ant temperature and may sometimes oper- ant temperature and may sometimes oper-
ant temperature and may sometimes oper-
ate even when the engine is not running. ate even when the engine is not running.ate even when the engine is not running. ate even when the engine is not running.
ate even when the engine is not running.
Use extreme caution when working near the Use extreme caution when working near theUse extreme caution when working near the Use extreme caution when working near the
Use extreme caution when working near the
blades of the cooling fan so that you are not blades of the cooling fan so that you are notblades of the cooling fan so that you are not blades of the cooling fan so that you are not
blades of the cooling fan so that you are not
injured by a rotating fan blade. As the en- injured by a rotating fan blade. As the en-injured by a rotating fan blade. As the en- injured by a rotating fan blade. As the en-
injured by a rotating fan blade. As the en-
gine coolant temperature decreases, the fan gine coolant temperature decreases, the fangine coolant temperature decreases, the fan gine coolant temperature decreases, the fan
gine coolant temperature decreases, the fan
will automatically shut off. This is a normal will automatically shut off. This is a normalwill automatically shut off. This is a normal will automatically shut off. This is a normal
will automatically shut off. This is a normal
condition. condition.condition. condition.
condition.
SSA6060A
0.039 ~ 0.043 in. (1.0 ~ 1.1 mm)
G060A03Y-AAT
SPARK PLUGS SPARK PLUGSSPARK PLUGS SPARK PLUGS
SPARK PLUGS
PLATINUM
PLATINUM
IRIDIUM*
G060B02E-AAT
Replacing the Spark Plugs Replacing the Spark PlugsReplacing the Spark Plugs Replacing the Spark Plugs
Replacing the Spark PlugsThe spark plugs should be changed at the
intervals specified in the vehicle maintenance
schedule in Section 5 or whenever engine per-
formance indicates they should be changed.
Symptoms that suggest poor spark plug perfor-
mance include engine misfiring under load, loss
of fuel economy, poor acceleration, etc. When
spark plugs are replaced, always use spark
plugs recommended by Hyundai. The use of
other spark plugs can result in loss of perfor-
mance, radio interference or engine damage.
NOTE: NOTE:NOTE: NOTE:
NOTE:When replacing the spark plugs, genuine When replacing the spark plugs, genuineWhen replacing the spark plugs, genuine When replacing the spark plugs, genuine
When replacing the spark plugs, genuine
Hyundai replacement parts are recom- Hyundai replacement parts are recom-Hyundai replacement parts are recom- Hyundai replacement parts are recom-
Hyundai replacement parts are recom-
mended. mended.mended. mended.
mended.
Recommended Spark Plugs: Recommended Spark Plugs:Recommended Spark Plugs: Recommended Spark Plugs:
Recommended Spark Plugs:
* 2.0L SULEV Only.
Page 157 of 172
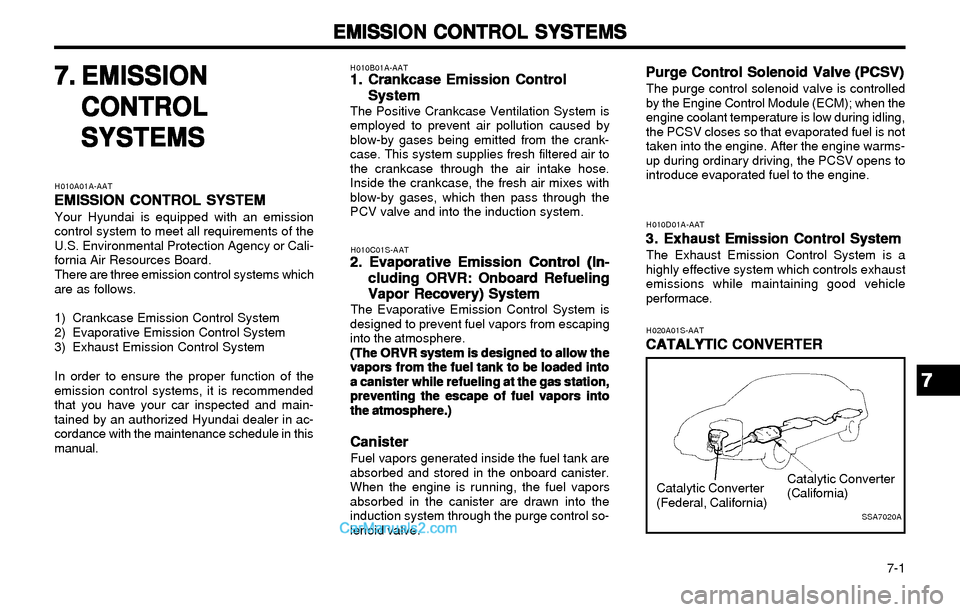
EMISSION CONTROL SYSTEMS EMISSION CONTROL SYSTEMSEMISSION CONTROL SYSTEMS EMISSION CONTROL SYSTEMS
EMISSION CONTROL SYSTEMS
7-1
7. 7.7. 7.
7.
EMISSION EMISSIONEMISSION EMISSION
EMISSION
CONTR CONTRCONTR CONTR
CONTR
OL OLOL OL
OL
SYSTEMS SYSTEMSSYSTEMS SYSTEMS
SYSTEMSH010B01A-AAT1. 1.1. 1.
1.
Crankcase Emission Control Crankcase Emission ControlCrankcase Emission Control Crankcase Emission Control
Crankcase Emission Control
System SystemSystem System
System
The Positive Crankcase Ventilation System is
employed to prevent air pollution caused by
blow-by gases being emitted from the crank-
case. This system supplies fresh filtered air to
the crankcase through the air intake hose.
Inside the crankcase, the fresh air mixes with
blow-by gases, which then pass through the
PCV valve and into the induction system.
H010C01S-AAT2. Evaporative Emission Control (In- 2. Evaporative Emission Control (In-2. Evaporative Emission Control (In- 2. Evaporative Emission Control (In-
2. Evaporative Emission Control (In-
cluding ORVR: Onboard Refueling cluding ORVR: Onboard Refuelingcluding ORVR: Onboard Refueling cluding ORVR: Onboard Refueling
cluding ORVR: Onboard Refueling
Vapor Recovery) System Vapor Recovery) SystemVapor Recovery) System Vapor Recovery) System
Vapor Recovery) System
The Evaporative Emission Control System is
designed to prevent fuel vapors from escaping
into the atmosphere.
(The ORVR system is designed to allow the (The ORVR system is designed to allow the(The ORVR system is designed to allow the (The ORVR system is designed to allow the
(The ORVR system is designed to allow the
vapors from the fuel tank to be loaded into vapors from the fuel tank to be loaded intovapors from the fuel tank to be loaded into vapors from the fuel tank to be loaded into
vapors from the fuel tank to be loaded into
a canister while refueling at the gas station, a canister while refueling at the gas station,a canister while refueling at the gas station, a canister while refueling at the gas station,
a canister while refueling at the gas station,
preventing the escape of fuel vapors into preventing the escape of fuel vapors intopreventing the escape of fuel vapors into preventing the escape of fuel vapors into
preventing the escape of fuel vapors into
the atmosphere.) the atmosphere.)the atmosphere.) the atmosphere.)
the atmosphere.)
Canister CanisterCanister Canister
CanisterFuel vapors generated inside the fuel tank are
absorbed and stored in the onboard canister.
When the engine is running, the fuel vapors
absorbed in the canister are drawn into the
induction system through the purge control so-
lenoid valve.
Purge Control Solenoid Valve (PCSV) Purge Control Solenoid Valve (PCSV)Purge Control Solenoid Valve (PCSV) Purge Control Solenoid Valve (PCSV)
Purge Control Solenoid Valve (PCSV)The purge control solenoid valve is controlled
by the Engine Control Module (ECM); when the
engine coolant temperature is low during idling,
the PCSV closes so that evaporated fuel is not
taken into the engine. After the engine warms-
up during ordinary driving, the PCSV opens to
introduce evaporated fuel to the engine.
H010D01A-AAT
3. 3.3. 3.
3.
Exhaust Emission Control System Exhaust Emission Control SystemExhaust Emission Control System Exhaust Emission Control System
Exhaust Emission Control SystemThe Exhaust Emission Control System is a
highly effective system which controls exhaust
emissions while maintaining good vehicle
performace.
H010A01A-AAT
EMISSION CONTROL SYSTEM EMISSION CONTROL SYSTEMEMISSION CONTROL SYSTEM EMISSION CONTROL SYSTEM
EMISSION CONTROL SYSTEMYour Hyundai is equipped with an emission
control system to meet all requirements of the
U.S. Environmental Protection Agency or Cali-
fornia Air Resources Board.
There are three emission control systems which
are as follows.
1) Crankcase Emission Control System
2) Evaporative Emission Control System
3) Exhaust Emission Control System
In order to ensure the proper function of the
emission control systems, it is recommended
that you have your car inspected and main-
tained by an authorized Hyundai dealer in ac-
cordance with the maintenance schedule in this
manual.
H020A01S-AAT
CATALYTIC CONVERTER CATALYTIC CONVERTERCATALYTIC CONVERTER CATALYTIC CONVERTER
CATALYTIC CONVERTER
Catalytic Converter
(California)
SSA7020A
Catalytic Converter
(Federal, California)
7 77 7
7
Page 165 of 172
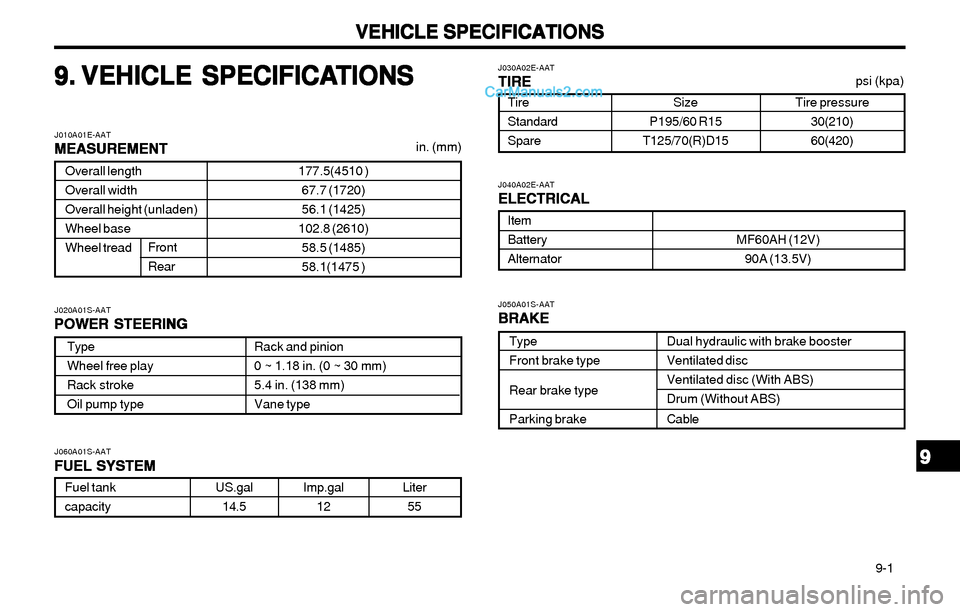
VEHICLE SPECIFICATIONS VEHICLE SPECIFICATIONSVEHICLE SPECIFICATIONS VEHICLE SPECIFICATIONS
VEHICLE SPECIFICATIONS
9-1 Liter
55
Item
Battery
Alternator
9. 9.9. 9.
9.
VEHICLE SPECIFICA VEHICLE SPECIFICAVEHICLE SPECIFICA VEHICLE SPECIFICA
VEHICLE SPECIFICA
TIONS TIONSTIONS TIONS
TIONS
Rack and pinion
0 ~ 1.18 in. (0 ~ 30 mm)
5.4 in. (138 mm)
Vane type
in. (mm)
9 99 9
9
Overall length
Overall width
Overall height (unladen)
Wheel base
Wheel tread
J010A01E-AAT
MEASUREMENT MEASUREMENTMEASUREMENT MEASUREMENT
MEASUREMENT
177.5(4510 )
67.7 (1720)
56.1 (1425)
102.8 (2610)
58.5 (1485)
58.1(1475 ) Front
Rear
J020A01S-AAT
POWER STEERING POWER STEERINGPOWER STEERING POWER STEERING
POWER STEERING
Type
Wheel free play
Rack stroke
Oil pump type
J060A01S-AAT
FUEL SYSTEM FUEL SYSTEMFUEL SYSTEM FUEL SYSTEM
FUEL SYSTEM
Fuel tank
capacityUS.gal
14.5Imp.gal
12
J040A02E-AAT
ELECTRICAL ELECTRICALELECTRICAL ELECTRICAL
ELECTRICAL
MF60AH (12V)
90A (13.5V)
J050A01S-AAT
BRAKE BRAKEBRAKE BRAKE
BRAKE
Type
Front brake type
Rear brake type
Parking brakeDual hydraulic with brake booster
Ventilated disc
Ventilated disc (With ABS)
Drum (Without ABS)
Cable Tire
Standard
Spare
Size
P195/60 R15
T125/70(R)D15
J030A02E-AAT
TIRE TIRETIRE TIRE
TIRE
Tire pressure
30(210)
60(420)
psi (kpa)
Page 169 of 172
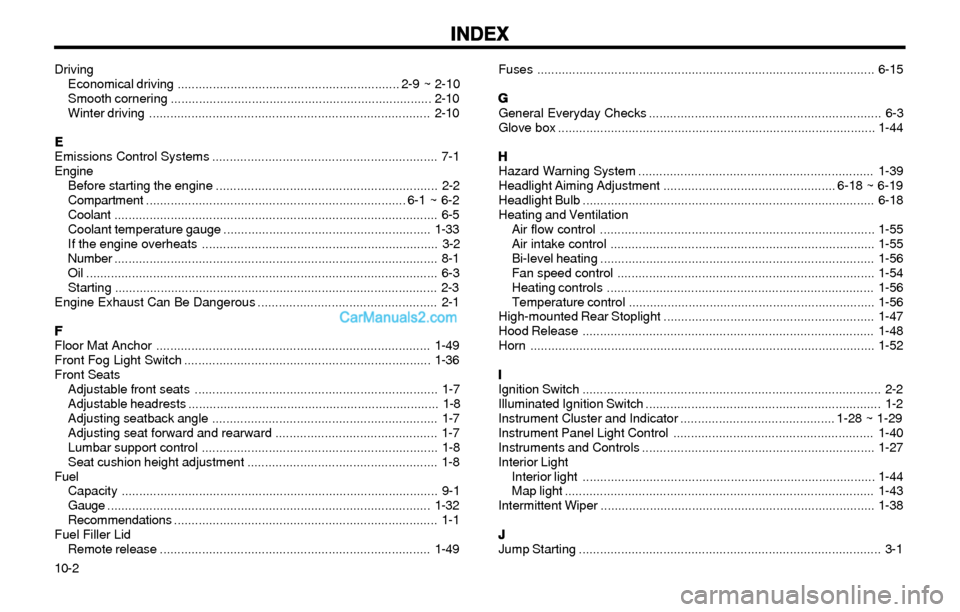
INDEX INDEXINDEX INDEX
INDEX
10-2Driving
Economical driving ............................................................... 2-9 ~ 2-10
Smooth cornering ..........................................................................2-10
Winter driving ................................................................................2-10
E EE E
E
Emissions Control Systems ................................................................ 7-1
Engine
Before starting the engine ............................................................... 2-2
Compartment.......................................................................... 6-1 ~ 6-2
Coolant............................................................................................ 6-5
Coolant temperature gauge ...........................................................1-33
If the engine overheats ................................................................... 3-2
Number............................................................................................ 8-1
Oil .................................................................................................... 6-3
Starting ............................................................................................ 2-3
Engine Exhaust Can Be Dangerous ................................................... 2-1
F FF F
F
Floor Mat Anchor ..............................................................................1-49
Front Fog Light Switch ......................................................................1-36
Front Seats
Adjustable front seats ..................................................................... 1-7
Adjustable headrests ....................................................................... 1-8
Adjusting seatback angle ................................................................ 1-7
Adjusting seat forward and rearward .............................................. 1-7
Lumbar support control ................................................................... 1-8
Seat cushion height adjustment ...................................................... 1-8
Fuel
Capacity .......................................................................................... 9-1
Gauge............................................................................................1-32
Recommendations........................................................................... 1-1
Fuel Filler Lid
Remote release .............................................................................1-49Fuses ................................................................................................6-15
G GG G
G
General Everyday Checks .................................................................. 6-3
Glove box ..........................................................................................1-44
H HH H
H
Hazard Warning System ...................................................................1-39
Headlight Aiming Adjustment ................................................. 6-18 ~ 6-19
Headlight Bulb ...................................................................................6-18
Heating and Ventilation
Air flow control ..............................................................................1-55
Air intake control ...........................................................................1-55
Bi-level heating ..............................................................................1-56
Fan speed control .........................................................................1-54
Heating controls ............................................................................1-56
Temperature control ......................................................................1-56
High-mounted Rear Stoplight ............................................................1-47
Hood Release ...................................................................................1-48
Horn ..................................................................................................1-52
I II I
I
Ignition Switch ..................................................................................... 2-2
Illuminated Ignition Switch ................................................................... 1-2
Instrument Cluster and Indicator ............................................ 1-28 ~ 1-29
Instrument Panel Light Control .........................................................1-40
Instruments and Controls ..................................................................1-27
Interior Light
Interior light ...................................................................................1-44
Map light ........................................................................................1-43
Intermittent Wiper ..............................................................................1-38
J JJ J
J
Jump Starting ...................................................................................... 3-1