Remove seat Hyundai Elantra 2009 Owner's Manual
[x] Cancel search | Manufacturer: HYUNDAI, Model Year: 2009, Model line: Elantra, Model: Hyundai Elantra 2009Pages: 345, PDF Size: 19.91 MB
Page 23 of 345
35
Safety features of your vehicle
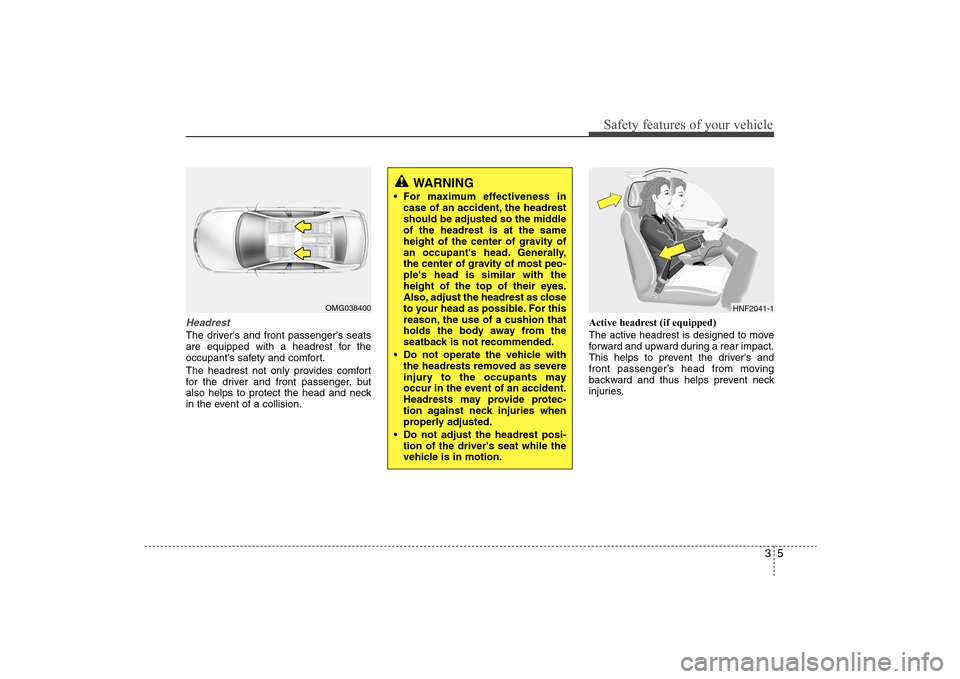
HeadrestThe driver's and front passenger's seats
are equipped with a headrest for the
occupant's safety and comfort.
The headrest not only provides comfort
for the driver and front passenger, but
also helps to protect the head and neck
in the event of a collision.Active headrest (if equipped)
The active headrest is designed to move
forward and upward during a rear impact.
This helps to prevent the driver's and
front passenger’s head from moving
backward and thus helps prevent neck
injuries.
OMG038400
WARNING
For maximum effectiveness in
case of an accident, the headrest
should be adjusted so the middle
of the headrest is at the same
height of the center of gravity of
an occupant's head. Generally,
the center of gravity of most peo-
ple's head is similar with the
height of the top of their eyes.
Also, adjust the headrest as close
to your head as possible. For this
reason, the use of a cushion that
holds the body away from the
seatback is not recommended.
Do not operate the vehicle with
the headrests removed as severe
injury to the occupants may
occur in the event of an accident.
Headrests may provide protec-
tion against neck injuries when
properly adjusted.
Do not adjust the headrest posi-
tion of the driver's seat while the
vehicle is in motion.
HNF2041-1
Page 27 of 345
39
Safety features of your vehicle
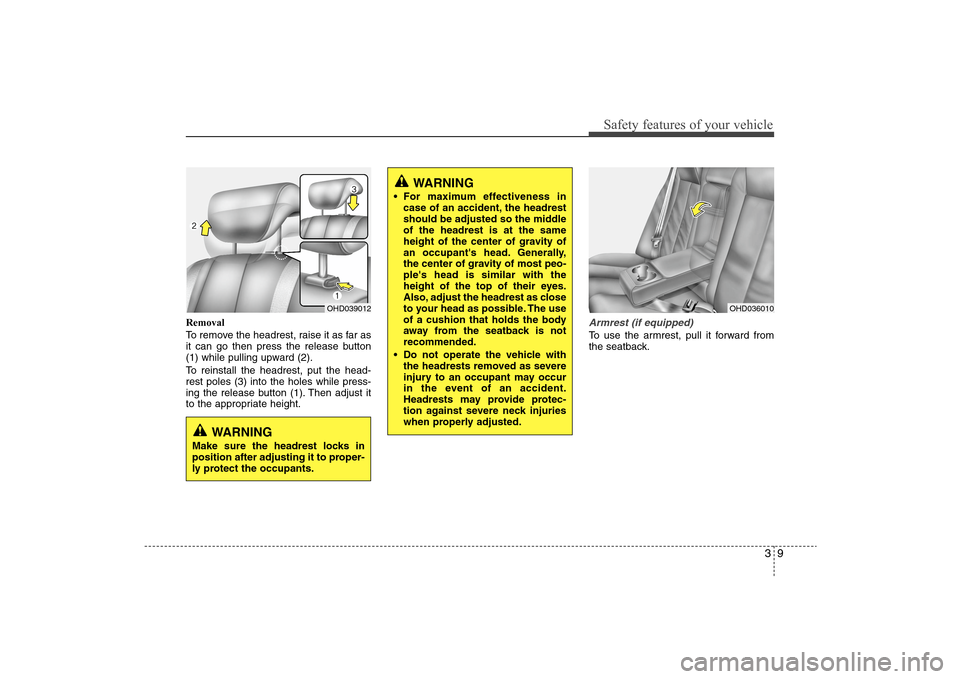
Removal
To remove the headrest, raise it as far as
it can go then press the release button
(1) while pulling upward (2).
To reinstall the headrest, put the head-
rest poles (3) into the holes while press-
ing the release button (1). Then adjust it
to the appropriate height.
Armrest (if equipped)To use the armrest, pull it forward from
the seatback.
WARNING
For maximum effectiveness in
case of an accident, the headrest
should be adjusted so the middle
of the headrest is at the same
height of the center of gravity of
an occupant's head. Generally,
the center of gravity of most peo-
ple's head is similar with the
height of the top of their eyes.
Also, adjust the headrest as close
to your head as possible. The use
of a cushion that holds the body
away from the seatback is not
recommended.
Do not operate the vehicle with
the headrests removed as severe
injury to an occupant may occur
in the event of an accident.
Headrests may provide protec-
tion against severe neck injuries
when properly adjusted.
OHD039012
WARNING
Make sure the headrest locks in
position after adjusting it to proper-
ly protect the occupants.
OHD036010
Page 43 of 345
325
Safety features of your vehicle
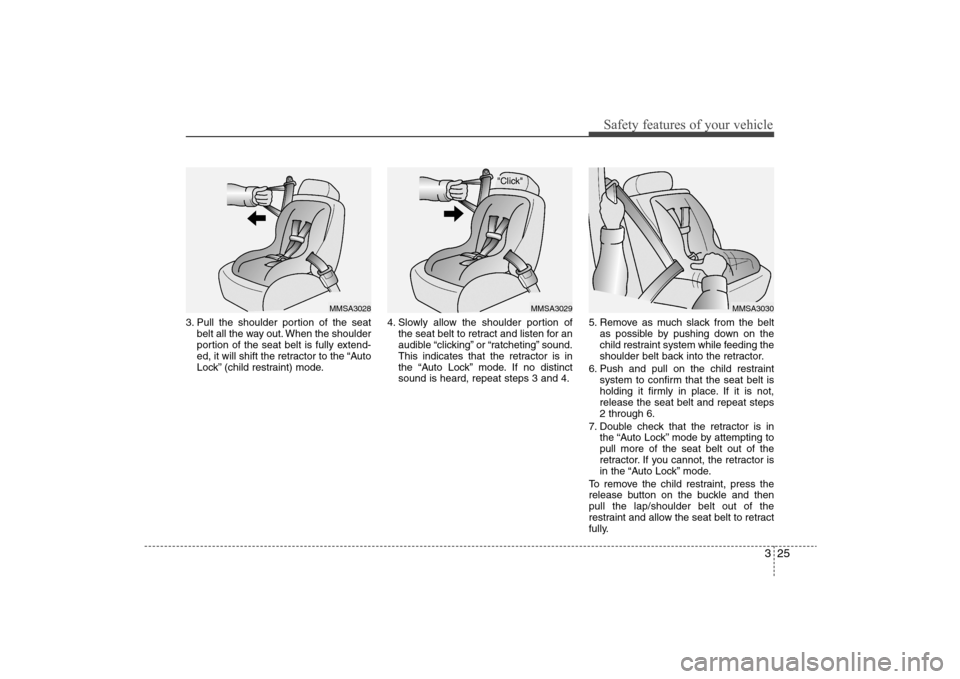
3. Pull the shoulder portion of the seat
belt all the way out. When the shoulder
portion of the seat belt is fully extend-
ed, it will shift the retractor to the “Auto
Lock” (child restraint) mode.4. Slowly allow the shoulder portion of
the seat belt to retract and listen for an
audible “clicking” or “ratcheting” sound.
This indicates that the retractor is in
the “Auto Lock” mode. If no distinct
sound is heard, repeat steps 3 and 4.5. Remove as much slack from the belt
as possible by pushing down on the
child restraint system while feeding the
shoulder belt back into the retractor.
6. Push and pull on the child restraint
system to confirm that the seat belt is
holding it firmly in place. If it is not,
release the seat belt and repeat steps
2 through 6.
7. Double check that the retractor is in
the “Auto Lock” mode by attempting to
pull more of the seat belt out of the
retractor. If you cannot, the retractor is
in the “Auto Lock” mode.
To remove the child restraint, press the
release button on the buckle and then
pull the lap/shoulder belt out of the
restraint and allow the seat belt to retract
fully.
MMSA3028
MMSA3029
MMSA3030
Page 51 of 345
333
Safety features of your vehicle
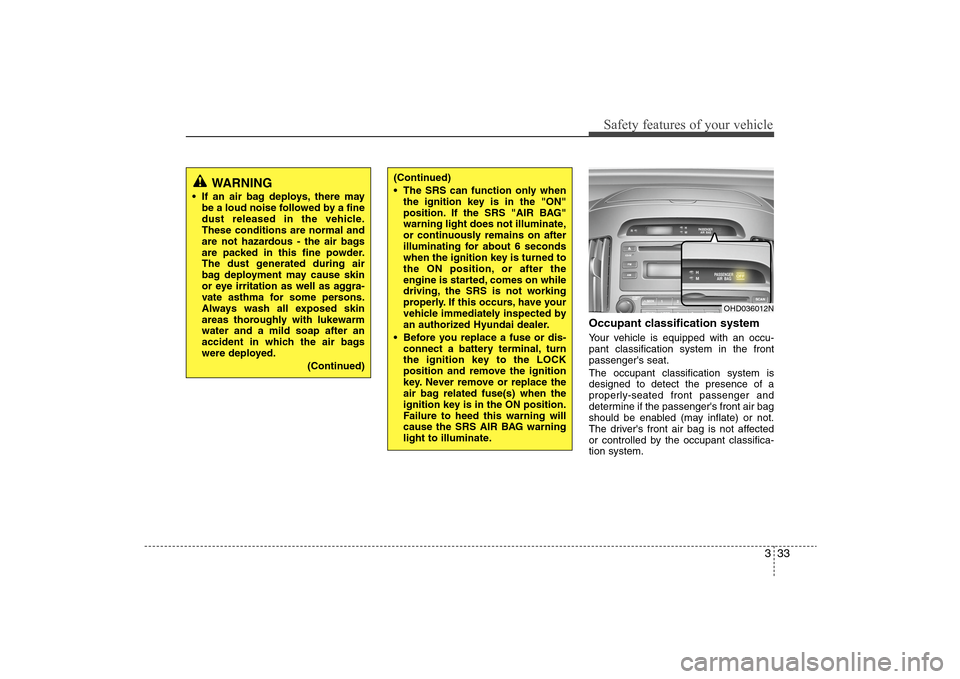
Occupant classification systemYour vehicle is equipped with an occu-
pant classification system in the front
passenger's seat.
The occupant classification system is
designed to detect the presence of a
properly-seated front passenger and
determine if the passenger's front air bag
should be enabled (may inflate) or not.
The driver's front air bag is not affected
or controlled by the occupant classifica-
tion system.
WARNING
If an air bag deploys, there may
be a loud noise followed by a fine
dust released in the vehicle.
These conditions are normal and
are not hazardous - the air bags
are packed in this fine powder.
The dust generated during air
bag deployment may cause skin
or eye irritation as well as aggra-
vate asthma for some persons.
Always wash all exposed skin
areas thoroughly with lukewarm
water and a mild soap after an
accident in which the air bags
were deployed.
(Continued)
(Continued)
The SRS can function only when
the ignition key is in the "ON"
position. If the SRS "AIR BAG"
warning light does not illuminate,
or continuously remains on after
illuminating for about 6 seconds
when the ignition key is turned to
the ON position, or after the
engine is started, comes on while
driving, the SRS is not working
properly. If this occurs, have your
vehicle immediately inspected by
an authorized Hyundai dealer.
Before you replace a fuse or dis-
connect a battery terminal, turn
the ignition key to the LOCK
position and remove the ignition
key. Never remove or replace the
air bag related fuse(s) when the
ignition key is in the ON position.
Failure to heed this warning will
cause the SRS AIR BAG warning
light to illuminate.
OHD036012N
Page 61 of 345
343
Safety features of your vehicle(Continued)
Sitting improperly or out of posi-
tion can result in serious or fatal
injury in a crash. All occupants
should sit upright with the seat
back in an upright position, cen-
tered on the seat cushion with
their seat belt on, legs comfort-
ably extended and their feet on
the floor until the vehicle is
parked and the ignition key is
removed.
The SRS air bag system must
deploy very rapidly to provide
protection in a crash. If an occu-
pant is out of position because of
not wearing a seat belt, the air
bag may forcefully contact the
occupant causing serious or fatal
injuries.
(Continued)
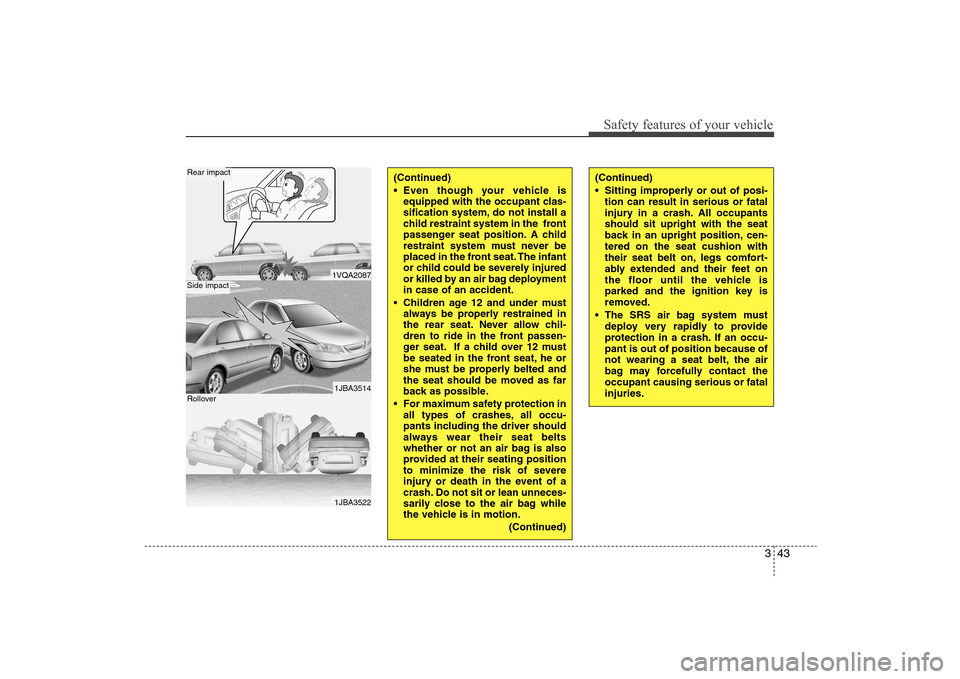
Even though your vehicle is
equipped with the occupant clas-
sification system, do not install a
child restraint system in the front
passenger seat position. A child
restraint system must never be
placed in the front seat. The infant
or child could be severely injured
or killed by an air bag deployment
in case of an accident.
Children age 12 and under must
always be properly restrained in
the rear seat. Never allow chil-
dren to ride in the front passen-
ger seat. If a child over 12 must
be seated in the front seat, he or
she must be properly belted and
the seat should be moved as far
back as possible.
For maximum safety protection in
all types of crashes, all occu-
pants including the driver should
always wear their seat belts
whether or not an air bag is also
provided at their seating position
to minimize the risk of severe
injury or death in the event of a
crash. Do not sit or lean unneces-
sarily close to the air bag while
the vehicle is in motion.
(Continued)
1VQA20871JBA35141JBA3522
Rear impactSide impactRollover
Page 255 of 345
What to do in an emergency16 6
10. To reinstall the wheel, hold it on
the studs, put the wheel nuts on
the studs and tighten them finger
tight. The nuts should be installed
with their tapered small diameter
ends directed inward. Jiggle the
tire to be sure it is completely
seated, then tighten the nuts as
much as possible with your fin-
gers again.
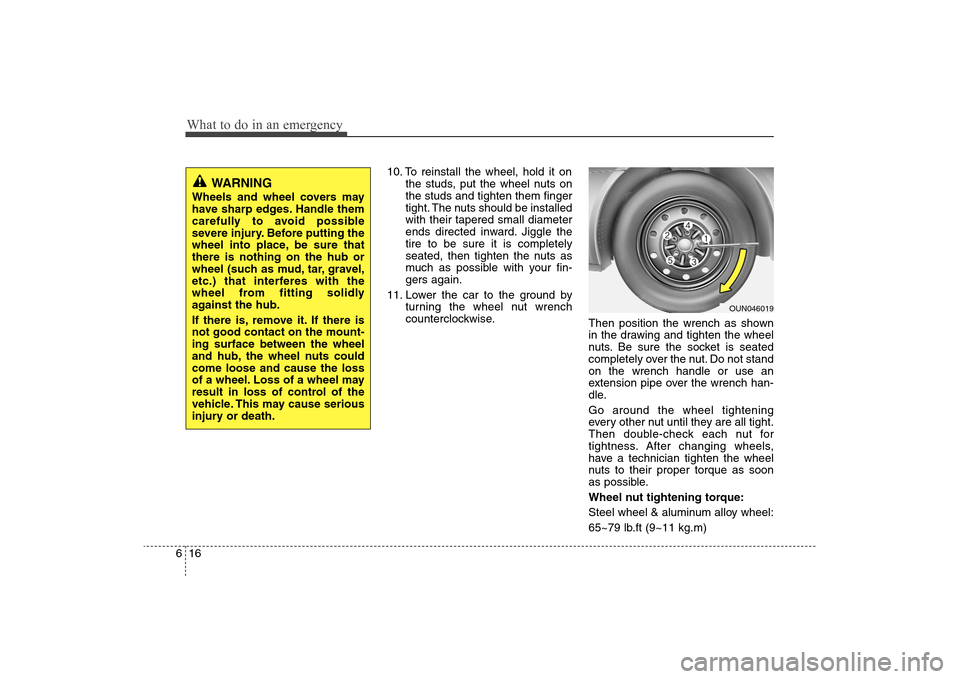
11. Lower the car to the ground by
turning the wheel nut wrench
counterclockwise.
Then position the wrench as shown
in the drawing and tighten the wheel
nuts. Be sure the socket is seated
completely over the nut. Do not stand
on the wrench handle or use an
extension pipe over the wrench han-
dle.
Go around the wheel tightening
every other nut until they are all tight.
Then double-check each nut for
tightness. After changing wheels,
have a technician tighten the wheel
nuts to their proper torque as soon
as possible.
Wheel nut tightening torque:
Steel wheel & aluminum alloy wheel:
65~79 lb.ft (9~11 kg.m)
OUN046019
WARNING
Wheels and wheel covers may
have sharp edges. Handle them
carefully to avoid possible
severe injury. Before putting the
wheel into place, be sure that
there is nothing on the hub or
wheel (such as mud, tar, gravel,
etc.) that interferes with the
wheel from fitting solidly
against the hub.
If there is, remove it. If there is
not good contact on the mount-
ing surface between the wheel
and hub, the wheel nuts could
come loose and cause the loss
of a wheel. Loss of a wheel may
result in loss of control of the
vehicle. This may cause serious
injury or death.