fog light Hyundai Elantra 2009 Инструкция по эксплуатации (in Russian)
[x] Cancel search | Manufacturer: HYUNDAI, Model Year: 2009, Model line: Elantra, Model: Hyundai Elantra 2009Pages: 308, PDF Size: 15.03 MB
Page 6 of 308
Introduction
6
1
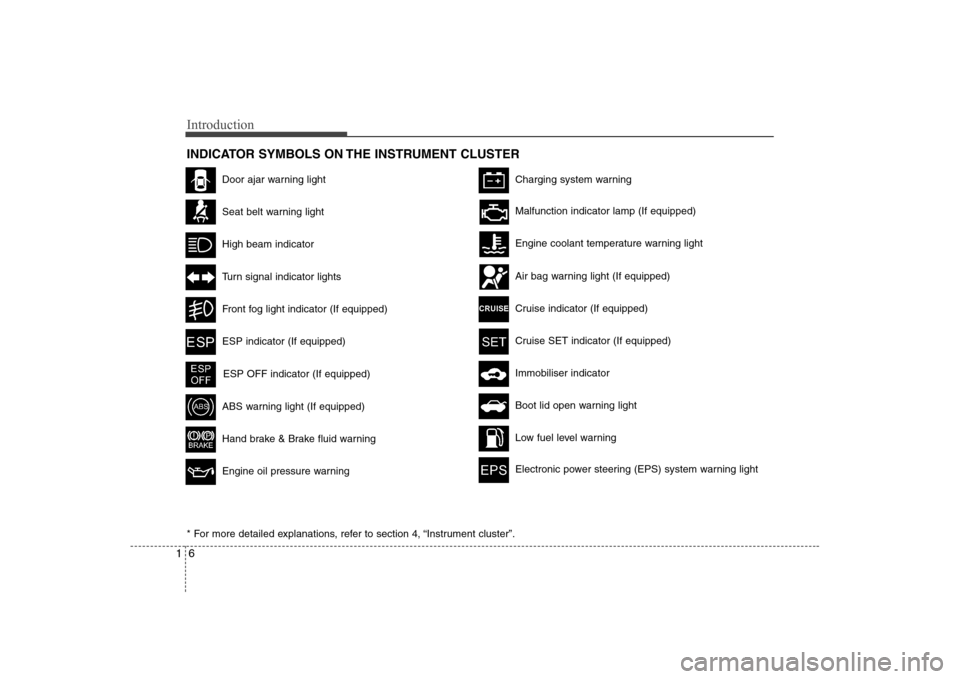
INDICATOR SYMBOLS ON THE INSTRUMENT CLUSTER
Door ajar warning light
Seat belt warning light
High beam indicator
Turn signal indicator lights
Front fog light indicator (If equipped)
ABS warning light (If equipped)
Hand brake & Brake fluid warning
Engine oil pressure warning
Charging system warning
ESP indicator (If equipped)
ESP OFF indicator (If equipped)
Malfunction indicator lamp (If equipped)
Air bag warning light (If equipped)
Cruise indicator (If equipped)
Cruise SET indicator (If equipped)
Immobiliser indicator
Low fuel level warning
Electronic power steering (EPS) system warning light
Boot lid open warning light
* For more detailed explanations, refer to section 4, “Instrument cluster”.
Engine coolant temperature warning light
Page 56 of 308
4
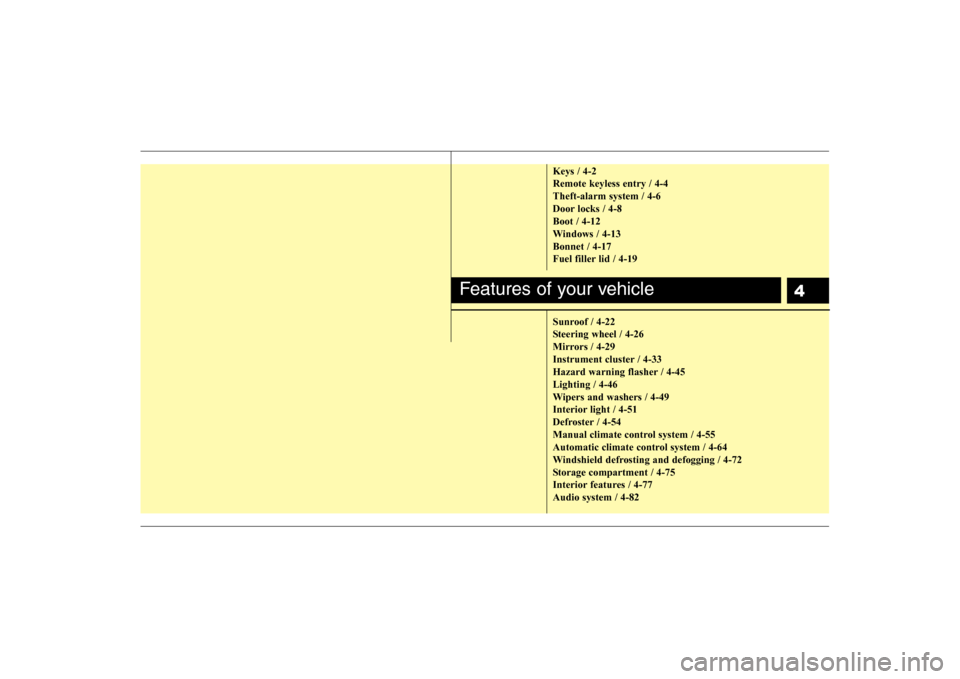
Keys / 4-2 Remote keyless entry / 4-4Theft-alarm system / 4-6
Door locks / 4-8Boot / 4-12
Windows / 4-13Bonnet / 4-17
Fuel filler lid / 4-19
Sunroof / 4-22
Steering wheel / 4-26
Mirrors / 4-29
Instrument cluster / 4-33
Hazard warning flasher / 4-45Lighting / 4-46
Wipers and washers / 4-49
Interior light / 4-51
Defroster / 4-54
Manual climate control system / 4-55
Automatic climate control system / 4-64
Windshield defrosting and defogging / 4-72
Storage compartment / 4-75
Interior features / 4-77Audio system / 4-82
Features of your vehicle
Page 97 of 308
Features of your vehicle
42
4
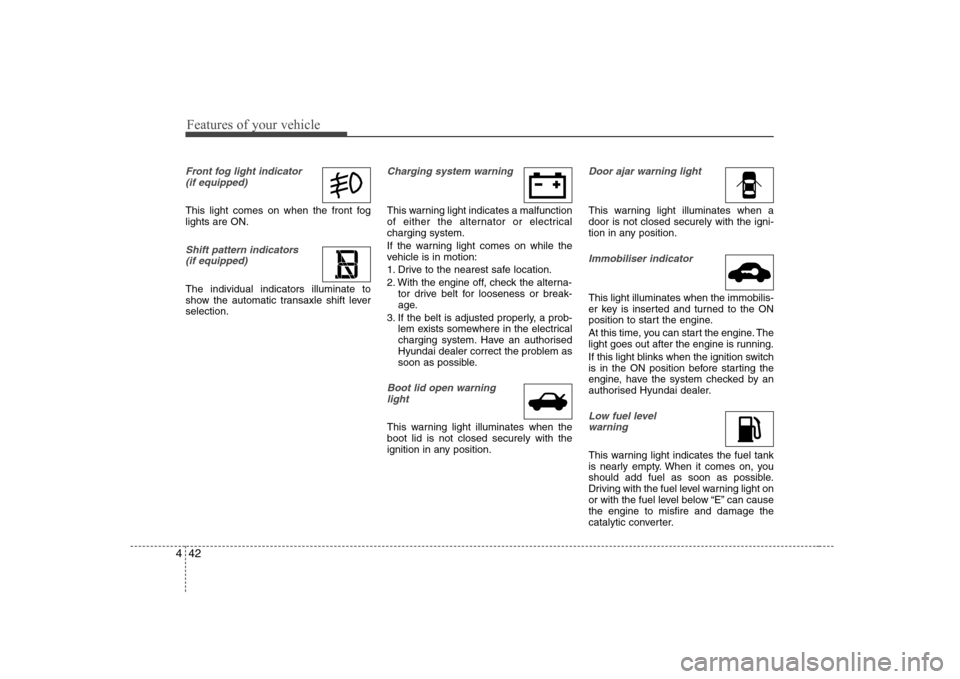
Front fog light indicator
(if equipped)
This light comes on when the front fog lights are ON.
Shift pattern indicators (if equipped)
The individual indicators illuminate to
show the automatic transaxle shift leverselection.
Charging system warning
This warning light indicates a malfunction
of either the alternator or electricalcharging system.
If the warning light comes on while the
vehicle is in motion:
1. Drive to the nearest safe location.
2. With the engine off, check the alterna- tor drive belt for looseness or break-
age.
3. If the belt is adjusted properly, a prob- lem exists somewhere in the electrical
charging system. Have an authorised
Hyundai dealer correct the problem as
soon as possible.
Boot lid open warning
light
This warning light illuminates when the boot lid is not closed securely with the
ignition in any position.
Door ajar warning light
This warning light illuminates when a door is not closed securely with the igni-
tion in any position.
Immobiliser indicator
This light illuminates when the immobilis-
er key is inserted and turned to the ON
position to start the engine.
At this time, you can start the engine. The
light goes out after the engine is running.
If this light blinks when the ignition switch
is in the ON position before starting the
engine, have the system checked by an
authorised Hyundai dealer.
Low fuel level warning
This warning light indicates the fuel tank
is nearly empty. When it comes on, you
should add fuel as soon as possible.
Driving with the fuel level warning light on
or with the fuel level below “E” can causethe engine to misfire and damage the
catalytic converter.
Page 103 of 308
Features of your vehicle
48
4
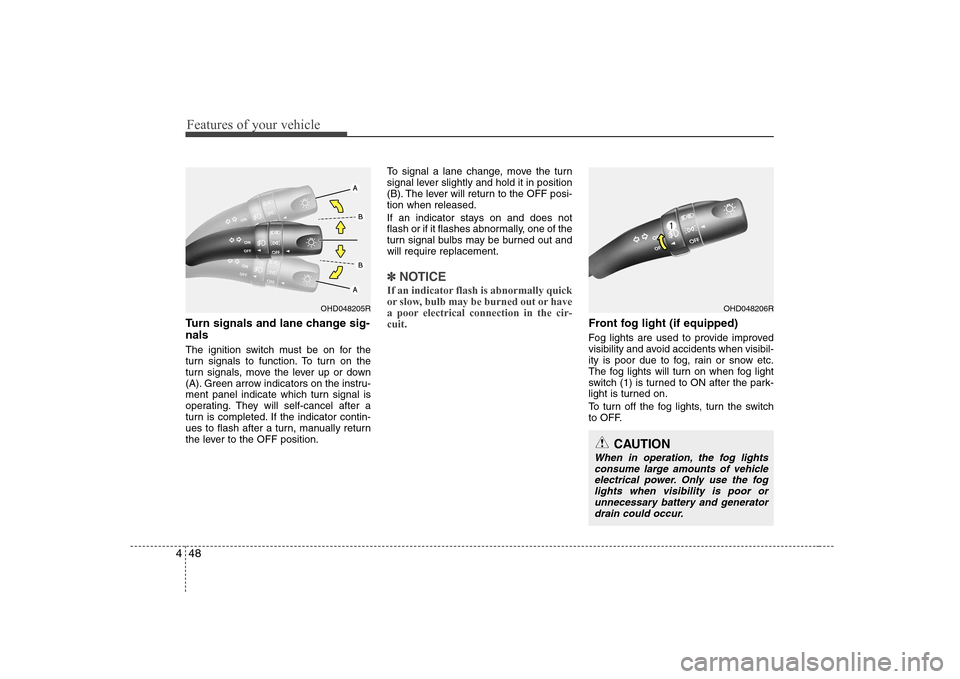
Turn signals and lane change sig- nals
The ignition switch must be on for the
turn signals to function. To turn on the
turn signals, move the lever up or down
(A). Green arrow indicators on the instru-
ment panel indicate which turn signal is
operating. They will self-cancel after a
turn is completed. If the indicator contin-
ues to flash after a turn, manually return
the lever to the OFF position. To signal a lane change, move the turn
signal lever slightly and hold it in position
(B). The lever will return to the OFF posi-tion when released.
If an indicator stays on and does not
flash or if it flashes abnormally, one of the
turn signal bulbs may be burned out andwill require replacement.
✽✽
NOTICE
If an indicator flash is abnormally quick
or slow, bulb may be burned out or have
a poor electrical connection in the cir-cuit.
Front fog light (if equipped)
Fog lights are used to provide improved
visibility and avoid accidents when visibil-
ity is poor due to fog, rain or snow etc.
The fog lights will turn on when fog light
switch (1) is turned to ON after the park-
light is turned on.
To turn off the fog lights, turn the switch
to OFF.
OHD048205ROHD048206R
CAUTION
When in operation, the fog lights consume large amounts of vehicle
electrical power. Only use the foglights when visibility is poor or unnecessary battery and generatordrain could occur.
Page 104 of 308
449
Features of your vehicle
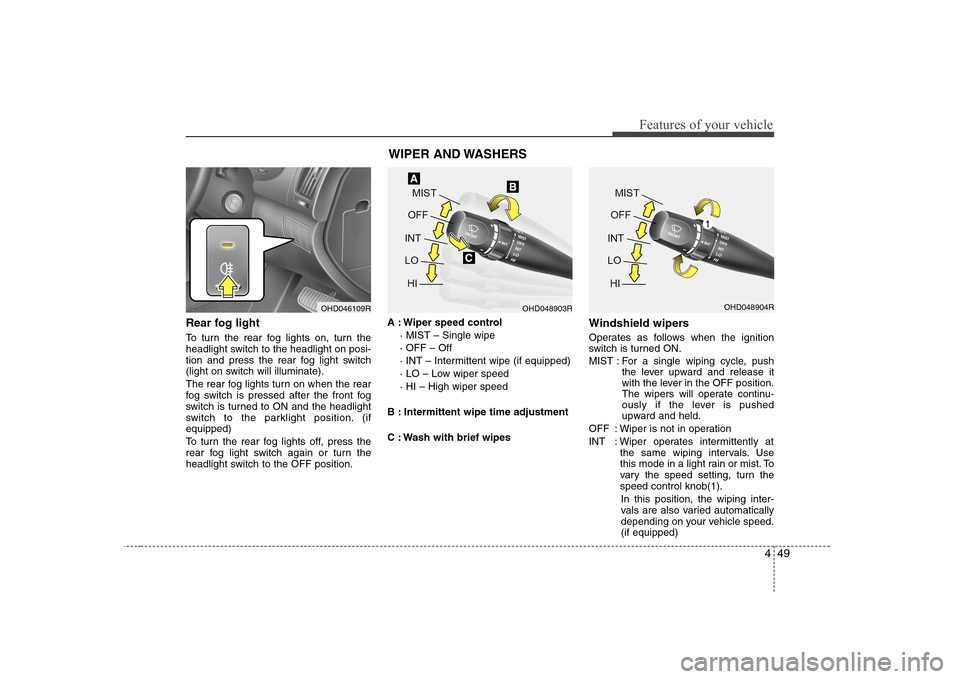
Rear fog light
To turn the rear fog lights on, turn the
headlight switch to the headlight on posi-
tion and press the rear fog light switch
(light on switch will illuminate).
The rear fog lights turn on when the rear
fog switch is pressed after the front fog
switch is turned to ON and the headlight
switch to the parklight position. (ifequipped)
To turn the rear fog lights off, press the
rear fog light switch again or turn the
headlight switch to the OFF position.A : Wiper speed control
· MIST – Single wipe · OFF – Off
· INT – Intermittent wipe (if equipped)
· LO – Low wiper speed· HI – High wiper speed
B : Intermittent wipe time adjustment
C : Wash with brief wipes Windshield wipers
Operates as follows when the ignition
switch is turned ON.
MIST : For a single wiping cycle, push
the lever upward and release it
with the lever in the OFF position.
The wipers will operate continu-
ously if the lever is pushed
upward and held.
OFF : Wiper is not in operation
INT : Wiper operates intermittently at the same wiping intervals. Use
this mode in a light rain or mist. To
vary the speed setting, turn thespeed control knob(1).
In this position, the wiping inter-
vals are also varied automatically
depending on your vehicle speed.(if equipped)
OHD046109R WIPER AND WASHERSOHD048903ROHD048904R
Page 114 of 308
459
Features of your vehicle
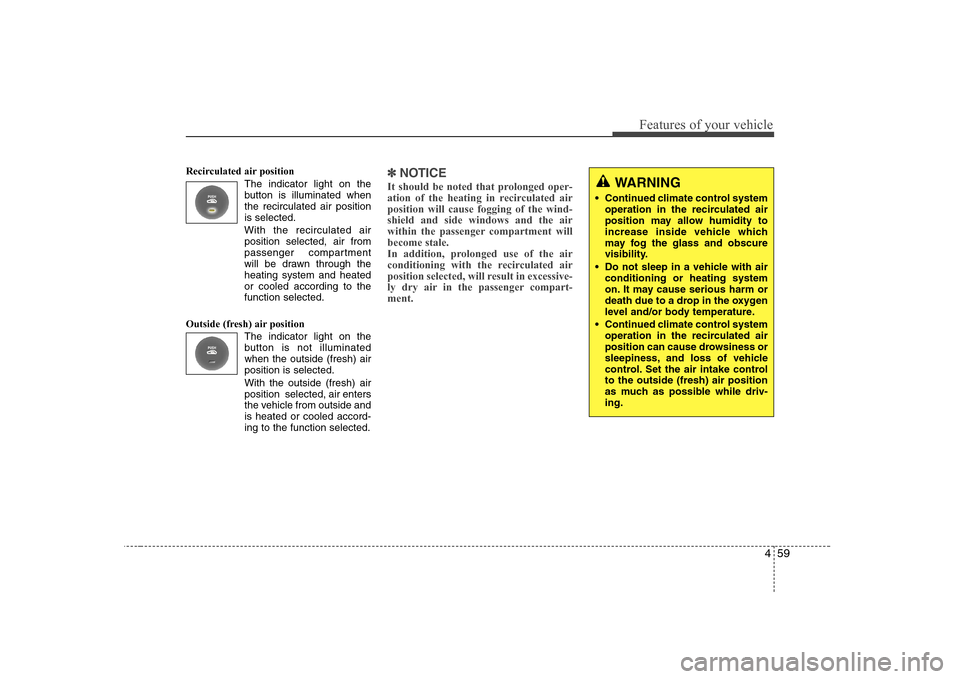
Recirculated air position The indicator light on the
button is illuminated whenthe recirculated air positionis selected.
With the recirculated air position selected, air from
passenger compartment
will be drawn through theheating system and heatedor cooled according to thefunction selected.
Outside (fresh) air position The indicator light on the
button is not illuminatedwhen the outside (fresh) airposition is selected. With the outside (fresh) air position selected, air enters
the vehicle from outside andis heated or cooled accord-ing to the function selected.✽✽NOTICE
It should be noted that prolonged oper-
ation of the heating in recirculated airposition will cause fogging of the wind-shield and side windows and the air
within the passenger compartment willbecome stale.
In addition, prolonged use of the air
conditioning with the recirculated air
position selected, will result in excessive-
ly dry air in the passenger compart-ment. WARNING
• Continued climate control system operation in the recirculated air
position may allow humidity to
increase inside vehicle which
may fog the glass and obscure
visibility.
Do not sleep in a vehicle with air conditioning or heating system
on. It may cause serious harm or
death due to a drop in the oxygen
level and/or body temperature.
Continued climate control system operation in the recirculated air
position can cause drowsiness or
sleepiness, and loss of vehicle
control. Set the air intake controlto the outside (fresh) air position
as much as possible while driv-ing.
Page 115 of 308
Features of your vehicle
60
4
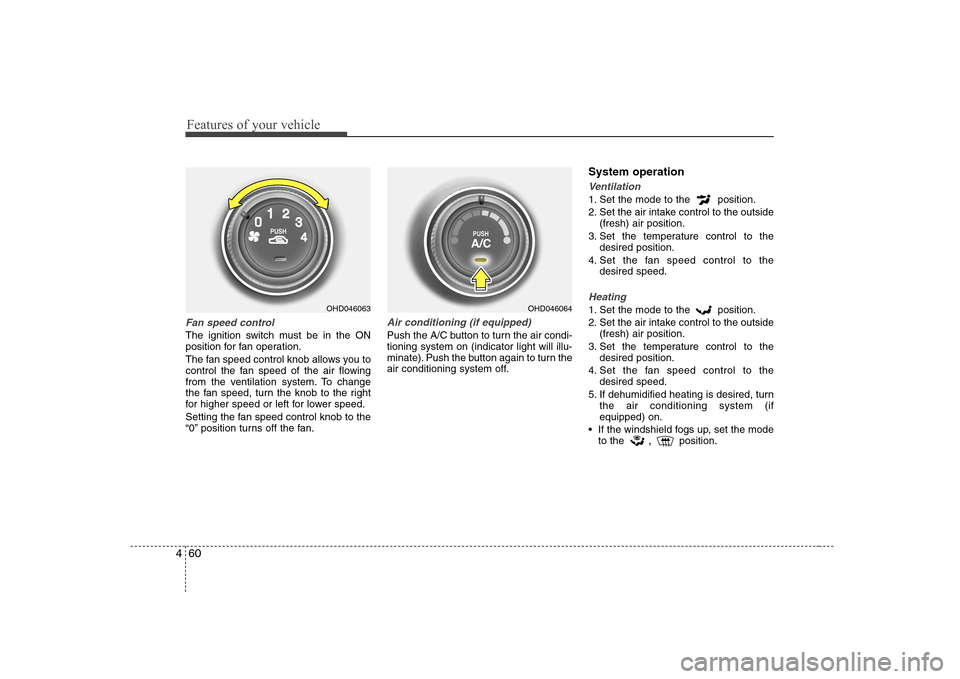
Fan speed control
The ignition switch must be in the ON
position for fan operation.
The fan speed control knob allows you to
control the fan speed of the air flowing
from the ventilation system. To change
the fan speed, turn the knob to the right
for higher speed or left for lower speed.
Setting the fan speed control knob to the
“0” position turns off the fan.
Air conditioning (if equipped)
Push the A/C button to turn the air condi- tioning system on (indicator light will illu-
minate). Push the button again to turn the
air conditioning system off. System operation
Ventilation
1. Set the mode to the position.
2. Set the air intake control to the outside
(fresh) air position.
3. Set the temperature control to the desired position.
4. Set the fan speed control to the desired speed.
Heating
1. Set the mode to the position.
2. Set the air intake control to the outside
(fresh) air position.
3. Set the temperature control to the desired position.
4. Set the fan speed control to the desired speed.
5. If dehumidified heating is desired, turn the air conditioning system (if equipped) on.
If the windshield fogs up, set the mode to the ,
position.OHD046063OHD046064
Page 124 of 308
469
Features of your vehicle
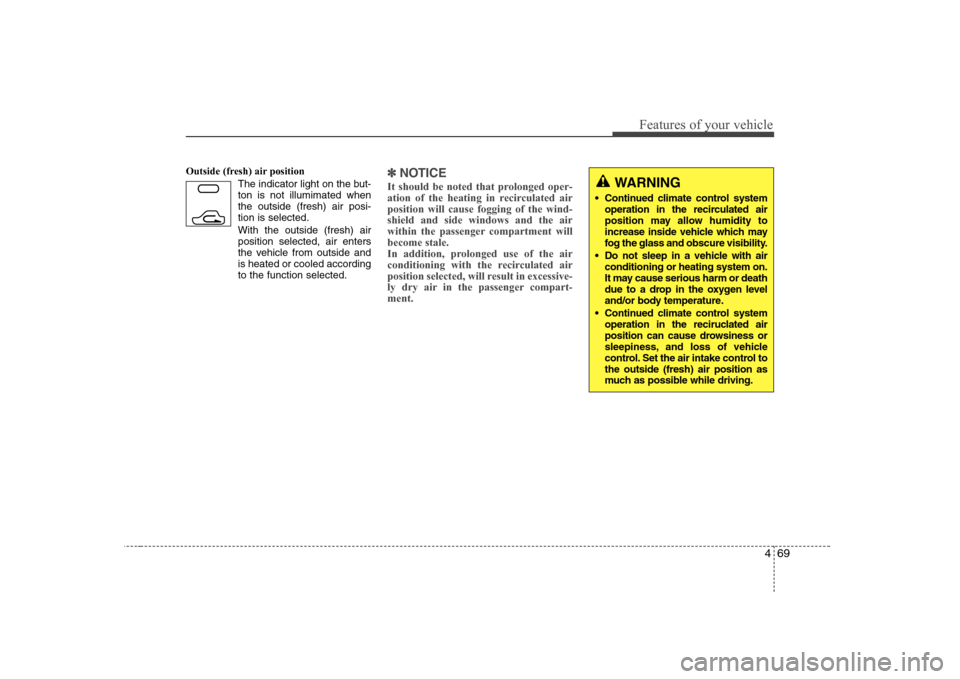
Outside (fresh) air positionThe indicator light on the but- ton is not illumimated whenthe outside (fresh) air posi-tion is selected. With the outside (fresh) air position selected, air enters
the vehicle from outside andis heated or cooled accordingto the function selected.✽✽NOTICE
It should be noted that prolonged oper-
ation of the heating in recirculated airposition will cause fogging of the wind-shield and side windows and the air
within the passenger compartment willbecome stale.
In addition, prolonged use of the air
conditioning with the recirculated air
position selected, will result in excessive-
ly dry air in the passenger compart-ment. WARNING
Continued climate control system operation in the recirculated air
position may allow humidity to
increase inside vehicle which may
fog the glass and obscure visibility.
Do not sleep in a vehicle with air conditioning or heating system on.
It may cause serious harm or death
due to a drop in the oxygen level
and/or body temperature.
Continued climate control system operation in the reciruclated air
position can cause drowsiness or
sleepiness, and loss of vehicle
control. Set the air intake control tothe outside (fresh) air position as
much as possible while driving.
Page 129 of 308
Features of your vehicle
74
4
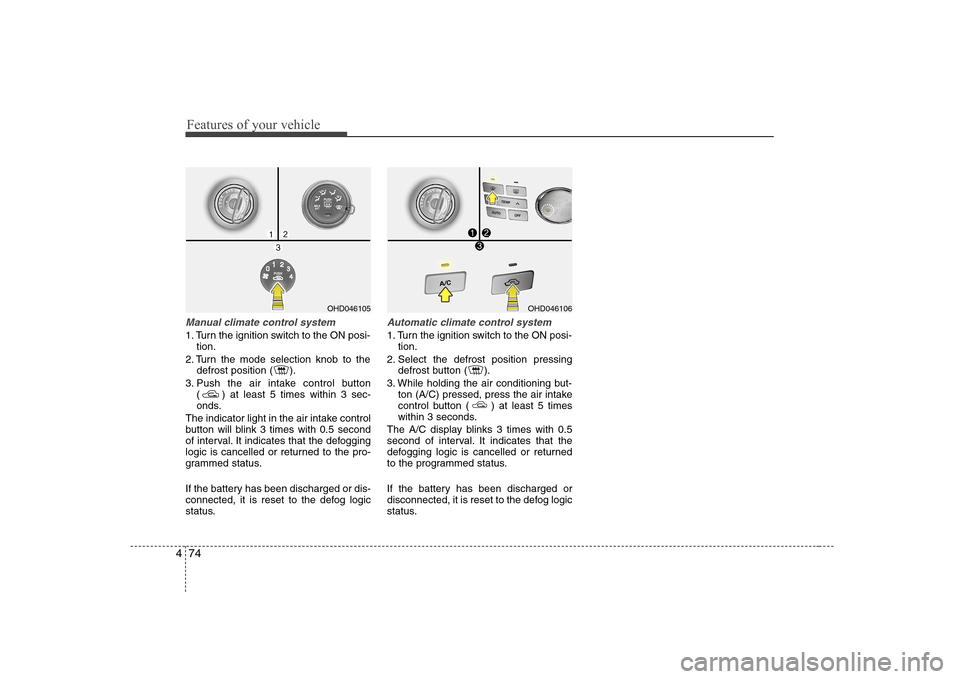
Manual climate control system
1. Turn the ignition switch to the ON posi-
tion.
2. Turn the mode selection knob to the defrost position ( ).
3. Push the air intake control button ( ) at least 5 times within 3 sec-
onds.
The indicator light in the air intake control
button will blink 3 times with 0.5 second
of interval. It indicates that the defogging
logic is cancelled or returned to the pro-
grammed status.
If the battery has been discharged or dis-
connected, it is reset to the defog logic
status.
Automatic climate control system
1. Turn the ignition switch to the ON posi- tion.
2. Select the defrost position pressing defrost button ( ).
3. While holding the air conditioning but- ton (A/C) pressed, press the air intake
control button ( ) at least 5 times
within 3 seconds.
The A/C display blinks 3 times with 0.5
second of interval. It indicates that the
defogging logic is cancelled or returned
to the programmed status.
If the battery has been discharged or
disconnected, it is reset to the defog logic
status.
OHD046105OHD046106
Page 271 of 308
Maintenance
46
7
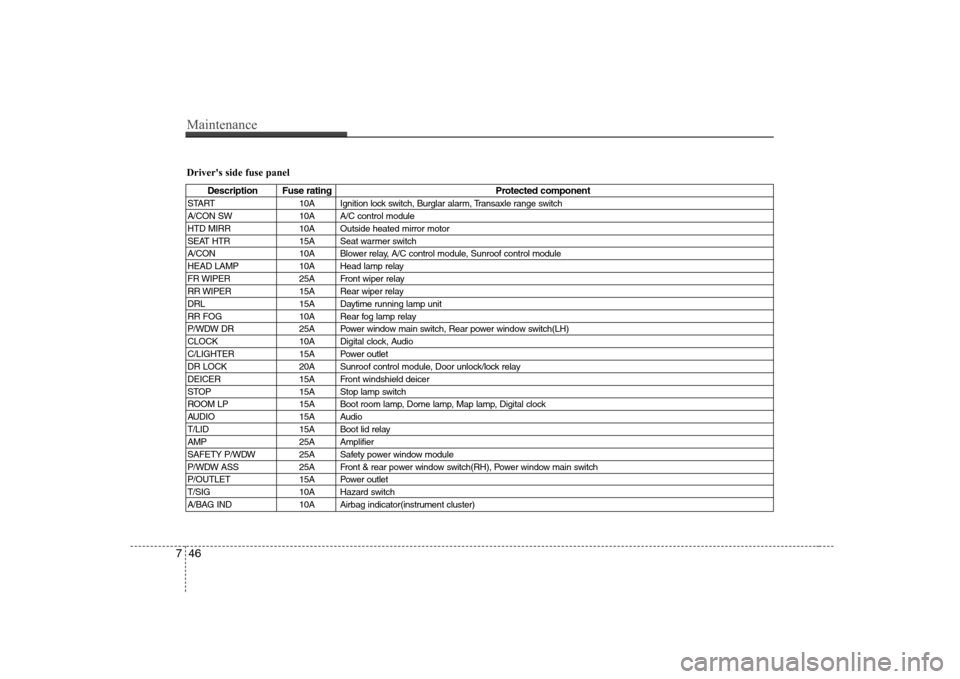
Driver's side fuse panel
Description Fuse rating Protected component
START 10A Ignition lock switch, Burglar alarm, Transaxle range switch
A/CON SW 10A A/C control module
HTD MIRR 10A Outside heated mirror motor
SEAT HTR 15A Seat warmer switch
A/CON 10A Blower relay, A/C control module, Sunroof control module
HEAD LAMP 10A Head lamp relay
FR WIPER 25A Front wiper relay
RR WIPER 15A Rear wiper relay
DRL 15A Daytime running lamp unit
RR FOG 10A Rear fog lamp relay
P/WDW DR 25A Power window main switch, Rear power window switch(LH)
CLOCK 10A Digital clock, Audio
C/LIGHTER 15A Power outlet
DR LOCK 20A Sunroof control module, Door unlock/lock relay
DEICER 15A Front windshield deicer
STOP 15A Stop lamp switch
ROOM LP 15A Boot room lamp, Dome lamp, Map lamp, Digital clock
AUDIO 15A Audio
T/LID 15A Boot lid relay
AMP 25A Amplifier
SAFETY P/WDW 25A Safety power window module
P/WDW ASS 25A Front & rear power window switch(RH), Power window main switch
P/OUTLET 15A Power outlet
T/SIG 10A Hazard switch
A/BAG IND 10A Airbag indicator(instrument cluster)