low gear Hyundai Elantra 2010 Owner's Manual
[x] Cancel search | Manufacturer: HYUNDAI, Model Year: 2010, Model line: Elantra, Model: Hyundai Elantra 2010Pages: 348, PDF Size: 5.78 MB
Page 122 of 348
449
Features of your vehicle
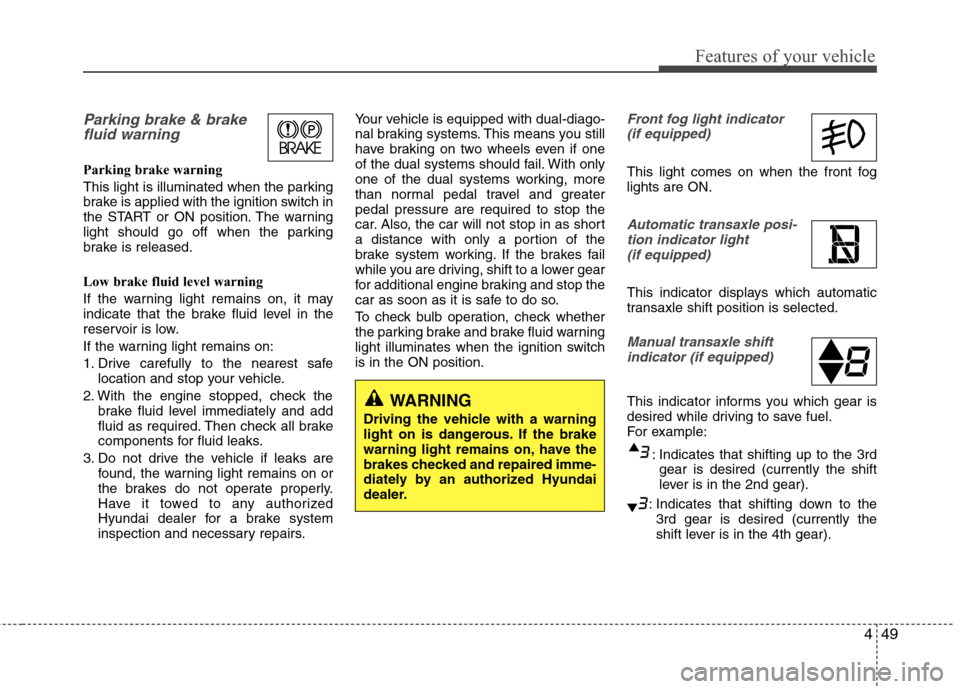
Parking brake & brakefluid warning
Parking brake warning
This light is illuminated when the parking
brake is applied with the ignition switch in
the START or ON position. The warning
light should go off when the parking
brake is released.
Low brake fluid level warning
If the warning light remains on, it may
indicate that the brake fluid level in the
reservoir is low.
If the warning light remains on:
1. Drive carefully to the nearest safe
location and stop your vehicle.
2. With the engine stopped, check the brake fluid level immediately and add
fluid as required. Then check all brake
components for fluid leaks.
3. Do not drive the vehicle if leaks are found, the warning light remains on or
the brakes do not operate properly.
Have it towed to any authorized
Hyundai dealer for a brake system
inspection and necessary repairs. Your vehicle is equipped with dual-diago-
nal braking systems. This means you still
have braking on two wheels even if one
of the dual systems should fail. With only
one of the dual systems working, more
than normal pedal travel and greater
pedal pressure are required to stop the
car. Also, the car will not stop in as short
a distance with only a portion of the
brake system working. If the brakes fail
while you are driving, shift to a lower gear
for additional engine braking and stop the
car as soon as it is safe to do so.
To check bulb operation, check whether
the parking brake and brake fluid warning
light illuminates when the ignition switch
is in the ON position.
Front fog light indicator
(if equipped)
This light comes on when the front fog
lights are ON.
Automatic transaxle posi- tion indicator light (if equipped)
This indicator displays which automatic
transaxle shift position is selected.
Manual transaxle shiftindicator (if equipped)
This indicator informs you which gear is
desired while driving to save fuel.
For example:
: Indicates that shifting up to the 3rdgear is desired (currently the shift
lever is in the 2nd gear).
: Indicates that shifting down to the 3rd gear is desired (currently the
shift lever is in the 4th gear).
WARNING
Driving the vehicle with a warning
light on is dangerous. If the brake
warning light remains on, have the
brakes checked and repaired imme-
diately by an authorized Hyundai
dealer.
Page 199 of 348
57
Driving your vehicle
Manual transaxle operation
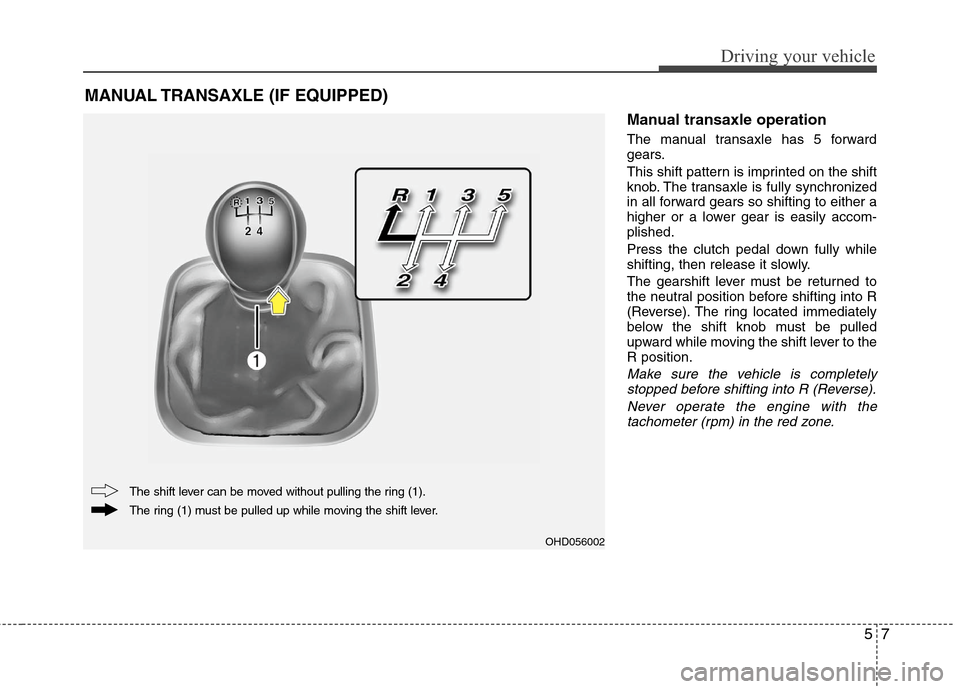
The manual transaxle has 5 forward
gears.
This shift pattern is imprinted on the shift
knob. The transaxle is fully synchronized
in all forward gears so shifting to either a
higher or a lower gear is easily accom-
plished.
Press the clutch pedal down fully while
shifting, then release it slowly.
The gearshift lever must be returned to
the neutral position before shifting into R
(Reverse). The ring located immediately
below the shift knob must be pulled
upward while moving the shift lever to the
R position.
Make sure the vehicle is completelystopped before shifting into R (Reverse).
Never operate the engine with thetachometer (rpm) in the red zone.
MANUAL TRANSAXLE (IF EQUIPPED)
OHD056002
The ring (1) must be pulled up while moving the shift lever. The shift lever can be moved without pulling the ring (1).
Page 200 of 348
Driving your vehicle
8
5
To shift into reverse, rest the lever in
neutral for at least 3 seconds after your
car is completely stopped. Then move
the lever into the reverse position.
During cold weather, shifting may be difficult until the transaxle lubricant has
warmed up. This is normal and not
harmful to the transaxle.
If you've come to a complete stop and it's hard to shift into 1st or R (Reverse),
put the shift lever in N (Neutral) posi-
tion and release the clutch. Press the
clutch pedal back down, and then shift
into 1st or R (Reverse) gear position.CAUTION
When downshifting from fifth gear to fourth gear, cautionshould be taken not to inadver-tently press the gear shift leversideways in such a manner that second gear is engaged. Such adrastic downshift may cause theengine speed to increase to thepoint that the tachometer willenter the red-zone. Such over-revving of the engine may possi-bly cause engine damage.
Do not downshift more than 2 gears or downshift the gear whenthe engine is running at highspeed (5,000 RPM or higher).Such a downshifting may damagethe engine.
CAUTION
To avoid premature clutch wear and damage, do not drive withyour foot resting on the clutchpedal. Also, don’t use the clutch to hold the vehicle stopped on anuphill grade, while waiting for atraffic light, etc.
Do not use the shift lever as a handrest during driving, as thiscan result in premature wear ofthe transaxle shift forks.
WARNING
Before leaving the driver’s seat,
always set the parking brake fully
and shut the engine off. Then make
sure the transaxle is shifted into 1st
gear when the vehicle is parked on
a level or uphill grade, and shifted
into R (Reverse) on a downhill
grade. Unexpected and sudden
vehicle movement can occur if
these precautions are not followed
in the order identified.
Page 201 of 348
59
Driving your vehicle
Using the clutch
The clutch should be pressed all the way
to the floor before shifting, then released
slowly. The clutch pedal should always be
fully released while driving. Do not rest
your foot on the clutch pedal while driv-
ing. This can cause unnecessary wear.
Do not partially engage the clutch to hold
the car on an incline. This causes unnec-
essary wear. Use the foot brake or park-
ing brake to hold the car on an incline. Do
not operate the clutch pedal rapidly and
repeatedly.
Downshifting
When you must slow down in heavy traf-
fic or while driving up steep hills, down-
shift before the engine starts to labor.
Downshifting reduces the chance of
stalling and gives better acceleration
when you again need to increase your
speed. When the vehicle is traveling
down steep hills, downshifting helps
maintain safe speed and prolongs brake
life.
Good driving practices
Never take the car out of gear andcoast down a hill. This is extremely
hazardous. Always leave the car in
gear.
Don't "ride" the brakes. This can cause them to overheat and malfunction.
Instead, when you are driving down a
long hill, slow down and shift to a lower
gear. When you do this, engine braking
will help slow the car.
Slow down before shifting to a lower gear. This will help avoid over-revving
the engine, which can cause damage.
Slow down when you encounter cross winds. This gives you much better con-
trol of your car.
Be sure the car is completely stopped before you attempt to shift into reverse.
The transaxle can be damaged if you
do not. To shift into reverse, depress
the clutch, move the shift lever to neu-
tral, wait three seconds, then shift to
the reverse position.
Exercise extreme caution when driving on a slippery surface. Be especially
careful when braking, accelerating or
shifting gears. On a slippery surface,
an abrupt change in vehicle speed can
cause the drive wheels to lose traction
and the vehicle to go out of control.WARNING
Always buckle-up! In a collision,an unbelted occupant is signifi-
cantly more likely to be seriously
injured or killed than a properly
belted occupant.
Avoid high speeds when corner- ing or turning.
Do not make quick steering wheel movements, such as sharp
lane changes or fast, sharp turns.
The risk of rollover is greatly increased if you lose control of
your vehicle at highway speeds.
Loss of control often occurs if two or more wheels drop off the
roadway and the driver over-
steers to reenter the roadway.
In the event your vehicle leaves the roadway, do not steer sharply.
Instead, slow down before pulling
back into the travel lanes.
Never exceed posted speed lim- its.
Page 203 of 348
511
Driving your vehicle
Automatic transaxle operation
The highly efficient automatic transaxle
has 4 forward speeds and one reverse
speed. The individual speeds are select-
ed automatically, depending on the posi-
tion of the shift lever.
All normal forward driving is done with
the shift lever in the D (Drive) position.
To move the shift lever from the P (Park)
position, the brake pedal must be
depressed with the ignition switch ON.
✽ ✽NOTICE
The first few shifts on a new vehicle, if
the battery has been disconnected, may
be somewhat abrupt. This is a normal
condition, and the shifting sequence will
adjust after shifts are cycled a few times
by the TCM (Transaxle Control
Module).
For smooth operation, depress the brake
pedal when shifting from N (Neutral) to aforward or reverse gear.
WARNING- Automatic transaxle
Always check the surrounding
areas near your vehicle for peo-
ple, especially children, before
putting a car into D (Drive) or R
(Reverse).
Before leaving the driver’s seat, always make sure the shift lever
is in the P (Park) position; then
set the parking brake fully and
shut the engine off. Unexpected
and sudden vehicle movement
can occur if these precautions
are not followed in the order iden-
tified.
CAUTION
To avoid damage to your transaxle, do not accelerate theengine in R (Reverse) or any for- ward gear position with thebrakes on.
When stopped on an upgrade, do not hold the vehicle stationarywith engine power. Use the serv-ice brake or the parking brake.
Do not shift from N (Neutral) or P (Park) into D (Drive), or R(Reverse) when the engine isabove idle speed.
Page 204 of 348
Driving your vehicle
12
5
Transaxle ranges
The indicator lights in the instrument
cluster indicate the shift lever position
when the ignition switch is in the ON
position.
P (Park)
Always come to a complete stop before
shifting into P (Park). This position locks
the transaxle and prevents the front
wheels from rotating. R (Reverse)
Use this position to drive the vehicle
backward.
N (Neutral)
The wheels and transaxle are not locked.
The vehicle will roll freely even on the
slightest incline unless the parking brake
or service brakes are applied.
D (Drive)
This is the normal forward driving posi-
tion. The transaxle will automatically shift
through a 4-gear sequence, providing the
best fuel economy and power.
For extra power when passing another
vehicle or climbing grades, depress the
accelerator fully, at which time the
transaxle will automatically downshift to
the next lower gear.(Continued)
Before leaving the driver’s seat,
always make sure the shift lever
is in the P (Park) position. Set the
parking brake fully, shut the
engine off and take the key with
you. Unexpected and sudden
vehicle movement can occur if
you do not follow these precau-
tions in the order specified.
Never leave a child unattended in a vehicle.
WARNING
Shifting into P (Park) while thevehicle is in motion will cause the
drive wheels to lock which will
cause you to lose control of the
vehicle.
Do not use the P (Park) position in place of the parking brake.
Always make sure the shift lever
is latched in the P (Park) position
and set the parking brake fully.
(Continued)
CAUTION
The transaxle may be damaged ifyou shift into P (Park) while thevehicle is in motion.
CAUTION
Always come to a complete stopbefore shifting into or out of R(Reverse); you may damage thetransaxle if you shift into R whilethe vehicle is in motion, except asexplained in “Rocking the Vehicle”,in this manual.
Page 205 of 348
513
Driving your vehicle
✽
✽NOTICE
Always come to a complete stop before
shifting into D (Drive).
3 (Third gear)
Use for towing a trailer during hill climb-
ing or to use engine braking downhill.
"3" automatically shifts between 1st, 2nd
and 3rd gears. This means that no shift-
up to 4th gear is performed. However, the
shift-up to 4th gear is done when the car
speed exceeds a certain value to prevent
the engine from over-revving. Manually
move the selector to "D" when returning
to normal driving condition.
2 (Second gear)
Use for driving on a slippery road, hill
climbing or engine braking downhill. "2"
automatically shifts between first and
second gears.
This means that no shift-up to 3rd gear is
performed. However, the shift-up to third
gear is done when the car speed
exceeds a certain value to prevent the
engine from over-revving. Manually move
the selector to "D" returning to normal
driving condition. L (Low gear)
Use for driving up a very steep grade or
for engine braking when descending
steep hills. When downshifting to "L", the
transaxle will temporarily remain in sec-
ond gear until the vehicle has slowed
enough for low gear to engage. Do not
exceed 30 mph (50 km/h) in low gear.
"L" shifts to 1st gear only. However, shift
up to 2nd is performed when the car
exceeds a certain speed and, as speed
increases, the transaxle will shift up to
3rd gear to prevent over-revving the
engine.
✽ ✽
NOTICE
• For smooth and safe operation,
depress the brake pedal when shifting
from "N" (Neutral) position or "P"
(Park) position to a forward or "R"
(Reverse) gear.
• Fully depress the brake pedal in order to move the shift lever from the "P"
(Park) position to any of the other
positions.
• It is always possible to shift from "R", "N", "D", "3", "2", "L" position to
"P" position. The vehicle must be
fully stopped to avoid transaxle dam-
age.
CAUTION
Shift into "R" and "P" position
only when the vehicle has com-pletely stopped.
Do not accelerate the engine in reverse or any of the forwardpositions with the brakes applied.
Always apply the footbrake when shifting from "P" or "N", to "R","D","3", "2" or "L" position.
Check the automatic transaxle fluid level regularly, and add fluidas necessary.
See the maintenance schedule forthe proper fluid recommendation.
Page 207 of 348
515
Driving your vehicle
Good driving practices
Never move the gear selector leverfrom P (Park) or N (Neutral) to any
other position with the accelerator
pedal depressed.
Never move the gear selector lever into "P" when the vehicle is in motion.
Be sure the car is completely stopped before you attempt to shift into R
(Reverse).
Never take the car out of gear and coast down a hill. This may be
extremely hazardous. Always leave the
car in gear when moving.
Do not "ride" the brakes. This can cause them to overheat and malfunc-
tion. Instead, when you are driving
down a long hill, slow down and shift to
a lower gear. When you do this, engine
braking will help slow the car.
Slow down before shifting to a lower gear. Otherwise, the lower gear may
not be engaged.
Always use the parking brake. Do not depend on placing the transaxle in P
(Park) to keep the car from moving.
Exercise extreme caution when driving on a slippery surface. Be especially
careful when braking, accelerating or
shifting gears. On a slippery surface,
an abrupt change in vehicle speed can
cause the drive wheels to lose traction
and the vehicle to go out of control. Optimum vehicle performance and
economy is obtained by smoothly
depressing and releasing the accelera-
tor pedal.
Moving up a steep grade from a stand-ing start
To move up a steep grade from a stand-
ing start, depress the brake pedal, shift
the shift lever to D (Drive). Select the
appropriate gear depending on load
weight and steepness of the grade, and
release the parking brake. Depress the
accelerator gradually while releasing the
service brakes.
WARNING
Always buckle-up! In a collision, an unbelted occupant is signifi-
cantly more likely to be seriously
injured or killed than a properly
belted occupant.
Avoid high speeds when corner- ing or turning.
Do not make quick steering wheel movements, such as sharp
lane changes or fast, sharp turns.
The risk of rollover is greatly increased if you lose control of
your vehicle at highway speeds.
Loss of control often occurs if two or more wheels drop off the
roadway and the driver over-
steers to reenter the roadway.
In the event your vehicle leaves the roadway, do not steer sharply.
Instead, slow down before pulling
back into the travel lanes.
Never exceed posted speed lim- its.
CAUTION
If your vehicle becomes stuck insnow, mud, sand, etc., then you mayattempt to rock the vehicle free bymoving it forward and backward. Donot attempt this procedure if peopleor objects are anywhere near the vehicle. During the rocking opera-tion the vehicle may suddenly move forward of backward as it becomesunstuck, causing injury or damage to nearby people or objects.
Page 208 of 348
Driving your vehicle
16
5
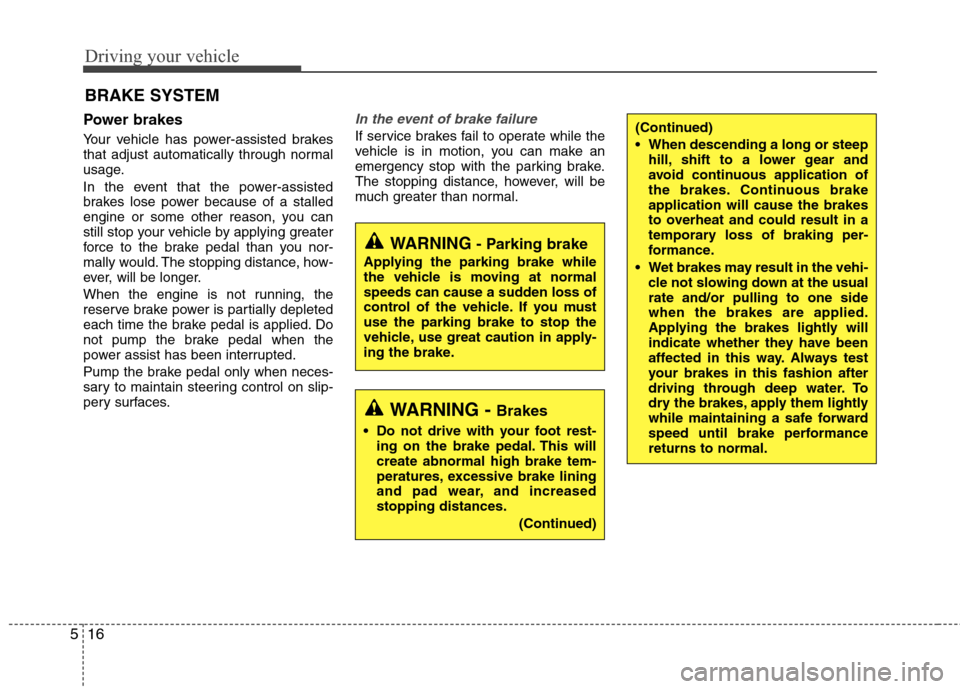
Power brakes
Your vehicle has power-assisted brakes
that adjust automatically through normal
usage.
In the event that the power-assisted
brakes lose power because of a stalled
engine or some other reason, you can
still stop your vehicle by applying greater
force to the brake pedal than you nor-
mally would. The stopping distance, how-
ever, will be longer.
When the engine is not running, the
reserve brake power is partially depleted
each time the brake pedal is applied. Do
not pump the brake pedal when the
power assist has been interrupted.
Pump the brake pedal only when neces-
sary to maintain steering control on slip-
pery surfaces.
In the event of brake failure
If service brakes fail to operate while the
vehicle is in motion, you can make an
emergency stop with the parking brake.
The stopping distance, however, will be
much greater than normal.
BRAKE SYSTEM
(Continued)
When descending a long or steep
hill, shift to a lower gear and
avoid continuous application of
the brakes. Continuous brake
application will cause the brakes
to overheat and could result in a
temporary loss of braking per-
formance.
Wet brakes may result in the vehi- cle not slowing down at the usual
rate and/or pulling to one side
when the brakes are applied.
Applying the brakes lightly will
indicate whether they have been
affected in this way. Always test
your brakes in this fashion after
driving through deep water. To
dry the brakes, apply them lightly
while maintaining a safe forward
speed until brake performance
returns to normal.
WARNING- Parking brake
Applying the parking brake while
the vehicle is moving at normal
speeds can cause a sudden loss of
control of the vehicle. If you must
use the parking brake to stop the
vehicle, use great caution in apply-
ing the brake.
WARNING - Brakes
Do not drive with your foot rest-ing on the brake pedal. This will
create abnormal high brake tem-
peratures, excessive brake lining
and pad wear, and increased
stopping distances.
(Continued)
Page 210 of 348
Driving your vehicle
18
5
Parking brake
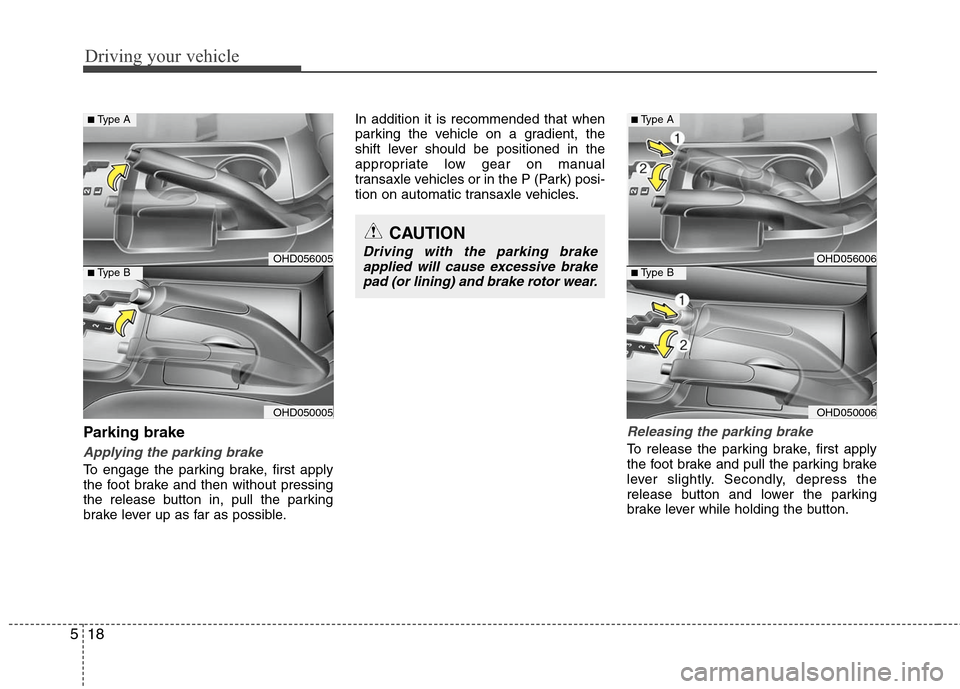
Applying the parking brake
To engage the parking brake, first apply
the foot brake and then without pressing
the release button in, pull the parking
brake lever up as far as possible. In addition it is recommended that when
parking the vehicle on a gradient, the
shift lever should be positioned in the
appropriate low gear on manual
transaxle vehicles or in the P (Park) posi-
tion on automatic transaxle vehicles.
Releasing the parking brake
To release the parking brake, first apply
the foot brake and pull the parking brake
lever slightly. Secondly, depress the
release button and lower the parking
brake lever while holding the button.
CAUTION
Driving with the parking brake
applied will cause excessive brake pad (or lining) and brake rotor wear.
OHD056005
OHD050005
■Type A
■Type B
OHD056006
OHD050006
■Type A
■Type B