check Hyundai Elantra 2012 Owner's Guide
[x] Cancel search | Manufacturer: HYUNDAI, Model Year: 2012, Model line: Elantra, Model: Hyundai Elantra 2012Pages: 383, PDF Size: 8.94 MB
Page 108 of 383
Features of your vehicle
30 4
Closing the hood
1. Before closing the hood, check the fol-
lowing:
must be correctly installed.
bustible material must be removed
from the engine compartment.
2. Return the support rod to its clip to
prevent it from rattling.
3. Lower the hood until it is about 1 ft. (30
cm) above the closed position and let
it drop. Make sure that it locks into
place.WARNING
Before closing the hood, ensure
that all obstructions are removed
from the hood opening. Closing
the hood with an obstruction
present in the hood opening may
result in property damage or
severe personal injury.
Do not leave gloves, rags or any
other combustible material in the
engine compartment. Doing so
may cause a heat-induced fire.
Always double check to be sure
that the hood is firmly latched
before driving away. If it is not
latched, the hood could open
while the vehicle is being driven,
causing a total loss of visibility,
which might result in an accident.
Do not move the vehicle with the
hood in the raised position, as
vision is obstructed and the hood
could fall or be damaged.
Page 109 of 383
431
Features of your vehicle
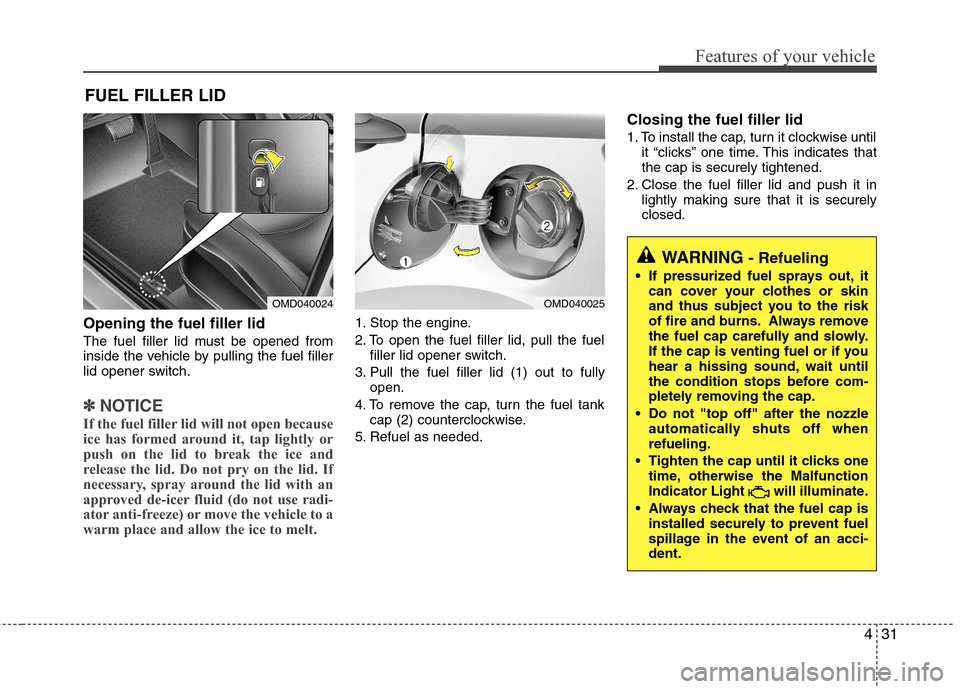
Opening the fuel filler lid
The fuel filler lid must be opened from
inside the vehicle by pulling the fuel filler
lid opener switch.
✽ ✽
NOTICE
If the fuel filler lid will not open because
ice has formed around it, tap lightly or
push on the lid to break the ice and
release the lid. Do not pry on the lid. If
necessary, spray around the lid with an
approved de-icer fluid (do not use radi-
ator anti-freeze) or move the vehicle to a
warm place and allow the ice to melt.
1. Stop the engine.
2. To open the fuel filler lid, pull the fuel
filler lid opener switch.
3. Pull the fuel filler lid (1) out to fully
open.
4. To remove the cap, turn the fuel tank
cap (2) counterclockwise.
5. Refuel as needed.
Closing the fuel filler lid
1. To install the cap, turn it clockwise until
it “clicks” one time. This indicates that
the cap is securely tightened.
2. Close the fuel filler lid and push it in
lightly making sure that it is securely
closed.
FUEL FILLER LID
OMD040024OMD040025
WARNING - Refueling
If pressurized fuel sprays out, it
can cover your clothes or skin
and thus subject you to the risk
of fire and burns. Always remove
the fuel cap carefully and slowly.
If the cap is venting fuel or if you
hear a hissing sound, wait until
the condition stops before com-
pletely removing the cap.
Do not "top off" after the nozzle
automatically shuts off when
refueling.
Tighten the cap until it clicks one
time, otherwise the Malfunction
Indicator Light will illuminate.
Always check that the fuel cap is
installed securely to prevent fuel
spillage in the event of an acci-
dent.
Page 110 of 383
Features of your vehicle
32 4
(Continued)
Use only approved portable plas-
tic fuel containers designed to
carry and store gasoline.
Do not use cellular phones while
refueling. Electric current and/or
electronic interference from cel-
lular phones can potentially
ignite fuel vapors causing a fire.
When refueling, always shut the
engine off. Sparks produced by
electrical components related to
the engine can ignite fuel vapors
causing a fire. Once refueling is
complete, check to make sure the
filler cap and filler door are
securely closed, before starting
the engine.
DO NOT use matches or a lighter
and DO NOT SMOKE or leave a lit
cigarette in your vehicle while at
a gas station especially during
refueling. Automotive fuel is
highly flammable and can, when
ignited, result in fire.
(Continued)(Continued)
Do not get back into a vehicle
once you have begun refueling
since you can generate static
electricity by touching, rubbing
or sliding against any item or fab-
ric (polyester, satin, nylon, etc.)
capable of producing static elec-
tricity. Static electricity discharge
can ignite fuel vapors resulting in
rapid burning. If you must re-
enter the vehicle, you should
once again eliminate potentially
dangerous static electricity dis-
charge by touching a metal part
of the vehicle, away from the fuel
filler neck, nozzle or other gaso-
line source.
When using an approved
portable fuel container, be sure to
place the container on the
ground prior to refueling. Static
electricity discharge from the
container can ignite fuel vapors
causing a fire. Once refueling has
begun, contact with the vehicle
should be maintained until the
filling is complete.
(Continued)WARNING - Refueling dan-
gers
Automotive fuels are flammable
materials. When refueling, please
note the following guidelines care-
fully. Failure to follow these guide-
lines may result in severe personal
injury, severe burns or death by fire
or explosion.
Read and follow all warnings
posted at the gas station facility.
Before refueling, note the loca-
tion of the Emergency Gasoline
Shut-Off, if available, at the gas
station facility.
Before touching the fuel nozzle,
you should eliminate potentially
dangerous static electricity dis-
charge by touching another metal
part of the vehicle, a safe dis-
tance away from the fuel filler
neck, nozzle, or other gas source.
(Continued)
Page 113 of 383
435
Features of your vehicle
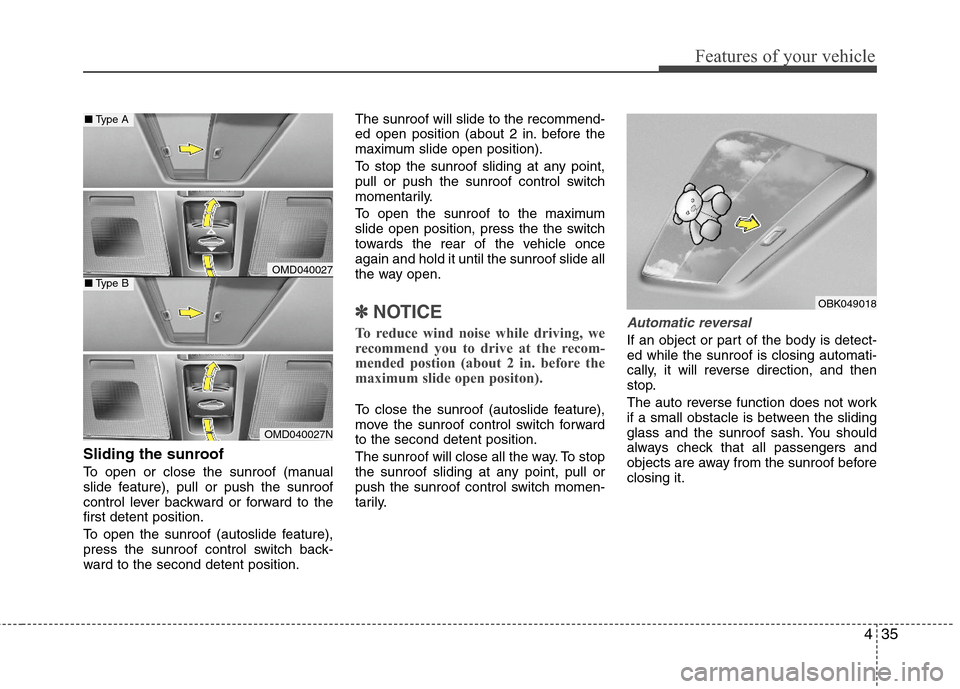
Sliding the sunroof
To open or close the sunroof (manual
slide feature), pull or push the sunroof
control lever backward or forward to the
first detent position.
To open the sunroof (autoslide feature),
press the sunroof control switch back-
ward to the second detent position.The sunroof will slide to the recommend-
ed open position (about 2 in. before the
maximum slide open position).
To stop the sunroof sliding at any point,
pull or push the sunroof control switch
momentarily.
To open the sunroof to the maximum
slide open position, press the the switch
towards the rear of the vehicle once
again and hold it until the sunroof slide all
the way open.
✽ ✽
NOTICE
To reduce wind noise while driving, we
recommend you to drive at the recom-
mended postion (about 2 in. before the
maximum slide open positon).
To close the sunroof (autoslide feature),
move the sunroof control switch forward
to the second detent position.
The sunroof will close all the way. To stop
the sunroof sliding at any point, pull or
push the sunroof control switch momen-
tarily.
Automatic reversal
If an object or part of the body is detect-
ed while the sunroof is closing automati-
cally, it will reverse direction, and then
stop.
The auto reverse function does not work
if a small obstacle is between the sliding
glass and the sunroof sash. You should
always check that all passengers and
objects are away from the sunroof before
closing it.
OBK049018
OMD040027
OMD040027N
■Type A
■Type B
Page 116 of 383
Features of your vehicle
38 4
Electric power steering (EPS)
The power steering uses a motor to
assist you in steering the vehicle. If the
engine is off or if the power steering sys-
tem becomes inoperative, the vehicle
may still be steered, but it will require
increased steering effort.
The motor driven power steering is con-
trolled by a power steering control unit
which senses the steering wheel torque
and vehicle speed to command the
motor.
The steering becomes heavier as the
vehicle’s speed increases and becomes
lighter as the vehicle’s speed decreases
for optimum steering control.
Should you notice any change in the
effort required to steer during normal
vehicle operation, have the power steer-
ing checked by an authorized HYUNDAI
dealer.
✽ ✽
NOTICE
The following symptoms may occur dur-
ing normal vehicle operation:
• The EPS warning light does not illu-
minate.
• The steering gets heavy immediately
after turning the ignition switch on.
This happens as the system performs
the EPS system diagnostics. When the
diagnostics is completed, the steering
wheel will return to its normal condi-
tion.
• A click noise may be heard from the
EPS relay after the ignition switch is
turned to the ON or LOCK (OFF)
position.
• A motor noise may be heard when the
vehicle is at a stop or at a low driving
speed.
• If the Electric Power Steering System
does not operate normally, the warning
light will illuminate on the instrument
cluster. The steering wheel may
become difficult to control or operate
abnormally. Take your vehicle to an
authorized HYUNDAI dealer and have
the vehicle checked as soon as possible.
(Continued)(Continued)
• When the vehicle is stationary, if you
turn the steering wheel all the way to
the left or right continuously, the
steering wheel becomes heavier from
the end. But this is for your safety, not
system malfunction. As time passes,
the steering wheel return to its normal
condition.
• When you operate the steering wheel in
low temperature, abnormal noise could
occur. If temperature rises, the noise will
disappear. This is a normal condition.
• When the charging system warning
light comes on or the voltage is low
(When the alternator (or battery) does
not operate normally or it malfunc-
tions), the steering wheel may get
heavy and become difficult to control
operate abnormally.
STEERING WHEEL
Page 117 of 383
439
Features of your vehicle
Tilt steering / Tilt and telescope
steering (if equipped)
Tilt steering allows you to adjust the
steering wheel before you drive. You can
also raise it to give your legs more room
when you exit and enter the vehicle.
The steering wheel should be positioned
so that it is comfortable for you to drive,
while permitting you to see the instru-
ment panel warning lights and gauges.
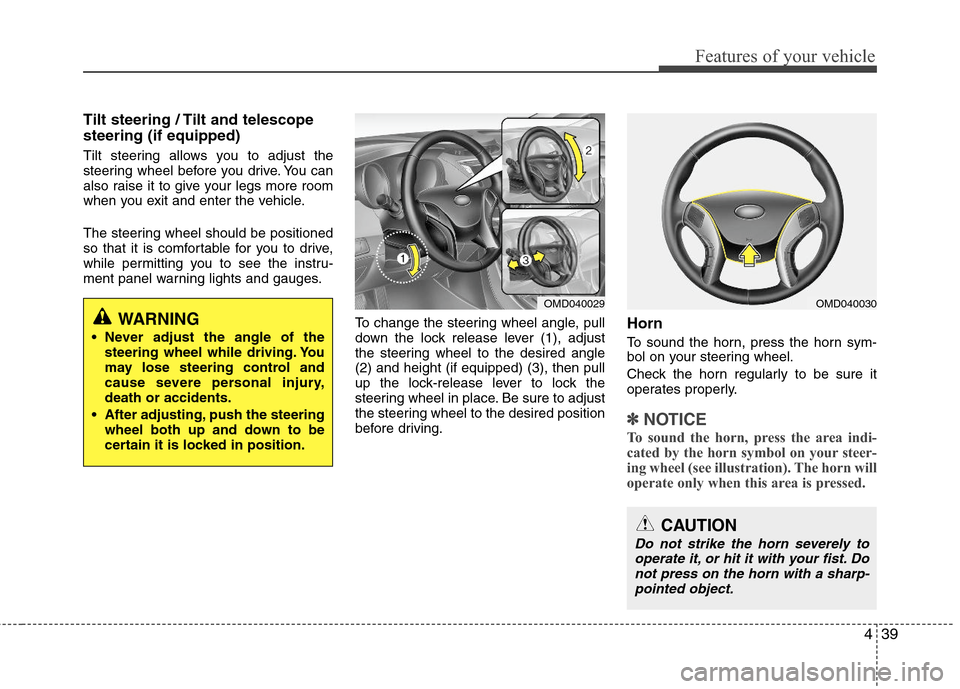
To change the steering wheel angle, pull
down the lock release lever (1), adjust
the steering wheel to the desired angle
(2) and height (if equipped) (3), then pull
up the lock-release lever to lock the
steering wheel in place. Be sure to adjust
the steering wheel to the desired position
before driving.
Horn
To sound the horn, press the horn sym-
bol on your steering wheel.
Check the horn regularly to be sure it
operates properly.
✽ ✽
NOTICE
To sound the horn, press the area indi-
cated by the horn symbol on your steer-
ing wheel (see illustration). The horn will
operate only when this area is pressed.
OMD040029OMD040030
CAUTION
Do not strike the horn severely to
operate it, or hit it with your fist. Do
not press on the horn with a sharp-
pointed object.
WARNING
Never adjust the angle of the
steering wheel while driving. You
may lose steering control and
cause severe personal injury,
death or accidents.
After adjusting, push the steering
wheel both up and down to be
certain it is locked in position.
Page 119 of 383
441
Features of your vehicle
Remote control
Manual type (if equipped)
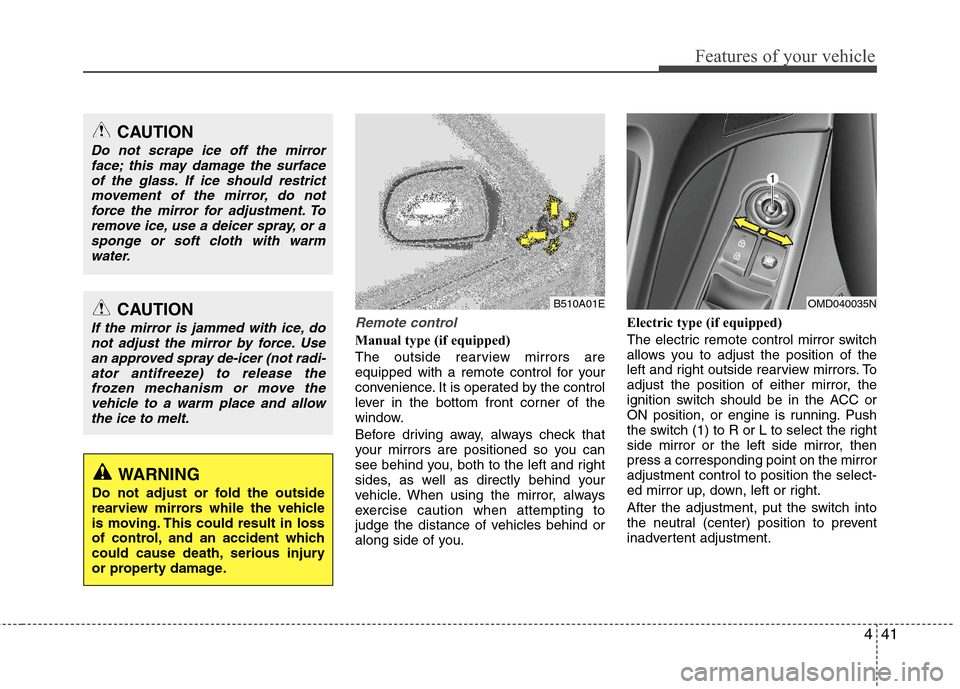
The outside rearview mirrors are
equipped with a remote control for your
convenience. It is operated by the control
lever in the bottom front corner of the
window.
Before driving away, always check that
your mirrors are positioned so you can
see behind you, both to the left and right
sides, as well as directly behind your
vehicle. When using the mirror, always
exercise caution when attempting to
judge the distance of vehicles behind or
along side of you.Electric type (if equipped)
The electric remote control mirror switch
allows you to adjust the position of the
left and right outside rearview mirrors. To
adjust the position of either mirror, the
ignition switch should be in the ACC or
ON position, or engine is running. Push
the switch (1) to R or L to select the right
side mirror or the left side mirror, then
press a corresponding point on the mirror
adjustment control to position the select-
ed mirror up, down, left or right.
After the adjustment, put the switch into
the neutral (center) position to prevent
inadvertent adjustment.
CAUTION
Do not scrape ice off the mirror
face; this may damage the surface
of the glass. If ice should restrict
movement of the mirror, do not
force the mirror for adjustment. To
remove ice, use a deicer spray, or a
sponge or soft cloth with warm
water.
CAUTION
If the mirror is jammed with ice, do
not adjust the mirror by force. Use
an approved spray de-icer (not radi-
ator antifreeze) to release the
frozen mechanism or move the
vehicle to a warm place and allow
the ice to melt.
WARNING
Do not adjust or fold the outside
rearview mirrors while the vehicle
is moving. This could result in loss
of control, and an accident which
could cause death, serious injury
or property damage.
OMD040035NB510A01E
Page 128 of 383
Features of your vehicle
50 4
Warnings and indicators
All warning lights are checked by turning
the ignition switch ON (do not start the
engine). Any light that does not illuminate
should be checked by an authorized
HYUNDAI dealer.
After starting the engine, check to make
sure that all warning lights are off. If any
are still on, this indicates a situation that
needs attention. When releasing the
parking brake, the brake system warning
light should go off. The fuel warning light
will stay on if the fuel level is low.
ECO indicator
(if equipped)
Active ECO system (if equipped)
When the active ECO is operating the
ECO indicator is green.
For more detailed information, refer to
“Active ECO” in chapter 5.
Air bag warning light
This warning light will illuminate for
approximately 6 seconds each time you
turn the ignition switch to the ON posi-
tion.
This light also comes on when the
Supplemental Restraint System (SRS) is
not working properly. If the SRS air bag
warning light does not come on, or
continuously remains on after operating
for about 6 seconds when you turned the
ignition switch to the ON position or start-
ed the engine, or if it comes on while
driving, have the SRS inspected by an
authorized HYUNDAI dealer.
Anti-lock brake system
(ABS) warning light
This light illuminates if the ignition switch
is turned ON and goes off in approxi-
mately 3 seconds if the system is operat-
ing normally.
If the ABS warning light remains on,
comes on while driving, or does not
come on when the ignition switch is
turned to the ON position, this indicates
that there may be a malfunction with the
ABS.
If this occurs, have your vehicle checked
by an authorized HYUNDAI dealer as
soon as possible. The normal braking
system will still be operational, but with-
out the assistance of the anti-lock brake
system.
ECO
Page 129 of 383
451
Features of your vehicle
If the ABS warning light turns on while
driving
1. Park the vehicle in a safe place and
turn off the engine.
2. Turn on the engine again.
3. If the warning light illuminates and
turns off in approximately 3 seconds,
the system is operating normally.
If the warning light does not turn off, have
your vehicle checked by an authorized
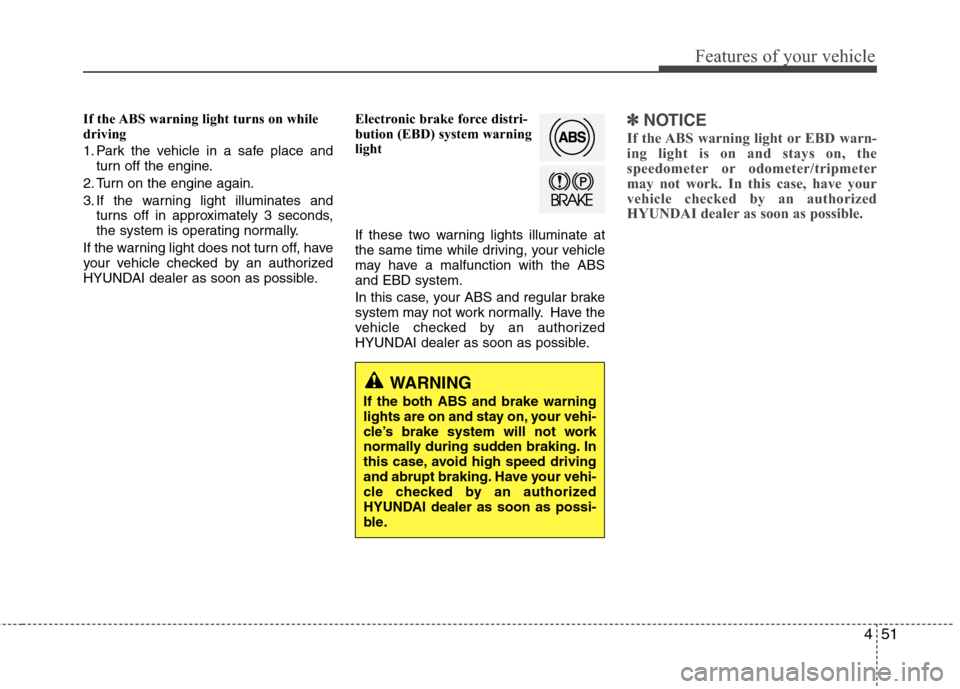
HYUNDAI dealer as soon as possible.Electronic brake force distri-
bution (EBD) system warning
light
If these two warning lights illuminate at
the same time while driving, your vehicle
may have a malfunction with the ABS
and EBD system.
In this case, your ABS and regular brake
system may not work normally. Have the
vehicle checked by an authorized
HYUNDAI dealer as soon as possible.✽ ✽
NOTICE
If the ABS warning light or EBD warn-
ing light is on and stays on, the
speedometer or odometer/tripmeter
may not work. In this case, have your
vehicle checked by an authorized
HYUNDAI dealer as soon as possible.
WARNING
If the both ABS and brake warning
lights are on and stay on, your vehi-
cle’s brake system will not work
normally during sudden braking. In
this case, avoid high speed driving
and abrupt braking. Have your vehi-
cle checked by an authorized
HYUNDAI dealer as soon as possi-
ble.
Page 131 of 383
453
Features of your vehicle
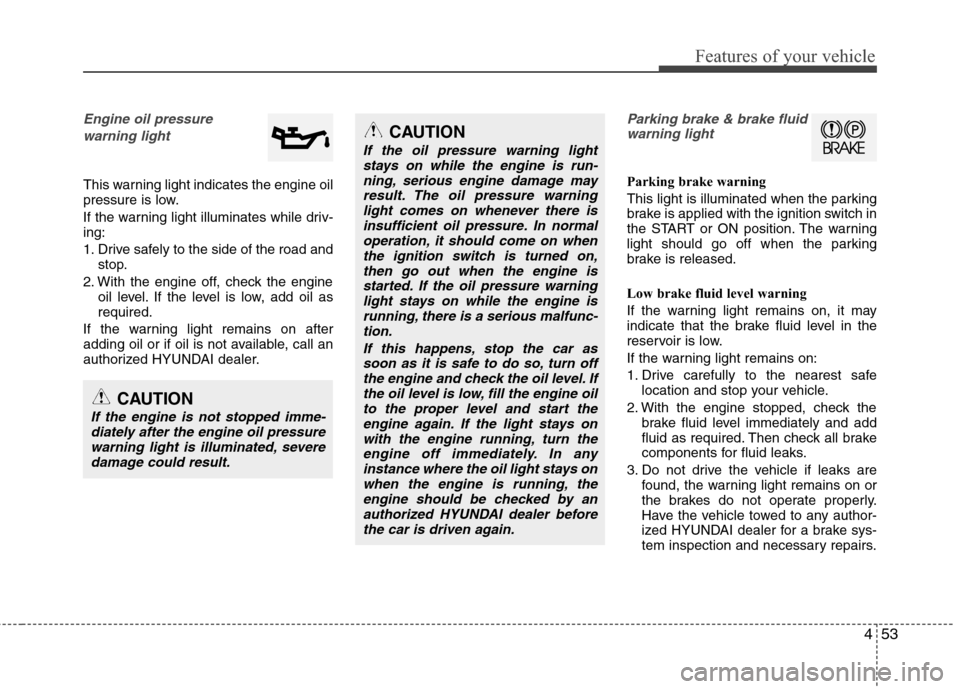
Engine oil pressure
warning light
This warning light indicates the engine oil
pressure is low.
If the warning light illuminates while driv-
ing:
1. Drive safely to the side of the road and
stop.
2. With the engine off, check the engine
oil level. If the level is low, add oil as
required.
If the warning light remains on after
adding oil or if oil is not available, call an
authorized HYUNDAI dealer.
Parking brake & brake fluid
warning light
Parking brake warning
This light is illuminated when the parking
brake is applied with the ignition switch in
the START or ON position. The warning
light should go off when the parking
brake is released.
Low brake fluid level warning
If the warning light remains on, it may
indicate that the brake fluid level in the
reservoir is low.
If the warning light remains on:
1. Drive carefully to the nearest safe
location and stop your vehicle.
2. With the engine stopped, check the
brake fluid level immediately and add
fluid as required. Then check all brake
components for fluid leaks.
3. Do not drive the vehicle if leaks are
found, the warning light remains on or
the brakes do not operate properly.
Have the vehicle towed to any author-
ized HYUNDAI dealer for a brake sys-
tem inspection and necessary repairs.
CAUTION
If the engine is not stopped imme-
diately after the engine oil pressure
warning light is illuminated, severe
damage could result.
CAUTION
If the oil pressure warning light
stays on while the engine is run-
ning, serious engine damage may
result. The oil pressure warning
light comes on whenever there is
insufficient oil pressure. In normal
operation, it should come on when
the ignition switch is turned on,
then go out when the engine is
started. If the oil pressure warning
light stays on while the engine is
running, there is a serious malfunc-
tion.
If this happens, stop the car as
soon as it is safe to do so, turn off
the engine and check the oil level. If
the oil level is low, fill the engine oil
to the proper level and start the
engine again. If the light stays on
with the engine running, turn the
engine off immediately. In any
instance where the oil light stays on
when the engine is running, the
engine should be checked by an
authorized HYUNDAI dealer before
the car is driven again.