headlamp Hyundai Elantra 2017 Owner's Manual - RHD (UK. Australia)
[x] Cancel search | Manufacturer: HYUNDAI, Model Year: 2017, Model line: Elantra, Model: Hyundai Elantra 2017Pages: 571, PDF Size: 65.66 MB
Page 20 of 571
F20F20
Parking brake .......................................................7-27
Checking the parking brake .........................................7-27
Air cleaner ............................................................7-28
Filter replacement ...........................................................7-28
Climate control air filter .....................................7-30
Filter inspection ...............................................................7-30
Filter replacement ...........................................................7-30
Wiper blades .........................................................7-31
Blade inspection ..............................................................7-31
Blade replacement ..........................................................7-31
Battery...................................................................7-34
For best battery service................................................7-34
Battery capacity label ...................................................7-36
Battery recharging .........................................................7-36
Reset items .......................................................................7-37
Ty r e s a n d w h e e l s . . . . . . . . . . . . . . . . . . . . . . . . . . . . . . . . . . . . . . . . . . . . . . . . . 7 - 3 8
Ty r e c a r e . . . . . . . . . . . . . . . . . . . . . . . . . . . . . . . . . . . . . . . . . . . . . . . . . . . . . . . . . . . . . . . . . . . . . . . . . . . 7 - 3 8
Recommended cold tyre inflation pressures ...........7-38
Checking tyre inflation pressure.................................7-40
Ty r e r o t a t i o n . . . . . . . . . . . . . . . . . . . . . . . . . . . . . . . . . . . . . . . . . . . . . . . . . . . . . . . . . . . . . . . . . . . 7 - 4 1
Wheel alignment and tyre balance .............................7-42
Ty r e r e p l a c e m e n t . . . . . . . . . . . . . . . . . . . . . . . . . . . . . . . . . . . . . . . . . . . . . . . . . . . . . . . . . . . . 7 - 4 2
Wheel replacement ........................................................7-44
Ty r e t r a c t i o n . . . . . . . . . . . . . . . . . . . . . . . . . . . . . . . . . . . . . . . . . . . . . . . . . . . . . . . . . . . . . . . . . . . . . 7 - 4 4
Ty r e m a i n t e n a n c e . . . . . . . . . . . . . . . . . . . . . . . . . . . . . . . . . . . . . . . . . . . . . . . . . . . . . . . . . . 7 - 4 4
Ty r e s i d e w a l l l a b e l l i n g . . . . . . . . . . . . . . . . . . . . . . . . . . . . . . . . . . . . . . . . . . . . . . . . . . . . 7 - 4 4
Low aspect ratio tyre ...................................................7-49
Fuses ......................................................................7-50
Fuse/relay panel description .......................................7-56
Light bulbs.............................................................7-67
Headlamp, position lamp, turn signal lamp and
fog lamp light bulb replacement .................................7-68
Side repeater lamp replacement .................................7-74
Rear combination lamp bulb replacement ................7-75
High mounted stop lamp replacement .......................7-79
Licence plate light bulb replacement ........................7-79
Interior light bulb replacement ....................................7-80
Appearance care ..................................................7-81
Exterior care ....................................................................7-81
Interior care......................................................................7-87
Emission control system .....................................7-88
Crankcase emission control system ...........................7-88
Evaporative emission control system.........................7-89
Exhaust emission control system ...............................7-89
Page 23 of 571
1-2
EEXXTTEERRIIOORR OOVVEERRVVIIEEWW ((II))
Yo u r v e h i c l e a t a g l a n c e
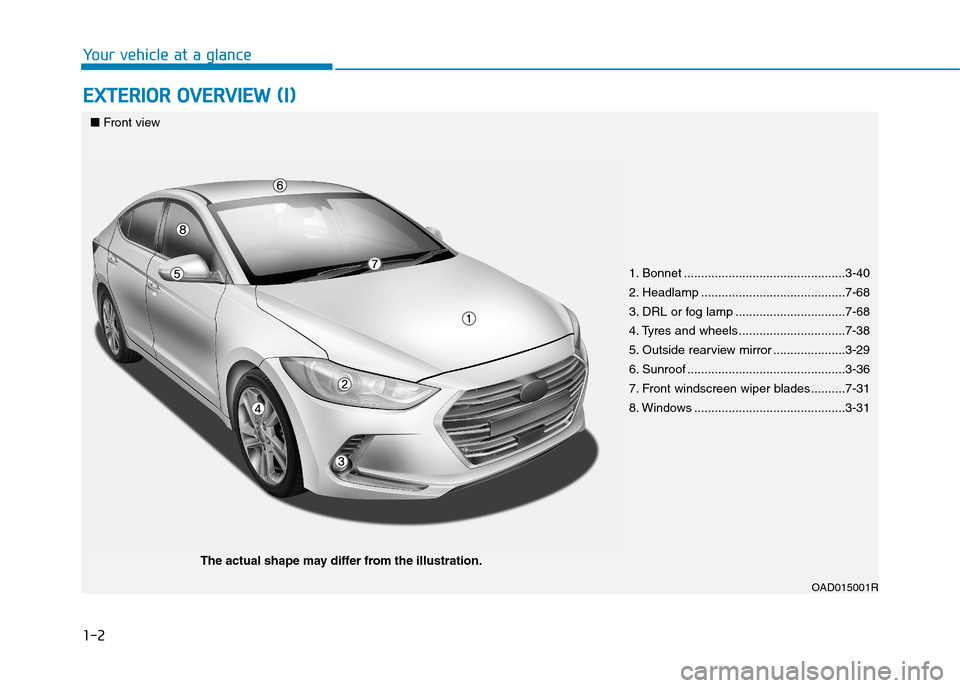
1. Bonnet ...............................................3-40
2. Headlamp ..........................................7-68
3. DRL or fog lamp ................................7-68
4. Tyres and wheels ...............................7-38
5. Outside rearview mirror .....................3-29
6. Sunroof ..............................................3-36
7. Front windscreen wiper blades ..........7-31
8. Windows ............................................3-31
OAD015001R
■Front view
The actual shape may differ from the illustration.
Page 159 of 571
3-67
Convenient features of your vehicle
3
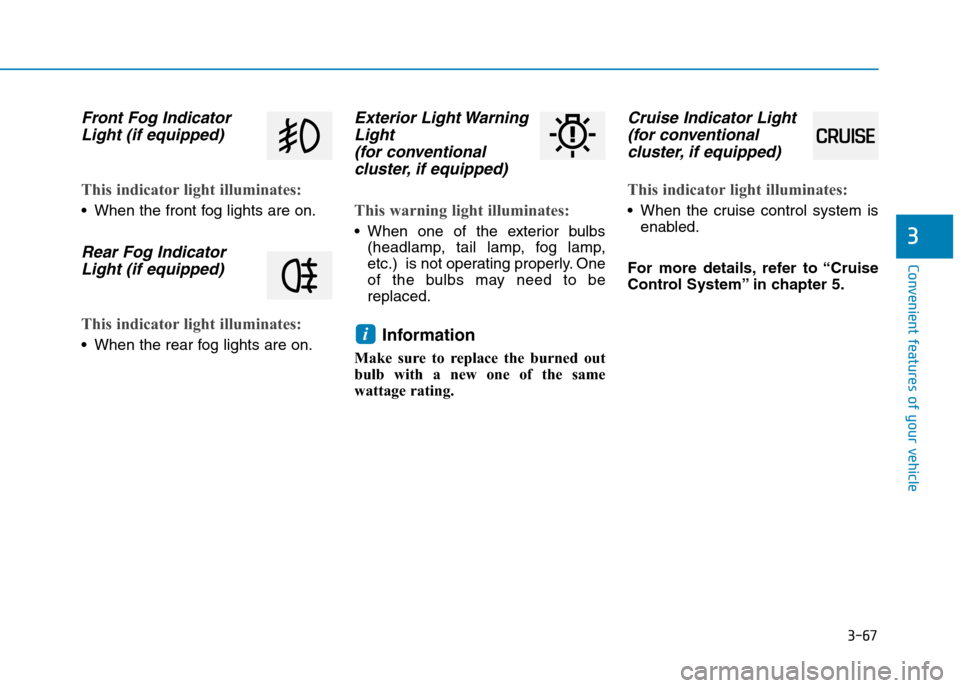
Front Fog Indicator
Light (if equipped)
This indicator light illuminates:
•When the front fog lights are on.
Rear Fog Indicator
Light (if equipped)
This indicator light illuminates:
•When the rear fog lights are on.
Exterior Light Warning
Light
(for conventional
cluster, if equipped)
This warning light illuminates:
•When one of the exterior bulbs
(headlamp, tail lamp, fog lamp,
etc.) is not operating properly. One
of the bulbs may need to be
replaced.
Information
Make sure to replace the burned out
bulb with a new one of the same
wattage rating.
Cruise Indicator Light
(for conventional
cluster, if equipped)
This indicator light illuminates:
•When the cruise control system is
enabled.
For more details, refer to “Cruise
Control System” in chapter 5.
i
Page 190 of 571
3-98
Convenient features of your vehicle
Exterior lights
Lighting control
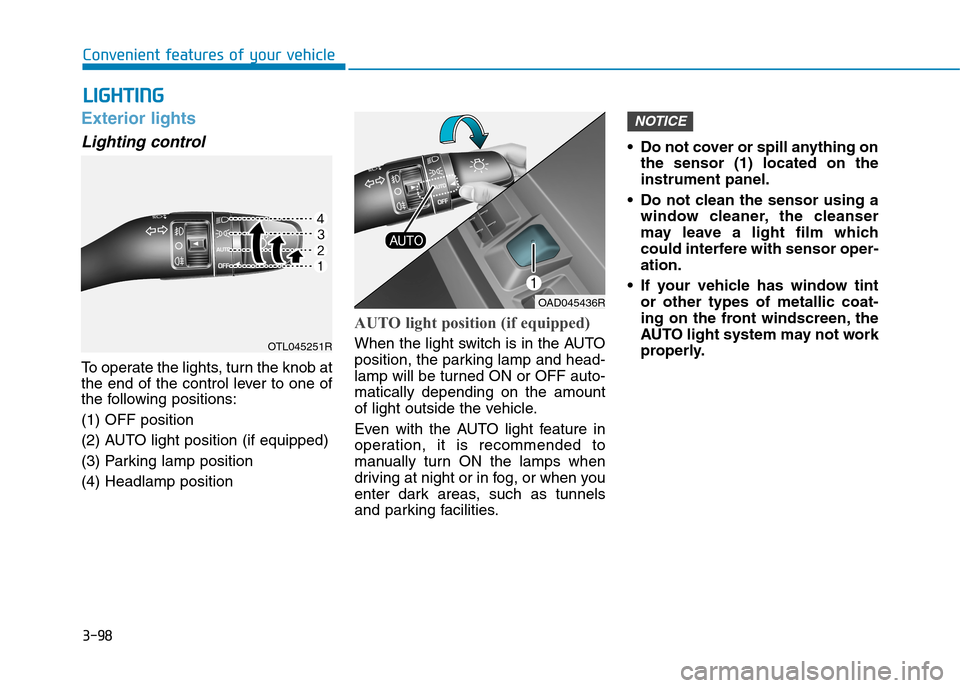
To o p e r a t e t h e l i g h t s , t u r n t h e k n o b a t
the end of the control lever to one of
the following positions:
(1) OFF position
(2) AUTO light position (if equipped)
(3) Parking lamp position
(4) Headlamp position
AUTO light position (if equipped)
When the light switch is in the AUTO
position, the parking lamp and head-
lamp will be turned ON or OFF auto-
matically depending on the amount
of light outside the vehicle.
Even with the AUTO light feature in
operation, it is recommended to
manually turn ON the lamps when
driving at night or in fog, or when you
enter dark areas, such as tunnels
and parking facilities.
•Do not cover or spill anything on
the sensor (1) located on the
instrument panel.
•Do not clean the sensor using a
window cleaner, the cleanser
may leave a light film which
could interfere with sensor oper-
ation.
•If your vehicle has window tint
or other types of metallic coat-
ing on the front windscreen, the
AUTO light system may not work
properly.
NOTICE
LLIIGGHHTTIINNGG
OTL045251R
OAD045436R
Page 191 of 571
3-99
Convenient features of your vehicle
3
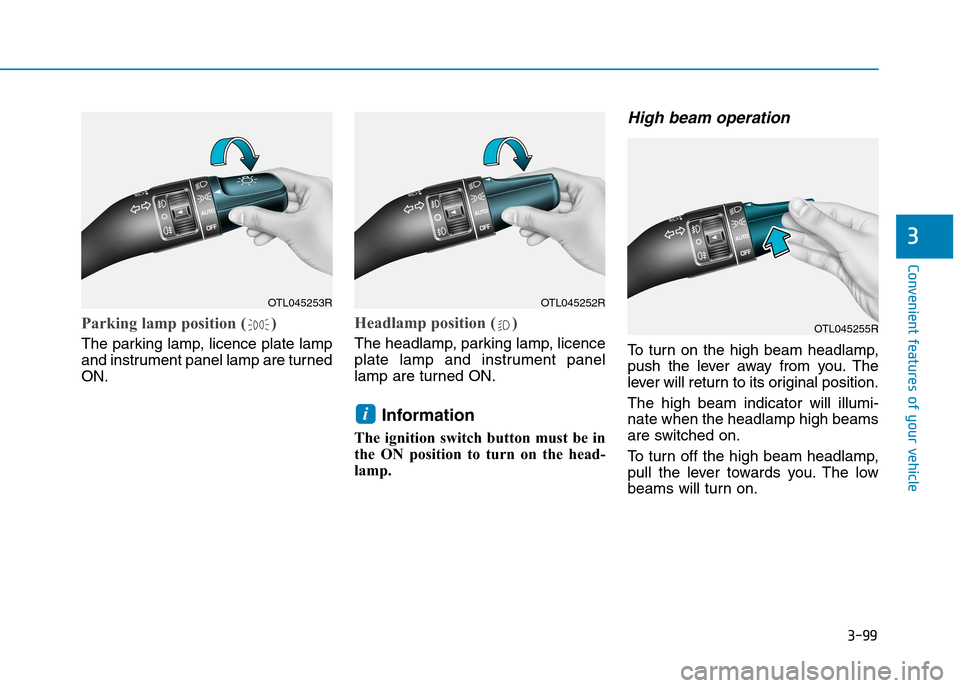
Parking lamp position ( )
The parking lamp, licence plate lamp
and instrument panel lamp are turned
ON.
Headlamp position ( )
The headlamp, parking lamp, licence
plate lamp and instrument panel
lamp are turned ON.
Information
The ignition switch button must be in
the ON position to turn on the head-
lamp.
High beam operation
To t u r n o n t h e h i g h b e a m h e a d l a m p ,
push the lever away from you. The
lever will return to its original position.
The high beam indicator will illumi-
nate when the headlamp high beams
are switched on.
To t u r n o f f t h e h i g h b e a m h e a d l a m p ,
pull the lever towards you. The low
beams will turn on.
i
OTL045253ROTL045252R
OTL045255R
Page 193 of 571
3-101
Convenient features of your vehicle
3
One-touch turn signal function
To a c t i v a t e a o n e - t o u c h t u r n s i g n a l
function, move the turn signal lever
slightly and then release it. The lane
change signals will blink 3, 5 or 7
times.
Yo u c a n a c t i v a t e / d e a c t i v a t e t h e O n e
To u c h Tu r n S i g n a l f u n c t i o n o r c h o o s e
the number of blinks (3, 5, or 7) from
the User Settings Mode on the LCD
display.For more details, refer to
"LCD Display" in this chapter.
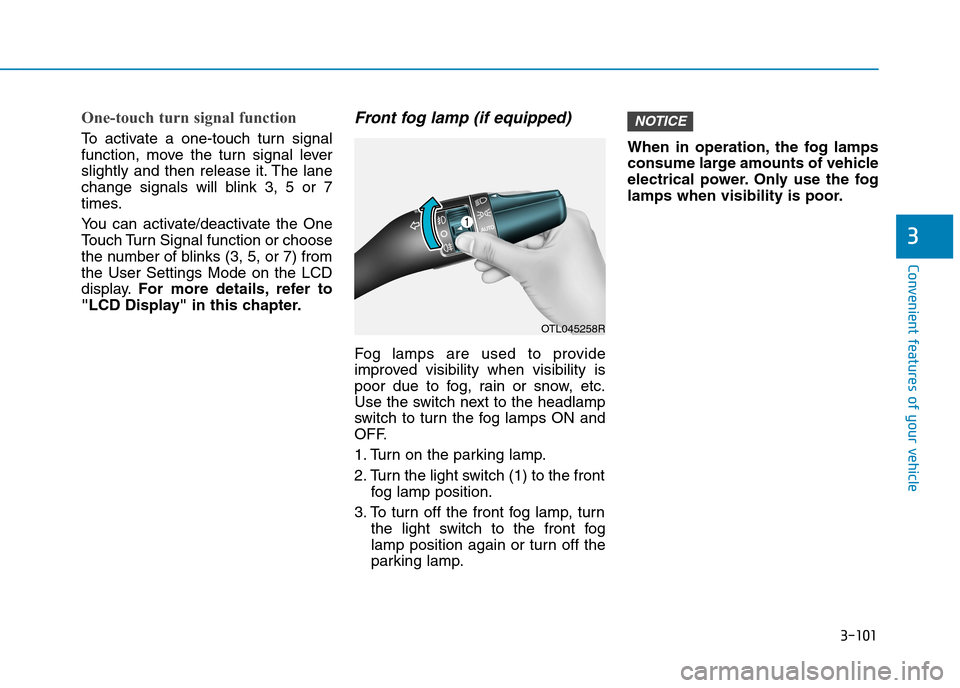
Front fog lamp (if equipped)
Fog lamps are used to provide
improved visibility when visibility is
poor due to fog, rain or snow, etc.
Use the switch next to the headlamp
switch to tur n the fog lamps ON and
OFF.
1. Turn on the parking lamp.
2. Turn the light switch (1) to the front
fog lamp position.
3. To turn off the front fog lamp, turn
the light switch to the front fog
lamp position again or turn off the
parking lamp.
When in operation, the fog lamps
consume large amounts of vehicle
electrical power. Only use the fog
lamps when visibility is poor.
NOTICE
OTL045258R
Page 194 of 571
3-102
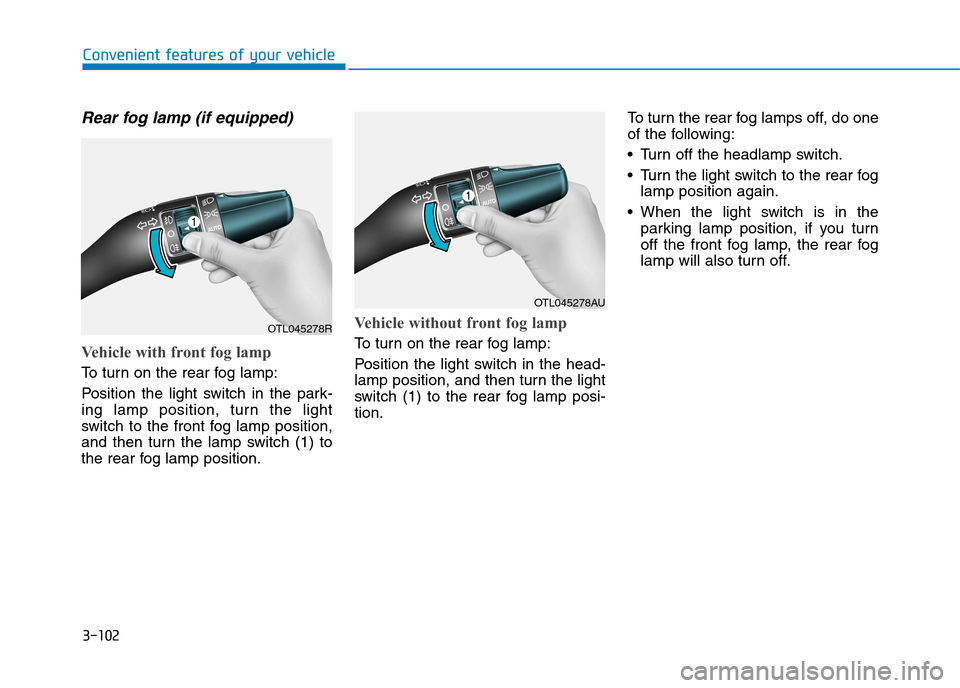
Rear fog lamp (if equipped)
Vehicle with front fog lamp
To t u r n o n t h e r e a r f o g l a m p :
Position the light switch in the par k-
ing lamp position, turn the light
switch to the front fog lamp position,
and then turn the lamp switch (1) to
the rear fog lamp position.
Vehicle without front fog lamp
To t u r n o n t h e r e a r f o g l a m p :
Position the light switch in the head-
lamp position, and then turn the light
switch (1) to the rear fog lamp posi-
tion.
To t u r n t h e r e a r f o g l a m p s o f f , d o o n e
of the following:
•Turn off the headlamp switch.
•Turn the light switch to the rear fog
lamp position again.
•When the light switch is in the
parking lamp position, if you turn
off the front fog lamp, the rear fog
lamp will also turn off.
Convenient features of your vehicle
OTL045278R
OTL045278AU
Page 195 of 571
3-103
Convenient features of your vehicle
3
Battery saver function
The purpose of this feature is to pre-
vent the batter y from being dis-
charged. The system automatically
turns off the parking lamp when the
driver turns the engine off and opens
the driver-side door.
With this feature, the parking lamps
will turn off automatically if the driver
parks on the side of the road at night.
If necessary, to keep the lamps on
when the engine is turned off, perform
the following:
1) Open the driver-side door.
2) Turn the parking lamps OFF and
ON again using the light switch on
the steering column.
Headlamp delay function
(if equipped)
If you place the ignition switch in the
ACC or OFF position with the head-
lamps ON, the headlamps (and/or
parking lamps) remain on for about 5
minutes. However, with the engine off
if the driver’s door is opened and
closed, the headlamps (and/or park-
ing lamps) are turned off after 15
seconds.
The headlamps (and/or parking
lamps) can be turned off by pressing
the lock button on the smart key
twice or turning the light switch to the
OFF or AUTO position. However, if
you turn the light switch to the AUTO
position when it is dark outside, the
headlamps will not be turned off.
Yo u c a n a c t i v a t e o r d e a c t i v a t e t h e
Headlamp Delay function from the
User Settings Mode on the LCD dis-
play.For more details, refer to
"LCD Display" in this chapter.
If the driver gets out of the vehicle
through other doors (except dri-
ver's door), the battery saver func-
tion does not operate and the
headlamp delay function does not
turn off automatically. Therefore, It
causes the battery to be dis-
charged. In this case, make sure to
turn off the lamp before getting out
of the vehicle.
Daytime running light (DRL)
(if equipped)
The Daytime Running Lights (DRL)
can make it easier for others to see
the front of your vehicle during the
day, especially after dawn and before
sunset.
The DRL system will turn the dedi-
cated lamp OFF when:
1. The headlights or front fog lights
are in the ON position.
2. The engine is turned off.
NOTICE
Page 196 of 571
3-104
Convenient features of your vehicle
Welcome system (if equipped)
Welcome light (if equipped)
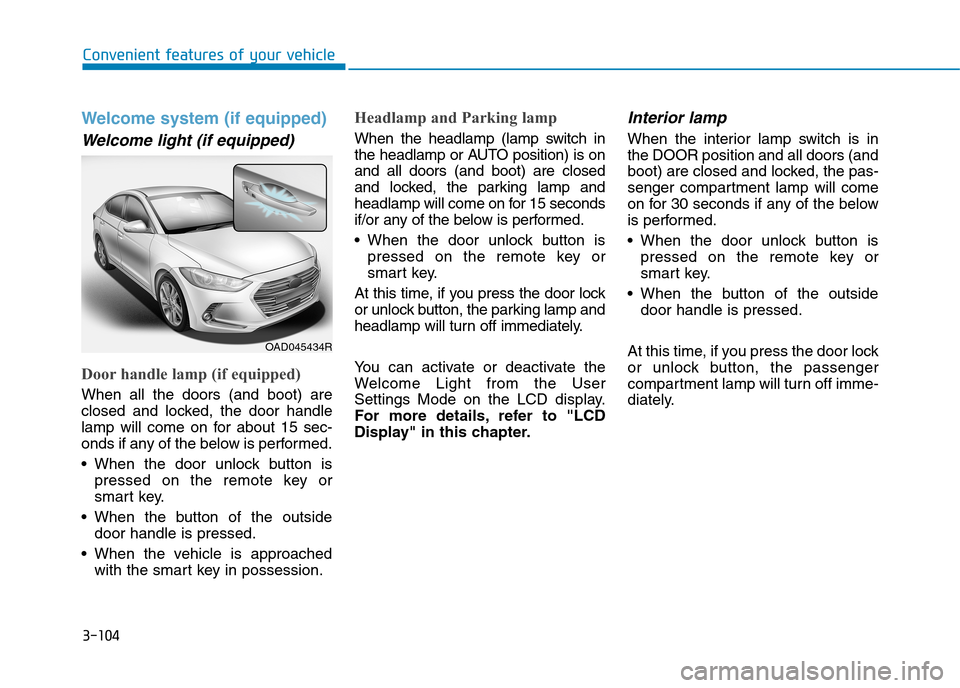
Door handle lamp (if equipped)
When all the doors (and boot) are
closed and locked, the door handle
lamp will come on for about 15 sec-
onds if any of the below is performed.
•When the door unlock button is
pressed on the remote key or
smart key.
•When the button of the outside
door handle is pressed.
•When the vehicle is approached
with the smart key in possession.
Headlamp and Parking lamp
When the headlamp (lamp switch in
the headlamp or AUTO position) is on
and all doors (and boot) are closed
and locked, the parking lamp and
headlamp will come on for 15 seconds
if/or any of the below is performed.
•When the door unlock button is
pressed on the remote key or
smart key.
At this time, if you press the door lock
or unlock button, the parking lamp and
headlamp will turn off immediately.
Yo u c a n a c t i v a t e o r d e a c t i v a t e t h e
Welcome Light from the User
Settings Mode on the LCD display.
For more details, refer to "LCD
Display" in this chapter.
Interior lamp
When the interior lamp switch is in
the DOOR position and all doors (and
boot) are closed and locked, the pas-
senger compartment lamp will come
on for 30 seconds if any of the below
is performed.
•When the door unlock button is
pressed on the remote key or
smart key.
•When the button of the outside
door handle is pressed.
At this time, if you press the door lock
or unlock button, the passenger
compartment lamp will turn off imme-
diately.
OAD045434R
Page 202 of 571
3-110
Convenient features of your vehicle
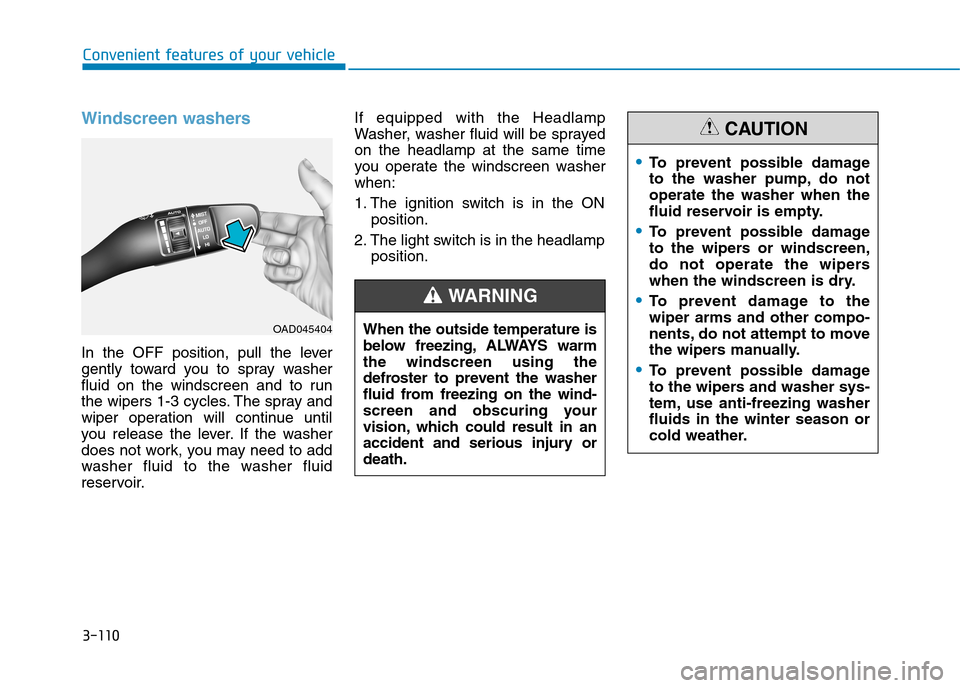
Windscreen washers
In the OFF position, pull the lever
gently toward you to spray washer
fluid on the windscreen and to run
the wipers 1-3 cycles. The spray and
wiper operation will continue until
you release the lever. If the washer
does not work, you may need to add
washer fluid to the washer fluid
reservoir.
If equipped with the Headlamp
Washer, washer fluid will be sprayed
on the headlamp at the same time
you operate the windscreen washer
when:
1. The ignition switch is in the ON
position.
2. The light switch is in the headlamp
position.
OAD045404When the outside temperature is
below freezing, ALWAYS warm
the windscreen using the
defroster to prevent the washer
fluid from freezing on the wind-
screen and obscuring your
vision, which could result in an
accident and serious injury or
death.
WA R N I N G
•To p r e v e n t p o s s i b l e d a m a g e
to the washer pump, do not
operate the washer when the
fluid reservoir is empty.
•To p r e v e n t p o s s i b l e d a m a g e
to the wipers or windscreen,
do not operate the wipers
when the windscreen is dry.
•To p r e v e n t d a m a g e t o t h e
wiper arms and other compo-
nents, do not attempt to move
the wipers manually.
•To p r e v e n t p o s s i b l e d a m a g e
to the wipers and washer sys-
tem, use anti-freezing washer
fluids in the winter season or
cold weather.
CAUTION