display Hyundai Elantra 2017 Owner's Manual - RHD (UK. Australia)
[x] Cancel search | Manufacturer: HYUNDAI, Model Year: 2017, Model line: Elantra, Model: Hyundai Elantra 2017Pages: 571, PDF Size: 65.66 MB
Page 14 of 571
F14F14
Windows ................................................................3-31
Power windows ................................................................3-31
Sunroof..................................................................3-36
Sunroof opening and closing .......................................3-36
Sliding the sunroof .........................................................3-36
Tilting the sunroof ..........................................................3-37
Sunshade ...........................................................................3-38
Resetting the sunroof ....................................................3-39
Exterior features .................................................3-40
Bonnet................................................................................3-40
Boot ....................................................................................3-42
Smart Boot ......................................................................3-43
Fuel filler door .................................................................3-47
Instrument cluster................................................3-50
Instrument cluster control ............................................3-52
Gauges ...............................................................................3-53
Odometer...........................................................................3-56
Warning and indicator lights ........................................3-56
LCD display messages ..................................................3-69
LCD display (for supervision cluster) ...............3-80
LCD display control.........................................................3-80
LCD modes ........................................................................3-80
User settings mode.........................................................3-84
Tr i p c o m p u t e r . . . . . . . . . . . . . . . . . . . . . . . . . . . . . . . . . . . . . . . . . . . . . . . . . . . . . . . 3 - 8 9
Conventional cluster .......................................................3-89
Supervision cluster .........................................................3-93
Lighting..................................................................3-98
Exterior lights ..................................................................3-98
Welcome system ...........................................................3-104
Interior lights..................................................................3-105
Wipers and washers ..........................................3-108
Windscreen wipers ......................................................3-108
Windscreen washers ...................................................3-110
Driver assist system ..........................................3-111
Rear view camera .........................................................3-111
Rear parking assist system ........................................3-112
Parking Assist System .................................................3-115
Defroster ............................................................3-119
Rear window defroster ...............................................3-119
Manual climate control system........................3-120
Heating and air conditioning......................................3-121
System operation ..........................................................3-126
System maintenance ....................................................3-128
Page 93 of 571
Convenient features of your vehicle
Accessing your vehicle .........................................3-4
Remote key .......................................................................3-4
Remote key precautions..................................................3-6
Smart key ...........................................................................3-8
Smart key precautions...................................................3-11
Immobiliser system ........................................................3-13
Door locks .............................................................3-14
Operating door locks from outside the vehicle .....3-14
Operating door locks from inside the vehicle ........3-16
Auto door lock/unlock features ................................3-18
Child-protector rear door locks ..................................3-19
Theft-alarm system .............................................3-20
Driver position memory system ........................3-21
Storing memory positions .............................................3-21
Easy access function ....................................................3-22
Steering wheel......................................................3-23
Electric power steering (EPS) ......................................3-23
Tilt steering/Telescope steering .................................3-24
Heated steering wheel .................................................3-24
Horn ....................................................................................3-25
Mirrors ...................................................................3-26
Inside rearview mirror....................................................3-26
Outside rearview mirror ................................................3-28
Windows ................................................................3-31
Power windows ................................................................3-31
Sunroof..................................................................3-36
Sunroof opening and closing .......................................3-36
Sliding the sunroof .........................................................3-36
Tilting the sunroof ..........................................................3-37
Sunshade ...........................................................................3-38
Resetting the sunroof ....................................................3-39
Exterior features .................................................3-40
Bonnet................................................................................3-40
Boot ....................................................................................3-42
Smart Boot ......................................................................3-43
Fuel filler door .................................................................3-47
Instrument cluster................................................3-50
Instrument cluster control ............................................3-52
Gauges ...............................................................................3-53
Odometer...........................................................................3-56
Warning and indicator lights ........................................3-56
LCD display messages ..................................................3-69
LCD display (for supervision cluster) ...............3-80
LCD display control.........................................................3-80
LCD modes ........................................................................3-80
User settings mode.........................................................3-84
3
Page 110 of 571
3-18
Convenient features of your vehicle
Auto door lock/unlock features
Impact sensing door unlock
system
All doors will be automatically
unlocked when an impact causes the
air bags to deploy.
Speed sensing door lock system
All doors will be automatically locked
when vehicle speed exceeds 15
km/h.
Yo u c a n a c t i v a t e o r d e a c t i v a t e t h e
Auto Door Lock/Unlock features from
the User Settings Mode on the LCD
display.For more details, refer to
"LCD Display" in this chapter.
Always secure your vehicle.
Leaving your vehicle unlocked
can invite theft or entry into the
vehicle.
To s e c u r e y o u r v e h i c l e , w h i l s t
depressing the brake, move the
shift lever to the P (Park) posi-
tion (for automatic transmis-
sion) or first gear or R (Reverse,
for manual transmission),
engage the parking brake, and
place the ignition switch in the
LOCK/OFF position, close all
windows, lock all doors, and
always take the key with you.
WA R N I N G
Opening a door when something
is approaching may cause dam-
age or injury. Be careful when
opening doors and watch for
vehicles, motorcycles, bicycles
or pedestrians approaching the
vehicle in the path of the door.
WA R N I N G
Page 113 of 571
3-21
Convenient features of your vehicle
3
The Driver Position Memory System
is provided to store and recall the fol-
lowing memory settings with a sim-
ple button operation.
- Driver's seat position
- Outside rearview mirror position
- Instrument panel illumination intensity
Information
• If the battery is disconnected, the
memory settings will be erased.
•If the Driver Position Memory
System does not operate normally,
we recommend that you have the
system checked by an authorised
HYUNDAI dealer.
Storing memory positions
1. Move the shift lever into P (for
Automatic transmission) or Neutral
(for manual transmission) whilst the
ignition switch or the Engine
Start/Stop button is in the ON posi-
tion.
2. Adjust the driver's seat position,
outside rearview mirror position
and instrument panel illumination
intensity to the desired position.
3. Press the SET button. The system
will beep once and notify you
"Press button to save settings"on
the LCD display.
4. Press one of the memory buttons
(1 or 2) within 5 seconds. The sys-
tem will beep twice when the mem-
ory has been successfully stored.
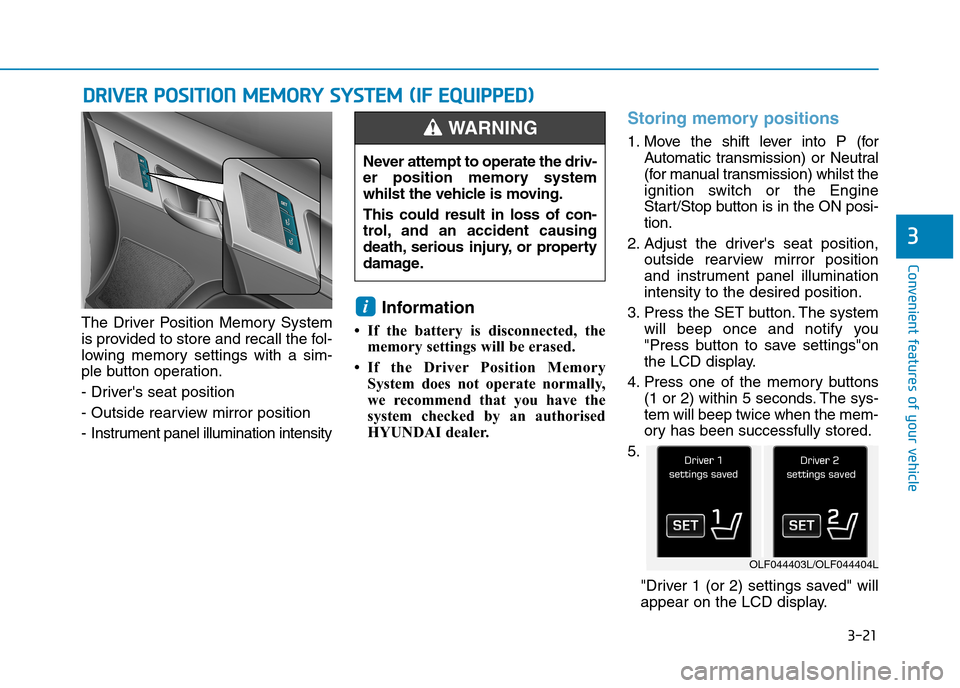
5.
"Driver 1 (or 2) settings saved" will
appear on the LCD display.
i
DDRRIIVVEERR PPOOSSIITTIIOONN MMEEMMOORRYY SSYYSSTTEEMM ((IIFF EEQQUUIIPPPPEEDD))
Never attempt to operate the driv-
er position memory system
whilst the vehicle is moving.
This could result in loss of con-
trol, and an accident causing
death, serious injury, or property
damage.
WA R N I N G
OLF044403L/OLF044404L
Page 114 of 571
3-22
Convenient features of your vehicle
Recalling memory position
1. Move the shift lever into P (for
Automatic transmission) or Neutral
(for manual transmission) whilst the
ignition switch or the Engine
Start/Stop button is in the ON posi-
tion.
2. Press the desired memory button
(1 or 2). The system will beep once,
then the driver’s seat position, out-
side rearview mirror and instrument
panel illumination will automatically
adjust to the stored position (if
equipped).
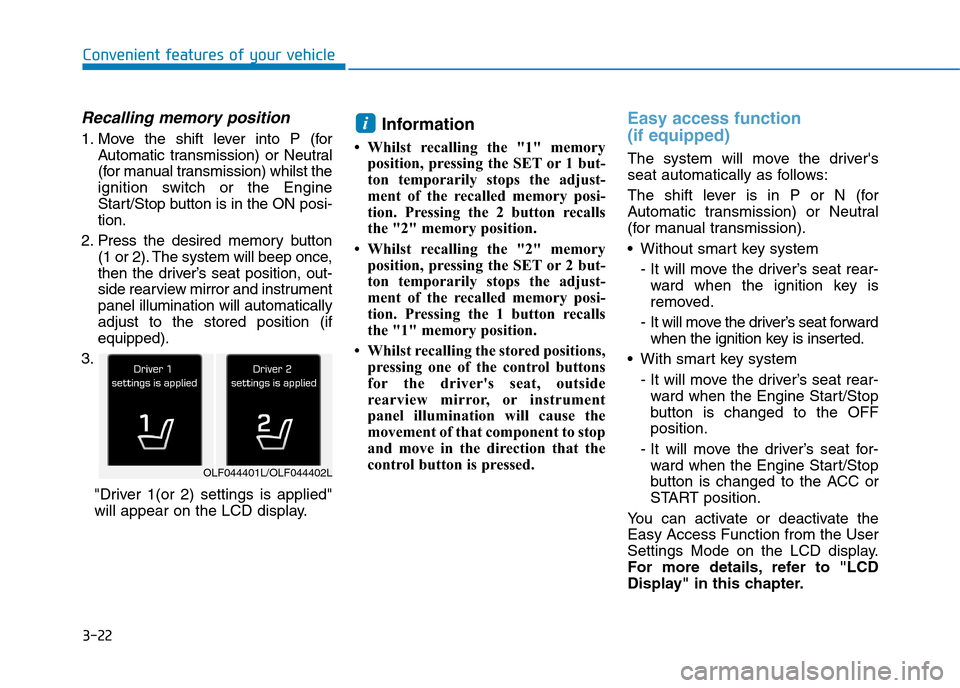
3.
"Driver 1(or 2) settings is applied"
will appear on the LCD display.
Information
• Whilst recalling the "1" memory
position, pressing the SET or 1 but-
ton temporarily stops the adjust-
ment of the recalled memory posi-
tion. Pressing the 2 button recalls
the "2" memory position.
• Whilst recalling the "2" memory
position, pressing the SET or 2 but-
ton temporarily stops the adjust-
ment of the recalled memory posi-
tion. Pressing the 1 button recalls
the "1" memory position.
• Whilst recalling the stored positions,
pressing one of the control buttons
for the driver's seat, outside
rearview mirror, or instrument
panel illumination will cause the
movement of that component to stop
and move in the direction that the
control button is pressed.
Easy access function
(if equipped)
The system will move the driver's
seat automatically as follows:
The shift lever is in P or N (for
Automatic transmission) or Neutral
(for manual transmission).
•Without smart key system
- It will move the driver’s seat rear-
ward when the ignition key is
removed.
- It will move the driver’s seat forward
when the ignition key is inserted.
•With smart key system
- It will move the driver’s seat rear-
ward when the Engine Star t/Stop
button is changed to the OFF
position.
- It will move the driver’s seat for-
ward when the Engine Star t/Stop
button is changed to the ACC or
START position.
Yo u c a n a c t i v a t e o r d e a c t i v a t e t h e
Easy Access Function from the User
Settings Mode on the LCD display.
For more details, refer to "LCD
Display" in this chapter.
i
OLF044401L/OLF044402L
Page 136 of 571
3-44
Convenient features of your vehicle
How to use the Smart Boot
The boot can be opened with no-
touch activation when the following
conditions are met:
•After 15 seconds when all doors
are closed and locked.
•Positioned in the detecting area for
more than 3 seconds.
Information
• The Smart Boot does not operate
when:
- The smart key is detected within
15 seconds after the doors are
closed and locked, and is continu-
ously detected.
- The smart key is detected within
15 seconds after the doors are
closed and locked, and 1.5 m from
the front door handles (for vehicles
equipped with a Welcome Light).
- A door is not locked or closed.
- The smart key is in the vehicle.
1. Setting
To a c t i v a t e t h e S m a r t B o o t , g o t o
User Settings Mode and select
Smart Boot on the LCD display.
For more details, refer to "LCD
Display" in this chapter.
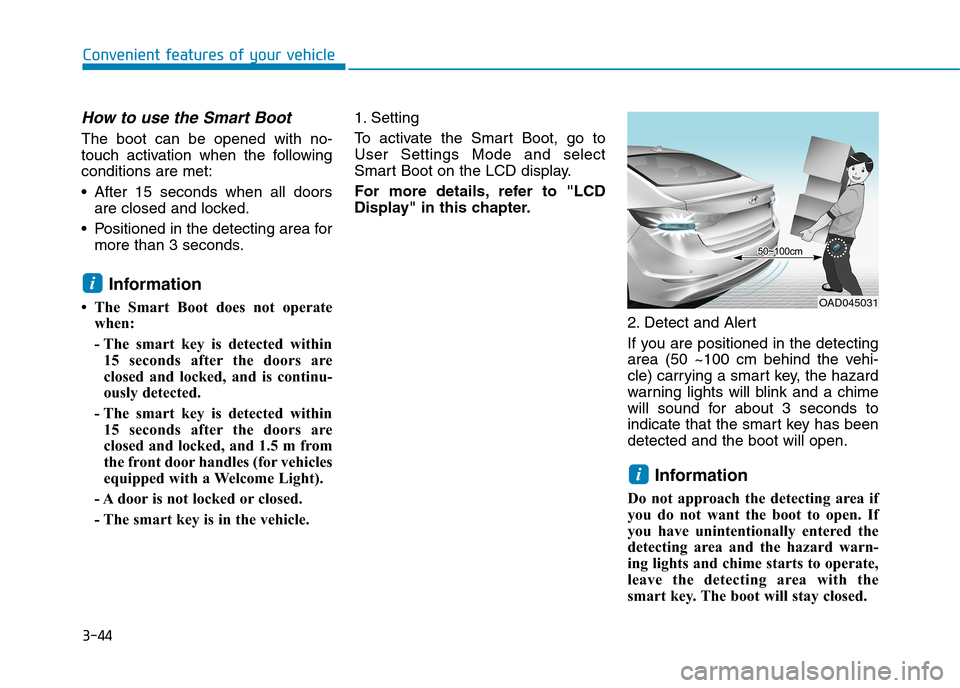
2. Detect and Alert
If you are positioned in the detecting
area (50 ~100 cm behind the vehi-
cle) carrying a smart key, the hazard
warning lights will blink and a chime
will sound for about 3 seconds to
indicate that the smart key has been
detected and the boot will open.
Information
Do not approach the detecting area if
you do not want the boot to open. If
you have unintentionally entered the
detecting area and the hazard warn-
ing lights and chime starts to operate,
leave the detecting area with the
smart key. The boot will stay closed.
i
i
OAD045031
Page 142 of 571
3-50
Convenient features of your vehicle
IINNSSTTRRUUMMEENNTT CCLLUUSSTTEERR
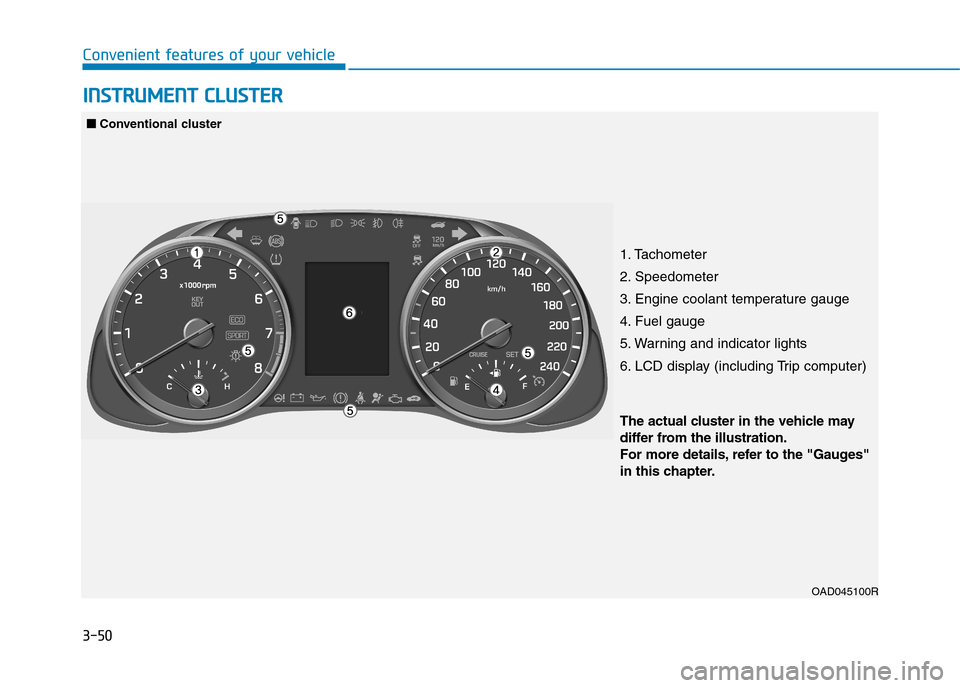
1. Tachometer
2. Speedometer
3. Engine coolant temperature gauge
4. Fuel gauge
5. Warning and indicator lights
6. LCD display (including Trip computer)
OAD045100R
■■Conventional cluster
The actual cluster in the vehicle may
differ from the illustration.
For more details, refer to the "Gauges"
in this chapter.
Page 143 of 571
3-51
Convenient features of your vehicle
3
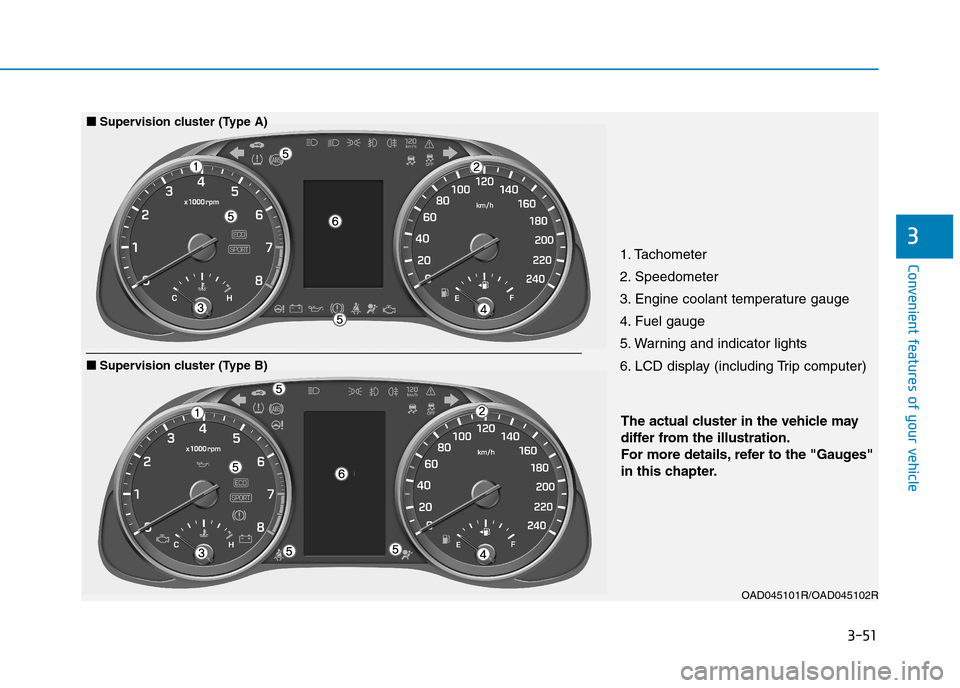
1. Tachometer
2. Speedometer
3. Engine coolant temperature gauge
4. Fuel gauge
5. Warning and indicator lights
6. LCD display (including Trip computer)
OAD045101R/OAD045102R
■■Supervision cluster (Type A)
The actual cluster in the vehicle may
differ from the illustration.
For more details, refer to the "Gauges"
in this chapter.
■■Supervision cluster (Type B)
Page 144 of 571
3-52
Convenient features of your vehicle
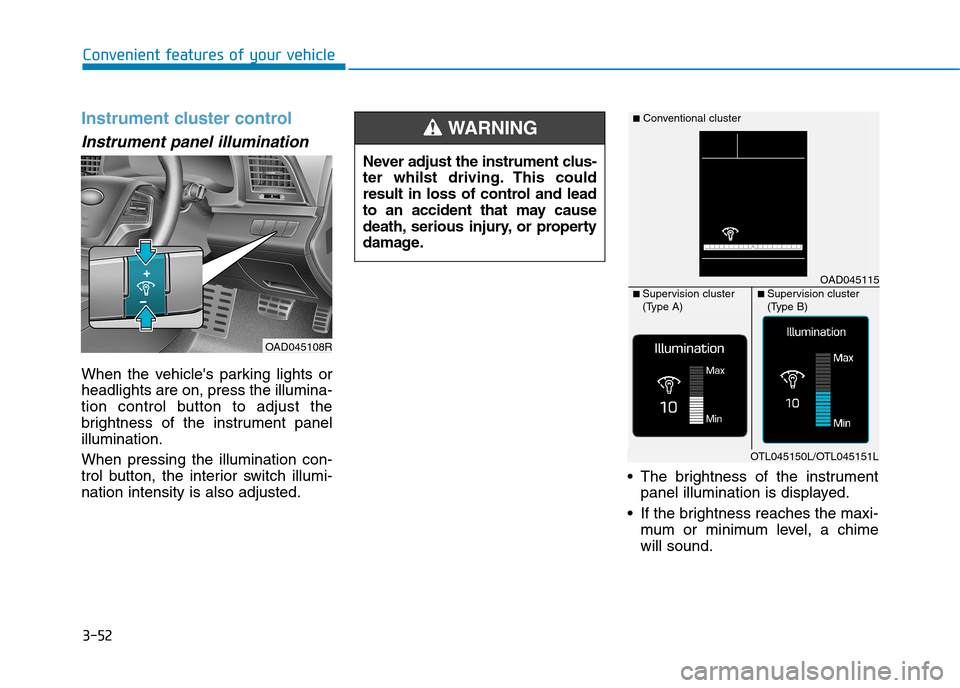
Instrument cluster control
Instrument panel illumination
When the vehicle's parking lights or
headlights are on, press the illumina-
tion control button to adjust the
brightness of the instrument panel
illumination.
When pressing the illumination con-
trol button, the interior switch illumi-
nation intensity is also adjusted.
•The brightness of the instrument
panel illumination is displayed.
•If the brightness reaches the maxi-
mum or minimum level, a chime
will sound.
Never adjust the instrument clus-
ter whilst driving. This could
result in loss of control and lead
to an accident that may cause
death, serious injury, or property
damage.
WA R N I N G
OAD045108R
OAD045115
■Conventional cluster
■ Supervision cluster(Type A)■ Supervision cluster(Type B)
OTL045150L/OTL045151L
Page 155 of 571
3-63
Convenient features of your vehicle
3
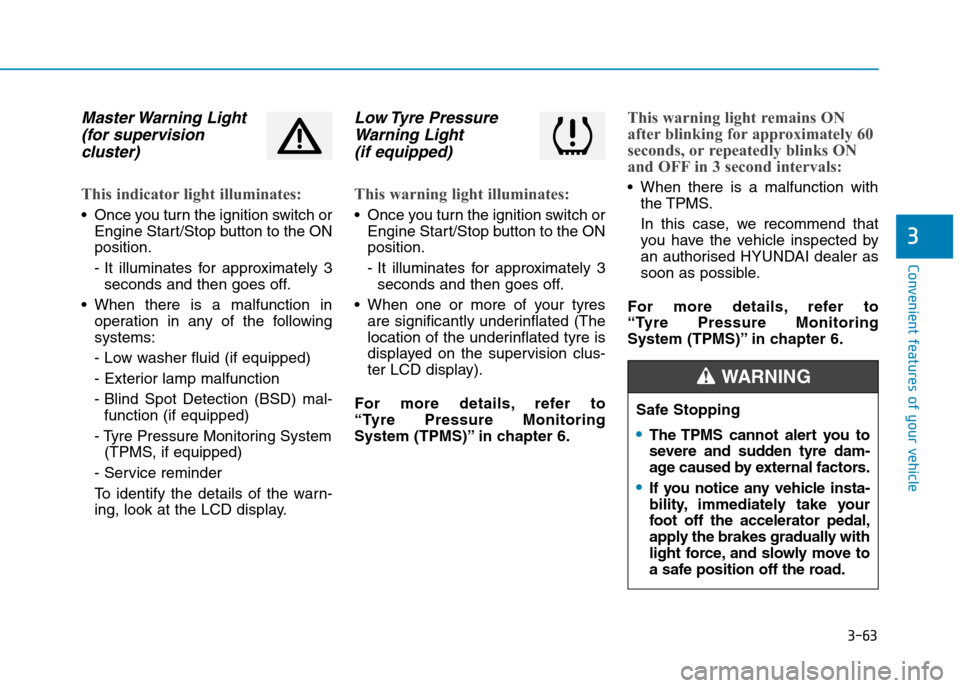
Master Warning Light
(for supervision
cluster)
This indicator light illuminates:
•Once you turn the ignition switch or
Engine Start/Stop button to the ON
position.
- It illuminates for approximately 3
seconds and then goes off.
•When there is a malfunction in
operation in any of the following
systems:
- Low washer fluid (if equipped)
- Exterior lamp malfunction
- Blind Spot Detection (BSD) mal-
function (if equipped)
- Tyre Pressure Monitoring System
(TPMS, if equipped)
- Service reminder
To i d e n t i f y t h e d e t a i l s o f t h e w a r n -
ing, look at the LCD display.
Low Tyre Pressure
Warning Light
(if equipped)
This warning light illuminates:
•Once you turn the ignition switch or
Engine Start/Stop button to the ON
position.
- It illuminates for approximately 3
seconds and then goes off.
•When one or more of your tyres
are significantly underinflated (The
location of the underinflated tyre is
displayed on the supervision clus-
ter LCD display).
For more details, refer to
“Tyre Pressure Monitoring
System (TPMS)” in chapter 6.
This warning light remains ON
after blinking for approximately 60
seconds, or repeatedly blinks ON
and OFF in 3 second intervals:
•When there is a malfunction with
the TPMS.
In this case, we recommend that
you have the vehicle inspected by
an authorised HYUNDAI dealer as
soon as possible.
For more details, refer to
“Tyre Pressure Monitoring
System (TPMS)” in chapter 6.
Safe Stopping
•The TPMS cannot alert you to
severe and sudden tyre dam-
age caused by external factors.
•If you notice any vehicle insta-
bility, immediately take your
foot off the accelerator pedal,
apply the brakes gradually with
light force, and slowly move to
a safe position off the road.
WA R N I N G