turn signal Hyundai Elantra 2017 Owner's Manual - RHD (UK. Australia)
[x] Cancel search | Manufacturer: HYUNDAI, Model Year: 2017, Model line: Elantra, Model: Hyundai Elantra 2017Pages: 571, PDF Size: 65.66 MB
Page 20 of 571
F20F20
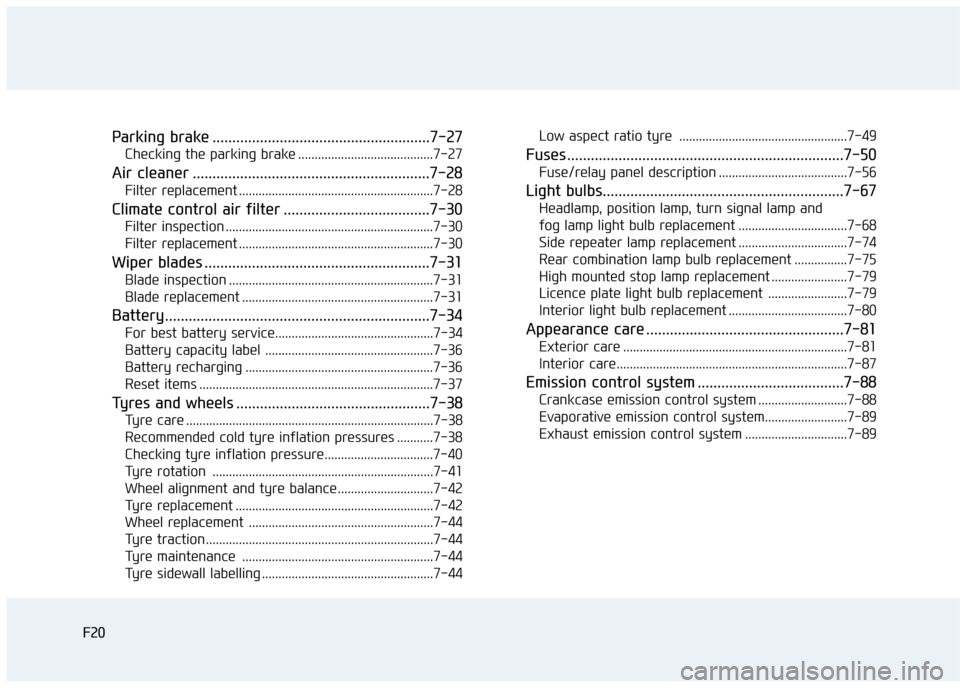
Parking brake .......................................................7-27
Checking the parking brake .........................................7-27
Air cleaner ............................................................7-28
Filter replacement ...........................................................7-28
Climate control air filter .....................................7-30
Filter inspection ...............................................................7-30
Filter replacement ...........................................................7-30
Wiper blades .........................................................7-31
Blade inspection ..............................................................7-31
Blade replacement ..........................................................7-31
Battery...................................................................7-34
For best battery service................................................7-34
Battery capacity label ...................................................7-36
Battery recharging .........................................................7-36
Reset items .......................................................................7-37
Ty r e s a n d w h e e l s . . . . . . . . . . . . . . . . . . . . . . . . . . . . . . . . . . . . . . . . . . . . . . . . . 7 - 3 8
Ty r e c a r e . . . . . . . . . . . . . . . . . . . . . . . . . . . . . . . . . . . . . . . . . . . . . . . . . . . . . . . . . . . . . . . . . . . . . . . . . . . 7 - 3 8
Recommended cold tyre inflation pressures ...........7-38
Checking tyre inflation pressure.................................7-40
Ty r e r o t a t i o n . . . . . . . . . . . . . . . . . . . . . . . . . . . . . . . . . . . . . . . . . . . . . . . . . . . . . . . . . . . . . . . . . . . 7 - 4 1
Wheel alignment and tyre balance .............................7-42
Ty r e r e p l a c e m e n t . . . . . . . . . . . . . . . . . . . . . . . . . . . . . . . . . . . . . . . . . . . . . . . . . . . . . . . . . . . . 7 - 4 2
Wheel replacement ........................................................7-44
Ty r e t r a c t i o n . . . . . . . . . . . . . . . . . . . . . . . . . . . . . . . . . . . . . . . . . . . . . . . . . . . . . . . . . . . . . . . . . . . . . 7 - 4 4
Ty r e m a i n t e n a n c e . . . . . . . . . . . . . . . . . . . . . . . . . . . . . . . . . . . . . . . . . . . . . . . . . . . . . . . . . . 7 - 4 4
Ty r e s i d e w a l l l a b e l l i n g . . . . . . . . . . . . . . . . . . . . . . . . . . . . . . . . . . . . . . . . . . . . . . . . . . . . 7 - 4 4
Low aspect ratio tyre ...................................................7-49
Fuses ......................................................................7-50
Fuse/relay panel description .......................................7-56
Light bulbs.............................................................7-67
Headlamp, position lamp, turn signal lamp and
fog lamp light bulb replacement .................................7-68
Side repeater lamp replacement .................................7-74
Rear combination lamp bulb replacement ................7-75
High mounted stop lamp replacement .......................7-79
Licence plate light bulb replacement ........................7-79
Interior light bulb replacement ....................................7-80
Appearance care ..................................................7-81
Exterior care ....................................................................7-81
Interior care......................................................................7-87
Emission control system .....................................7-88
Crankcase emission control system ...........................7-88
Evaporative emission control system.........................7-89
Exhaust emission control system ...............................7-89
Page 26 of 571
1-5
Yo u r v e h i c l e a t a g l a n c e
1
IINNSSTTRRUUMMEENNTT PPAANNEELL OOVVEERRVVIIEEWW
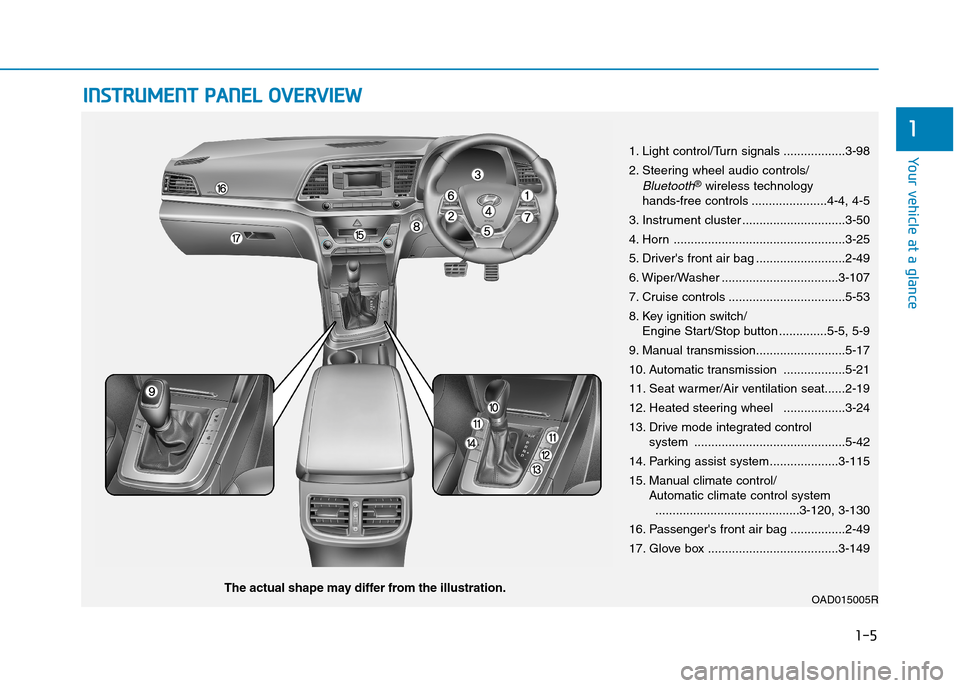
1. Light control/Turn signals ..................3-98
2. Steering wheel audio controls/
Bluetooth®wireless technology hands-free controls ......................4-4, 4-5
3. Instrument cluster ..............................3-50
4. Horn ..................................................3-25
5. Driver's front air bag ..........................2-49
6. Wiper/Washer ..................................3-107
7. Cruise controls ..................................5-53
8. Key ignition switch/Engine Start/Stop button ..............5-5, 5-9
9. Manual transmission..........................5-17
10. Automatic transmission ..................5-21
11. Seat warmer/Air ventilation seat......2-19
12. Heated steering wheel ..................3-24
13. Drive mode integrated control system ............................................5-42
14. Parking assist system....................3-115
15. Manual climate control/Automatic climate control system..........................................3-120, 3-130
16. Passenger's front air bag ................2-49
17. Glove box ......................................3-149
OAD015005RThe actual shape may differ from the illustration.
Page 80 of 571
2-53
Safety system of your vehicle
2
SRS warning light
The SRS air bag warning light on the
instrument panel will illuminate for
about 6 seconds after the ignition
switch is tur ned to the ON position,
after which the air bag warning light
should go out.
During a frontal collision, sensors will
detect the vehicle’s deceleration. If
the rate of deceleration is high
enough, the control unit will inflate
the front air bags, at the time and
with the force needed.
The front air bags help protect the
driver and front passenger by
responding to frontal impacts in
which seat belts alone cannot pro-
vide adequate restraint. When need-
ed, the side air bags help provide
protection in the event of a side
impact.
•Air bags are activated (able to
inflate if necessary) only when the
ignition switch is in the ON posi-
tion.
•Air bags inflate in the event of cer-
tain frontal or side collisions to help
protect the occupants from serious
physical injury.
•Generally, air bags are designed to
inflate based upon the severity of a
collision it’s direction etc. These
two factors determine whether the
sensors produce an electronic
deployment/inflation signal.
If your SRS malfunctions, the
air bag may not inflate properly
during an accident increasing
the risk of serious injury or
death.
If any of the following condi-
tions occur, your SRS is mal-
functioning:
•The light does not turn on for
approximately six seconds
when the ignition switch is in
the ON position.
•The light stays on after illumi-
nating for approximately six
seconds.
•The light comes on whilst the
vehicle is in motion.
•The light blinks when the
engine is running.
We recommend that an autho-
rised HYUNDAI dealer inspect
the SRS as soon as possible if
any of these conditions occur.
WA R N I N G
Page 158 of 571
3-66
Convenient features of your vehicle
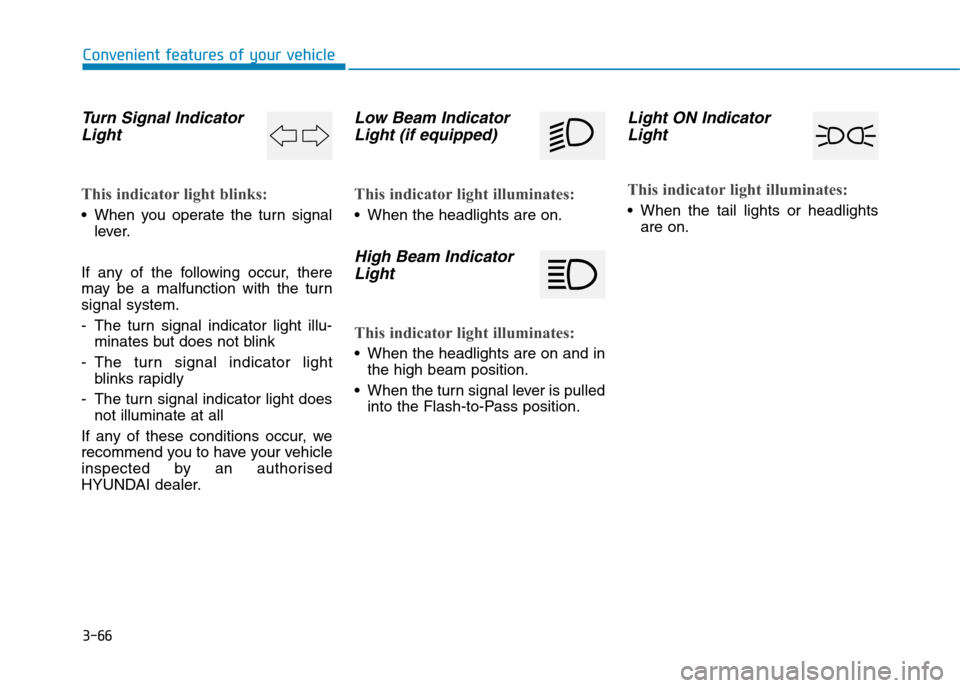
Tu r n S i g n a l I n d i c a t o r
Light
This indicator light blinks:
•When you operate the turn signal
lever.
If any of the following occur, there
may be a malfunction with the turn
signal system.
-The turn signal indicator light illu-
minates but does not blink
-The turn signal indicator light
blinks rapidly
-The turn signal indicator light does
not illuminate at all
If any of these conditions occur, we
recommend you to have your vehicle
inspected by an authorised
HYUNDAI dealer.
Low Beam Indicator
Light (if equipped)
This indicator light illuminates:
•When the headlights are on.
High Beam Indicator
Light
This indicator light illuminates:
•When the headlights are on and in
the high beam position.
•When the turn signal lever is pulled
into the Flash-to-Pass position.
Light ON Indicator
Light
This indicator light illuminates:
•When the tail lights or headlights
are on.
Page 178 of 571
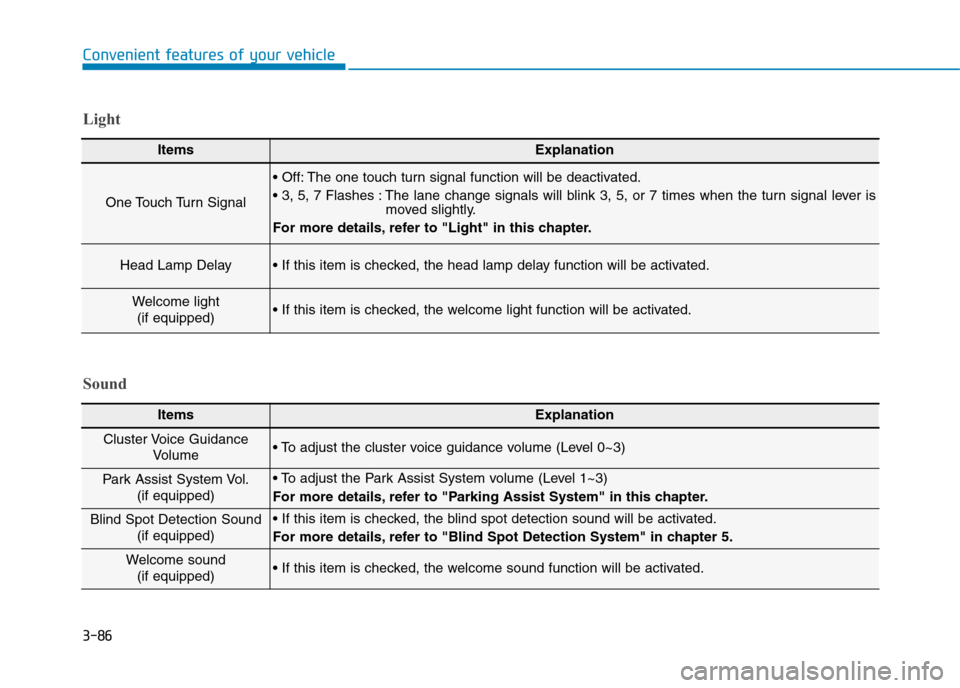
3-86
Convenient features of your vehicle
Light
ItemsExplanation
One Touch Turn Signal
• Off: The one touch turn signal function will be deactivated.
• 3, 5, 7 Flashes : The lane change signals will blink 3, 5, or 7 times when the turn signal lever ismoved slightly.
For more details, refer to "Light" in this chapter.
Head Lamp Delay• If this item is checked, the head lamp delay function will be activated.
Welcome light
(if equipped)• If this item is checked, the welcome light function will be activated.
Sound
ItemsExplanation
Cluster Voice Guidance
Vo l u m e • To adjust the cluster voice guidance volume (Level 0~3)
Par k Assist System Vol.
(if equipped)
• To adjust the Park Assist System volume (Level 1~3)
For more details, refer to "Parking Assist System" in this chapter.
Blind Spot Detection Sound
(if equipped)
• If this item is checked, the blind spot detection sound will be activated.
For more details, refer to "Blind Spot Detection System" in chapter 5.
Welcome sound
(if equipped)• If this item is checked, the welcome sound function will be activated.
Page 192 of 571
3-100
Convenient features of your vehicle
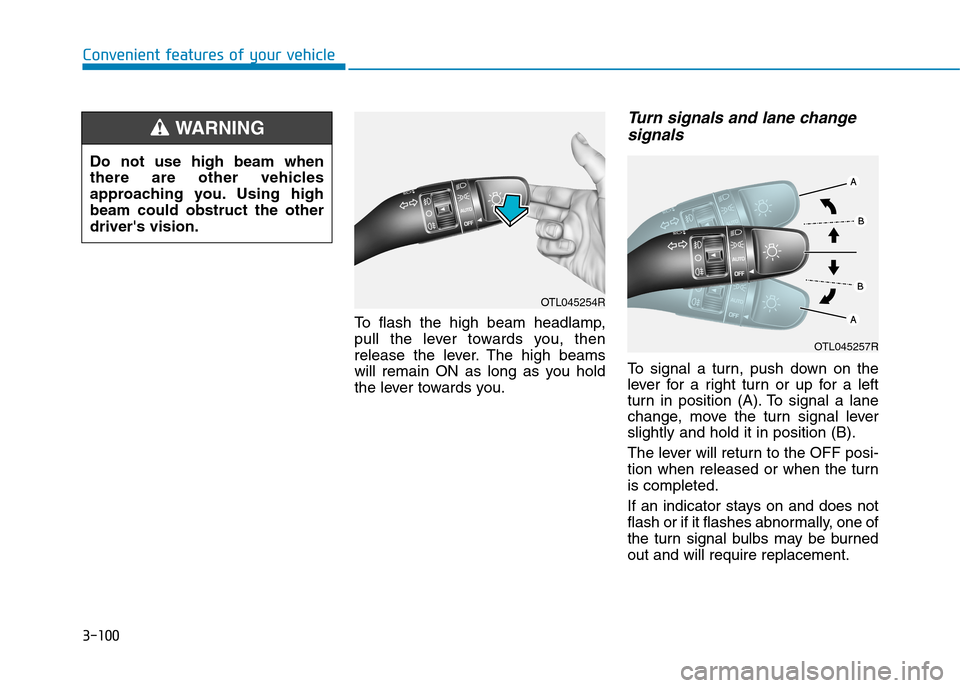
To f l a s h t h e h i g h b e a m h e a d l a m p ,
pull the lever towards you, then
release the lever. The high beams
will remain ON as long as you hold
the lever towards you.
Tu r n s i g n a l s a n d l a n e c h a n g e
signals
To s i g n a l a t u r n , p u s h d o w n o n t h e
lever for a right turn or up for a left
turn in position (A). To signal a lane
change, move the turn signal lever
slightly and hold it in position (B).
The lever will return to the OFF posi-
tion when released or when the turn
is completed.
If an indicator stays on and does not
flash or if it flashes abnormally, one of
the turn signal bulbs may be burned
out and will require replacement.
Do not use high beam when
there are other vehicles
approaching you. Using high
beam could obstruct the other
driver's vision.
WA R N I N G
OTL045254R
OTL045257R
Page 193 of 571
3-101
Convenient features of your vehicle
3
One-touch turn signal function
To a c t i v a t e a o n e - t o u c h t u r n s i g n a l
function, move the turn signal lever
slightly and then release it. The lane
change signals will blink 3, 5 or 7
times.
Yo u c a n a c t i v a t e / d e a c t i v a t e t h e O n e
To u c h Tu r n S i g n a l f u n c t i o n o r c h o o s e
the number of blinks (3, 5, or 7) from
the User Settings Mode on the LCD
display.For more details, refer to
"LCD Display" in this chapter.
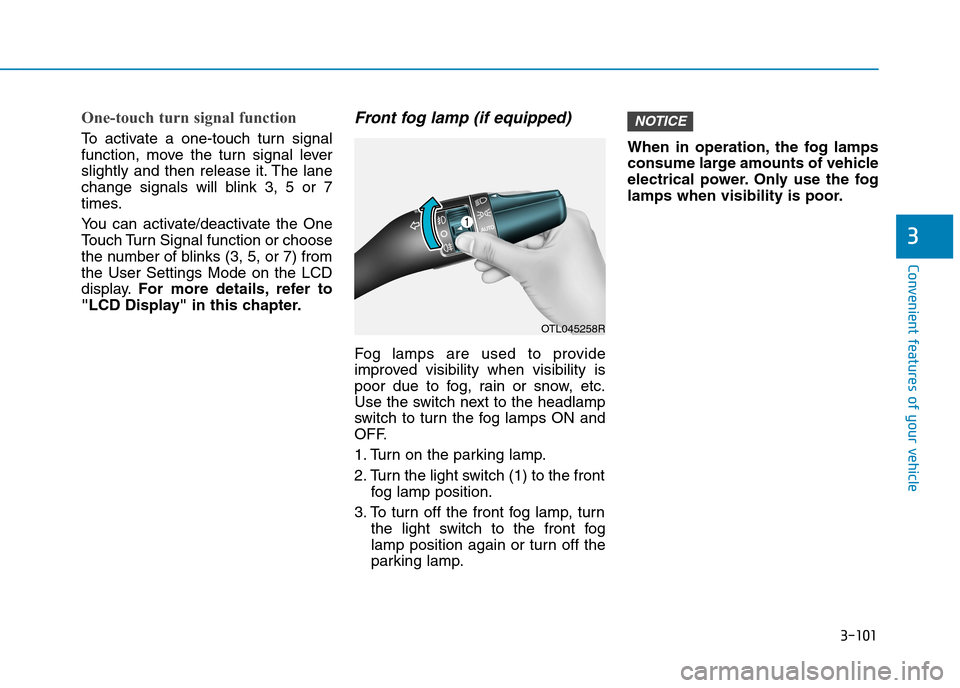
Front fog lamp (if equipped)
Fog lamps are used to provide
improved visibility when visibility is
poor due to fog, rain or snow, etc.
Use the switch next to the headlamp
switch to tur n the fog lamps ON and
OFF.
1. Turn on the parking lamp.
2. Turn the light switch (1) to the front
fog lamp position.
3. To turn off the front fog lamp, turn
the light switch to the front fog
lamp position again or turn off the
parking lamp.
When in operation, the fog lamps
consume large amounts of vehicle
electrical power. Only use the fog
lamps when visibility is poor.
NOTICE
OTL045258R
Page 238 of 571

3-146
Convenient features of your vehicle
Auto defogging system
(only for automatic climate
control system, if equipped)
Auto defogging reduces the possibil-
ity of fogging up the inside of the
windscreen by automatically sensing
the moisture on the inside of the
windscreen.
The auto defogging system operates
when the heater or air conditioning is
on.
Information
The auto defogging system may not
operate normally, when the outside
temperature is below -10 °C.
When the Auto Defogging
System operates, the indi-
cator will illuminate.
If high levels of moisture are sensed
in the vehicle, the Auto Defogging
System will operate in the following
order:
Step 1 : Outside air position
Step 2 : Operating the air condition-
ing
Step 3 : Blowing air toward the wind-
screen
Step 4 : Increasing air flow toward
the windscreen
If the air conditioning is off or recircu-
lated air position is manually select-
ed whilst Auto Defogging System is
ON, the Auto Defogging System
Indicator will blink 3 times to signal
that the manual operation has been
cancelled.
To c a n c e l o r r e s e t t h e A u t o D e f o g g i n g
System
Press the front windscreen defroster
button for 3 seconds when the igni-
tion switch is in the ON position.
When the Auto Defogging System is
cancelled, the ADS OFF symbol will
blink 3 times and the ADS OFF will
be displayed on the climate control
information screen.
When the Auto Defogging System is
reset, the ADS OFF symbol will blink
6 times without a signal.
Information
• When the air conditioning is turned
on by the Auto defogging system, if
you try to turn off the air condition-
ing, the indicator will blink 3 times
and the air conditioning will not be
turned off.
• For efficiency, do not select recircu-
lated air position whilst the Auto
defogging system is operating.
i
i
OAD045331
Page 277 of 571
4-28
Multimedia System
(Continued)
•Do not use a mobile phone orper-
form Bluetooth®Wireless Technology
settings (e.g. pairing a phone) whilst
driving.
•Even if the phone supports
Bluetooth®Wireless Technology, the
phone will not be found during
device searches if the phone has
been set to hidden state or the
Bluetooth®Wireless Technology
power is turned off. Disable the hid-
den state or turn on the Bluetooth®
Wireless Technology power prior to
searching/connecting with the audio
system.
•You will not be able to use the
hands-free feature when your phone
(in the vehicle) is outside of the
mobile service area (e.g. in a tunnel,
underground, in a mountainous
area, etc.).
• If the mobile phone signal is poor or
the vehicle's interior noise is too
loud, it may be difficult to hear the
other person’s voice during a call.
(Continued)
(Continued)
•Do not place the phone near or
inside metallic objects, otherwise
communications with Bluetooth®
Wireless Technology system or
mobile service stations can be dis-
turbed.
• Placing the audio system within an
electromagnetic environment may
result in noise interference.
•Some mobile phones or other
devices may cause interference,
noise or malfunction to audio sys-
tem. In this case, storing the device
in a different location may resolve
the condition.
•Whilst a phone is connected through
Bluetooth®Wireless Technology your
phone may discharge quicker than
usual for additional Bluetooth®
Wireless Technology-related opera-
tions.
(Continued)
(Continued)
• If Priority is set upon vehicle igni-
tion (IGN/ACC ON), the Bluetooth®
Wireless Technology phone will be
automatically connected. Even if
you are outside, the Bluetooth®
Wireless Technology phone will be
automatically connected once you
are in the vicinity of the vehicle. If
you do not want to automatically
connect yourBluetooth®Wireless
Technology phone, try the following.
1) Turn off the Bluetooth®Wireless
Te c h n o l o g y f e a t u r e i n y o u r
mobile phone.
2) Turn off the Bluetooth®Wireless
Technology feature in your audio
system.
-To turn off the Bluetooth®
Wireless Technology feature in
your audio system, go to
[SETUP/CLOCK] > [Phone] and
[turn off] the Bluetooth®Wireless
Technology feature.
(Continued)
Page 323 of 571
4-74
Multimedia System
(Continued)
•Bluetooth®Wireless Technology fea-
tures supported within the vehicle
are as follows. Some features may
not be supported depending on your
Bluetooth®Wireless Technology
device.
-Answering and placing
Bluetooth®Wireless Technology
Handsfree calls
-Menu operation during call
(Switch to Private, Switch to call
waiting, Outgoing volume)
- Download Call History
- Download Mobile Phone book
-Phone book/Call History Auto
Download
-Bluetooth®Wireless Technology
device auto connection
-Bluetooth®Wireless Technology
Audio
•Before using Bluetooth®Wireless
Technology related features of the
audio system, refer to your phone’s
User’s Manual for phone-side
Bluetooth®Wireless Technology
operations.
(Continued)
(Continued)
• The phone must be paired to the
audio system to use Bluetooth®
Wireless Technology related fea-
tures.
• Pairing and connecting a Bluetooth®
Wireless Technology enabled mobile
phone will work only when the
Bluetooth®Wireless Technology
option within your mobile phone
has been turned on. (Methods of
turning on the Bluetooth®Wireless
Te c h n o l o g y e n a b l e d f e a t u r e m a y
differ depending on the mobile
phone.)
• Do not use a mobile phone or per-
form Bluetooth®Wireless
Technology settings (e.g. pairing a
phone) whilst driving.
(Continued)
(Continued)
•Even if the phone supports
Bluetooth®Wireless Technology, the
phone will not be found during
device searches if the phone has
been set to hidden state or the
Bluetooth®Wireless Technology
power is turned off. Disable the hid-
den state or turn on the Bluetooth®
Wireless Technology power prior to
searching/connecting with the audio
system.
•You will not be able to use the
hands-free feature when your phone
(in the vehicle) is outside of the
mobile service area (e.g. in a tunnel,
underground, in a mountainous
area, etc.).
• If the mobile phone signal is poor or
the vehicle’s interior noise is too
loud, it may be difficult to hear the
other person’s voice during a call.
•Do not place the phone near or
inside metallic objects, otherwise
communications with the
Bluetooth®Wireless Technology sys-
tem or mobile service stations can
be disturbed.
(Continued)