automatic Hyundai Elantra 2019 Owner's Manual
[x] Cancel search | Manufacturer: HYUNDAI, Model Year: 2019, Model line: Elantra, Model: Hyundai Elantra 2019Pages: 535, PDF Size: 16.83 MB
Page 7 of 535
F7
Introduction
F
FU
U E
EL
L
R
R E
EQ
Q U
UI
IR
R E
EM
M E
EN
N T
TS
S
NOTICE indicates a situation
which, if not avoided, could result
in vehicle damage. Your new vehicle is designed to
obtain maximum performance with
UNLEADED FUEL, as well as mini-
mize exhaust emissions and spark
plug fouling.
Your new vehicle is designed to use
only unleaded fuel having an octane
number ((R+M)/2) of 87 (Research
Octane Number 91) or higher. (Do not
use methanol blended fuels)
To prevent damage to the engine
and engine components, never
add any fuel system cleaning
agents to the fuel tank other than
what has been specified.
Consult an authorized HYUNDAI
dealer for additional information.
Gasoline containing alcohol or
methanol
Gasohol, a mixture of gasoline and
ethanol (also known as grain alcohol)
are being marketed along with or
instead of leaded or unleaded gaso-
line. For example, "E15" is a gasohol
comprised of 15% ethanol and 85%
gasoline.
Do not use gasohol containing more
than 15% ethanol, and do not use
gasoline or gasohol containing any
methanol. Either of these fuels may
cause drivability problems and dam-
age to the fuel system, engine control
system and emission control system.
Discontinue using gasohol of any
kind if drivability problems occur.
NOTICE
NOTICE
CAUTION indicates a hazardous
situation which, if not avoided,
could result in minor or moder-
ate injury.
CAUTION
•Do not "top off" after the noz-
zle automatically shuts off
when refueling.
Always check that the fuel cap
is installed securely to pre-
vent fuel spillage in the event
of an accident.
WARNING
Page 37 of 535
2-20
Safety system of your vehicle
Automatic temperature control The seat warmer starts to auto-
matically control the seat tempera-
ture in order to prevent low-tem-
perature burns after being manual-
ly turned ON.
If HIGH temperature is manually
selected again, the temperature
will be controlled automatically.
When pressing the switch for more than 1.5 seconds with the seat
warmer operating, the seat warmer
will turn OFF.
The seat warmer defaults to the OFF position whenever the ignition
switch is in the ON position.
Information
With the seat warmer switch in the
ON position, the heating system in the
seat turns off or on automatically
depending on the seat temperature.
Rear seat warmers (if equipped)
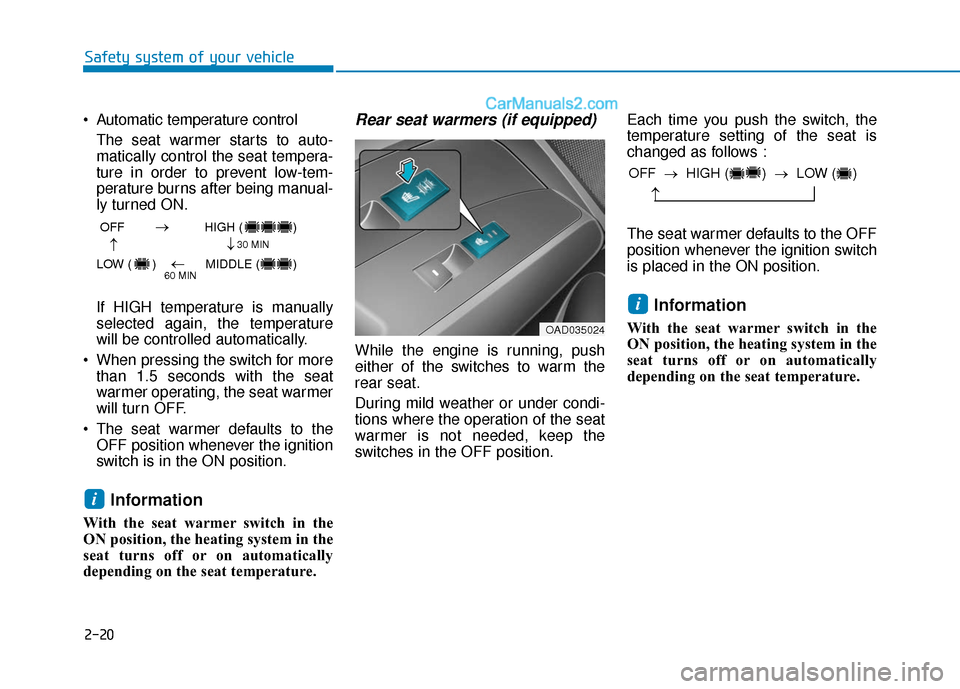
While the engine is running, push
either of the switches to warm the
rear seat.
During mild weather or under condi-
tions where the operation of the seat
warmer is not needed, keep the
switches in the OFF position. Each time you push the switch, the
temperature setting of the seat is
changed as follows :
The seat warmer defaults to the OFF
position whenever the ignition switch
is placed in the ON position.
Information
With the seat warmer switch in the
ON position, the heating system in the
seat turns off or on automatically
depending on the seat temperature.
i
i
OFF
HIGH ( )
LOW ( ) MIDDLE ( )
→→
→
→
30 MIN
60 MIN
OAD035024
OFF → HIGH ( ) → LOW ( )
→
Page 41 of 535
2-24
Seat Belt Restraint System
Seat Belt-Driver's 3-point sys-tem with emergency lockingretractor
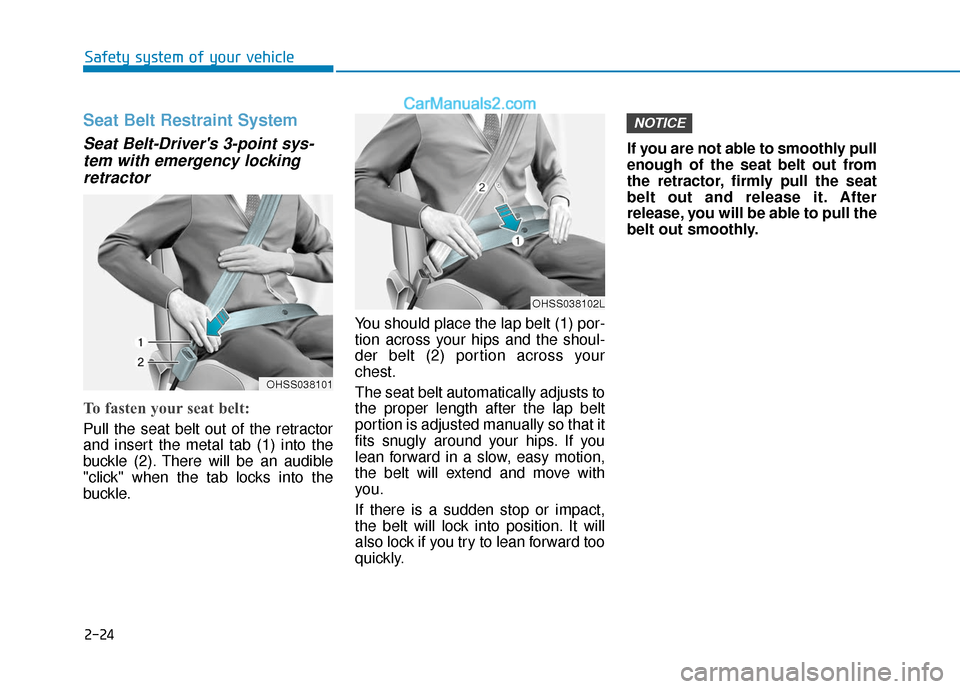
To fasten your seat belt:
Pull the seat belt out of the retractor
and insert the metal tab (1) into the
buckle (2). There will be an audible
"click" when the tab locks into the
buckle. You should place the lap belt (1) por-
tion across your hips and the shoul-
der belt (2) portion across your
chest.
The seat belt automatically adjusts to
the proper length after the lap belt
portion is adjusted manually so that it
fits snugly around your hips. If you
lean forward in a slow, easy motion,
the belt will extend and move with
you.
If there is a sudden stop or impact,
the belt will lock into position. It will
also lock if you try to lean forward too
quickly.If you are not able to smoothly pull
enough of the seat belt out from
the retractor, firmly pull the seat
belt out and release it. After
release, you will be able to pull the
belt out smoothly.
NOTICE
Safety system of your vehicle
OHSS038101
OHSS038102L
Page 43 of 535
2-26
Safety system of your vehicle
To fasten your seat belt:
Pull the seat belt out of the retractor
and insert the metal tab into the
buckle. There will be an audible
"click" when the tab locks into the
buckle. When not securing a child
restraint, the seat belt operates in the
same way as the driver's seat belt
(Emergency Locking Retractor
Type). It automatically adjusts to the
proper length only after the lap belt
portion of the seat belt is adjusted
manually so that it fits snugly across
your hips.
When the seat belt is fully extended
from the retractor to allow the instal-
lation of a child restraint system, the
seat belt operation changes to allow
the belt to retract, but not to extend
(Automatic Locking Retractor Type).
Refer to the "Using a Child Restraint
System" section in this chapter.Although the seat belt retractor
provides the same level of protec-
tion for seated passengers in
either emergency or automatic
locking modes, the emergency
locking mode allows seated pas-
sengers to move freely in their
seat while keeping some tension
on the belt. During a collision or
sudden stop, the retractor auto-
matically locks the belt to help
restrain your body.
To deactivate the automatic lock-
ing mode, unbuckle the seat belt
and allow the belt to fully retract.
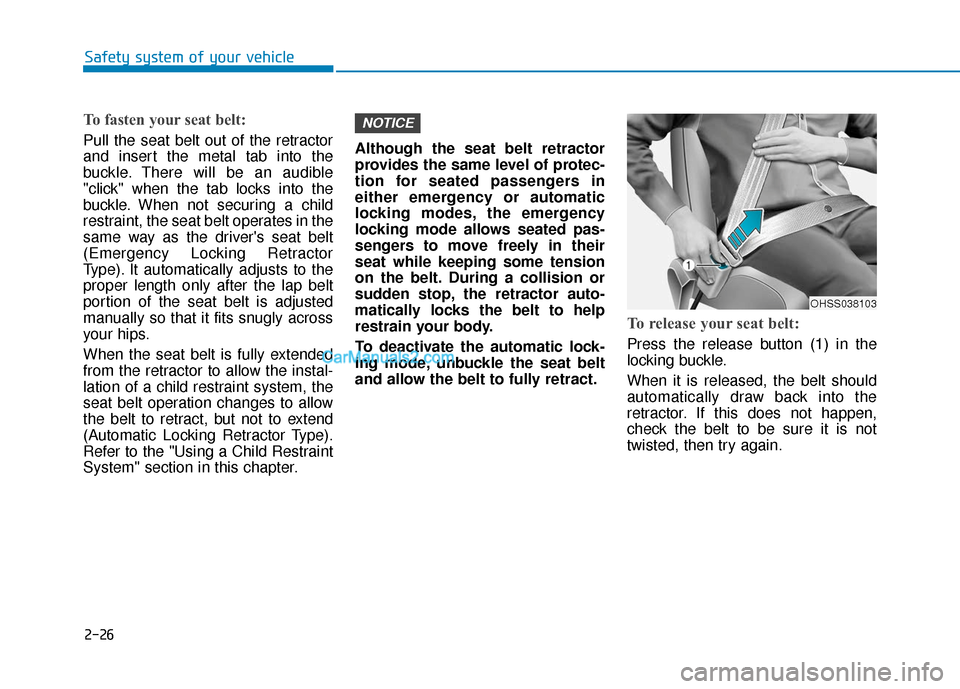
To release your seat belt:
Press the release button (1) in the
locking buckle.
When it is released, the belt should
automatically draw back into the
retractor. If this does not happen,
check the belt to be sure it is not
twisted, then try again.
NOTICE
OHSS038103
Page 57 of 535
2-40
Safety system of your vehicle
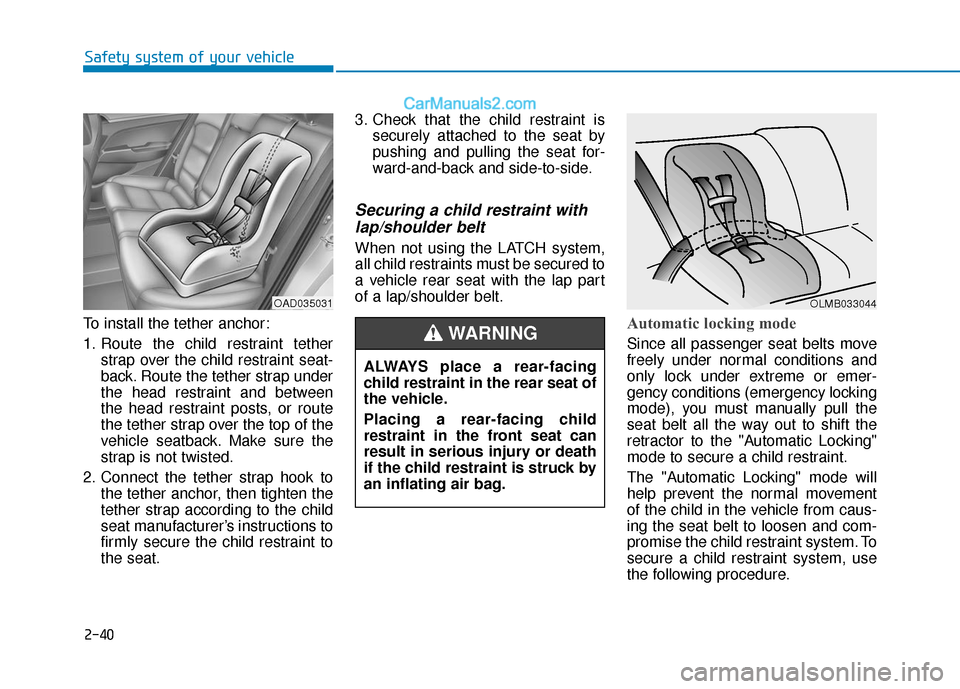
To install the tether anchor:
1. Route the child restraint tether strap over the child restraint seat-
back. Route the tether strap under
the head restraint and between
the head restraint posts, or route
the tether strap over the top of the
vehicle seatback. Make sure the
strap is not twisted.
2. Connect the tether strap hook to the tether anchor, then tighten the
tether strap according to the child
seat manufacturer’s instructions to
firmly secure the child restraint to
the seat. 3. Check that the child restraint is
securely attached to the seat by
pushing and pulling the seat for-
ward-and-back and side-to-side.
Securing a child restraint withlap/shoulder belt
When not using the LATCH system,
all child restraints must be secured to
a vehicle rear seat with the lap part
of a lap/shoulder belt.
Automatic locking mode
Since all passenger seat belts move
freely under normal conditions and
only lock under extreme or emer-
gency conditions (emergency locking
mode), you must manually pull the
seat belt all the way out to shift the
retractor to the "Automatic Locking"
mode to secure a child restraint.
The "Automatic Locking" mode will
help prevent the normal movement
of the child in the vehicle from caus-
ing the seat belt to loosen and com-
promise the child restraint system. To
secure a child restraint system, use
the following procedure.
OAD035031
ALWAYS place a rear-facing
child restraint in the rear seat of
the vehicle.
Placing a rear-facing child
restraint in the front seat can
result in serious injury or death
if the child restraint is struck by
an inflating air bag.
WARNING
OLMB033044
Page 58 of 535
2-41
Safety system of your vehicle
2
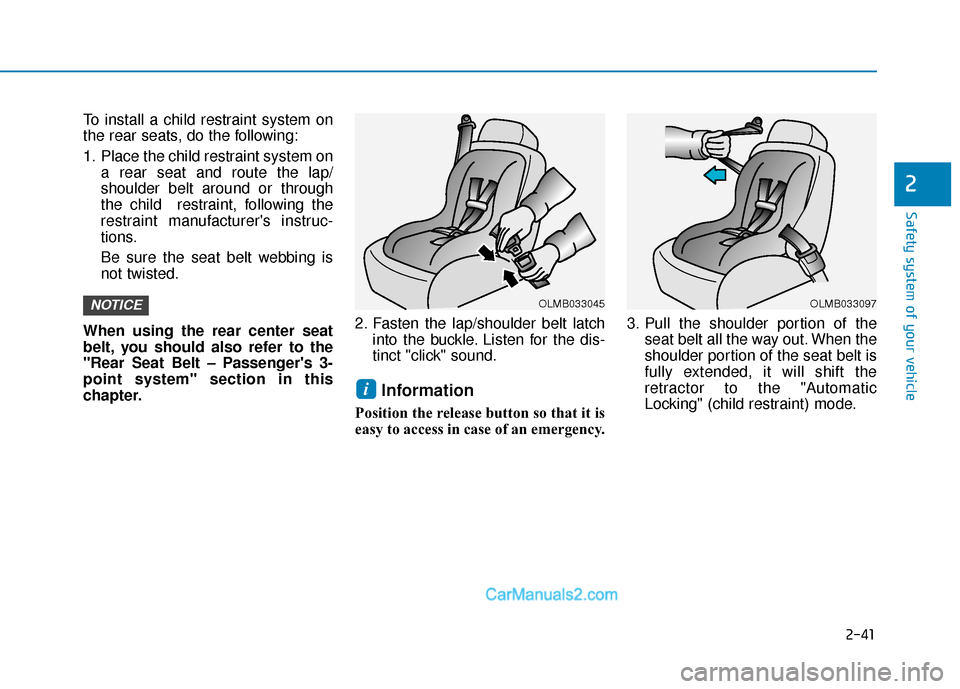
To install a child restraint system on
the rear seats, do the following:
1. Place the child restraint system ona rear seat and route the lap/
shoulder belt around or through
the child restraint, following the
restraint manufacturer's instruc-
tions.
Be sure the seat belt webbing is
not twisted.
When using the rear center seat
belt, you should also refer to the
"Rear Seat Belt – Passenger's 3-
point system" section in this
chapter. 2. Fasten the lap/shoulder belt latch
into the buckle. Listen for the dis-
tinct "click" sound.
Information
Position the release button so that it is
easy to access in case of an emergency. 3. Pull the shoulder portion of the
seat belt all the way out. When the
shoulder portion of the seat belt is
fully extended, it will shift the
retractor to the "Automatic
Locking" (child restraint) mode.
i
NOTICEOLMB033045OLMB033097
Page 59 of 535
2-42
Safety system of your vehicle
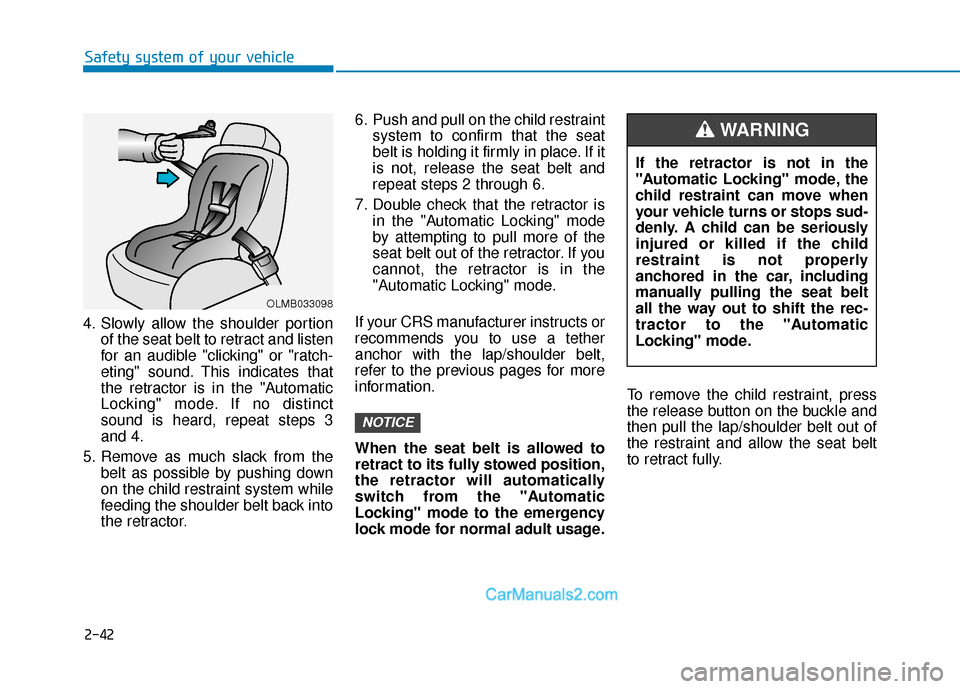
4. Slowly allow the shoulder portion of the seat belt to retract and listen
for an audible "clicking" or "ratch-
eting" sound. This indicates that
the retractor is in the "Automatic
Locking" mode. If no distinct
sound is heard, repeat steps 3
and 4.
5. Remove as much slack from the belt as possible by pushing down
on the child restraint system while
feeding the shoulder belt back into
the retractor. 6. Push and pull on the child restraint
system to confirm that the seat
belt is holding it firmly in place. If it
is not, release the seat belt and
repeat steps 2 through 6.
7. Double check that the retractor is in the "Automatic Locking" mode
by attempting to pull more of the
seat belt out of the retractor. If you
cannot, the retractor is in the
"Automatic Locking" mode.
If your CRS manufacturer instructs or
recommends you to use a tether
anchor with the lap/shoulder belt,
refer to the previous pages for more
information.
When the seat belt is allowed to
retract to its fully stowed position,
the retractor will automatically
switch from the "Automatic
Locking" mode to the emergency
lock mode for normal adult usage. To remove the child restraint, press
the release button on the buckle and
then pull the lap/shoulder belt out of
the restraint and allow the seat belt
to retract fully.
NOTICE
OLMB033098
If the retractor is not in the
"Automatic Locking" mode, the
child restraint can move when
your vehicle turns or stops sud-
denly. A child can be seriously
injured or killed if the child
restraint is not properly
anchored in the car, including
manually pulling the seat belt
all the way out to shift the rec-
tractor to the "Automatic
Locking" mode.
WARNING
Page 69 of 535
2-52
Safety system of your vehicle
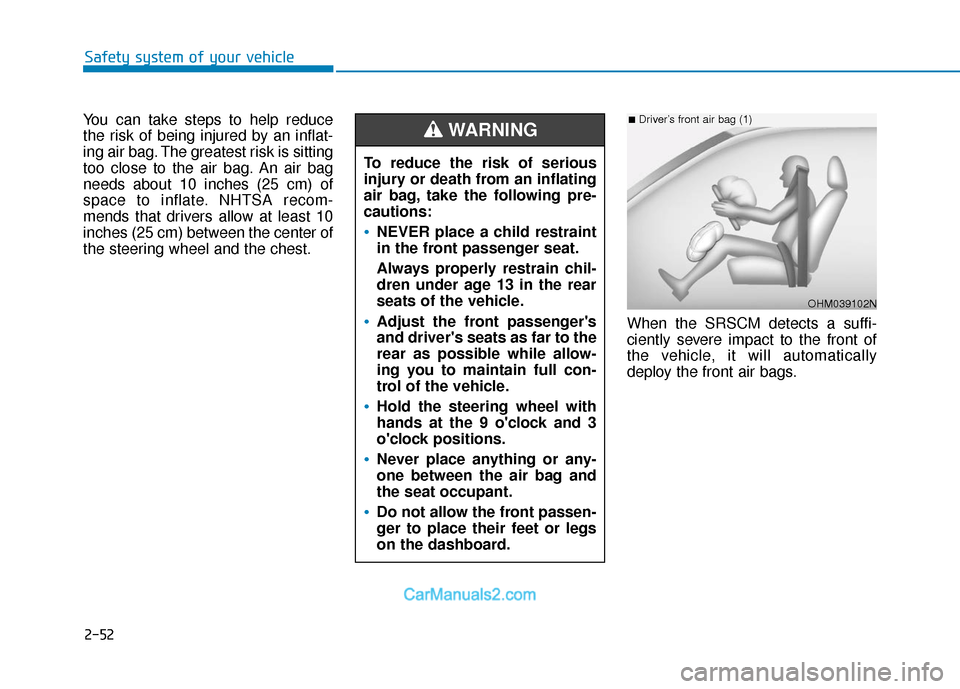
You can take steps to help reduce
the risk of being injured by an inflat-
ing air bag. The greatest risk is sitting
too close to the air bag. An air bag
needs about 10 inches (25 cm) of
space to inflate. NHTSA recom-
mends that drivers allow at least 10
inches (25 cm) between the center of
the steering wheel and the chest.
When the SRSCM detects a suffi-
ciently severe impact to the front of
the vehicle, it will automatically
deploy the front air bags.
To reduce the risk of serious
injury or death from an inflating
air bag, take the following pre-
cautions:
NEVER place a child restraint
in the front passenger seat.
Always properly restrain chil-
dren under age 13 in the rear
seats of the vehicle.
Adjust the front passenger's
and driver's seats as far to the
rear as possible while allow-
ing you to maintain full con-
trol of the vehicle.
Hold the steering wheel with
hands at the 9 o'clock and 3
o'clock positions.
Never place anything or any-
one between the air bag and
the seat occupant.
Do not allow the front passen-
ger to place their feet or legs
on the dashboard.
WARNING
OHM039102N
■Driver’s front air bag (1)
Page 72 of 535
2-55
Safety system of your vehicle
2
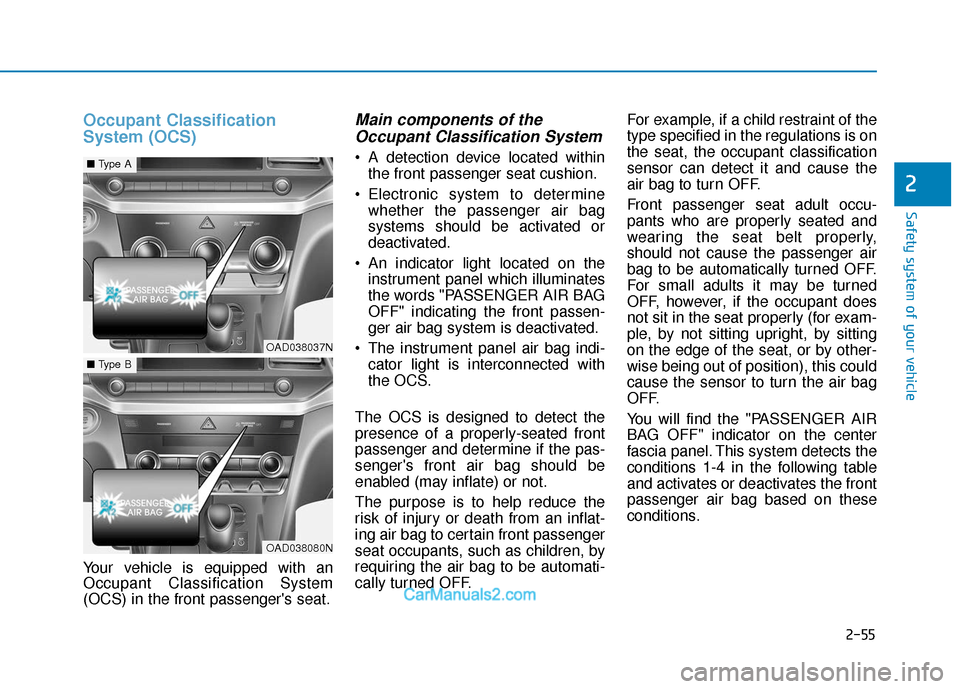
Occupant Classification
System (OCS)
Your vehicle is equipped with an
Occupant Classification System
(OCS) in the front passenger's seat.
Main components of theOccupant Classification System
A detection device located within
the front passenger seat cushion.
Electronic system to determine whether the passenger air bag
systems should be activated or
deactivated.
An indicator light located on the instrument panel which illuminates
the words "PASSENGER AIR BAG
OFF" indicating the front passen-
ger air bag system is deactivated.
The instrument panel air bag indi- cator light is interconnected with
the OCS.
The OCS is designed to detect the
presence of a properly-seated front
passenger and determine if the pas-
senger's front air bag should be
enabled (may inflate) or not.
The purpose is to help reduce the
risk of injury or death from an inflat-
ing air bag to certain front passenger
seat occupants, such as children, by
requiring the air bag to be automati-
cally turned OFF. For example, if a child restraint of the
type specified in the regulations is on
the seat, the occupant classification
sensor can detect it and cause the
air bag to turn OFF.
Front passenger seat adult occu-
pants who are properly seated and
wearing the seat belt properly,
should not cause the passenger air
bag to be automatically turned OFF.
For small adults it may be turned
OFF, however, if the occupant does
not sit in the seat properly (for exam-
ple, by not sitting upright, by sitting
on the edge of the seat, or by other-
wise being out of position), this could
cause the sensor to turn the air bag
OFF.
You will find the "PASSENGER AIR
BAG OFF" indicator on the center
fascia panel. This system detects the
conditions 1-4 in the following table
and activates or deactivates the front
passenger air bag based on these
conditions.
OAD038037N
■
Type A
OAD038080N
■Type B
Page 86 of 535

Trip Computer .......................................................3-91
Conventional Cluster.......................................................3\
-91
Supervision Cluster .........................................................3-95
Light .......................................................................3\
-99
Exterior Lights .................................................................3-99
Interior Lights ................................................................3-106
Welcome System ...........................................................3-108
Wipers and Washers..........................................3-110
Windshield Wipers ........................................................3-110
Windshield Washers .....................................................3-111
Driver Assist System .........................................3-112
Rear View Monitor .......................................................3-112
Defroster .............................................................3-113
Rear Window Defroster ..............................................3-113
Manual Climate Control System.......................3-114
Heating and Air Conditioning .....................................3-115
System Operation .........................................................3-119
System Maintenance....................................................3-121
Automatic Climate Control System ..................3-123
Automatic Heating and Air Conditioning.................3-124
Manual Heating and Air Conditioning......................3-125
System Operation .........................................................3-131
System Maintenance....................................................3-133
Windshield Defrosting and Defogging ............3-134
Auto Defogging System ..............................................3-137
Climate Control Additional Features ...............3-139
Automatic Ventilation ...................................................3-139
Sunroof Inside Air Recirculation ...............................3-139
Storage Compartment .......................................3-139
Center Console Storage ..............................................3-140
Sliding Armrest ..............................................................3-140
Glove Box ........................................................................\
3-140
Sunglass Holder.............................................................3-141
Interior Features ................................................3-142
Cup Holder ........................................................................\
..3-142Sunvisor ........................................................................\
...3-143
Power Outlet ..................................................................3-144
Wireless Cellular Phone Charging System..............3-145
USB Charger ...................................................................3-147\
Clock ........................................................................\
.........3-147
Clothes Hanger ..............................................................3-147
Floor Mat Anchor(s).....................................................3-148
3