instrument cluster Hyundai Elantra 2020 Owner's Manual
[x] Cancel search | Manufacturer: HYUNDAI, Model Year: 2020, Model line: Elantra, Model: Hyundai Elantra 2020Pages: 535, PDF Size: 16.8 MB
Page 16 of 535
I
IN
N S
ST
T R
R U
U M
M E
EN
N T
T
P
P A
A N
N E
EL
L
O
O V
VE
ER
R V
V I
IE
E W
W
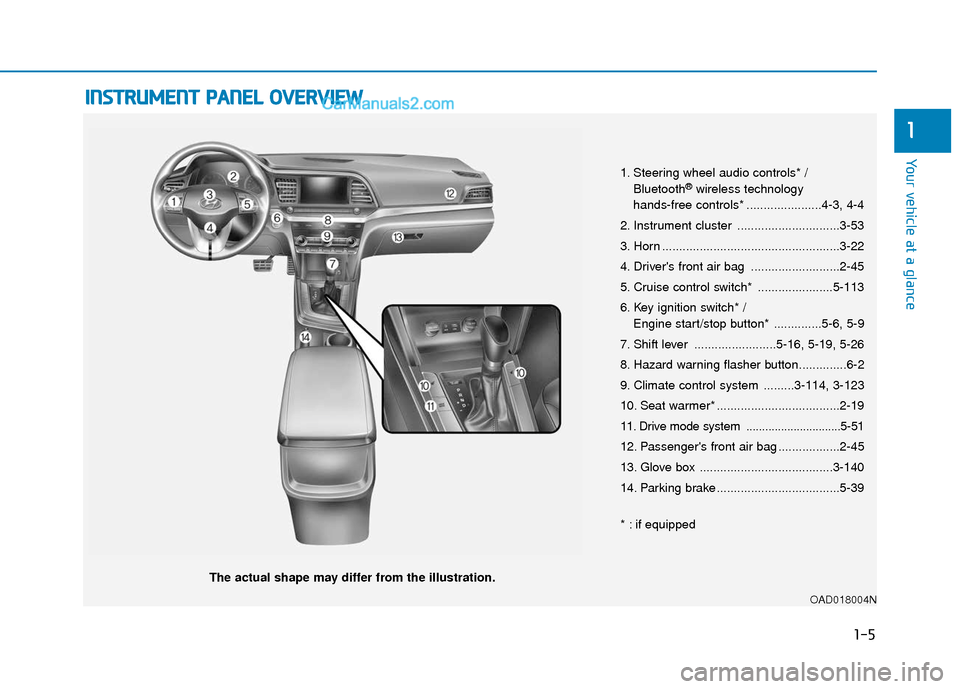
The actual shape may differ from the illustration.
1-5
Your vehicle at a glance
1
1. Steering wheel audio controls* /
Bluetooth®wireless technology
hands-free controls* ......................4-3, 4-4
2. Instrument cluster ..............................3-53
3. Horn ....................................................3-22
4. Driver's front air bag ..........................2-45
5. Cruise control switch* ......................5-113
6. Key ignition switch* / Engine start/stop button* ..............5-6, 5-9
7. Shift lever ........................5-16, 5-19, 5-26
8. Hazard warning flasher button..............6-2
9. Climate control system .........3-114, 3-123
10. Seat warmer* ....................................2-19
11. Drive mode system ..............................5-51
12. Passenger's front air bag ..................2-45
13. Glove box .......................................3-140
14. Parking brake ....................................5-39
* : if equipped
OAD018004N
Page 70 of 535
2-53
Safety system of your vehicle
2
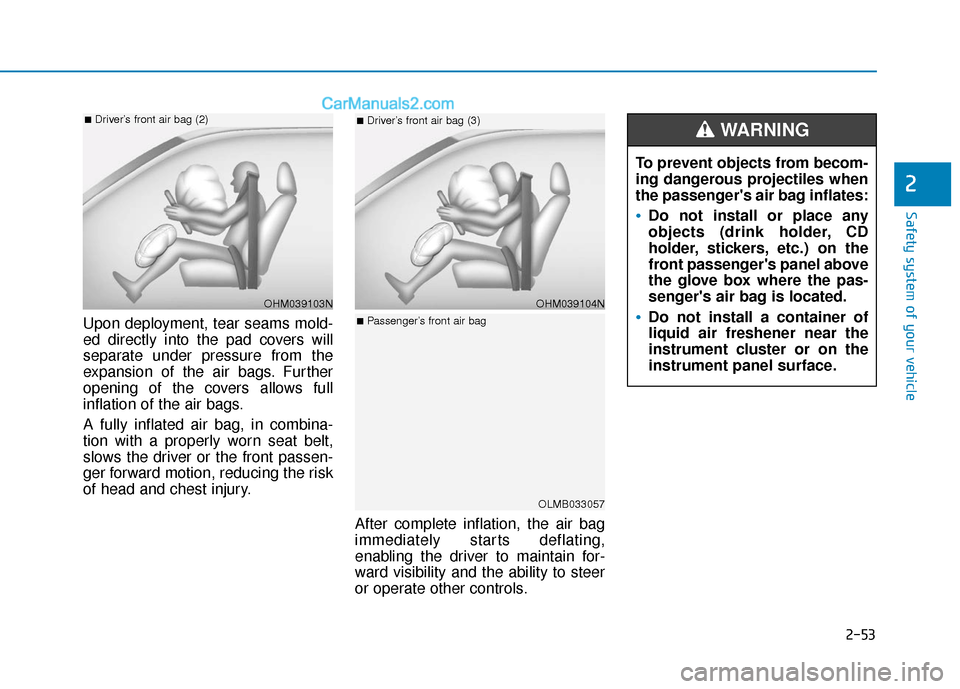
Upon deployment, tear seams mold-
ed directly into the pad covers will
separate under pressure from the
expansion of the air bags. Further
opening of the covers allows full
inflation of the air bags.
A fully inflated air bag, in combina-
tion with a properly worn seat belt,
slows the driver or the front passen-
ger forward motion, reducing the risk
of head and chest injury.After complete inflation, the air bag
immediately starts deflating,
enabling the driver to maintain for-
ward visibility and the ability to steer
or operate other controls.
OHM039103N
■Driver’s front air bag (2)
OHM039104N
■Driver’s front air bag (3)
OLMB033057
■Passenger’s front air bag
To prevent objects from becom-
ing dangerous projectiles when
the passenger's air bag inflates:
Do not install or place any
objects (drink holder, CD
holder, stickers, etc.) on the
front passenger's panel above
the glove box where the pas-
senger's air bag is located.
Do not install a container of
liquid air freshener near the
instrument cluster or on the
instrument panel surface.
WARNING
Page 85 of 535
Convenient features of your vehicle
Accessing Your Vehicle .........................................3-3
Remote Key........................................................................\
.3-3
Smart Key ........................................................................\
....3-6
Immobilizer System .........................................................3-11
Door Locks ............................................................3-12
Operating Door Locks from Outside the Vehicle ....3-12
Operating Door Locks from Inside the Vehicle .......3-13
Auto Door Lock/Unlock Features ...............................3-15
Child-Protector Rear Door locks ................................3-16
Safe Exit Assist (SEA) System .....................................3-16
Theft-Alarm System ............................................3-17
Driver Position Memory System ........................3-18
Storing Positions into Memory ....................................3-18
Recalling Positions from Memory...............................3-19
Resetting the Driver's Seat Memory System...........3-19
Easy Access Function ....................................................3-20
Steering Wheel .....................................................3-21
Electric Power Steering (EPS) .....................................3-21
Tilt Steering/Telescopic Steering ................................3-21
Horn ........................................................................\
............3-22
Mirrors ...................................................................3-23
Inside Rearview Mirror ..................................................3-23
Side View Mirrors ...........................................................3-30
Reverse Parking Aid Function......................................3-33
Windows ................................................................3-34
Power Windows ...............................................................3-35
Sunroof..................................................................3-39
Sunroof opening and closing .......................................3-40
Sliding the sunroof .........................................................3-40
Tilting the sunroof ..........................................................3-40
Sunshade ........................................................................\
...3-41
Resetting the sunroof ....................................................3-41
Sunroof Open Warning ..................................................3-42
Exterior Features .................................................3-43
Hood ........................................................................\
...........3-43
Trunk ........................................................................\
..........3-44
Smart Trunk ......................................................................3-\
46
Fuel Filler Door ................................................................3-49
Instrument Cluster ...............................................3-53
Instrument Cluster Control............................................3-55
Gauges ........................................................................\
.......3-56
Transmission Shift Indicator .........................................3-60
Warning and Indicator lights ........................................3-61
LCD Display Messages ...................................................3-73
LCD Display (For Supervision Cluster) .............3-79
LCD Display Control ........................................................3-79
LCD Display Modes .........................................................3-80
3
Page 105 of 535
3-21
Convenient features of your vehicle
3
S
ST
T E
EE
ER
R I
IN
N G
G
W
W H
HE
EE
EL
L
Electric Power Steering (EPS)
The system assists you with steering
the vehicle. If the engine is turned off
or if the power steering system
becomes inoperative, you may still
steer the vehicle, but it will require
increased steering effort.
Should you notice any change in the
effort required to steer during normal
vehicle operation, have the system
checked by an authorized HYUNDAI
dealer.
Information
The following symptoms may occur
during normal vehicle operation:
• The steering effort may be high
immediately after placing the igni-
tion switch in the ON position.
This happens as the system performs
the EPS system diagnostics. When
the diagnostics are completed, the
steering wheel will return to its nor-
mal condition.
• A click noise may be heard from the EPS relay after the ignition switch is
in the ON or LOCK/OFF position.
• Motor noise may be heard when the vehicle is at a stop or at a low driving
speed.
• When you operate the steering wheel in low temperature, abnormal noise
may occur. If temperature rises, the
noise will disappear. This is a normal
condition.
• When an error is detected from the EPS, the warning light will illumi-
nate on the instrument cluster and
the steering efforts may be increased.
When the following symptoms occur,
immediately drive the vehicle to a
safe area and check it.
Tilt Steering/Telescopic
Steering
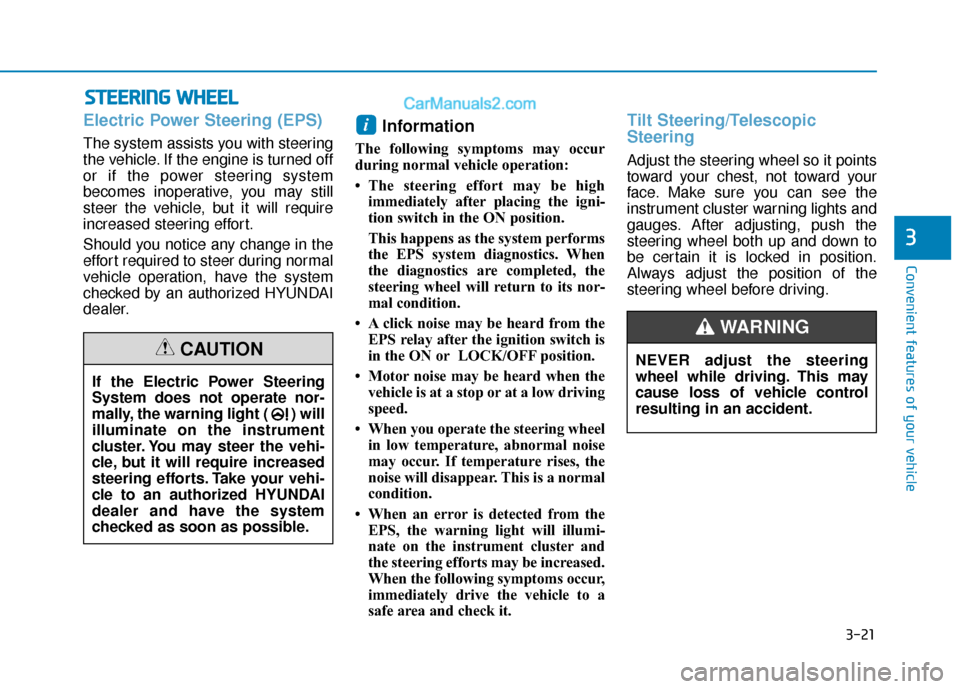
Adjust the steering wheel so it points
toward your chest, not toward your
face. Make sure you can see the
instrument cluster warning lights and
gauges. After adjusting, push the
steering wheel both up and down to
be certain it is locked in position.
Always adjust the position of the
steering wheel before driving.
i
If the Electric Power Steering
System does not operate nor-
mally, the warning light ( ) will
illuminate on the instrument
cluster. You may steer the vehi-
cle, but it will require increased
steering efforts. Take your vehi-
cle to an authorized HYUNDAI
dealer and have the system
checked as soon as possible.
CAUTIONNEVER adjust the steering
wheel while driving. This may
cause loss of vehicle control
resulting in an accident.
WARNING
Page 139 of 535
3-55
Convenient features of your vehicle
3
Instrument Cluster Control
Adjusting instrument clusterillumination
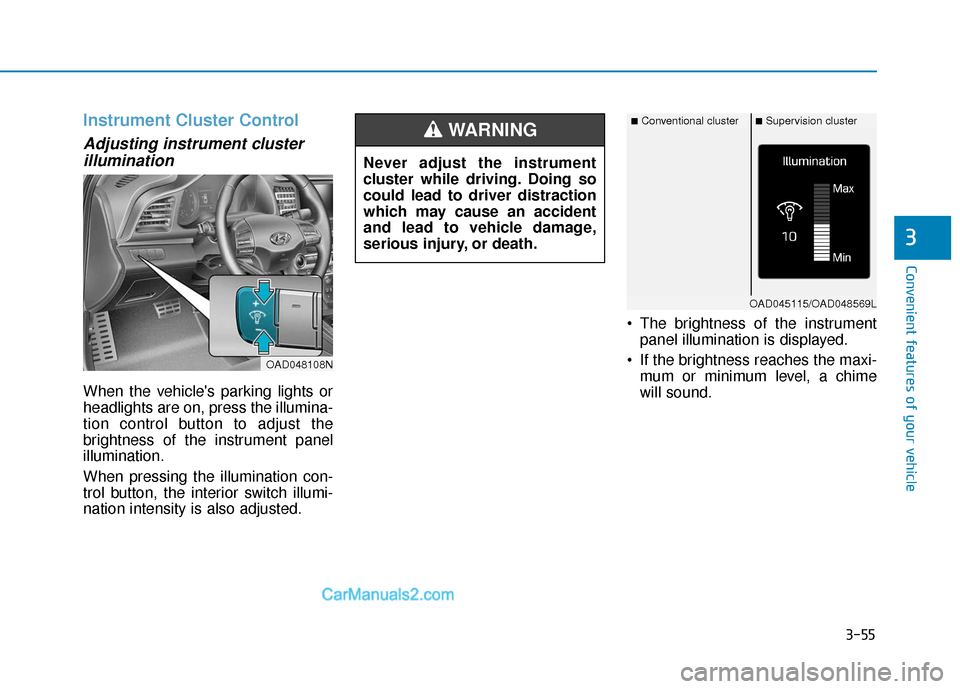
When the vehicle's parking lights or
headlights are on, press the illumina-
tion control button to adjust the
brightness of the instrument panel
illumination.
When pressing the illumination con-
trol button, the interior switch illumi-
nation intensity is also adjusted. The brightness of the instrument
panel illumination is displayed.
If the brightness reaches the maxi- mum or minimum level, a chime
will sound.
OAD048108N
■Conventional cluster■Supervision cluster
Never adjust the instrument
cluster while driving. Doing so
could lead to driver distraction
which may cause an accident
and lead to vehicle damage,
serious injury, or death.
WARNING
OAD045115/OAD048569L
Page 159 of 535
3-75
Convenient features of your vehicle
3
Sunroof open indicator
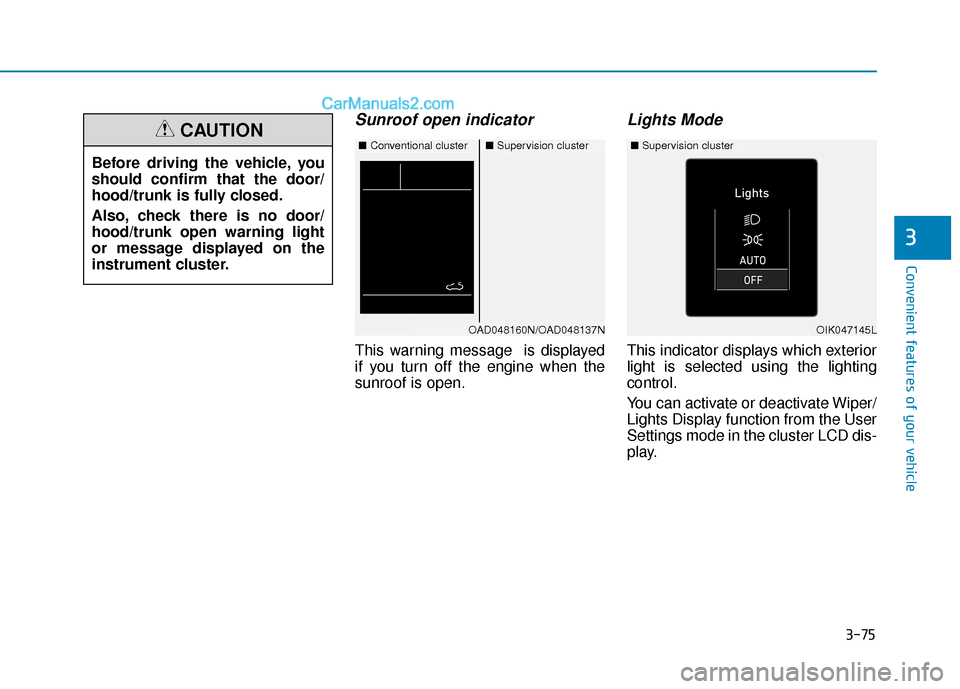
This warning message is displayed
if you turn off the engine when the
sunroof is open.
Lights Mode
This indicator displays which exterior
light is selected using the lighting
control.
You can activate or deactivate Wiper/
Lights Display function from the User
Settings mode in the cluster LCD dis-
play.
Before driving the vehicle, you
should confirm that the door/
hood/trunk is fully closed.
Also, check there is no door/
hood/trunk open warning light
or message displayed on the
instrument cluster.
CAUTION■
Conventional cluster■Supervision cluster
OAD048160N/OAD048137NOIK047145L
■Supervision cluster
Page 167 of 535
3-83
Convenient features of your vehicle
3
User settings mode
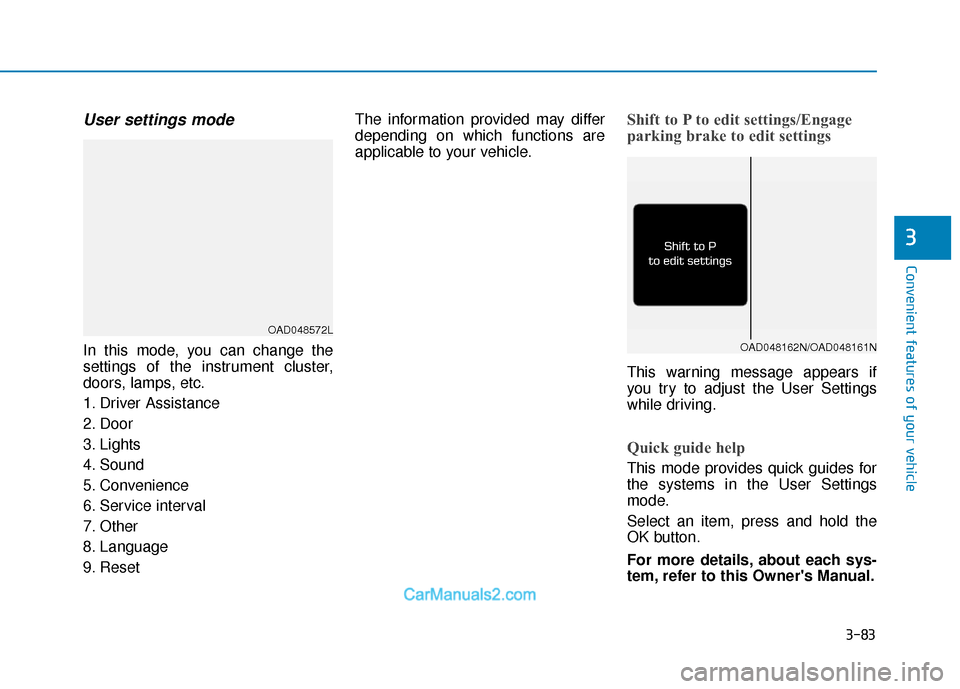
In this mode, you can change the
settings of the instrument cluster,
doors, lamps, etc.
1. Driver Assistance
2. Door
3. Lights
4. Sound
5. Convenience
6. Service interval
7. Other
8. Language
9. ResetThe information provided may differ
depending on which functions are
applicable to your vehicle.
Shift to P to edit settings/Engage
parking brake to edit settings
This warning message appears if
you try to adjust the User Settings
while driving.
Quick guide help
This mode provides quick guides for
the systems in the User Settings
mode.
Select an item, press and hold the
OK button.
For more details, about each sys-
tem, refer to this Owner's Manual.
OAD048572L
OAD048162N/OAD048161N
Page 213 of 535
3-129
Convenient features of your vehicle
3
Temperature conversion
If the battery has been discharged or
disconnected, the temperature mode
display will reset to Fahrenheit.
To change the temperature unit from
°F to °C or °C to °F:
- On the instrument cluster, go toUser Settings Mode ➝ Other
Features ➝Temperature Unit.
- Press the AUTO button for 3 sec- onds while pressing the OFF but-
ton. (Automatic climate control sys-
tem)
Both the temperature unit on the
cluster LCD display and climate con-
trol screen will change.
Air intake control
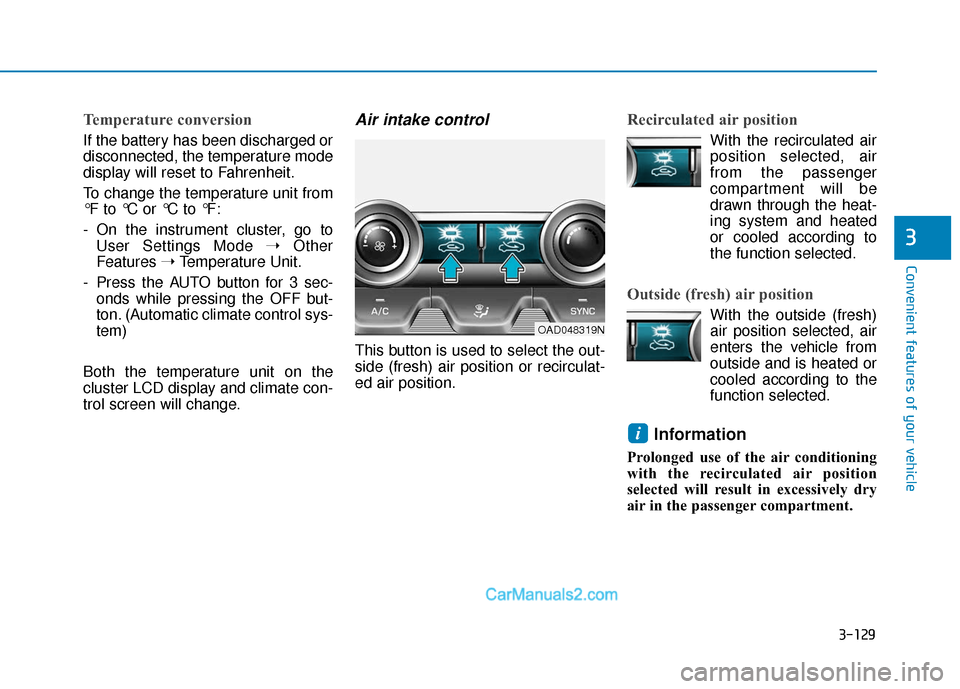
This button is used to select the out-
side (fresh) air position or recirculat-
ed air position.
Recirculated air position
With the recirculated air position selected, air
from the passenger
compartment will be
drawn through the heat-
ing system and heated
or cooled according to
the function selected.
Outside (fresh) air position
With the outside (fresh) air position selected, air
enters the vehicle from
outside and is heated or
cooled according to the
function selected.
Information
Prolonged use of the air conditioning
with the recirculated air position
selected will result in excessively dry
air in the passenger compartment.
i
OAD048319N
Page 229 of 535
![Hyundai Elantra 2020 Owners Manual 3-145
Convenient features of your vehicle
3
Wireless Cellular Phone
Charging System (if equipped)
[A]: Indicator light, [B]: Charging pad
On certain models, the vehicle
comes equipped with a wireless Hyundai Elantra 2020 Owners Manual 3-145
Convenient features of your vehicle
3
Wireless Cellular Phone
Charging System (if equipped)
[A]: Indicator light, [B]: Charging pad
On certain models, the vehicle
comes equipped with a wireless](/img/35/14535/w960_14535-228.png)
3-145
Convenient features of your vehicle
3
Wireless Cellular Phone
Charging System (if equipped)
[A]: Indicator light, [B]: Charging pad
On certain models, the vehicle
comes equipped with a wireless cel-
lular phone charger.
The system is available when all
doors are closed, and when the igni-
tion switch is ON.
To charge a cellular phone
The wireless cellular phone charging
system charges only the Qi-enabled
cellular phones ( ). Read the label
on the cellular phone accessory
cover or visit your cellular phone
manufacturer's website to check
whether your cellular phone supports
the Qi technology.
The wireless charging process starts
when you put a Qi-enabled cellular
phone on the wireless charging unit.
1. Remove other items, including thesmart key, from the wireless charg-
ing unit. If not, the wireless charg-
ing process may be interrupted.
Place the cellular phone on the
center of the charging pad ( ).
2. The indicator light is orange when the cellular phone is charging. The
indicator light turns green when
phone charging is complete.
3. You can turn ON or OFF the wire- less charging function in the user
settings mode on the instrument
cluster. For further information,
refer to the "LCD Display Modes"
in this chapter. If your cellular phone is not charging:
- Slightly change the position of the
cellular phone on the charging
pad.
- Make sure the indicator light is orange.
The indicator light will blink orange for
10 seconds if there is a malfunction in
the wireless charging system.
In this case, temporarily stop the
charging process, and re-attempt to
charge your cellular phone again.
The system warns you with a mes-
sage on the LCD display if the cellular
phone is still on the wireless charging
unit after the engine is turned OFF
and the front door is opened.
Information
For some manufacturers' cellular
phones, the system may not warn you
even though the cellular phone is left
on the wireless charging unit. This is
due to the particular characteristic of
the cellular phone and not a malfunc-
tion of the wireless charging.
i
OAD048575L
Page 287 of 535
5-51
Driving your vehicle
5
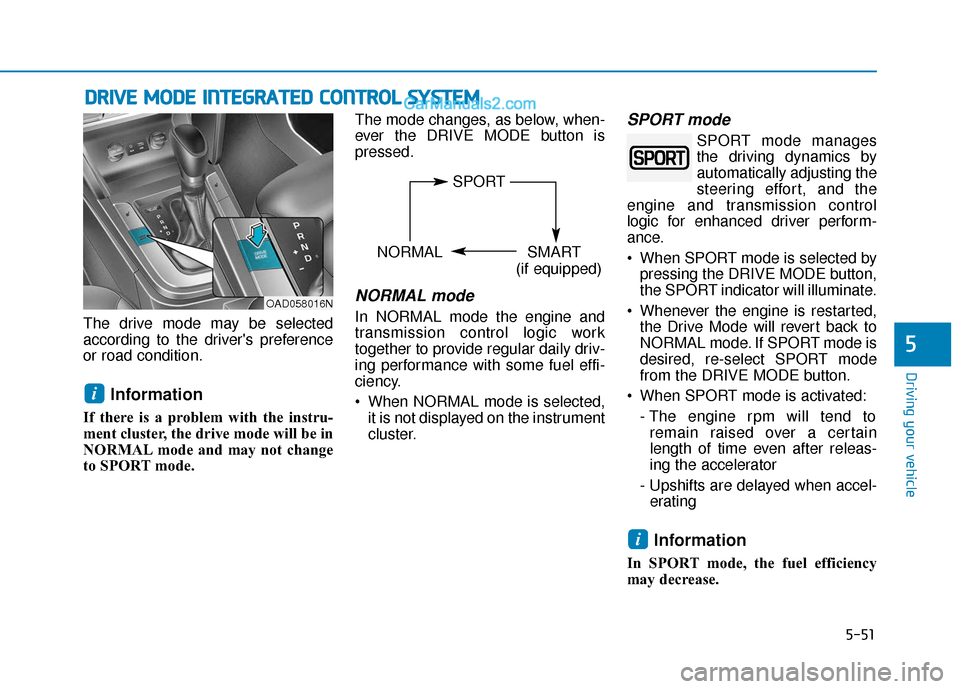
The drive mode may be selected
according to the driver's preference
or road condition.
Information
If there is a problem with the instru-
ment cluster, the drive mode will be in
NORMAL mode and may not change
to SPORT mode. The mode changes, as below, when-
ever the DRIVE MODE button is
pressed.
NORMAL mode
In NORMAL mode the engine and
transmission control logic work
together to provide regular daily driv-
ing performance with some fuel effi-
ciency.
When NORMAL mode is selected,
it is not displayed on the instrument
cluster.
SPORT mode
SPORT mode manages
the driving dynamics by
automatically adjusting the
steering effort, and the
engine and transmission control
logic for enhanced driver perform-
ance.
When SPORT mode is selected by pressing the DRIVE MODE button,
the SPORT indicator will illuminate.
Whenever the engine is restarted, the Drive Mode will revert back to
NORMAL mode. If SPORT mode is
desired, re-select SPORT mode
from the DRIVE MODE button.
When SPORT mode is activated: - The engine rpm will tend toremain raised over a certain
length of time even after releas-
ing the accelerator
- Upshifts are delayed when accel- erating
Information
In SPORT mode, the fuel efficiency
may decrease.
i
i
D D R
RI
IV
V E
E
M
M O
OD
DE
E
I
IN
N T
TE
EG
G R
RA
A T
TE
ED
D
C
C O
O N
NT
TR
R O
O L
L
S
S Y
Y S
ST
T E
EM
M
OAD058016N
SPORT
NORMAL SMART
(if equipped)