open Hyundai Elantra 2020 Owner's Manual
[x] Cancel search | Manufacturer: HYUNDAI, Model Year: 2020, Model line: Elantra, Model: Hyundai Elantra 2020Pages: 535, PDF Size: 16.8 MB
Page 8 of 535
F8
Introduction
"E85" fuel is an alternative fuel com-
prised of 85 percent ethanol and 15
percent gasoline, and is manufac-
tured exclusively for use in Flexible
Fuel Vehicles. "E85" is not compati-
ble with your vehicle. Use of "E85"
may result in poor engine perform-
ance and damage to your vehicle's
engine and fuel system. HYUNDAI
recommends that customers do not
use fuel with an ethanol content
exceeding 15 percent.
To prevent damage to your vehi-
cle’s engine and fuel system:
Never use gasohol which con- tains methanol.
Never use gasohol containing more than 15% ethanol.
Never use leaded fuel or leaded gasohol.
Never use "E85" fuel.
Your New Vehicle Limited Warranty
does not cover damage to the fuel
system or any performance prob-
lems caused by the use of "E85"
fuel.
Using Fuel Additives (except Detergent Fuel Additives)
Using fuel additives such as:
- Silicone fuel additive
- Ferrocene (iron-based) fuel additive
- Other metallic-based fuel additives
may result in cylinder misfire, poor
acceleration, engine stalling, dam-
age to the catalyst, or abnormal cor-
rosion, and may cause damage to
the engine resulting in a reduction in
the overall life of the powertrain.
- The Malfunction Indicator Lamp
(MIL) may illuminate.
Damage to the fuel system or per-
formance problem caused by the
use of these fuels or fuel additives
may not be covered by your New
Vehicle Limited Warranty.
Gasoline containing MMT
Some gasoline contains harmful
manganese-based fuel additives
such as
MMT (Methylcyclopentadienyl
Manganese Tricarbonyl
).
HYUNDAI does not recommend the
use of gasoline containing MMT.
This type of fuel can reduce vehicle
performance and affect your emis-
sion control system.
The malfunction indicator lamp on
the cluster may come on.
Detergent Fuel Additives
HYUNDAI recommends that you use
good quality gasolines treated with
detergent additives such as TOP
TIER Detergent Gasoline, which
help prevent deposit formation in the
engine. These gasolines will help the
engine run cleaner and enhance per-
formance of the Emission Control
System. For more information on TOP
TIER Detergent Gasoline, please go
to the website (www
.toptiergas.com).
NOTICE
NOTICE
Page 66 of 535
2-49
Safety system of your vehicle
2
How Does the Air Bag System
Operate?
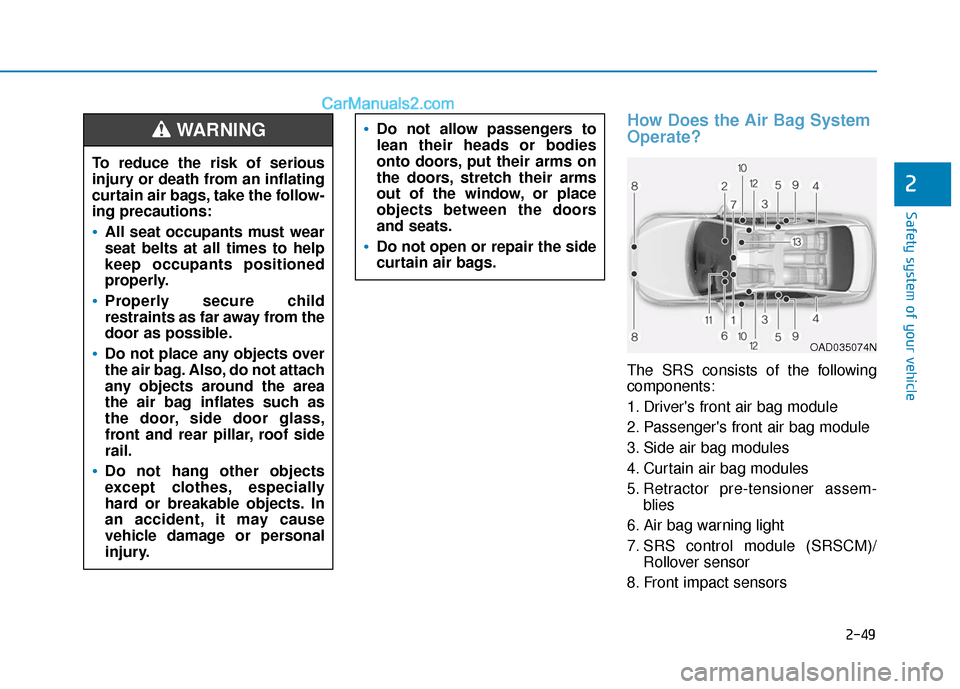
The SRS consists of the following
components:
1. Driver's front air bag module
2. Passenger's front air bag module
3. Side air bag modules
4. Curtain air bag modules
5. Retractor pre-tensioner assem-blies
6. Air bag warning light
7. SRS control module (SRSCM)/ Rollover sensor
8. Front impact sensors
To reduce the risk of serious
injury or death from an inflating
curtain air bags, take the follow-
ing precautions:
All seat occupants must wear
seat belts at all times to help
keep occupants positioned
properly.
Properly secure child
restraints as far away from the
door as possible.
Do not place any objects over
the air bag. Also, do not attach
any objects around the area
the air bag inflates such as
the door, side door glass,
front and rear pillar, roof side
rail.
Do not hang other objects
except clothes, especially
hard or breakable objects. In
an accident, it may cause
vehicle damage or personal
injury.
Do not allow passengers to
lean their heads or bodies
onto doors, put their arms on
the doors, stretch their arms
out of the window, or place
objects between the doors
and seats.
Do not open or repair the side
curtain air bags.
WARNING
OAD035074N
Page 70 of 535
2-53
Safety system of your vehicle
2
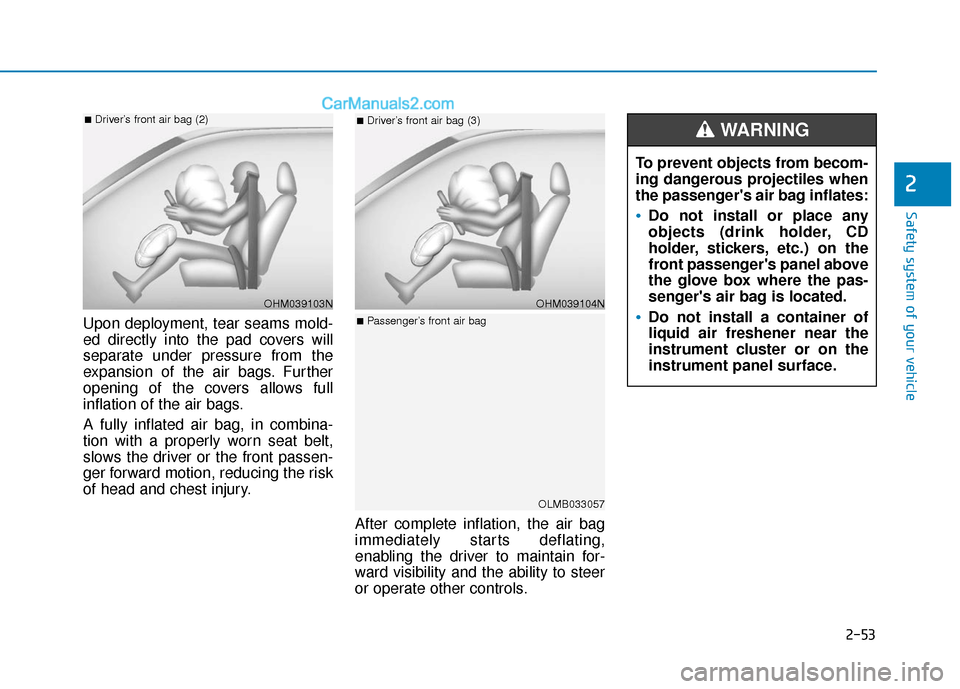
Upon deployment, tear seams mold-
ed directly into the pad covers will
separate under pressure from the
expansion of the air bags. Further
opening of the covers allows full
inflation of the air bags.
A fully inflated air bag, in combina-
tion with a properly worn seat belt,
slows the driver or the front passen-
ger forward motion, reducing the risk
of head and chest injury.After complete inflation, the air bag
immediately starts deflating,
enabling the driver to maintain for-
ward visibility and the ability to steer
or operate other controls.
OHM039103N
■Driver’s front air bag (2)
OHM039104N
■Driver’s front air bag (3)
OLMB033057
■Passenger’s front air bag
To prevent objects from becom-
ing dangerous projectiles when
the passenger's air bag inflates:
Do not install or place any
objects (drink holder, CD
holder, stickers, etc.) on the
front passenger's panel above
the glove box where the pas-
senger's air bag is located.
Do not install a container of
liquid air freshener near the
instrument cluster or on the
instrument panel surface.
WARNING
Page 71 of 535
2-54
Safety system of your vehicle
What to Expect After an Air
Bag Inflates
After a frontal or side air bag inflates,
it will deflate very quickly. Air bag
inflation will not prevent the driver
from seeing out of the windshield or
being able to steer. Curtain air bags
may remain partially inflated for
some time after they deploy.
Noise and smoke from inflatingair bag
When the air bags inflate, they make
a loud noise and may produce
smoke and powder in the air inside of
the vehicle. This is normal and is a
result of the ignition of the air bag
inflator. After the air bag inflates, you
may feel substantial discomfort in
breathing because of the contact of
your chest with both the seat belt and
the air bag, as well as from breathing
the smoke and powder. The powder
may aggravate asthma for some
people. If you experience breathing
problems after an air bag deploy-
ment, seek medical attention imme-
diately.
Though the smoke and powder are
nontoxic, they may cause irritation to
the skin, eyes, nose, throat, etc. If
this is the case, wash and rinse with
cold water immediately and seek
medical attention if the symptoms
persist.
After an air bag inflates, take
the following precautions:
Open your windows and
doors as soon as possible
after impact to reduce pro-
longed exposure to the smoke
and powder released by the
inflating air bag.
Do not touch the air bag stor-
age area's internal compo-
nents immediately after an air
bag has inflated. The parts
that come into contact with an
inflating air bag may be very
hot.
WARNING
Always wash exposed skin
areas thoroughly with cold
and mild soap.
Always have an authorized
HYUNDAI dealer replace the
air bag immediately after
deployment. Air bags are
designed to be used only
once.
Page 85 of 535

Convenient features of your vehicle
Accessing Your Vehicle .........................................3-3
Remote Key........................................................................\
.3-3
Smart Key ........................................................................\
....3-6
Immobilizer System .........................................................3-11
Door Locks ............................................................3-12
Operating Door Locks from Outside the Vehicle ....3-12
Operating Door Locks from Inside the Vehicle .......3-13
Auto Door Lock/Unlock Features ...............................3-15
Child-Protector Rear Door locks ................................3-16
Safe Exit Assist (SEA) System .....................................3-16
Theft-Alarm System ............................................3-17
Driver Position Memory System ........................3-18
Storing Positions into Memory ....................................3-18
Recalling Positions from Memory...............................3-19
Resetting the Driver's Seat Memory System...........3-19
Easy Access Function ....................................................3-20
Steering Wheel .....................................................3-21
Electric Power Steering (EPS) .....................................3-21
Tilt Steering/Telescopic Steering ................................3-21
Horn ........................................................................\
............3-22
Mirrors ...................................................................3-23
Inside Rearview Mirror ..................................................3-23
Side View Mirrors ...........................................................3-30
Reverse Parking Aid Function......................................3-33
Windows ................................................................3-34
Power Windows ...............................................................3-35
Sunroof..................................................................3-39
Sunroof opening and closing .......................................3-40
Sliding the sunroof .........................................................3-40
Tilting the sunroof ..........................................................3-40
Sunshade ........................................................................\
...3-41
Resetting the sunroof ....................................................3-41
Sunroof Open Warning ..................................................3-42
Exterior Features .................................................3-43
Hood ........................................................................\
...........3-43
Trunk ........................................................................\
..........3-44
Smart Trunk ......................................................................3-\
46
Fuel Filler Door ................................................................3-49
Instrument Cluster ...............................................3-53
Instrument Cluster Control............................................3-55
Gauges ........................................................................\
.......3-56
Transmission Shift Indicator .........................................3-60
Warning and Indicator lights ........................................3-61
LCD Display Messages ...................................................3-73
LCD Display (For Supervision Cluster) .............3-79
LCD Display Control ........................................................3-79
LCD Display Modes .........................................................3-80
3
Page 88 of 535
3-4
The Two Press Unlock feature can
also be enabled or disabled by
pressing the door lock and unlock
buttons simultaneously on the Key
FOB:
Press and hold both the Door Lock
button and the Door Unlock button
simultaneously until the hazard
warning lights blink.
This will enable or disable the Two
Press Unlock feature. Repeat this
procedure to enable/disable the
mode again.
Information
After unlocking the doors, the doors
will lock automatically after 30 sec-
onds unless a door is opened.
Trunk unlocking
To unlock:
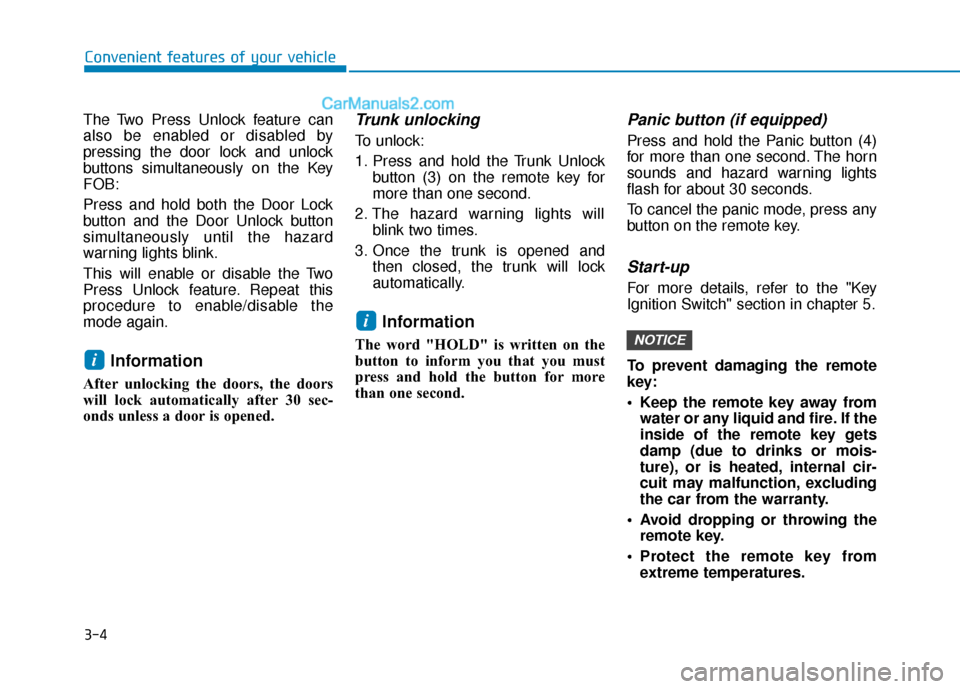
1. Press and hold the Trunk Unlockbutton (3) on the remote key for
more than one second.
2. The hazard warning lights will blink two times.
3. Once the trunk is opened and then closed, the trunk will lock
automatically.
Information
The word "HOLD" is written on the
button to inform you that you must
press and hold the button for more
than one second.
Panic button (if equipped)
Press and hold the Panic button (4)
for more than one second. The horn
sounds and hazard warning lights
flash for about 30 seconds.
To cancel the panic mode, press any
button on the remote key.
Start-up
For more details, refer to the "Key
Ignition Switch" section in chapter 5.
To prevent damaging the remote
key:
• Keep the remote key away fromwater or any liquid and fire. If the
inside of the remote key gets
damp (due to drinks or mois-
ture), or is heated, internal cir-
cuit may malfunction, excluding
the car from the warranty.
Avoid dropping or throwing the remote key.
Protect the remote key from extreme temperatures.
NOTICE
i
i
Convenient features of your vehicle
Page 89 of 535
3-5
Convenient features of your vehicle
Mechanical key
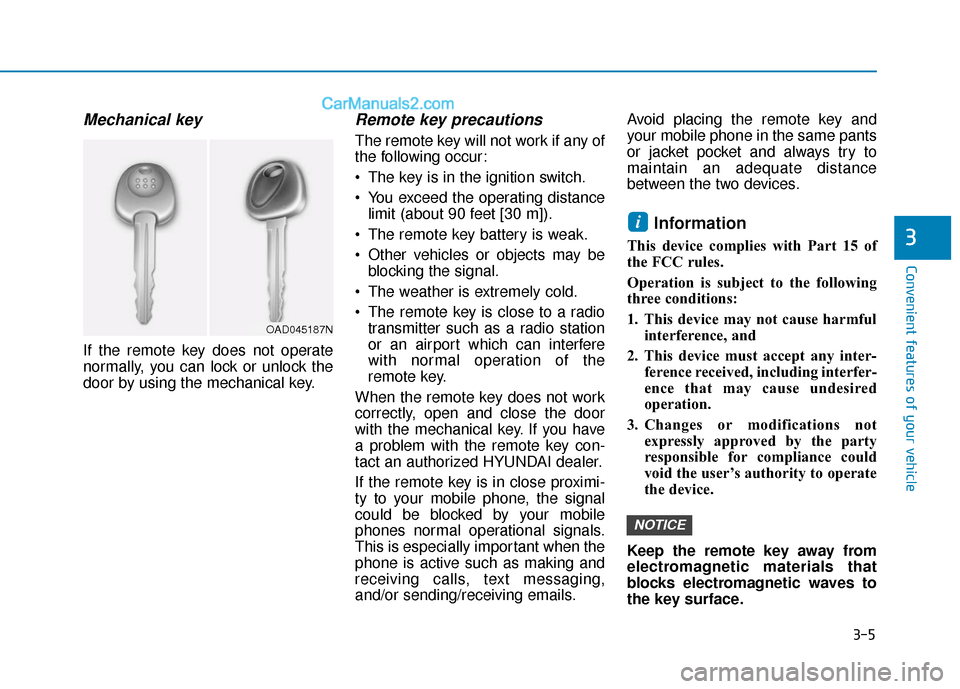
If the remote key does not operate
normally, you can lock or unlock the
door by using the mechanical key.
Remote key precautions
The remote key will not work if any of
the following occur:
The key is in the ignition switch.
You exceed the operating distancelimit (about 90 feet [30 m]).
The remote key battery is weak.
Other vehicles or objects may be blocking the signal.
The weather is extremely cold.
The remote key is close to a radio transmitter such as a radio station
or an airport which can interfere
with normal operation of the
remote key.
When the remote key does not work
correctly, open and close the door
with the mechanical key. If you have
a problem with the remote key con-
tact an authorized HYUNDAI dealer.
If the remote key is in close proximi-
ty to your mobile phone, the signal
could be blocked by your mobile
phones normal operational signals.
This is especially important when the
phone is active such as making and
receiving calls, text messaging,
and/or sending/receiving emails. Avoid placing the remote key and
your mobile phone in the same pants
or jacket pocket and always try to
maintain an adequate distance
between the two devices.
Information
This device complies with Part 15 of
the FCC rules.
Operation is subject to the following
three conditions:
1. This device may not cause harmful
interference, and
2. This device must accept any inter- ference received, including interfer-
ence that may cause undesired
operation.
3. Changes or modifications not expressly approved by the party
responsible for compliance could
void the user’s authority to operate
the device.
Keep the remote key away from
electromagnetic materials that
blocks electromagnetic waves to
the key surface.
NOTICE
i
3
OAD045187N
Page 90 of 535
3-6
Convenient features of your vehicle
Battery replacement
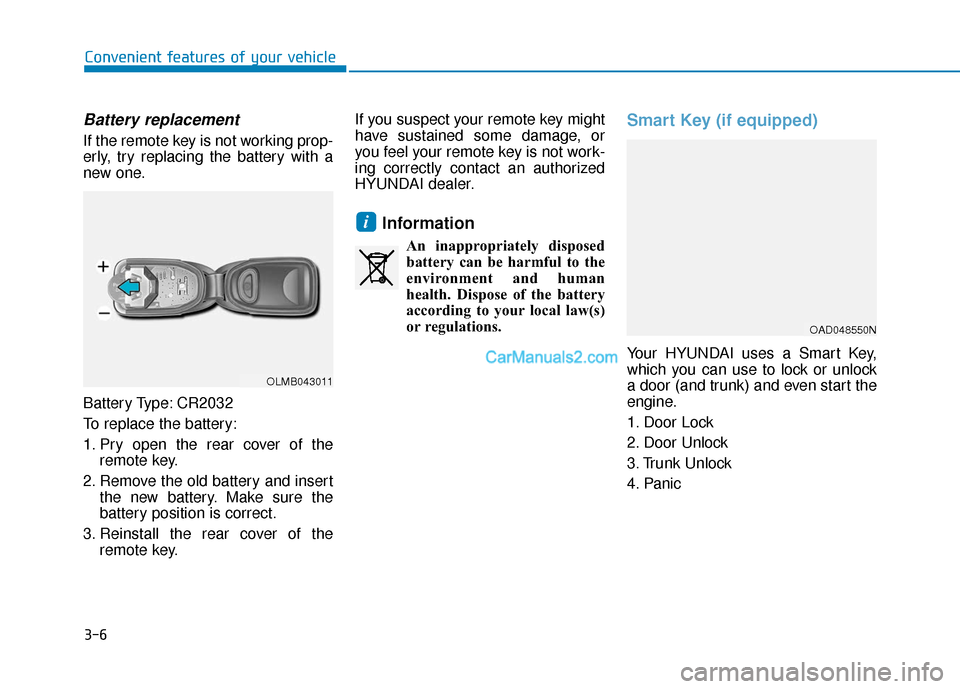
If the remote key is not working prop-
erly, try replacing the battery with a
new one.
Battery Type: CR2032
To replace the battery:
1. Pry open the rear cover of theremote key.
2. Remove the old battery and insert the new battery. Make sure the
battery position is correct.
3. Reinstall the rear cover of the remote key. If you suspect your remote key might
have sustained some damage, or
you feel your remote key is not work-
ing correctly contact an authorized
HYUNDAI dealer.
Information
An inappropriately disposed
battery can be harmful to the
environment and human
health. Dispose of the battery
according to your local law(s)
or regulations.
Smart Key (if equipped)
Your HYUNDAI uses a Smart Key,
which you can use to lock or unlock
a door (and trunk) and even start the
engine.
1. Door Lock
2. Door Unlock
3. Trunk Unlock
4. Panic
i
OLMB043011
OAD048550N
Page 91 of 535
3-7
Convenient features of your vehicle
3
Locking
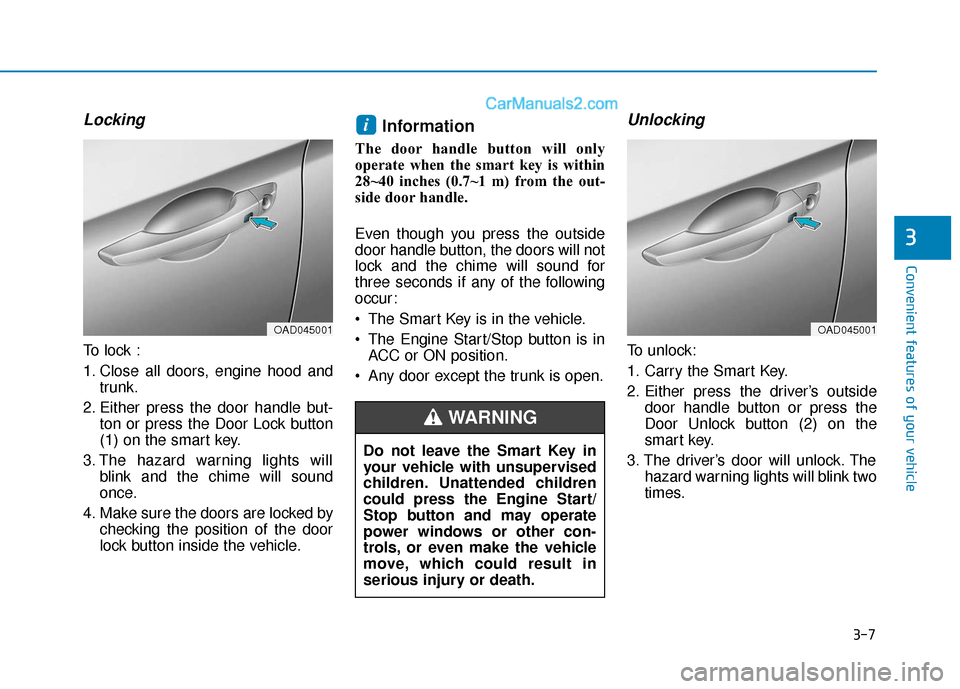
To lock :
1. Close all doors, engine hood andtrunk.
2. Either press the door handle but- ton or press the Door Lock button
(1) on the smart key.
3. The hazard warning lights will blink and the chime will sound
once.
4. Make sure the doors are locked by checking the position of the door
lock button inside the vehicle.
Information
The door handle button will only
operate when the smart key is within
28~40 inches (0.7~1 m) from the out-
side door handle.
Even though you press the outside
door handle button, the doors will not
lock and the chime will sound for
three seconds if any of the following
occur:
The Smart Key is in the vehicle.
The Engine Start/Stop button is inACC or ON position.
Any door except the trunk is open.
Unlocking
To unlock:
1. Carry the Smart Key.
2. Either press the driver’s outside door handle button or press the
Door Unlock button (2) on the
smart key.
3. The driver’s door will unlock. The hazard warning lights will blink two
times.
i
OAD045001
Do not leave the Smart Key in
your vehicle with unsupervised
children. Unattended children
could press the Engine Start/
Stop button and may operate
power windows or other con-
trols, or even make the vehicle
move, which could result in
serious injury or death.
WARNING
OAD045001
Page 92 of 535

3-8
Convenient features of your vehicle
Two Press Unlock Feature
The priority for unlocking the driver
door only, or unlocking all the doors
with one press may be adjusted in
the User Settings mode in the cluster
LCD display.
The Two Press Unlock feature, when
enabled, will require the user to
press the door unlock button once for
driver door only and twice for unlock-
ing all the doors.
Select or Deselect the Two Press
Unlock feature in the User Settings
mode in the cluster LCD display. The
option can be found under the follow-
ing menu:
User Settings ➞ Door ➞Two Press
Unlock
The Two Press Unlock feature can
also be enabled or disabled by
pressing the door lock and unlock
buttons simultaneously on the Key
FOB:
Press and hold both the Door Lock
button and the Door Unlock button
simultaneously until the hazard
warning lights blink. This will enable or disable the Two
Press Unlock feature. Repeat this
procedure to enable/disable the
mode again.
Information
• The door handle button will only
operate when the smart key is with-
in 28~40 inches (0.7~1 m) from the
outside door handle and other peo-
ple can also open the doors.
• If you press the front passenger 's
outside door handle, while carrying
the Smart Key, all doors will unlock.
• After unlocking the doors, the doors will lock automatically after 30 sec-
onds unless a door is opened.
• Either the driver or front passenger door can be opened with the door
handle button when the smart key is
within this range.
Trunk opening
To open:
1. Carry the smart key.
2. Either press the inside the trunk emblem or press and hold the
Trunk Unlock button (3) on the
smart key for more than one sec-
ond.
The hazard warning lights will blink two times.
3. Once the trunk is opened and then closed, the trunk will lock
automatically.
Information
The trunk handle button will only
operate when the smart key is within
28 inches (0.7 m) from the trunk han-
dle.
Panic button
Press and hold the Panic button (4)
for more than one second. The horn
sounds and hazard warning lights
blink for about 30 seconds. To cancel
the panic mode, press any button on
the Smart Key.
i
i