Hyundai Elantra Coupe 2016 Owner's Manual
Manufacturer: HYUNDAI, Model Year: 2016, Model line: Elantra Coupe, Model: Hyundai Elantra Coupe 2016Pages: 526, PDF Size: 9.99 MB
Page 121 of 526
Features of your vehicle
36 4
✽NOTICE
After washing the vehicle or after a
rain, be sure to wipe off the water on
the sunroof before operating the
sunroof.
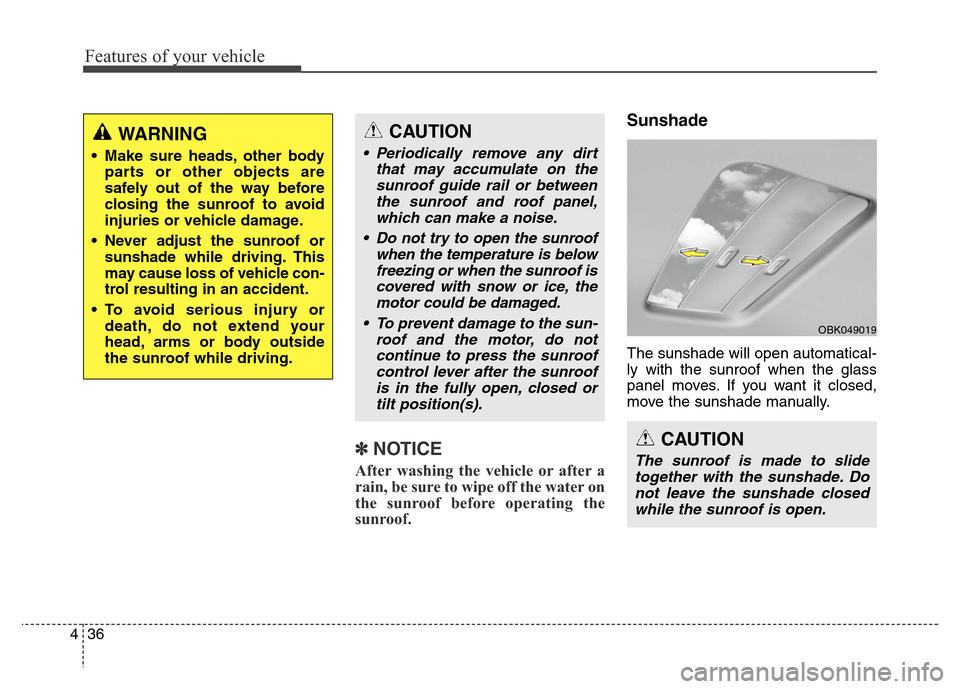
Sunshade
The sunshade will open automatical-
ly with the sunroof when the glass
panel moves. If you want it closed,
move the sunshade manually.
CAUTION
The sunroof is made to slide
together with the sunshade. Do
not leave the sunshade closed
while the sunroof is open.
OBK049019
CAUTION
• Periodically remove any dirt
that may accumulate on the
sunroof guide rail or between
the sunroof and roof panel,
which can make a noise.
• Do not try to open the sunroof
when the temperature is below
freezing or when the sunroof is
covered with snow or ice, the
motor could be damaged.
• To prevent damage to the sun-
roof and the motor, do not
continue to press the sunroof
control lever after the sunroof
is in the fully open, closed or
tilt position(s).
WARNING
• Make sure heads, other body
parts or other objects are
safely out of the way before
closing the sunroof to avoid
injuries or vehicle damage.
• Never adjust the sunroof or
sunshade while driving. This
may cause loss of vehicle con-
trol resulting in an accident.
• To avoid serious injury or
death, do not extend your
head, arms or body outside
the sunroof while driving.
Page 122 of 526
437
Features of your vehicle
To reset the sunroof
Sunroof needs to be reset if (in the
followings)
- Battery is discharged or discon-
nected or the related fuse has been
replaced or disconnected.
- The one-touch sliding function of
the sunroof does not normally oper-
ate.
1. The ignition switch must be in the
ON position.
2. Close the sunroof completely.
3. Release the control lever.
4. Push the control lever forward until
the sunroof tilts and slightly moves
up and down. Then, release the
lever.
5. Push the control lever forward until
the sunroof is operated as follows:
TILT OPEN →SLIDE OPEN →
SLIDE CLOSE
Then, release the control lever.If the sunroof does not operate prop-
erly after resetting, have the system
checked by an authorized HYUNDAI
dealer.
Page 123 of 526
Features of your vehicle
38 4
Electric power steering (EPS)
The system assists you with steering
the vehicle. If the engine is off or if
the power steering system becomes
inoperative, the vehicle may still be
steered, but it will require increased
steering effort.
Also, the steering effort becomes
heavier as the vehicle’s speed
increases and becomes lighter as
the vehicle’s speed decreases for
better control of the steering wheel.
Should you notice any change in the
effort required to steer during normal
vehicle operation, we recommend
that the system be checked by an
authorized HYUNDAI dealer.
✽NOTICE
The following symptoms may occur
during normal vehicle operation:
• The steering effort may be high
immediately after placing the igni-
tion switch in the ON position.
This happens as the system per-
forms the EPS system diagnostics.
When the diagnostics is complet-
ed, the steering wheel will return
to its normal condition.
• A click noise may be heard from
the EPS relay after the ignition
switch is placed to the ON or
LOCK/OFF position.
• A motor noise may be heard when
the vehicle is at stop or at a low
driving speed.
• When you operate the steering
wheel in low temperature, abnor-
mal noise may occur. If tempera-
ture rises, the noise will disappear.
This is a normal condition.
STEERING WHEEL
CAUTION
If the Electric Power Steering
System does not operate nor-
mally, the warning light ( ) will
illuminate on the instrument
cluster. The steering wheel may
become difficult to control or
operate. Take your vehicle to an
authorized HYUNDAI dealer and
have the system checked as
soon as possible.
Page 124 of 526
439
Features of your vehicle
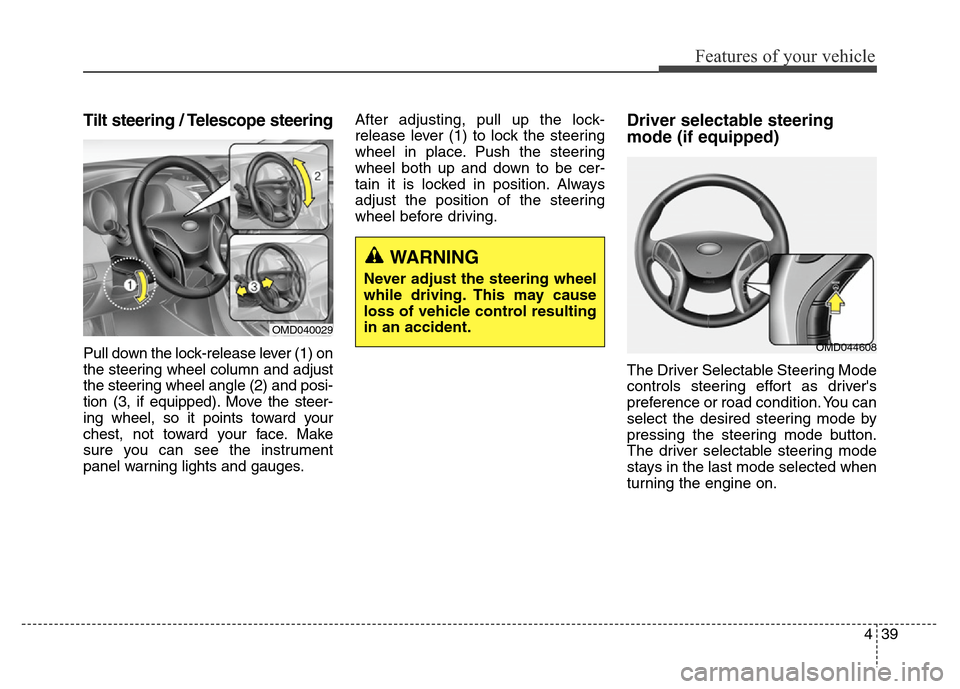
Tilt steering / Telescope steering
Pull down the lock-release lever (1) on
the steering wheel column and adjust
the steering wheel angle (2) and posi-
tion (3, if equipped). Move the steer-
ing wheel, so it points toward your
chest, not toward your face. Make
sure you can see the instrument
panel warning lights and gauges.After adjusting, pull up the lock-
release lever (1) to lock the steering
wheel in place. Push the steering
wheel both up and down to be cer-
tain it is locked in position. Always
adjust the position of the steering
wheel before driving.
Driver selectable steering
mode (if equipped)
The Driver Selectable Steering Mode
controls steering effort as driver's
preference or road condition. You can
select the desired steering mode by
pressing the steering mode button.
The driver selectable steering mode
stays in the last mode selected when
turning the engine on.
WARNING
Never adjust the steering wheel
while driving. This may cause
loss of vehicle control resulting
in an accident.
OMD040029
OMD044608
Page 125 of 526
Features of your vehicle
40 4
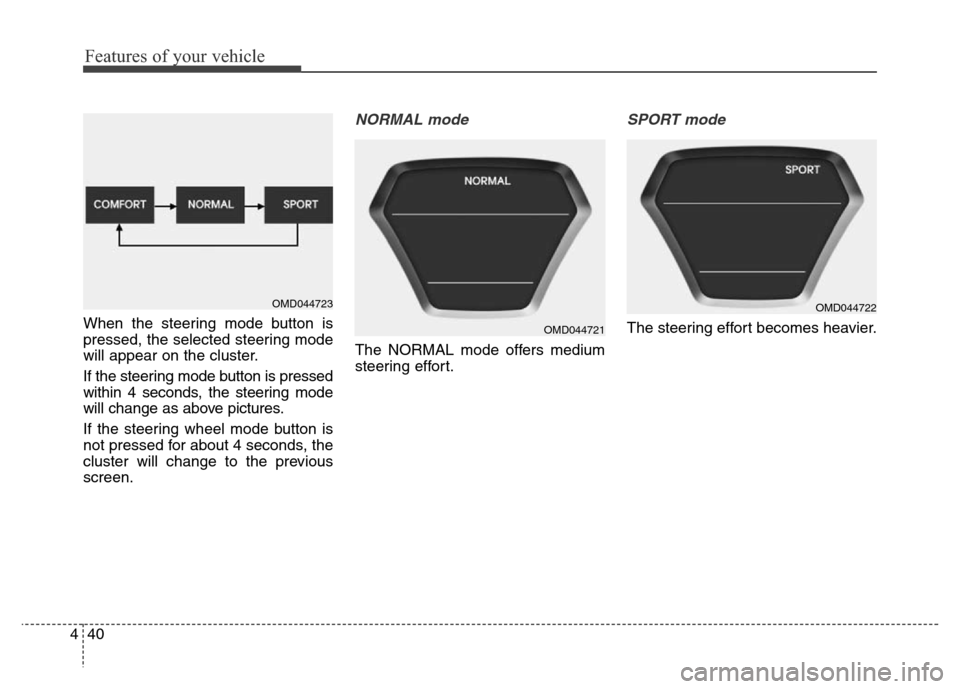
When the steering mode button is
pressed, the selected steering mode
will appear on the cluster.
If the steering mode button is pressed
within 4 seconds, the steering mode
will change as above pictures.
If the steering wheel mode button is
not pressed for about 4 seconds, the
cluster will change to the previous
screen.
NORMAL mode
The NORMAL mode offers medium
steering effort.
SPORT mode
The steering effort becomes heavier.
OMD044723
OMD044721
OMD044722
Page 126 of 526
441
Features of your vehicle
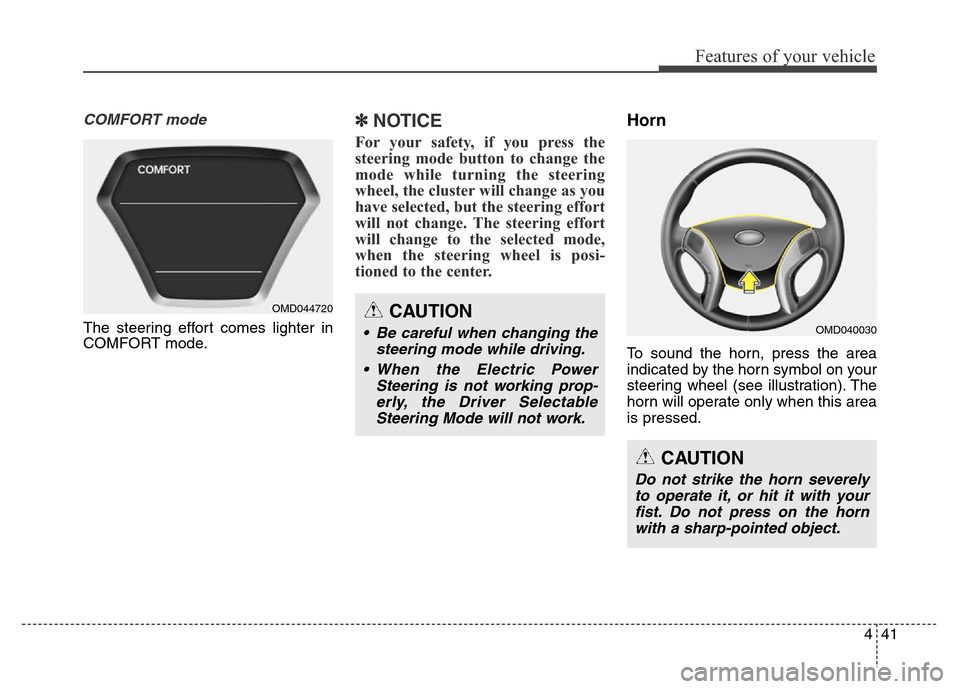
COMFORT mode
The steering effort comes lighter in
COMFORT mode.
✽NOTICE
For your safety, if you press the
steering mode button to change the
mode while turning the steering
wheel, the cluster will change as you
have selected, but the steering effort
will not change. The steering effort
will change to the selected mode,
when the steering wheel is posi-
tioned to the center.
Horn
To sound the horn, press the area
indicated by the horn symbol on your
steering wheel (see illustration). The
horn will operate only when this area
is pressed.
OMD044720CAUTION
• Be careful when changing the
steering mode while driving.
• When the Electric Power
Steering is not working prop-
erly, the Driver Selectable
Steering Mode will not work.OMD040030
CAUTION
Do not strike the horn severely
to operate it, or hit it with your
fist. Do not press on the horn
with a sharp-pointed object.
Page 127 of 526
Features of your vehicle
42 4
Inside rearview mirror
Before you start driving, adjust the
rearview mirror to the center on the
view through the rear window.
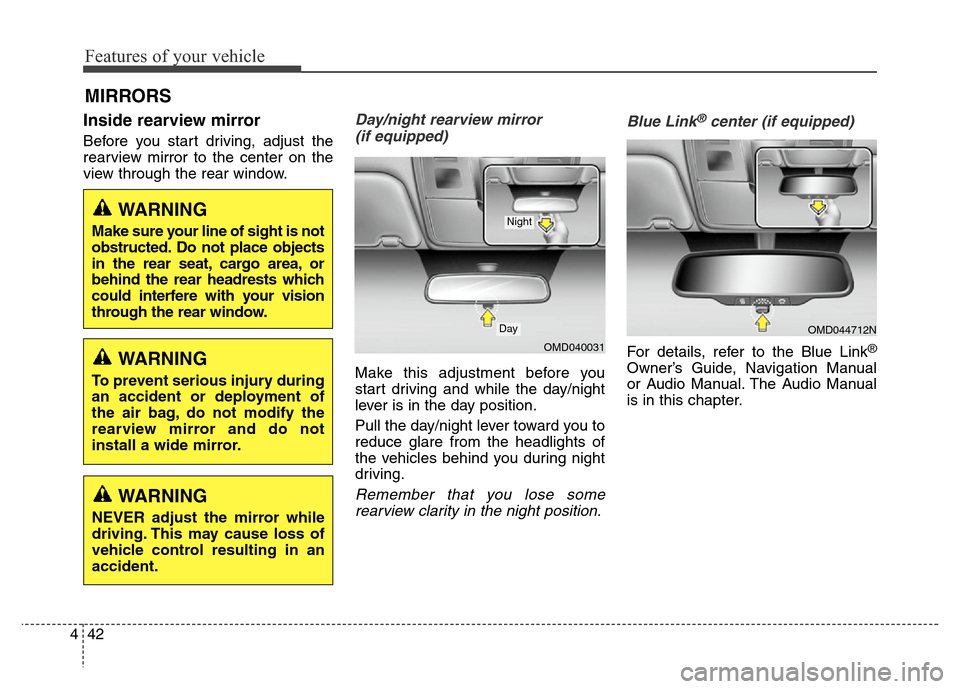
Day/night rearview mirror
(if equipped)
Make this adjustment before you
start driving and while the day/night
lever is in the day position.
Pull the day/night lever toward you to
reduce glare from the headlights of
the vehicles behind you during night
driving.
Remember that you lose some
rearview clarity in the night position.Blue Link
®center (if equipped)
For details, refer to the Blue Link®
Owner’s Guide, Navigation Manual
or Audio Manual. The Audio Manual
is in this chapter.
MIRRORS
WARNING
Make sure your line of sight is not
obstructed. Do not place objects
in the rear seat, cargo area, or
behind the rear headrests which
could interfere with your vision
through the rear window.
WARNING
To prevent serious injury during
an accident or deployment of
the air bag, do not modify the
rearview mirror and do not
install a wide mirror.
WARNING
NEVER adjust the mirror while
driving. This may cause loss of
vehicle control resulting in an
accident.
OMD040031
Day
Night
OMD044712N
Page 128 of 526
443
Features of your vehicle
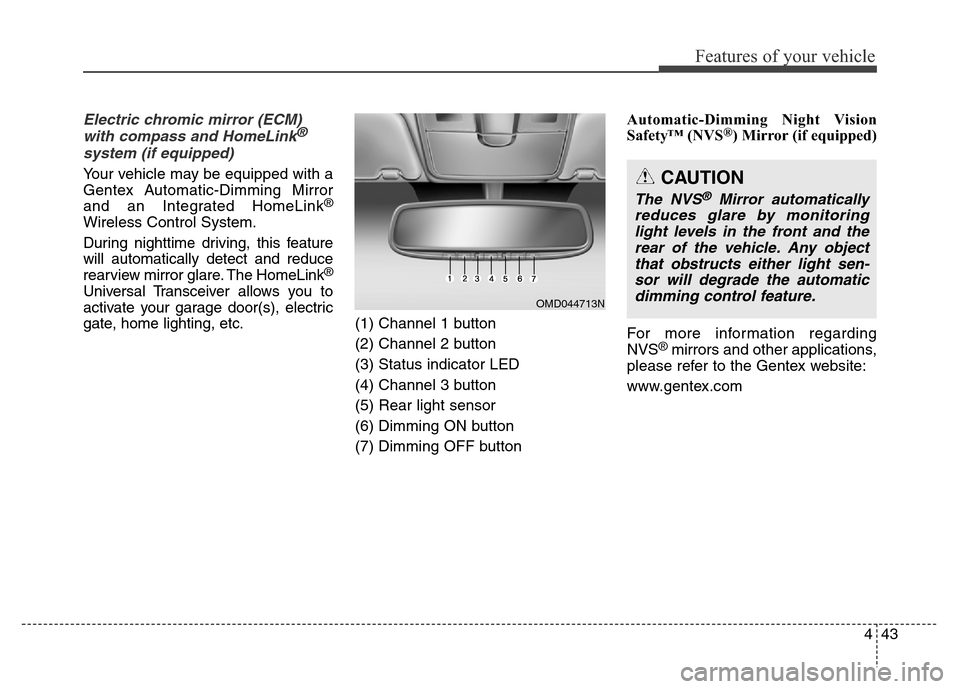
Electric chromic mirror (ECM)
with compass and HomeLink®
system (if equipped)
Your vehicle may be equipped with a
Gentex Automatic-Dimming Mirror
and an Integrated HomeLink
®
Wireless Control System.
During nighttime driving, this feature
will automatically detect and reduce
rearview mirror glare. The HomeLink
®
Universal Transceiver allows you to
activate your garage door(s), electric
gate, home lighting, etc.
(1) Channel 1 button
(2) Channel 2 button
(3) Status indicator LED
(4) Channel 3 button
(5) Rear light sensor
(6) Dimming ON button
(7) Dimming OFF buttonAutomatic-Dimming Night Vision
Safety™ (NVS
®) Mirror (if equipped)
For more information regarding
NVS
®mirrors and other applications,
please refer to the Gentex website:
www.gentex.com
OMD044713N
CAUTION
The NVS®Mirror automatically
reduces glare by monitoring
light levels in the front and the
rear of the vehicle. Any object
that obstructs either light sen-
sor will degrade the automatic
dimming control feature.
Page 129 of 526
Features of your vehicle
44 4
The auto-dimming function can be
controlled by pressing the ON/OFF
button:
1. Pressing the OFF button (7) turns
the auto-dimming function off
which is indicated by the green
Status Indicator LED turning off.
2. Pressing the ON button (6) again
turns the auto-dimming function
on which is indicated by the green
Status Indicator LED turning on.
The mirror defaults to the ON posi-
tion each time the vehicle is started.Integrated HomeLink®Wireless
Control System
The HomeLink
®Wireless Control
System can replace up to three
hand-held radio-frequency (RF)
transmitters with a single built-in
device. This innovative feature will
learn the radio frequency codes of
most current transmitters to operate
devices such as gate operators,
garage door openers, entry door
locks, security systems, even home
lighting. Both standard and rolling
code-equipped transmitters can be
programmed by following the out-
lined procedures.
Additional HomeLink
®information
can be found at: www.homelink.com
or by calling 1-800-355-3515.
Retain the original transmitter of the
RF device you are programming for
use in other vehicles as well as for
future HomeLink
®programming. It is
also suggested that upon the sale of
the vehicle, the programmed
HomeLink
®buttons be erased for
security purposes.
WARNING
Before programming
HomeLink®to a garage door
opener or gate operator, make
sure people and objects are out
of the way of the device to pre-
vent potential harm or damage.
Do not use the HomeLink
®with
any garage door opener that
lacks the safety stop and
reverse features required by
U.S. federal safety standards
(this includes any garage door
opener model manufactured
before April 1, 1982). A garage
door that cannot detect an
object - signaling the door to
stop and reverse - does not
meet current U.S. federal safety
standards. Using a garage door
opener without these features
increases the risk of serious
injury or death.
Page 130 of 526
445
Features of your vehicle
Programming HomeLink®
Please note the following:
• When programming a garage door
opener, it is advised to park the
vehicle outside of the garage.
• It is recommended that a new bat-
tery be placed in the hand-held
transmitter of the device being pro-
grammed to HomeLink
®for quicker
training and accurate transmission
of the radio-frequency signal.
• Some vehicles may require the
ignition switch to be placed in the
ACC (or "Accessories") position for
programming and/or operation of
HomeLink
®.
• In the event that there are still pro-
gramming difficulties or questions
after following the programming
steps listed below, contact
HomeLink
®at: www.homelink.com
or by calling 1-800-355-3515.
Rolling code programming
Rolling code devices which are
"code-protected" and manufactured
after 1996 may be determined by the
following:
• Reference the device owner's
manual for verification.
• The handheld transmitter appears
to program the HomeLink
®
Universal Transceiver but does not
activate the device.
• Press and hold the trained
HomeLink button. The device has
the rolling code feature if the indi-
cator light flashes rapidly and then
turns solid after 2 seconds.To train rolling code devices, follow
these instructions:
1. At the garage door opener receiv-
er (motor-head unit) in the garage,
locate the "learn" or "smart" but-
ton. This can usually be found
where the hanging antenna wire is
attached to the motor-head unit.
Exact location and color of the but-
ton may vary by garage door
opener brand. If there is difficulty
locating the training button, refer-
ence the device owner's manual or
please visit our Web site at
www.homelink.com.
2. Firmly press and release the
"learn" or "smart" button (which
activates the "training light"). You
will have 30 seconds to initiate
step 3.
3. Return to the vehicle and firmly
press, hold for two seconds and
then release the desired
HomeLink
®button. Repeat the
"press/hold/release" sequence a
second time to complete the pro-
gramming. (Some devices may
require you to repeat this
sequence a third time to complete
the programming.)