reset HYUNDAI ELANTRA GT 2014 Owners Manual
[x] Cancel search | Manufacturer: HYUNDAI, Model Year: 2014, Model line: ELANTRA GT, Model: HYUNDAI ELANTRA GT 2014Pages: 476, PDF Size: 31.71 MB
Page 23 of 476
Safety features of your vehicle
4 3
WARNING - Rear
seatbacks
The rear seatback must be
securely latched. If not, pas-
sengers and objects could be
thrown forward resulting in
serious injury or death in the
event of a sudden stop or col-
lision.
No passenger should ride in
the cargo area or sit or lie on
folded seatbacks while the
vehicle is moving. All passen-
gers must be properly seated
in seats and restrained prop-
erly while riding.
When resetting the seatback
to the upright position, make
sure it is securely latched by
pushing it forward and rear-
wards.
To avoid the possibility of
burns, do not remove the car-
pet in the cargo area. Emission
control devices beneath this
floor generate high tempera-
tures.
(Continued)(Continued)
Luggage and other cargo
should be laid flat in the cargo
area or on the folded rear
seatback. If objects are large,
heavy, or must be piled, they
must be secured. Under no
circumstances should cargo
be piled higher than the seat-
backs. Failure to follow these
warnings could result in seri-
ous injury or death in the
event of a sudden stop, colli-
sion or rollover.
WARNING
After adjusting the seat, always
check that it is securely locked
into place by attempting to
move the seat forward or
reverse without using the lock
release lever. Sudden or unex-
pected movement of the dri-
ver's seat could cause you to
lose control of the vehicle
resulting in an accident.
WARNING
Do not adjust the seat while
wearing seat belts. Moving the
seat cushion forward may
cause strong pressure on the
abdomen.
Use extreme caution so that
hands or other objects are not
caught in the seat mechanisms
while the seat is moving.
Do not place a cigarette
lighter on the floor or seat.
When you operate the seat,
gas may exit out of the lighter
causing a fire.
CAUTION
If there is a car accident, seats
need to be inspected at an
authorized HYUNDAI dealer.
Page 114 of 476
429
Features of your vehicle
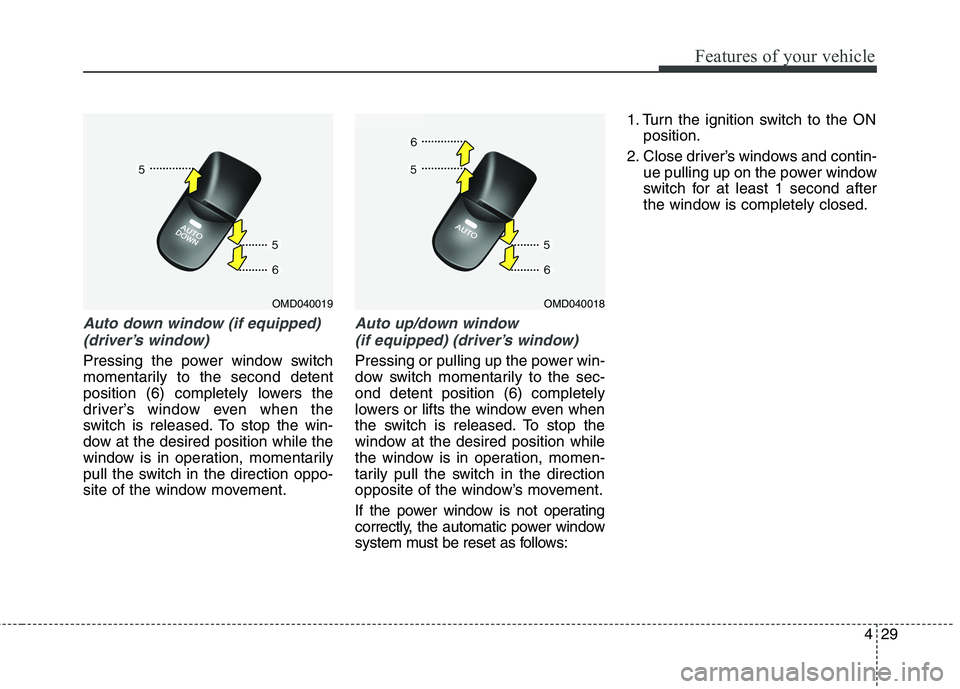
Auto down window (if equipped)
(driver’s window)
Pressing the power window switch
momentarily to the second detent
position (6) completely lowers the
driver’s window even when the
switch is released. To stop the win-
dow at the desired position while the
window is in operation, momentarily
pull the switch in the direction oppo-
site of the window movement.
Auto up/down window
(if equipped) (driver’s window)
Pressing or pulling up the power win-
dow switch momentarily to the sec-
ond detent position (6) completely
lowers or lifts the window even when
the switch is released. To stop the
window at the desired position while
the window is in operation, momen-
tarily pull the switch in the direction
opposite of the window’s movement.
If the power window is not operating
correctly, the automatic power window
system must be reset as follows:1. Turn the ignition switch to the ON
position.
2. Close driver’s windows and contin-
ue pulling up on the power window
switch for at least 1 second after
the window is completely closed.
OMD040019OMD040018
Page 126 of 476
441
Features of your vehicle
Resetting the sunroof
Whenever the vehicle battery is dis-
connected or discharged, or related
fuse is blown, you must reset your
sunroof system as follows:
1. Turn the engine on and close the
sunroof glass and sunshade com-
pletely.
2. Release the control lever.
3. Push the sunroof control lever for-
ward in the direction of close
(about 10 seconds) until the sun-
roof operates as follows;
SUNSHADE OPEN →TILT OPEN
Then, release the control lever.
CAUTION - Sunroof motor
damage
If you try to open the sunroof
when the temperature is below
freezing or when the sunroof is
covered with snow or ice, the
glass or the motor could be
damaged.
CAUTION
Periodically remove any dirt
that may accumulate on the
guide rail.
If you drive with the sunroof
opened right after a car wash
or rain, water may get inside
the vehicle.
WARNING - Sunroof
Be careful that someone’s
head, hands and body are not
trapped by a closing sunroof.
Do not extend the face, neck,
arms or body outside through
an opened sunroof while driv-
ing.
Make sure your hands and
face are safely out of the way
before closing a sunroof.
The panorama sunroof is
made of glass, and it may
break in an accident. If you do
not have your seat belt on, in
an accident, your body could
move past the roof area and
result in serious injury or
death. All passengers should
wear seat belts at all time.
Page 127 of 476
Features of your vehicle
42 4
4. Push the sunroof control lever for-
ward in the close direction until the
sunroof operates as follows;
SLIDE OPEN →SLIDE CLOSE
Then, release the control lever.
When this is complete, the sunroof
system is reset.
For more detailed information, we
recommend that you contact an
authorized HYUNDAI dealer.
✽ ✽
NOTICE
If you do not reset the sunroof, it
may not work properly.
Page 146 of 476
461
Features of your vehicle
Trip computer
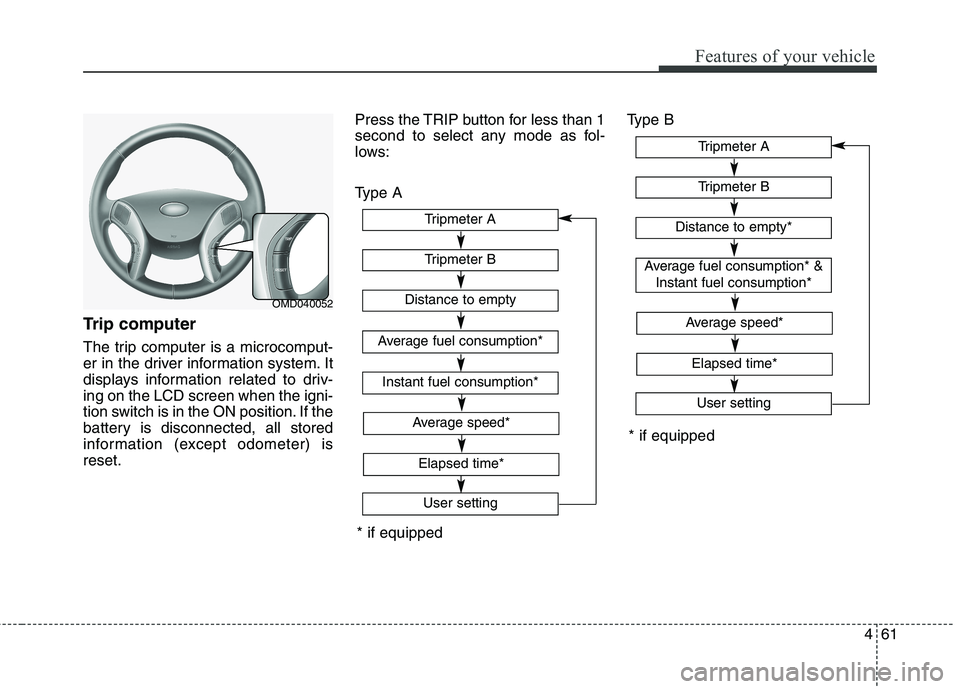
The trip computer is a microcomput-
er in the driver information system. It
displays information related to driv-
ing on the LCD screen when the igni-
tion switch is in the ON position. If the
battery is disconnected, all stored
information (except odometer) is
reset.Press the TRIP button for less than 1
second to select any mode as fol-
lows:
Type AType B
OMD040052
* if equipped
Tripmeter B
Instant fuel consumption*
Tripmeter A
Distance to empty
Average fuel consumption*
User setting
Elapsed time*
Average speed*
Tripmeter B
Tripmeter A
Distance to empty*
Average fuel consumption* &
Instant fuel consumption*
User setting
* if equipped
Elapsed time*
Average speed*
Page 147 of 476
Features of your vehicle
62 4
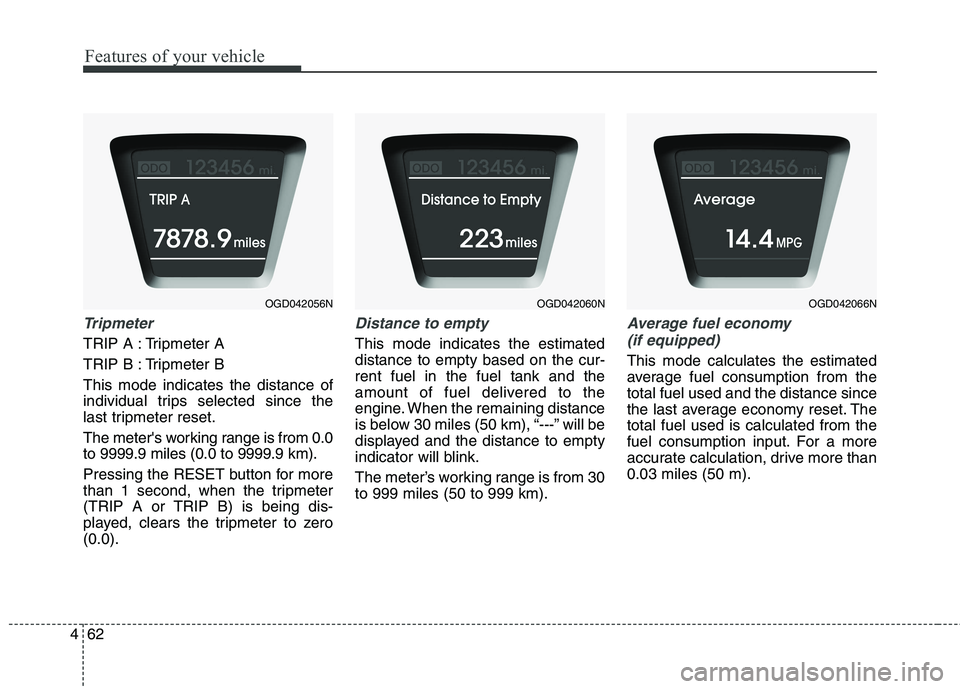
Tripmeter
TRIP A : Tripmeter A
TRIP B : Tripmeter B
This mode indicates the distance of
individual trips selected since the
last tripmeter reset.
The meter's working range is from 0.0
to 9999.9 miles (0.0 to 9999.9 km).
Pressing the RESET button for more
than 1 second, when the tripmeter
(TRIP A or TRIP B) is being dis-
played, clears the tripmeter to zero
(0.0).
Distance to empty
This mode indicates the estimated
distance to empty based on the cur-
rent fuel in the fuel tank and the
amount of fuel delivered to the
engine. When the remaining distance
is below 30 miles (50 km), “---” will be
displayed and the distance to empty
indicator will blink.
The meter’s working range is from 30
to 999 miles (50 to 999 km).
Average fuel economy
(if equipped)
This mode calculates the estimated
average fuel consumption from the
total fuel used and the distance since
the last average economy reset. The
total fuel used is calculated from the
fuel consumption input. For a more
accurate calculation, drive more than
0.03 miles (50 m).
OGD042056NOGD042060NOGD042066N
Page 148 of 476
463
Features of your vehicle
• When the “AVG Fuel Economy” of
“User Setting” is in the “Auto Reset”
If the vehicle speed exceeds 1.6
MPH (1 km/h) after refueling more
than 1.6 gallons (6 l), the average
fuel consumption will be cleared to
zero (---).
• When the “AVG Fuel Economy” of
“User Setting” is in the “Manual
Reset”
Pressing the RESET button for more
than 1 second when the average fuel
consumption is displayed clears the
average fuel consumption to zero (--.-).
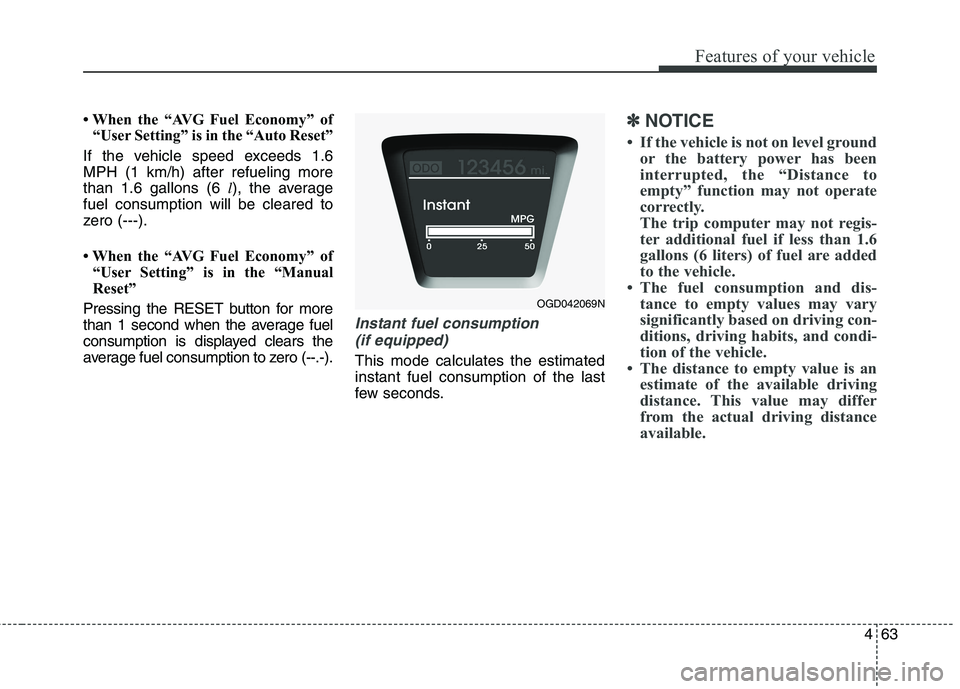
Instant fuel consumption
(if equipped)
This mode calculates the estimated
instant fuel consumption of the last
few seconds.
✽ ✽
NOTICE
• If the vehicle is not on level ground
or the battery power has been
interrupted, the “Distance to
empty” function may not operate
correctly.
The trip computer may not regis-
ter additional fuel if less than 1.6
gallons (6 liters) of fuel are added
to the vehicle.
• The fuel consumption and dis-
tance to empty values may vary
significantly based on driving con-
ditions, driving habits, and condi-
tion of the vehicle.
• The distance to empty value is an
estimate of the available driving
distance. This value may differ
from the actual driving distance
available.
OGD042069N
Page 149 of 476
Features of your vehicle
64 4
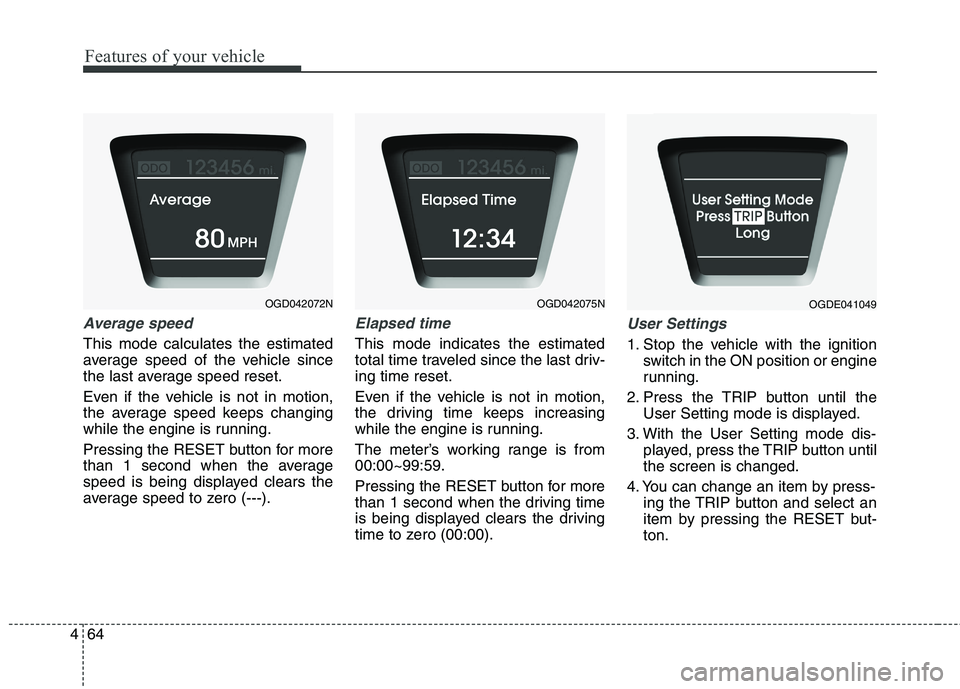
Average speed
This mode calculates the estimated
average speed of the vehicle since
the last average speed reset.
Even if the vehicle is not in motion,
the average speed keeps changing
while the engine is running.
Pressing the RESET button for more
than 1 second when the average
speed is being displayed clears the
average speed to zero (---).
Elapsed time
This mode indicates the estimated
total time traveled since the last driv-
ing time reset.
Even if the vehicle is not in motion,
the driving time keeps increasing
while the engine is running.
The meter’s working range is from
00:00~99:59.
Pressing the RESET button for more
than 1 second when the driving time
is being displayed clears the driving
time to zero (00:00).
User Settings
1. Stop the vehicle with the ignition
switch in the ON position or engine
running.
2. Press the TRIP button until the
User Setting mode is displayed.
3. With the User Setting mode dis-
played, press the TRIP button until
the screen is changed.
4. You can change an item by press-
ing the TRIP button and select an
item by pressing the RESET but-
ton.
OGD042072NOGD042075NOGDE041049
Page 151 of 476
Features of your vehicle
66 4
Headlamp delay (if equipped)
On - The Headlamp delay and
Headlamp Welcome function
will be activated.
Off - The Headlamp delay and
Headlamp Welcome function
will be inactivated.
Auto Triple Turn
(One-touch triple turn signal)
On - The lane change signals will
blink 3 times when the turn sig-
nal lever is moved slightly.
Off - The Auto Triple Turn function
will be inactivated.Welcome Light (if equipped)
On - The Welcome Light function will
be activated.
Off - The Welcome Light function will
be inactivated.
Welcome Sound (if equipped)
On - The Welcome Sound function
will be activated.
Off - The Welcome Sound function
will be deactivated.AVG fuel economy
Auto Reset - The estimated average
fuel economy will reset
automatically when you
drive after refueling.
Manual Reset - The estimated aver-
age fuel economy
will not reset auto-
matically when you
drive after refueling.
Temperature unit
Convert the temperature unit from °C
to °F or from °F to °C.
Eco driving (if equipped)
(Manual transaxle vehicle)
On - The shift indicator will illuminate.
Off - The shift indicator will turn off.
Page 195 of 476
Features of your vehicle
110 4
Adjusting the driver and passenger
side temperature individually
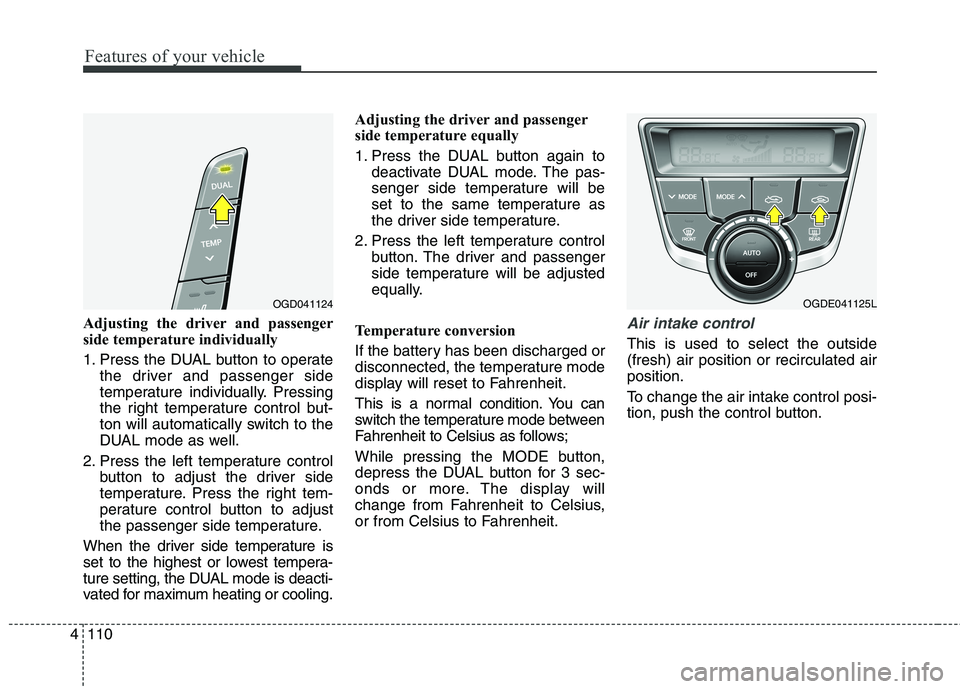
1. Press the DUAL button to operate
the driver and passenger side
temperature individually. Pressing
the right temperature control but-
ton will automatically switch to the
DUAL mode as well.
2. Press the left temperature control
button to adjust the driver side
temperature. Press the right tem-
perature control button to adjust
the passenger side temperature.
When the driver side temperature is
set to the highest or lowest tempera-
ture setting, the DUAL mode is deacti-
vated for maximum heating or cooling.Adjusting the driver and passenger
side temperature equally
1. Press the DUAL button again to
deactivate DUAL mode. The pas-
senger side temperature will be
set to the same temperature as
the driver side temperature.
2. Press the left temperature control
button. The driver and passenger
side temperature will be adjusted
equally.
Temperature conversion
If the battery has been discharged or
disconnected, the temperature mode
display will reset to Fahrenheit.
This is a normal condition. You can
switch the temperature mode between
Fahrenheit to Celsius as follows;
While pressing the MODE button,
depress the DUAL button for 3 sec-
onds or more. The display will
change from Fahrenheit to Celsius,
or from Celsius to Fahrenheit.Air intake control
This is used to select the outside
(fresh) air position or recirculated air
position.
To change the air intake control posi-
tion, push the control button.
OGD041124OGDE041125L