reset Hyundai Elantra GT 2018 User Guide
[x] Cancel search | Manufacturer: HYUNDAI, Model Year: 2018, Model line: Elantra GT, Model: Hyundai Elantra GT 2018Pages: 478, PDF Size: 13.64 MB
Page 194 of 478
3-109
Convenient features of your vehicle
3
Temperature control
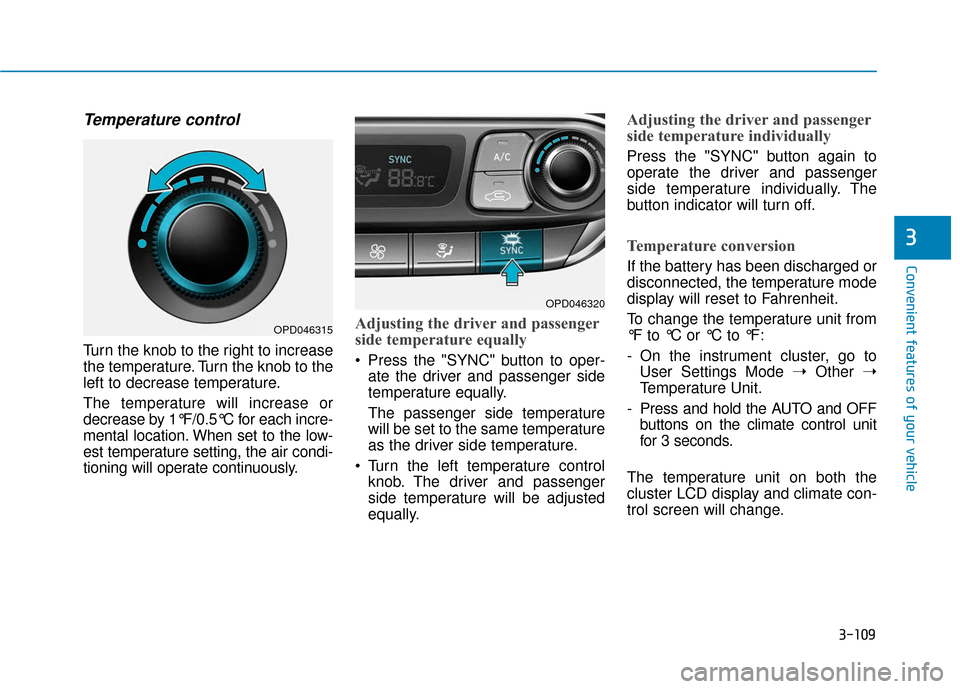
Turn the knob to the right to increase
the temperature. Turn the knob to the
left to decrease temperature.
The temperature will increase or
decrease by 1°F/0.5°C for each incre-
mental location. When set to the low-
est temperature setting, the air condi-
tioning will operate continuously.
Adjusting the driver and passenger
side temperature equally
Press the "SYNC" button to oper-ate the driver and passenger side
temperature equally.
The passenger side temperature
will be set to the same temperature
as the driver side temperature.
Turn the left temperature control knob. The driver and passenger
side temperature will be adjusted
equally.
Adjusting the driver and passenger
side temperature individually
Press the "SYNC" button again to
operate the driver and passenger
side temperature individually. The
button indicator will turn off.
Temperature conversion
If the battery has been discharged or
disconnected, the temperature mode
display will reset to Fahrenheit.
To change the temperature unit from
°F to °C or °C to °F:
- On the instrument cluster, go toUser Settings Mode ➝ Other ➝
Temperature Unit.
- Press and hold the AUTO and OFF buttons on the climate control unit
for 3 seconds.
The temperature unit on both the
cluster LCD display and climate con-
trol screen will change.
OPD046320
OPD046315
Page 202 of 478
3-117
Convenient features of your vehicle
3
To defrost outside windshield
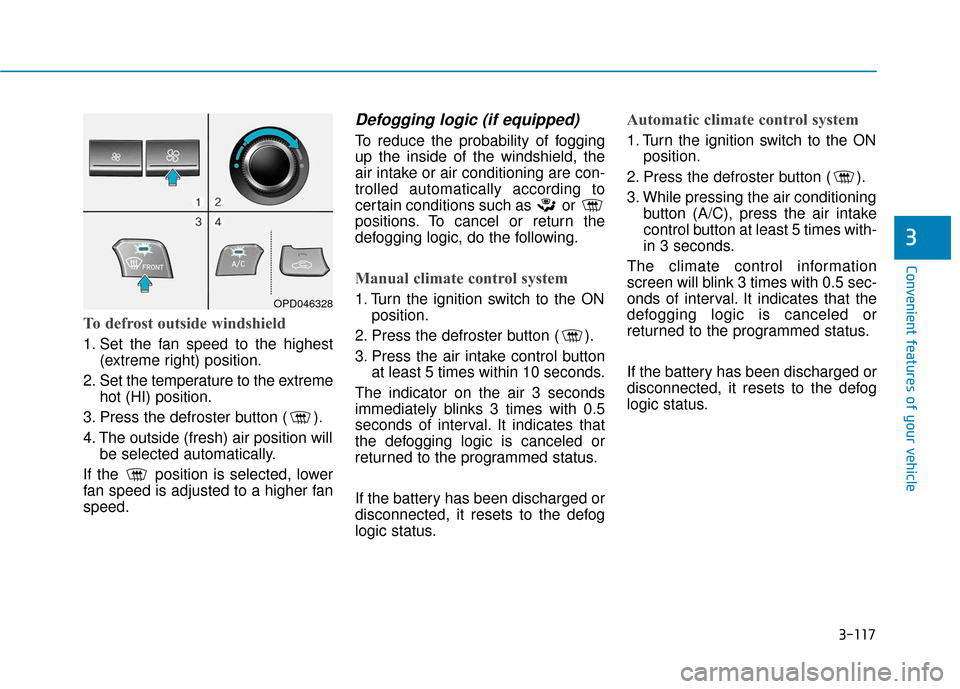
1. Set the fan speed to the highest(extreme right) position.
2. Set the temperature to the extreme hot (HI) position.
3. Press the defroster button ( ).
4. The outside (fresh) air position will be selected automatically.
If the position is selected, lower
fan speed is adjusted to a higher fan
speed.
Defogging logic (if equipped)
To reduce the probability of fogging
up the inside of the windshield, the
air intake or air conditioning are con-
trolled automatically according to
certain conditions such as or
positions. To cancel or return the
defogging logic, do the following.
Manual climate control system
1. Turn the ignition switch to the ON position.
2. Press the defroster button ( ).
3. Press the air intake control button at least 5 times within 10 seconds.
The indicator on the air 3 seconds
immediately blinks 3 times with 0.5
seconds of interval. It indicates that
the defogging logic is canceled or
returned to the programmed status.
If the battery has been discharged or
disconnected, it resets to the defog
logic status.
Automatic climate control system
1. Turn the ignition switch to the ON position.
2. Press the defroster button ( ).
3. While pressing the air conditioning button (A/C), press the air intake
control button at least 5 times with-
in 3 seconds.
The climate control information
screen will blink 3 times with 0.5 sec-
onds of interval. It indicates that the
defogging logic is canceled or
returned to the programmed status.
If the battery has been discharged or
disconnected, it resets to the defog
logic status.
OPD046328
Page 203 of 478
3-118
Convenient features of your vehicle
Auto Defogging System
(Only for Automatic Climate
Control System, if equipped)
Auto defogging reduces the possibili-
ty of fogging up the inside of the wind-
shield by automatically sensing the
moisture on inside the windshield.
The auto defogging system operates
when the heater or air conditioning is
on.
Information
The auto defogging system may not
operate normally, when the outside
temperature is below 50 °F (-10 °C).When the Auto Defogging
System operates, the indi-
cator will illuminate.
If high levels of moisture are sensed in
the vehicle, the Auto Defogging System
will operate in the following order:
Step 1: Outside air position
Step 2: Operating the air conditioning
Step 3: Blowing air toward the wind- shield
Step 4: Increasing air flow toward the windshield
If the air conditioning is off or recircu-
lated air position is manually selected
while Auto Defogging System is ON,
the Auto Defogging System Indicator
will blink 3 times to signal that the
manual operation has been canceled.
To cancel or reset the
Auto Defogging System
Press the front windshield defroster
button for 3 seconds when the ignition
switch is in the ON position. When the
Auto Defogging System is canceled,
the ADS OFF symbol will blink 3 times
and ADS OFF will be displayed on the
climate control information screen. When the Auto Defogging System is
reset, the ADS OFF symbol will blink
6 times without a signal.
Information
• When the air conditioning is turned
on by Auto defogging system, if you
try to turn off the air conditioning, the
indicator will blink 3 times and the air
conditioning will not be turned off.
• For efficiency, do not select recircu- lated air position while the Auto
defogging system is operating.
• When Auto defogging mode is selected, fan speed, temperature and
intake mode which is adjusted man-
ually are canceled for better defog-
ging result.
Do not remove the sensor cover
located on the upper end of the
windshield glass.
Damage to system parts could
occur and may not be covered by
your vehicle warranty.
NOTICE
i
i
OPD047316N
Page 205 of 478
3-120
Convenient features of your vehicle
C
CL
LI
IM
M A
AT
TE
E
C
C O
O N
NT
TR
R O
O L
L
A
A D
DD
DI
IT
T I
IO
O N
NA
AL
L
F
F E
E A
A T
TU
U R
RE
ES
S
(
( I
IF
F
E
E Q
Q U
UI
IP
P P
PE
ED
D )
)
Cluster ionizer (if equipped)
When the ignition switch is in the ON
position, the clean air function turns
on automatically.
Also, the clean air function turns off
automatically, when the ignition
switch is in the OFF position.
Automatic Ventilation
(if equipped)
When the ignition switch is in the ON
position or when the engine is run-
ning and temperature is below 59°F
(15°C) with the recirculated air posi-
tion selected more than five minutes,
the air intake position will automati-
cally change to the outside (fresh) air
position.
To cancel or reset the Automatic
Ventilation
When the air conditioning system is
on, select Face Level mode and
while pressing the A/C button, press
the recirculated air position button
five times within three seconds.
When the automatic ventilation is set,
the air intake control button (recircu-
lated air position) indicator will blink 6
times. When canceled, the air intake
control button (recirculated air posi-
tion) indicator will blink 3 times.
Sunroof Inside Air
Recirculation (if equipped)
When the heater or air conditioning
system is on with the sunroof
opened, the outside (fresh) air posi-
tion will be automatically selected. At
this time, if you press the recirculated
air position button, the recirculated
air position will be selected but will
change back to the outside (fresh) air
position after 3 minutes.
When the sunroof is closed, the air
intake position will return to the orig-
inal position that was selected.
Page 218 of 478
4-3
Multimedia System
4
Antenna
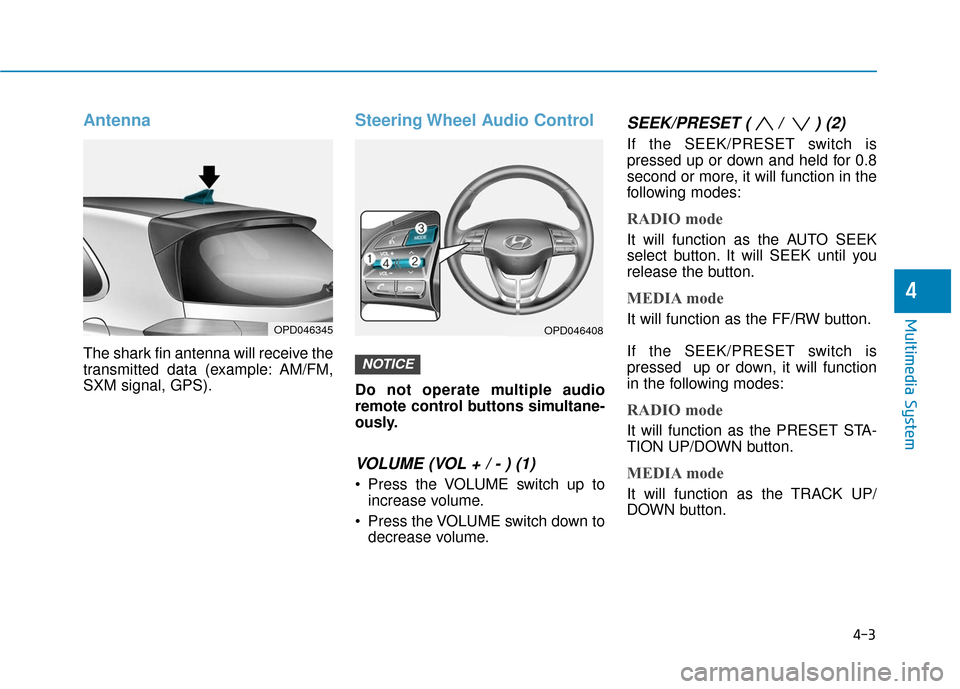
The shark fin antenna will receive the
transmitted data (example: AM/FM,
SXM signal, GPS).
Steering Wheel Audio Control
Do not operate multiple audio
remote control buttons simultane-
ously.
VOLUME (VOL + / - ) (1)
Press the VOLUME switch up toincrease volume.
Press the VOLUME switch down to decrease volume.
SEEK/PRESET ( / ) (2)
If the SEEK/PRESET switch is
pressed up or down and held for 0.8
second or more, it will function in the
following modes:
RADIO mode
It will function as the AUTO SEEK
select button. It will SEEK until you
release the button.
MEDIA mode
It will function as the FF/RW button.
If the SEEK/PRESET switch is
pressed up or down, it will function
in the following modes:
RADIO mode
It will function as the PRESET STA-
TION UP/DOWN button.
MEDIA mode
It will function as the TRACK UP/
DOWN button.
NOTICE
OPD046345OPD046408
Page 221 of 478
5
Driver Attention Alert System (DAA)................5-82
System Setting and Activation.....................................5-82
Resetting the System .....................................................5-83
System Standby ...............................................................5-84
System Malfunction .......................................................5-84
Cruise Control .......................................................5-86
Cruise Control operation ...............................................5-86
Advanced Smart Cruise Control System ...........5-91
Smart Cruise Control Speed .........................................5-92
Smart Cruise Control Vehicle-to-Vehicle
Distance ........................................................................\
.....5-96
Sensor to Detect Distance to the
Vehicle Ahead ..................................................................5-99
To Adjust the Sensitivity of
Smart Cruise Control ....................................................5-101
To Convert to Cruise Control Mode .........................5-101
Limitations of the System...........................................5-102
Special Driving Conditions ................................5-107
Hazardous Driving Conditions....................................5-107
Rocking the Vehicle ......................................................5-107
Smooth Cornering .........................................................5-108
Driving at Night .............................................................5-108
Driving in the Rain ........................................................5-108
Driving in Flooded Areas.............................................5-109
Highway Driving ............................................................5-109
Winter Driving ....................................................5-110
Snow or Icy Conditions................................................5-110
Winter Precautions .......................................................5-112
Vehicle Load Limit..............................................5-114
Tire Loading Information Label .................................5-115
Trailer Towing .....................................................5-119
Page 273 of 478
5-54
Driving your vehicle
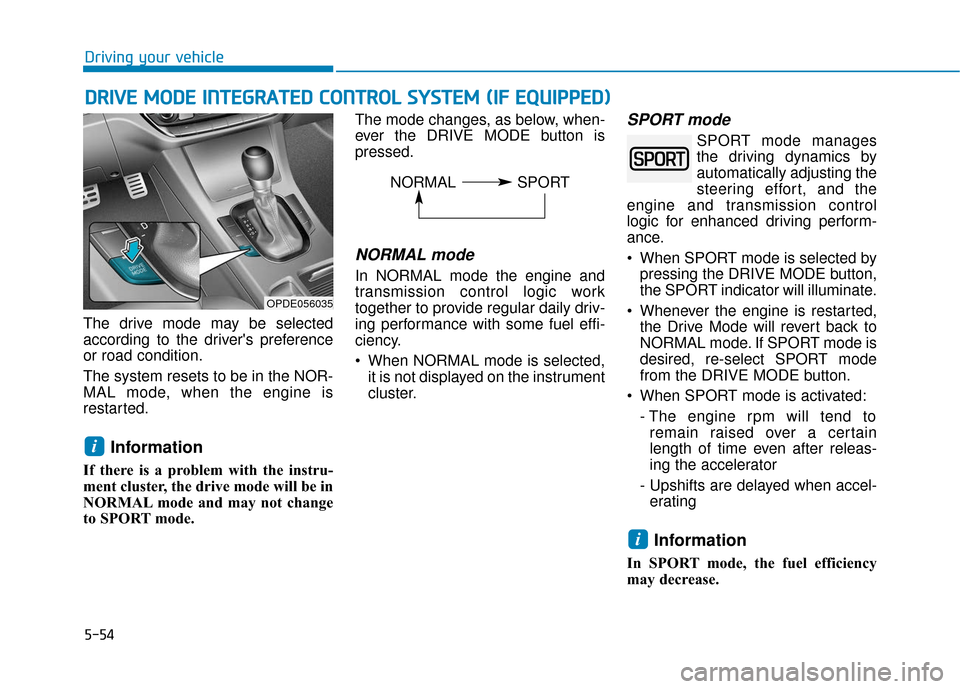
The drive mode may be selected
according to the driver's preference
or road condition.
The system resets to be in the NOR-
MAL mode, when the engine is
restarted.
Information
If there is a problem with the instru-
ment cluster, the drive mode will be in
NORMAL mode and may not change
to SPORT mode. The mode changes, as below, when-
ever the DRIVE MODE button is
pressed.
NORMAL mode
In NORMAL mode the engine and
transmission control logic work
together to provide regular daily driv-
ing performance with some fuel effi-
ciency.
When NORMAL mode is selected,
it is not displayed on the instrument
cluster.
SPORT mode
SPORT mode manages
the driving dynamics by
automatically adjusting the
steering effort, and the
engine and transmission control
logic for enhanced driving perform-
ance.
When SPORT mode is selected by pressing the DRIVE MODE button,
the SPORT indicator will illuminate.
Whenever the engine is restarted, the Drive Mode will revert back to
NORMAL mode. If SPORT mode is
desired, re-select SPORT mode
from the DRIVE MODE button.
When SPORT mode is activated: - The engine rpm will tend toremain raised over a certain
length of time even after releas-
ing the accelerator
- Upshifts are delayed when accel- erating
Information
In SPORT mode, the fuel efficiency
may decrease.
i
i
D D R
RI
IV
V E
E
M
M O
OD
DE
E
I
IN
N T
TE
EG
G R
RA
A T
TE
ED
D
C
C O
O N
NT
TR
R O
O L
L
S
S Y
Y S
ST
T E
EM
M
(
( I
IF
F
E
E Q
Q U
UI
IP
P P
PE
ED
D )
)
OPDE056035
NORMAL SPORT
Page 302 of 478
5-83
Driving your vehicle
5
The driver can monitor their drivingconditions on the LCD display.
The DAA screen will appear when
you select the Assist mode tab ( )
on the LCD display if the system is
activated. (For more information,
refer to "LCD Display Modes" in
chapter 3.)
The driver's attention level is dis- played on the scale of 1 to 5. The
lower the number is, the more inat-
tentive the driver is.
The number decreases when the driver does not take a break for a
certain period of time.
The number increases when the driver attentively drives for a cer-
tain period of time.
When the driver turns on the sys- tem while driving, it displays 'Last
Break time' and level.Take a break
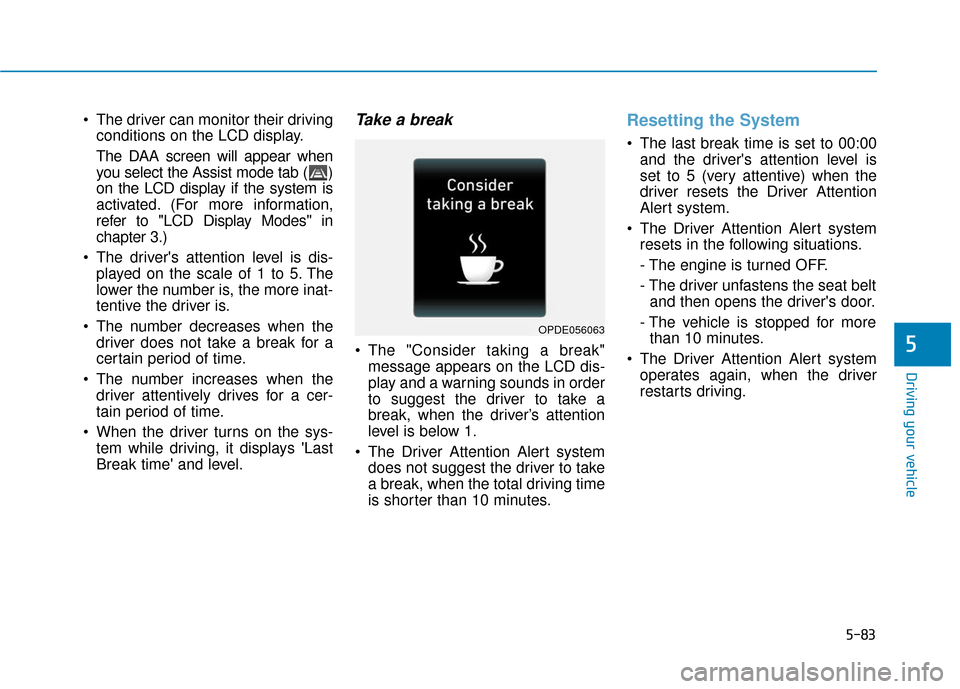
The "Consider taking a break"message appears on the LCD dis-
play and a warning sounds in order
to suggest the driver to take a
break, when the driver’s attention
level is below 1.
The Driver Attention Alert system does not suggest the driver to take
a break, when the total driving time
is shorter than 10 minutes.
Resetting the System
The last break time is set to 00:00and the driver's attention level is
set to 5 (very attentive) when the
driver resets the Driver Attention
Alert system.
The Driver Attention Alert system resets in the following situations.
- The engine is turned OFF.
- The driver unfastens the seat beltand then opens the driver's door.
- The vehicle is stopped for more than 10 minutes.
The Driver Attention Alert system operates again, when the driver
restarts driving.
OPDE056063
Page 308 of 478
5-89
Driving your vehicle
5
To temporarily accelerate withthe Cruise Control ON
Depress the accelerator pedal. When
you take your foot off the accelerator,
the vehicle will return to the previ-
ously set speed.
If you push the toggle switch down
(SET-) at the increased speed, the
Cruise Control will maintain the
increased speed.
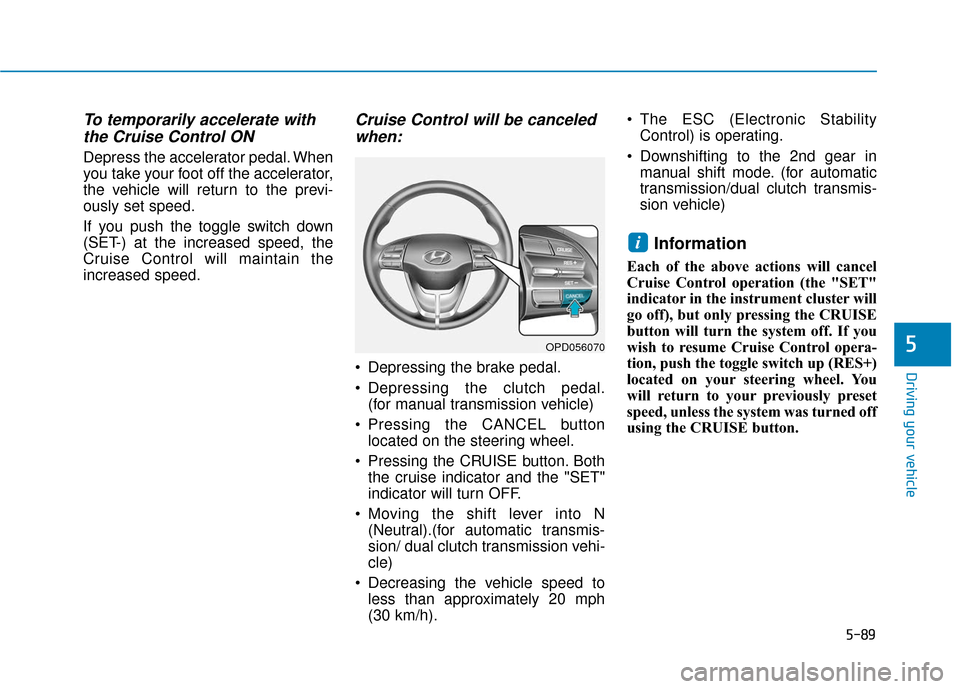
Cruise Control will be canceledwhen:
Depressing the brake pedal.
Depressing the clutch pedal.
(for manual transmission vehicle)
Pressing the CANCEL button located on the steering wheel.
Pressing the CRUISE button. Both the cruise indicator and the "SET"
indicator will turn OFF.
Moving the shift lever into N (Neutral).(for automatic transmis-
sion/ dual clutch transmission vehi-
cle)
Decreasing the vehicle speed to less than approximately 20 mph
(30 km/h). The ESC (Electronic Stability
Control) is operating.
Downshifting to the 2nd gear in manual shift mode. (for automatic
transmission/dual clutch transmis-
sion vehicle)
Information
Each of the above actions will cancel
Cruise Control operation (the "SET"
indicator in the instrument cluster will
go off), but only pressing the CRUISE
button will turn the system off. If you
wish to resume Cruise Control opera-
tion, push the toggle switch up (RES+)
located on your steering wheel. You
will return to your previously preset
speed, unless the system was turned off
using the CRUISE button.
i
OPD056070
Page 309 of 478
5-90
Driving your vehicle
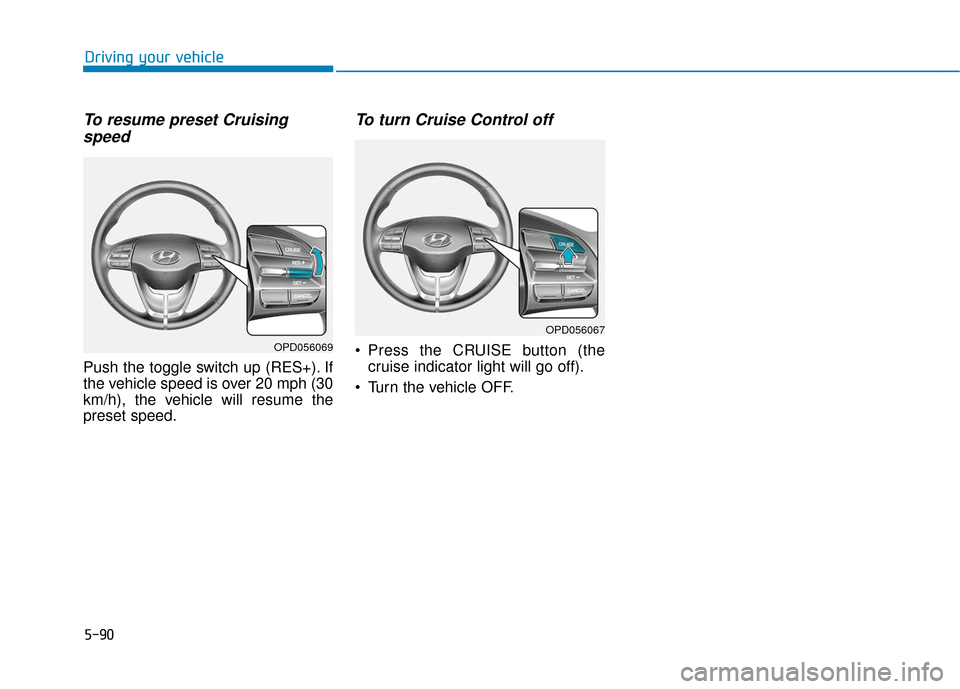
To resume preset Cruisingspeed
Push the toggle switch up (RES+). If
the vehicle speed is over 20 mph (30
km/h), the vehicle will resume the
preset speed.
To turn Cruise Control off
Press the CRUISE button (the
cruise indicator light will go off).
Turn the vehicle OFF.OPD056069
OPD056067