automatic transmission Hyundai Elantra GT 2018 Owner's Guide
[x] Cancel search | Manufacturer: HYUNDAI, Model Year: 2018, Model line: Elantra GT, Model: Hyundai Elantra GT 2018Pages: 478, PDF Size: 13.64 MB
Page 250 of 478
5-31
Driving your vehicle
5
Information
• Only the seven forward gears can beselected in Manual Shift Mode. To
reverse or park the vehicle, move
the shift lever to the R (Reverse) or
P (Park) position as required.
• Downshifts are made automatically when the vehicle slows down. When
the vehicle stops, 1
stgear is automat-
ically selected.
• When the engine rpm approaches the red zone the transmission will
upshift automatically.
• If the driver presses the lever to + (Up) or - (Down) position, the
transmission may not make the
requested gear change if the next
gear is outside of the allowable
engine rpm range. The driver must
execute upshifts in accordance with
road conditions, taking care to keep
the engine rpms below the red zone.
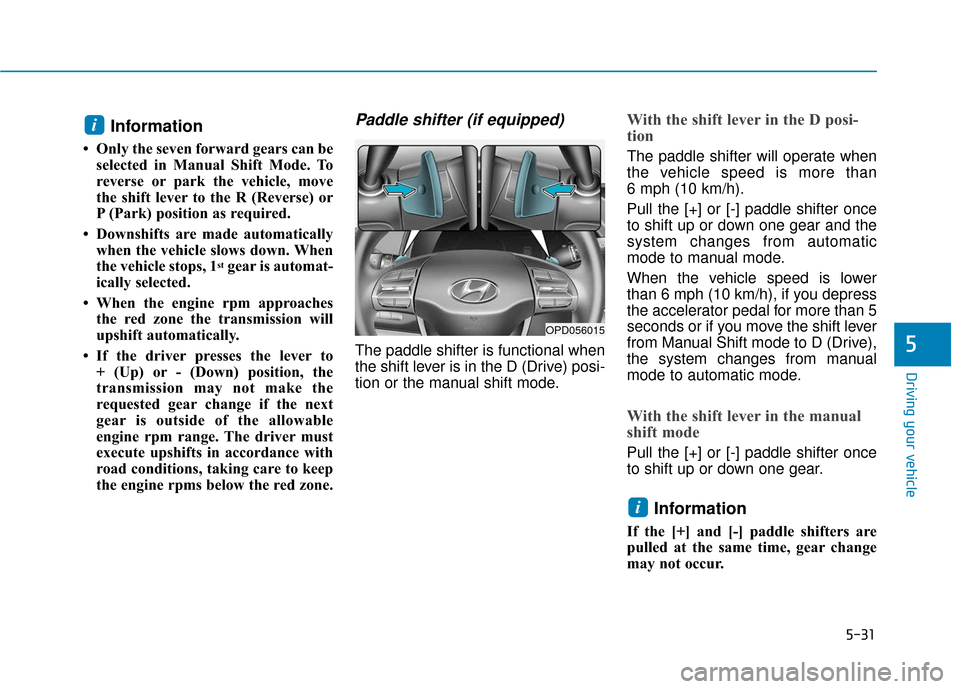
Paddle shifter (if equipped)
The paddle shifter is functional when
the shift lever is in the D (Drive) posi-
tion or the manual shift mode.
With the shift lever in the D posi-
tion
The paddle shifter will operate when
the vehicle speed is more than
6 mph (10 km/h).
Pull the [+] or [-] paddle shifter once
to shift up or down one gear and the
system changes from automatic
mode to manual mode.
When the vehicle speed is lower
than 6 mph (10 km/h), if you depress
the accelerator pedal for more than 5
seconds or if you move the shift lever
from Manual Shift mode to D (Drive),
the system changes from manual
mode to automatic mode.
With the shift lever in the manual
shift mode
Pull the [+] or [-] paddle shifter once
to shift up or down one gear.
Information
If the [+] and [-] paddle shifters are
pulled at the same time, gear change
may not occur.
i
i
OPD056015
Page 251 of 478
5-32
Driving your vehicle
Shift-lock system
For your safety, the automatic trans-
mission has a shift-lock system
which prevents shifting the transmis-
sion from P (Park) into R (Reverse)
unless the brake pedal is depressed.
To shift the transmission from P
(Park) into R (Reverse):
1. Depress and hold the brake pedal.
2. Start the engine or place the igni-tion switch in the ON position.
3. Move the shift lever.
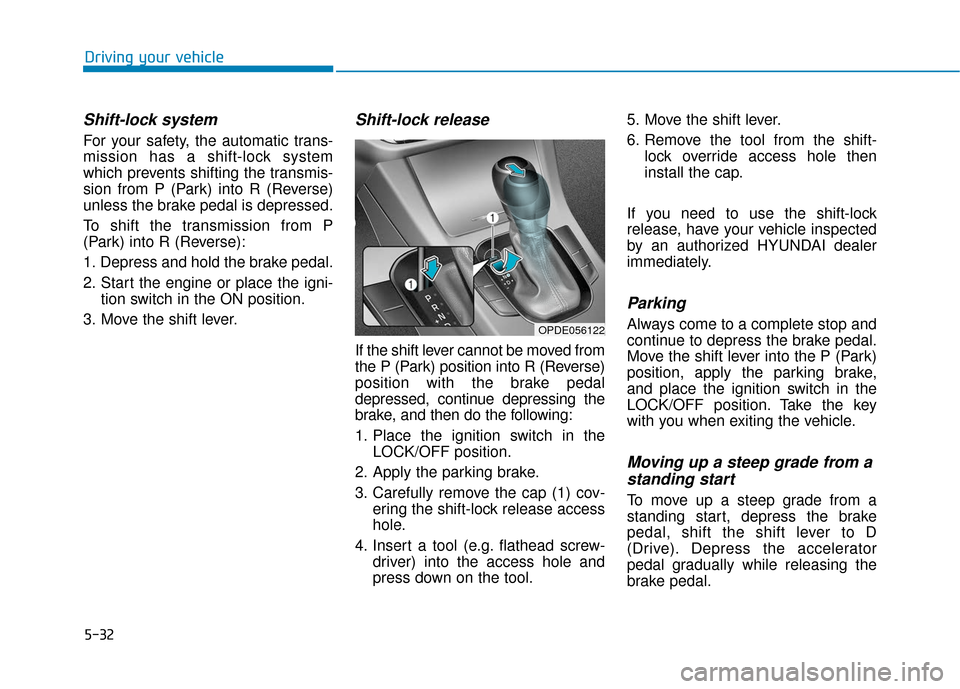
Shift-lock release
If the shift lever cannot be moved from
the P (Park) position into R (Reverse)
position with the brake pedal
depressed, continue depressing the
brake, and then do the following:
1. Place the ignition switch in the LOCK/OFF position.
2. Apply the parking brake.
3. Carefully remove the cap (1) cov- ering the shift-lock release access
hole.
4. Insert a tool (e.g. flathead screw- driver) into the access hole and
press down on the tool. 5. Move the shift lever.
6. Remove the tool from the shift-
lock override access hole then
install the cap.
If you need to use the shift-lock
release, have your vehicle inspected
by an authorized HYUNDAI dealer
immediately.
Parking
Always come to a complete stop and
continue to depress the brake pedal.
Move the shift lever into the P (Park)
position, apply the parking brake,
and place the ignition switch in the
LOCK/OFF position. Take the key
with you when exiting the vehicle.
Moving up a steep grade from a standing start
To move up a steep grade from a
standing start, depress the brake
pedal, shift the shift lever to D
(Drive). Depress the accelerator
pedal gradually while releasing the
brake pedal.
OPDE056122
Page 258 of 478
5-39
Driving your vehicle
To release EPB (Electronic Parking
Brake) automatically:
Shift lever in P (Park)With the engine running depress
the brake pedal and shift out of P
(Park) to R (Reverse) or D (Drive).
Shift lever in N (Neutral) With the engine running depress
the brake pedal and shift out of N
(Neutral) to R (Reverse) or D
(Drive).
Manual transmission vehicle 1. Ensure seat belts are fastened and the doors, hood and liftgate
are closed.
2. With the engine running, depress the clutch pedal and move the
shift lever to 1 (First) gear or R
(Reverse).
3. Depress the accelerator pedal while releasing the clutch pedal. Automatic transmission/Dual clutch
transmission vehicle
1. Ensure seat belts are fastened and the doors, hood and liftgate
are closed.
2. With the engine running, depress the brake pedal and shift out of P
(Park) to R (Reverse) or D
(Drive).
3. Depress the accelerator pedal.
Make sure the Parking Brake
Warning light goes off.
Information
• For your safety, you can engage the EPB even though the Engine Stop/
Start button is in the OFF position,
but you cannot release it.
• For your safety, depress the brake pedal and release the parking brake
manually with the EPB switch when
you drive downhill or when backing
up the vehicle.
Information - Manual trans-mission
A vehicle towing a trailer on a hill or
on an incline may slightly roll back-
wards when starting the vehicle. To
prevent the situation follow the below
instructions.
1. Depress the clutch pedal and select a gear.
2. Keep pulling up the EPB switch.
3. Depress the accelerator pedal and slowly release the clutch pedal.
4. If the vehicle starts off with enough driving power release the EPB
switch.
Do not follow the above procedure
when driving on a flat level ground.
The vehicle may suddenly move for-
ward.i
i5
Page 272 of 478
5-53
Driving your vehicle
5
Hill-Start Assist Control (HAC)
The Hill-Start Assist Control (HAC)
helps prevent the vehicle from rolling
backwards when starting a vehicle
from a stop on a hill. The system
operates the brakes automatically for
approximately 2 seconds and releas-
es the brake after 2 seconds or when
the accelerator pedal is depressed.
The HAC does not operate whenthe shift lever is in P (Park) or N
(Neutral)
The HAC activates even though the ESC (Electronic Stability
Control) is off but does not acti-
vate when the ESC has malfunc-
tioned.
Good Braking Practices
Wet brakes can be dangerous! The
brakes may get wet if the vehicle is
driven through standing water or if it
is washed. Your vehicle will not stop
as quickly if the brakes are wet. Wet
brakes may cause the vehicle to pull
to one side. To dry the brakes, apply the brakes
lightly until the braking action returns
to normal, taking care to keep the
vehicle under control at all times. If
the braking action does not return to
normal, stop as soon as it is safe to
do so and call an authorized
HYUNDAI dealer for assistance.
DO NOT drive with your foot resting
on the brake pedal. Even light, but
constant pedal pressure can result in
the brakes overheating, brake wear,
and possibly even brake failure.
If a tire goes flat while you are driv-
ing, apply the brakes gently and
keep the vehicle pointed straight
ahead while you slow down. When
you are moving slowly enough for it
to be safe to do so, pull off the road
and stop in a safe location.
Keep your foot firmly on the brake
pedal when the vehicle is stopped to
prevent the vehicle from rolling for-
ward.
NOTICE
Always be ready to depress the
accelerator pedal when starting
off on a incline. The HAC activates
only for approximately 2 seconds.
WARNING
Whenever leaving the vehicle or
parking, always come to a com-
plete stop and continue to
depress the brake pedal. Move
the shift lever into the 1
stgear
(for manual transmission vehi-
cle) or P (Park, for automatic
transmission vehicle) position,
then apply the parking brake,
and place the ignition switch in
the LOCK/OFF position.
Vehicles parked with the park-
ing brake not applied or not
fully engaged may roll inadver-
tently and may cause injury to
the driver and others. ALWAYS
apply the parking brake before
exiting the vehicle.
WARNING
Page 273 of 478
5-54
Driving your vehicle
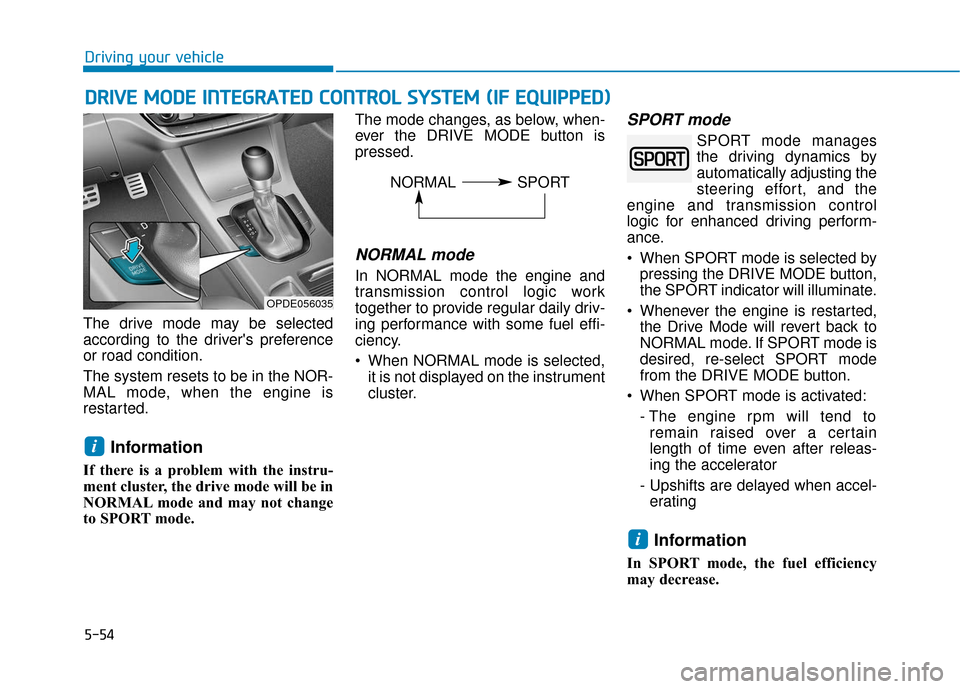
The drive mode may be selected
according to the driver's preference
or road condition.
The system resets to be in the NOR-
MAL mode, when the engine is
restarted.
Information
If there is a problem with the instru-
ment cluster, the drive mode will be in
NORMAL mode and may not change
to SPORT mode. The mode changes, as below, when-
ever the DRIVE MODE button is
pressed.
NORMAL mode
In NORMAL mode the engine and
transmission control logic work
together to provide regular daily driv-
ing performance with some fuel effi-
ciency.
When NORMAL mode is selected,
it is not displayed on the instrument
cluster.
SPORT mode
SPORT mode manages
the driving dynamics by
automatically adjusting the
steering effort, and the
engine and transmission control
logic for enhanced driving perform-
ance.
When SPORT mode is selected by pressing the DRIVE MODE button,
the SPORT indicator will illuminate.
Whenever the engine is restarted, the Drive Mode will revert back to
NORMAL mode. If SPORT mode is
desired, re-select SPORT mode
from the DRIVE MODE button.
When SPORT mode is activated: - The engine rpm will tend toremain raised over a certain
length of time even after releas-
ing the accelerator
- Upshifts are delayed when accel- erating
Information
In SPORT mode, the fuel efficiency
may decrease.
i
i
D D R
RI
IV
V E
E
M
M O
OD
DE
E
I
IN
N T
TE
EG
G R
RA
A T
TE
ED
D
C
C O
O N
NT
TR
R O
O L
L
S
S Y
Y S
ST
T E
EM
M
(
( I
IF
F
E
E Q
Q U
UI
IP
P P
PE
ED
D )
)
OPDE056035
NORMAL SPORT
Page 308 of 478
5-89
Driving your vehicle
5
To temporarily accelerate withthe Cruise Control ON
Depress the accelerator pedal. When
you take your foot off the accelerator,
the vehicle will return to the previ-
ously set speed.
If you push the toggle switch down
(SET-) at the increased speed, the
Cruise Control will maintain the
increased speed.
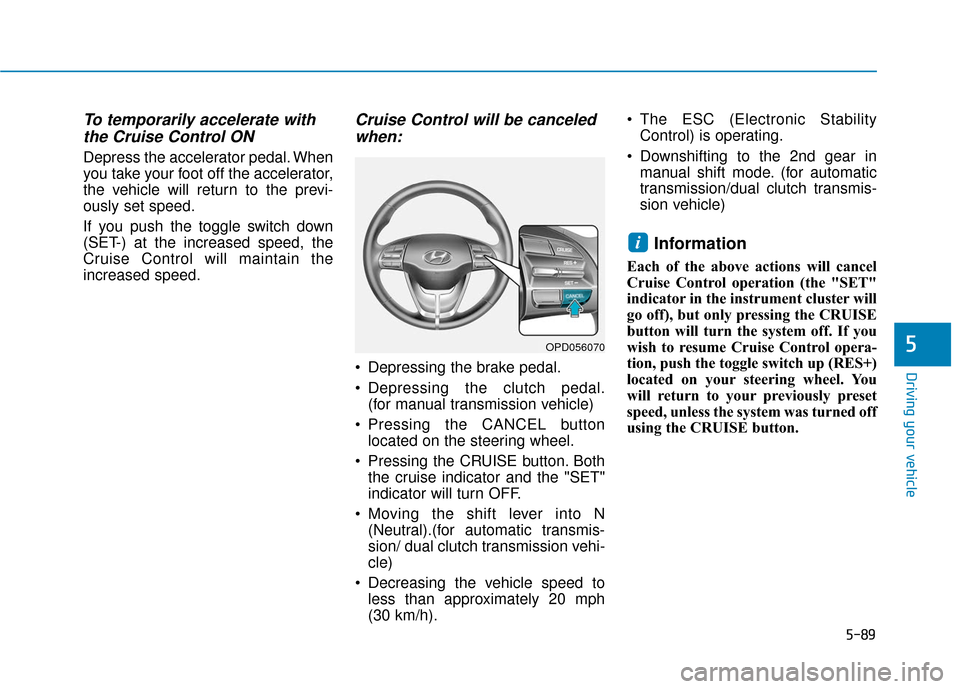
Cruise Control will be canceledwhen:
Depressing the brake pedal.
Depressing the clutch pedal.
(for manual transmission vehicle)
Pressing the CANCEL button located on the steering wheel.
Pressing the CRUISE button. Both the cruise indicator and the "SET"
indicator will turn OFF.
Moving the shift lever into N (Neutral).(for automatic transmis-
sion/ dual clutch transmission vehi-
cle)
Decreasing the vehicle speed to less than approximately 20 mph
(30 km/h). The ESC (Electronic Stability
Control) is operating.
Downshifting to the 2nd gear in manual shift mode. (for automatic
transmission/dual clutch transmis-
sion vehicle)
Information
Each of the above actions will cancel
Cruise Control operation (the "SET"
indicator in the instrument cluster will
go off), but only pressing the CRUISE
button will turn the system off. If you
wish to resume Cruise Control opera-
tion, push the toggle switch up (RES+)
located on your steering wheel. You
will return to your previously preset
speed, unless the system was turned off
using the CRUISE button.
i
OPD056070
Page 326 of 478
5-107
Driving your vehicle
5
Hazardous Driving Conditions
When hazardous driving elements
are encountered such as water,
snow, ice, mud and sand, take the
below suggestions:
Drive cautiously and keep a longerbraking distance.
Avoid abrupt braking or steering.
When your vehicle is stuck in snow, mud, or sand, use second gear.
Accelerate slowly to avoid unnec-
essary wheel spin.
Put sand, rock salt, tire chains or other non-slip materials under the
wheels to provide additional trac-
tion while the vehicle becomes
stuck in ice, snow, or mud.
Rocking the Vehicle
If it is necessary to rock the vehicle
to free it from snow, sand, or mud,
first turn the steering wheel right and
left to clear the area around your
front wheels. Then, shift back and
forth between R (Reverse) and a for-
ward gear.
Try to avoid spinning the wheels, and
do not race the engine.
To prevent transmission wear, wait
until the wheels stop spinning before
shifting gears. Release the accelera-
tor pedal while shifting, and press
lightly on the accelerator pedal while
the transmission is in gear. Slowly
spinning the wheels in forward and
reverse directions causes a rocking
motion that may free the vehicle.
S SP
P E
EC
CI
IA
A L
L
D
D R
RI
IV
V I
IN
N G
G
C
C O
O N
ND
DI
IT
T I
IO
O N
NS
S
Downshifting with an automatic
transmission/dual clutch trans-
mission while driving on slip-
pery surfaces can cause an
accident. The sudden change in
tire speed could cause the tires
to skid. Be careful when down-
shifting on slippery surfaces.
WARNING
If the vehicle is stuck and
excessive wheel spin occurs,
the temperature in the tires can
increase very quickly. If the tires
become damaged, a tire blow
out or tire explosion can occur.
This condition is dangerous -
you and others may be injured.
Do not attempt this procedure if
people or objects are anywhere
near the vehicle.
If you attempt to free the vehicle,
the vehicle can overheat quickly,
possibly causing an engine
compartment fire or other dam-
age. Try to avoid spinning the
wheels as much as possible to
prevent overheating of either the
tires or the engine. DO NOT
allow the vehicle to spin the
wheels above 35 mph (56 km/h).
WARNING
Page 357 of 478
6-19
What to do in an emergency
6
Jack label
To prevent damaging the com-
pact spare tire and your vehicle:
Drive slowly enough for the
road conditions to avoid all
hazards, such as a potholes
or debris.
Avoid driving over obstacles.
The compact spare tire diame-
ter is smaller than the diame-
ter of a conventional tire and
reduces the ground clearance
approximately 1 inch (25 mm).
Do not use tire chains on the
compact spare tire. Because
of the smaller size, a tire chain
will not fit properly.
Do not use the compact spare
tire on any other wheels, nor
should standard tires, snow
tires, wheel covers or trim
rings be used with the com-
pact spare wheel.
CAUTION
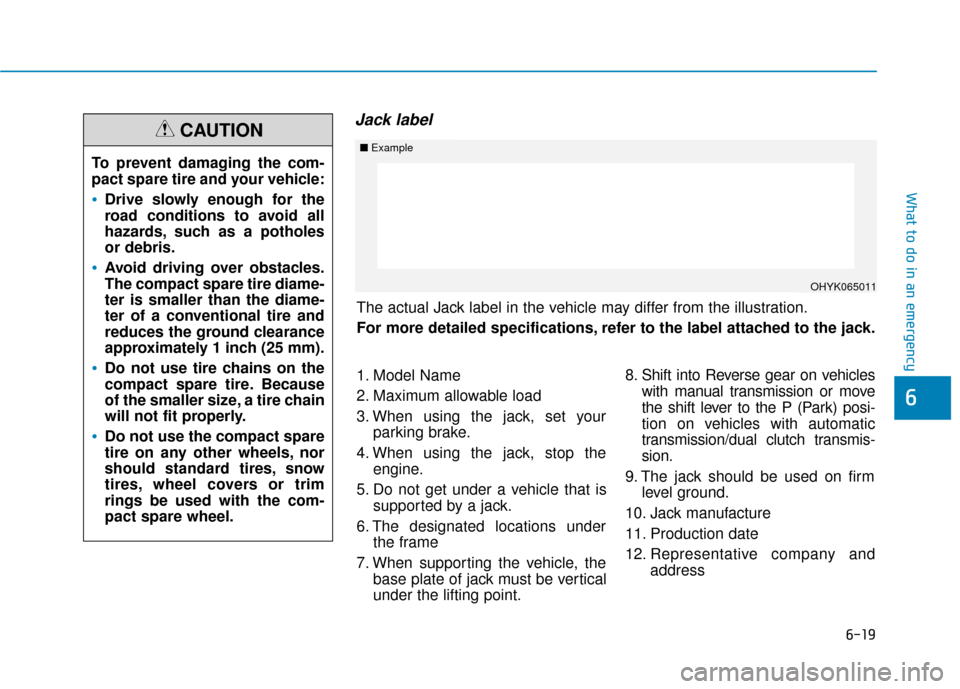
The actual Jack label in the vehicle may differ from the illustration.
For more detailed specifications, refer to the label attached to the jack.
■Example
OHYK065011
1. Model Name
2. Maximum allowable load
3. When using the jack, set your
parking brake.
4. When using the jack, stop the engine.
5. Do not get under a vehicle that is supported by a jack.
6. The designated locations under the frame
7. When supporting the vehicle, the base plate of jack must be vertical
under the lifting point. 8. Shift into Reverse gear on vehicles
with manual transmission or move
the shift lever to the P (Park) posi-
tion on vehicles with automatic
transmission/dual clutch transmis-
sion.
9. The jack should be used on firm level ground.
10. Jack manufacture
11. Production date
12. Representative company and address
Page 361 of 478
6-23
What to do in an emergency
6
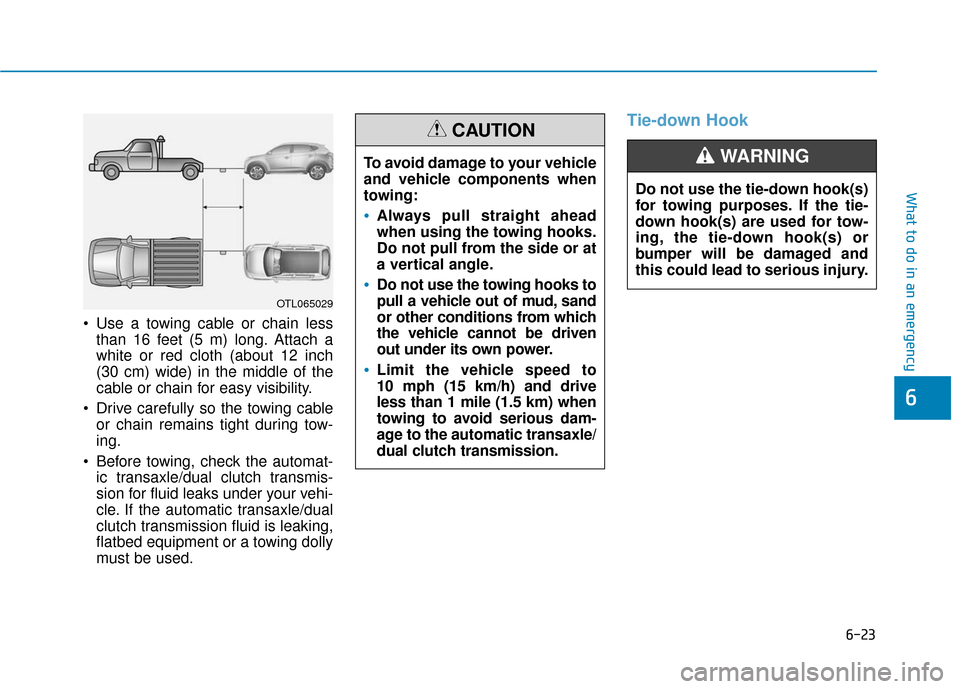
Use a towing cable or chain lessthan 16 feet (5 m) long. Attach a
white or red cloth (about 12 inch
(30 cm) wide) in the middle of the
cable or chain for easy visibility.
Drive carefully so the towing cable or chain remains tight during tow-
ing.
Before towing, check the automat- ic transaxle/dual clutch transmis-
sion for fluid leaks under your vehi-
cle. If the automatic transaxle/dual
clutch transmission fluid is leaking,
flatbed equipment or a towing dolly
must be used.
Tie-down Hook
To avoid damage to your vehicle
and vehicle components when
towing:
Always pull straight ahead
when using the towing hooks.
Do not pull from the side or at
a vertical angle.
Do not use the towing hooks to
pull a vehicle out of mud, sand
or other conditions from which
the vehicle cannot be driven
out under its own power.
Limit the vehicle speed to
10 mph (15 km/h) and drive
less than 1 mile (1.5 km) when
towing to avoid serious dam-
age to the automatic transaxle/
dual clutch transmission.
CAUTION
Do not use the tie-down hook(s)
for towing purposes. If the tie-
down hook(s) are used for tow-
ing, the tie-down hook(s) or
bumper will be damaged and
this could lead to serious injury.
WARNING
OTL065029
Page 366 of 478
7-5
7
Maintenance
O
OW
W N
NE
ER
R
M
M A
AI
IN
N T
TE
EN
N A
AN
N C
CE
E
The following lists are vehicle checks
and inspections that should be per-
formed by the owner or an author-
ized HYUNDAI dealer at the frequen-
cies indicated to help ensure safe,
dependable operation of your vehi-
cle.
Any adverse conditions should be
brought to the attention of your deal-
er as soon as possible.
These Owner Maintenance vehicle
checks are generally not covered by
warranties and you may be charged
for labor, parts and lubricants used.
Performing maintenance work
on a vehicle can be dangerous.
If you lack sufficient knowledge
and experience or the proper
tools and equipment to do the
work, have it done by an author-
ized HYUNDAI dealer.
ALWAYS follow these precau-
tions for performing mainte-
nance work:
•Park your vehicle on level
ground, move the shift lever
into the P (Park, for automatic
transmission vehicle) position
or neutral (for manual trans-
mission vehicle), apply the
parking brake, place the igni-
tion switch in the LOCK/OFF
position.
(Continued)
WARNING (Continued)
Block the tires (front and
back) to prevent the vehicle
from moving.
Remove loose clothing or jew-
elry that can become entan-
gled in moving parts.
If you must run the engine
during maintenance, do so
out doors or in an area with
plenty of ventilation.
Keep flames, sparks, or smok-
ing materials away from the
battery and fuel-related parts.