HYUNDAI ELANTRA GT 2019 Owners Manual
Manufacturer: HYUNDAI, Model Year: 2019, Model line: ELANTRA GT, Model: HYUNDAI ELANTRA GT 2019Pages: 486, PDF Size: 78.59 MB
Page 441 of 486
7-68
Maintenance
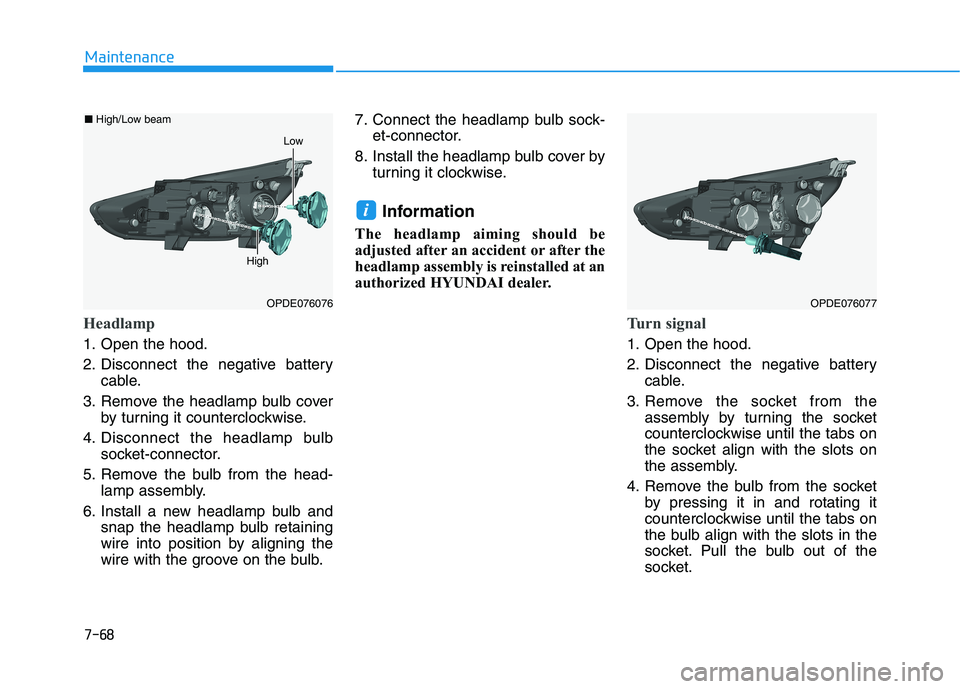
Headlamp
1. Open the hood.
2. Disconnect the negative batterycable.
3. Remove the headlamp bulb cover by turning it counterclockwise.
4. Disconnect the headlamp bulb socket-connector.
5. Remove the bulb from the head- lamp assembly.
6. Install a new headlamp bulb and snap the headlamp bulb retaining
wire into position by aligning the
wire with the groove on the bulb. 7. Connect the headlamp bulb sock-
et-connector.
8. Install the headlamp bulb cover by turning it clockwise.
Information
The headlamp aiming should be
adjusted after an accident or after the
headlamp assembly is reinstalled at an
authorized HYUNDAI dealer.
Turn signal
1. Open the hood.
2. Disconnect the negative battery cable.
3. Remove the socket from the assembly by turning the socket
counterclockwise until the tabs on
the socket align with the slots on
the assembly.
4. Remove the bulb from the socket by pressing it in and rotating it
counterclockwise until the tabs on
the bulb align with the slots in the
socket. Pull the bulb out of the
socket.
i
OPDE076077OPDE076076
■High/Low beam
High
Low
Page 442 of 486
7-69
7
Maintenance
5. Install a new bulb by inserting itinto the socket and rotating it until
it locks into place.
6. Install the socket in the assembly by aligning the tabs on the socket
with the slots in the assembly.
7. Push the socket into the assembly and turn the socket clockwise.
Parking lamp and daytime running
light
Your vehicle is equipped with LED
lamps. LED lamps do not have
replaceable bulbs. If the LED lamp
does not operate, have the vehicle
checked by an authorized HYUNDAI
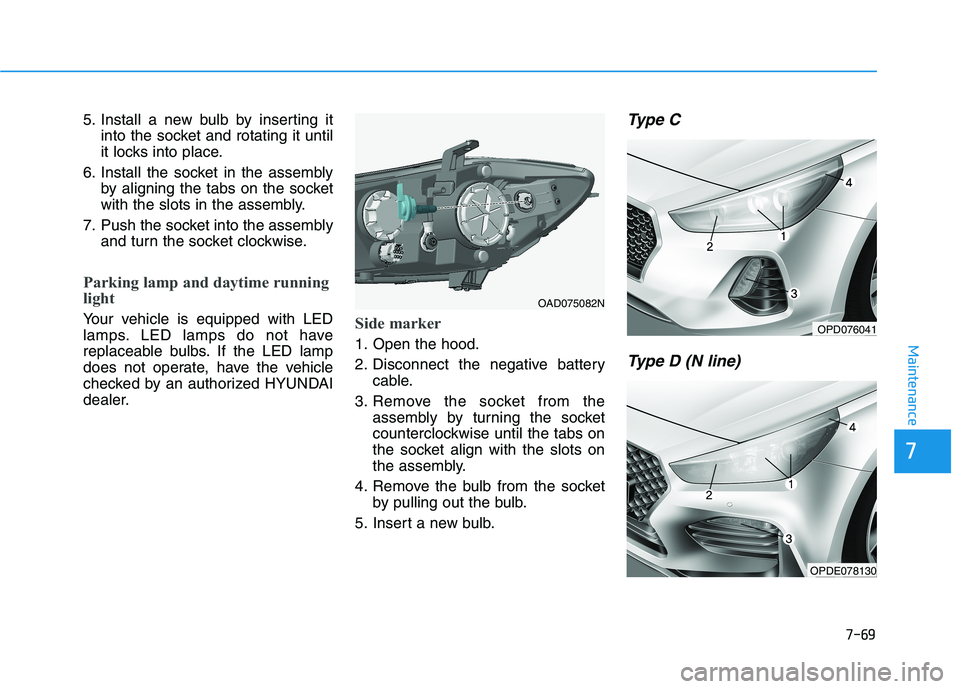
dealer.Side marker
1. Open the hood.
2. Disconnect the negative batterycable.
3. Remove the socket from the assembly by turning the socket
counterclockwise until the tabs on
the socket align with the slots on
the assembly.
4. Remove the bulb from the socket by pulling out the bulb.
5. Insert a new bulb.
Type C
Type D (N line)
OAD075082N
OPD076041
OPDE078130
Page 443 of 486
7-70
Maintenance
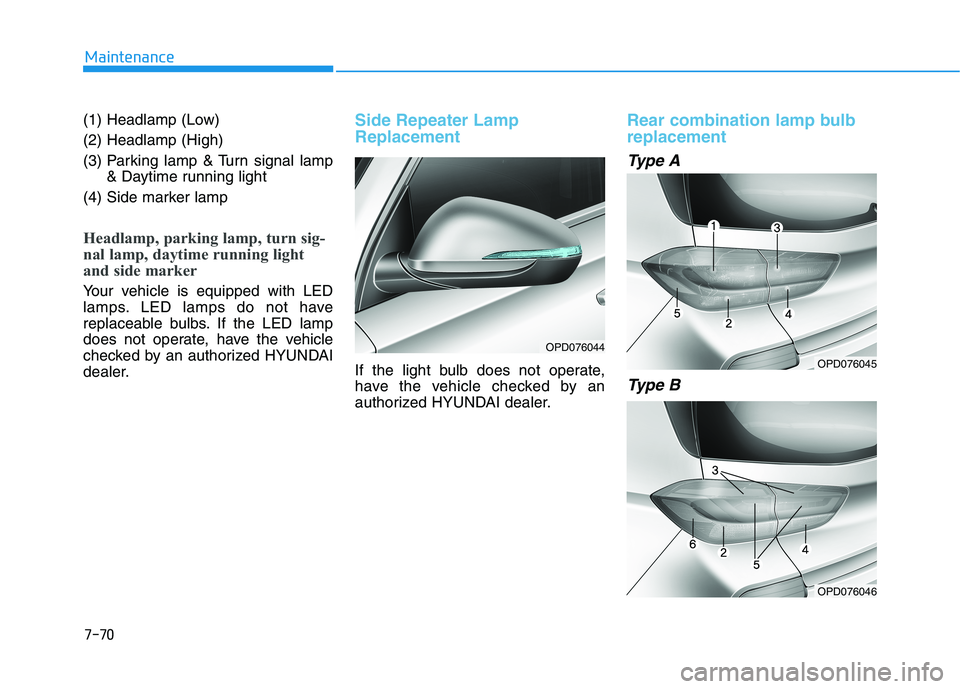
(1) Headlamp (Low) (2) Headlamp (High)
(3) Parking lamp & Turn signal lamp& Daytime running light
(4) Side marker lamp
Headlamp, parking lamp, turn sig-
nal lamp, daytime running light
and side marker
Your vehicle is equipped with LED
lamps. LED lamps do not have
replaceable bulbs. If the LED lamp
does not operate, have the vehicle
checked by an authorized HYUNDAI
dealer.
Side Repeater Lamp Replacement
If the light bulb does not operate,
have the vehicle checked by an
authorized HYUNDAI dealer.
Rear combination lamp bulb replacement
Type A
Type B
OPD076044
OPD076045
OPD076046
Page 444 of 486
7-71
7
Maintenance
Type C (N Line)
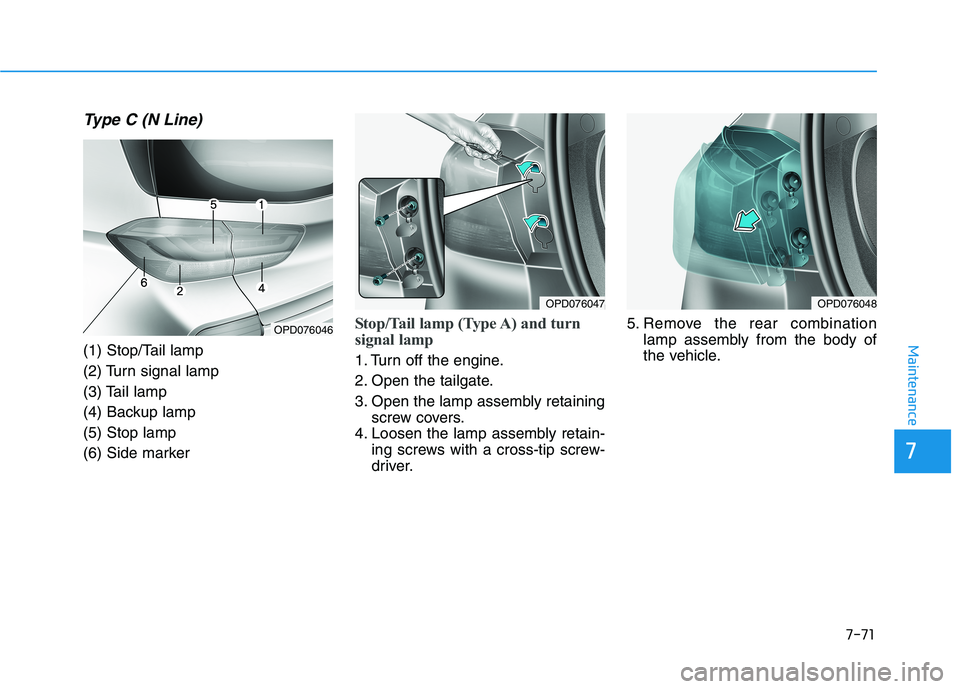
(1) Stop/Tail lamp
(2) Turn signal lamp
(3) Tail lamp
(4) Backup lamp(5) Stop lamp
(6) Side marker
Stop/Tail lamp (Type A) and turn
signal lamp
1. Turn off the engine.
2. Open the tailgate.
3. Open the lamp assembly retainingscrew covers.
4. Loosen the lamp assembly retain- ing screws with a cross-tip screw-
driver. 5. Remove the rear combination
lamp assembly from the body of
the vehicle.
OPD076046
OPD076047OPD076048
Page 445 of 486
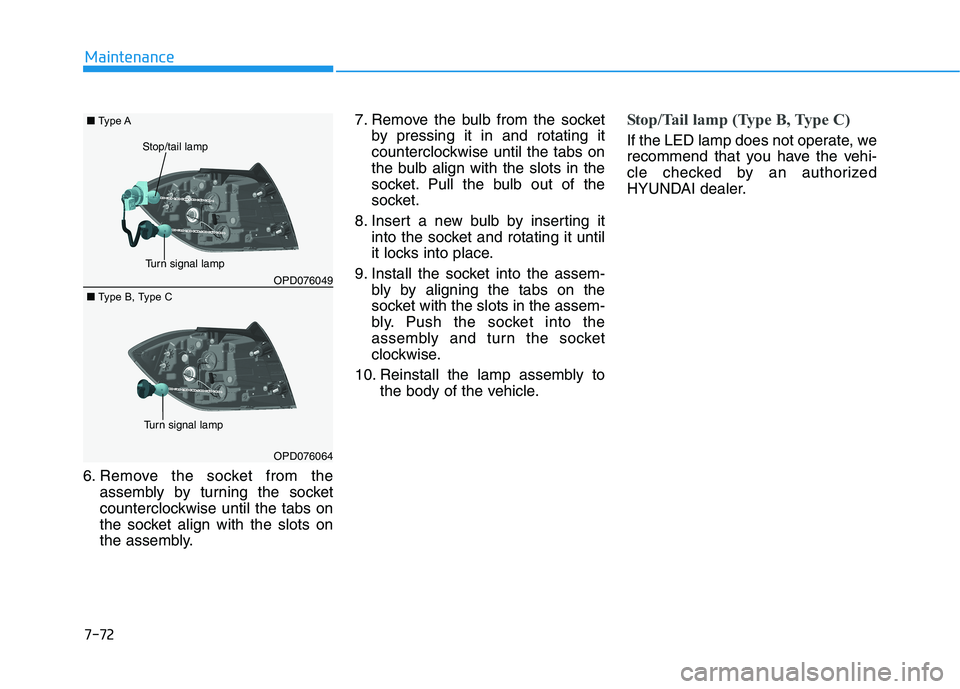
7-72
Maintenance
6. Remove the socket from theassembly by turning the socket
counterclockwise until the tabs on
the socket align with the slots on
the assembly. 7. Remove the bulb from the socket
by pressing it in and rotating it
counterclockwise until the tabs on
the bulb align with the slots in the
socket. Pull the bulb out of the
socket.
8. Insert a new bulb by inserting it into the socket and rotating it until
it locks into place.
9. Install the socket into the assem- bly by aligning the tabs on the
socket with the slots in the assem-
bly. Push the socket into the
assembly and turn the socket
clockwise.
10. Reinstall the lamp assembly to the body of the vehicle.
Stop/Tail lamp (Type B, Type C)
If the LED lamp does not operate, we
recommend that you have the vehi-
cle checked by an authorized
HYUNDAI dealer.
OPD076049
Stop/tail lamp
Turn signal lamp
OPD076064
Turn signal lamp
■Type A
■Type B, Type C
Page 446 of 486
7-73
7
Maintenance
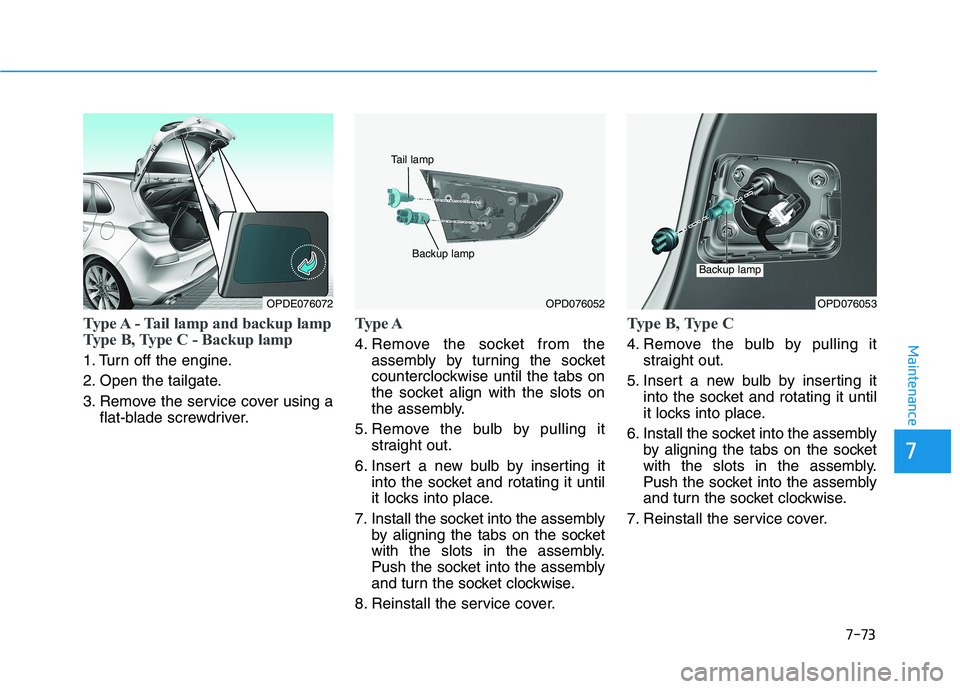
Type A - Tail lamp and backup lamp
Type B, Type C - Backup lamp
1. Turn off the engine.
2. Open the tailgate.
3. Remove the service cover using aflat-blade screwdriver.
Type A
4. Remove the socket from theassembly by turning the socket
counterclockwise until the tabs on
the socket align with the slots on
the assembly.
5. Remove the bulb by pulling it straight out.
6. Insert a new bulb by inserting it into the socket and rotating it until
it locks into place.
7. Install the socket into the assembly by aligning the tabs on the socket
with the slots in the assembly.
Push the socket into the assembly
and turn the socket clockwise.
8. Reinstall the service cover.
Type B, Type C
4. Remove the bulb by pulling it straight out.
5. Insert a new bulb by inserting it into the socket and rotating it until
it locks into place.
6. Install the socket into the assembly by aligning the tabs on the socket
with the slots in the assembly.
Push the socket into the assembly
and turn the socket clockwise.
7. Reinstall the service cover.
OPD076052
Backup lamp
Tail lamp
OPD076053
Backup lamp
OPDE076072
Page 447 of 486
7-74
Maintenance
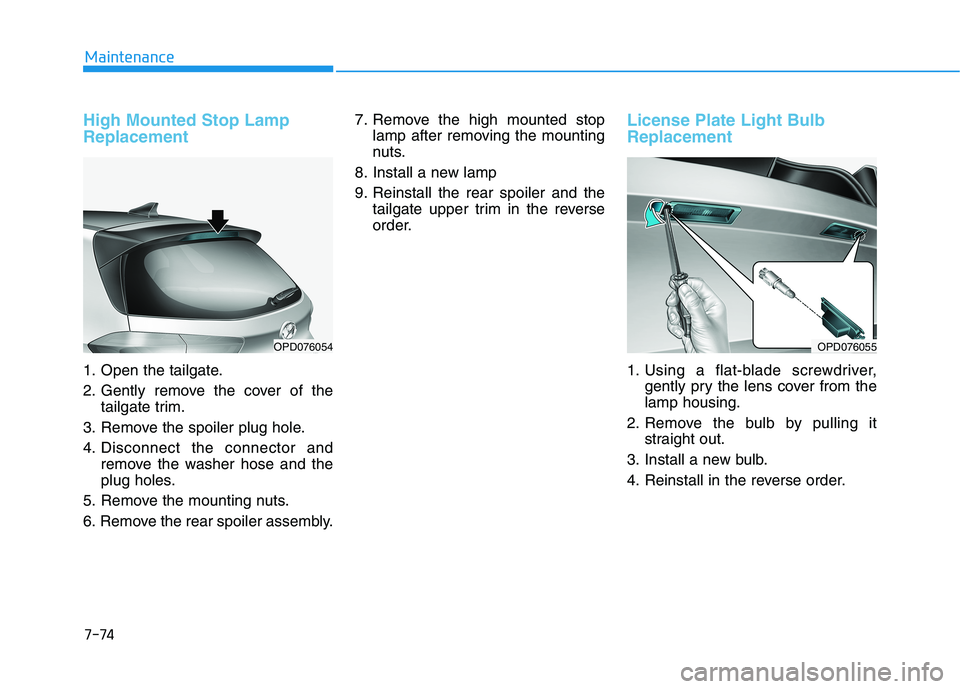
High Mounted Stop Lamp Replacement
1. Open the tailgate.
2. Gently remove the cover of thetailgate trim.
3. Remove the spoiler plug hole.
4. Disconnect the connector and remove the washer hose and the
plug holes.
5. Remove the mounting nuts.
6. Remove the rear spoiler assembly. 7. Remove the high mounted stop
lamp after removing the mounting
nuts.
8. Install a new lamp
9. Reinstall the rear spoiler and the tailgate upper trim in the reverse
order.
License Plate Light Bulb Replacement
1. Using a flat-blade screwdriver,gently pry the lens cover from the lamp housing.
2. Remove the bulb by pulling it straight out.
3. Install a new bulb.
4. Reinstall in the reverse order.
OPD076054OPD076055
Page 448 of 486
7-75
7
Maintenance
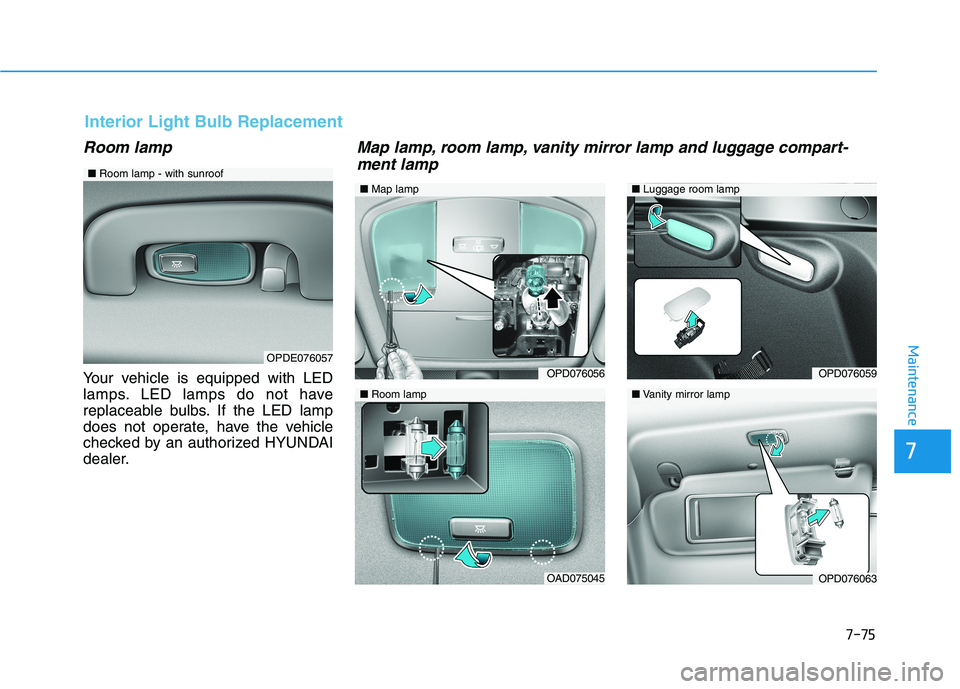
Room lamp
Your vehicle is equipped with LED
lamps. LED lamps do not have
replaceable bulbs. If the LED lamp
does not operate, have the vehicle
checked by an authorized HYUNDAI
dealer.
OPDE076057
■Room lamp - with sunroof
■Map lamp
OPD076056
OAD075045
■ Luggage room lamp
■Vanity mirror lamp
OPD076059
OPD076063
■ Room lamp
Map lamp, room lamp, vanity mirror lamp and luggage compart-
ment lamp
Interior Light Bulb Replacement
Page 449 of 486
7-76
Maintenance
1. Using a flat-blade screwdriver,gently pry the lens from the interi- or lamp housing.
2. Remove the bulb by pulling it straight out.
3. Install a new bulb in the socket.
4. Align the lens tabs with the interi- or lamp housing notches and snap
the lens into place.
Use care not to dirty or damage
lens, lens tab, and plastic hous-ings.
NOTICE
Prior to working on the Interior
Lights, ensure that the "OFF"
button is depressed to avoid
burning your fingers or receiv-
ing an electric shock.
WARNING
Page 450 of 486
7-77
7
Maintenance
AAPPPPEEAA RRAA NN CCEE CC AA RREE
Exterior Care
Exterior general caution
It is very important to follow the label
directions when using any chemical
cleaner or polish. Read all warningand caution statements that appearon the label.
High-pressure washing
When using high-pressure wash-
ers, make sure to maintain suffi-
cient distance from the vehicle.
Insufficient clearance or excessivepressure can lead to component
damage or water penetration.
Do not spray the camera, sensors or its surrounding area directly with
a high pressure washer. Shock
applied from high pressure water
may cause the device to not oper-
ate normally.
Do not bring the nozzle tip close to boots (rubber or plastic covers)or
connectors as they may be dam-
aged if they come into contact with
high pressure water.
Do not use any high-pressure noz- zles, which induce either one-direct
water stream or water swirling.
Protecting your vehicle’s finish
Washing
To help protect your vehicle’s finish
from rust and deterioration, wash itthoroughly and frequently at least
once a month with lukewarm or cold
water.
If you use your vehicle for off-road
driving, you should wash it after each
off-road trip. Pay special attention to
the removal of any accumulation of
salt, dirt, mud, and other foreign
materials. Make sure the drain holes
in the lower edges of the doors and
rocker panels are kept clear andclean.
Insects, tar, tree sap, bird droppings,
industrial pollution and similar
deposits can damage your vehicle’s
finish if not removed immediately.
Even prompt washing with plain
water may not completely remove all
these deposits. A mild soap, safe for
use on painted surfaces, should beused.
After washing, rinse the vehicle thor-
oughly with lukewarm or cold water.
Do not allow soap to dry on the fin-ish. Do not use strong soap, chemi-
cal detergents or hot water, and
do not wash the vehicle in direct
sunlight or when the body of the
vehicle is warm.
Be careful when washing the side windows of your vehicle.
Especially, with high-pressure
water, water may leak through
the windows and wet the interi-
or.
To prevent damage to the plastic parts, do not clean with chemi-
cal solvents or strong deter-
gents.
NOTICE
After washing the vehicle, test
the brakes while driving slowly
to see if they have been affected
by water before getting on the
road. If braking performance is
impaired, dry the brakes by
applying them lightly while
maintaining a slow forwardspeed.
WARNING