driver seat adjustment HYUNDAI ELANTRA HYBRID 2021 Owners Manual
[x] Cancel search | Manufacturer: HYUNDAI, Model Year: 2021, Model line: ELANTRA HYBRID, Model: HYUNDAI ELANTRA HYBRID 2021Pages: 555, PDF Size: 56.08 MB
Page 50 of 555
03
3-5
Front Seats
WARNING
Take the following precautions when
adjusting your seat:
• NEVER attempt to adjust the seat
while the vehicle is moving. The seat
could respond with unexpected
movement and may cause loss
of vehicle control resulting in an
accident.
• Do not place anything under the
front seats. Loose objects in the
driver’s foot area could interfere
with the operation of the foot pedals,
causing an accident.
• Do not allow anything to interfere
with the normal position and proper
locking of the seatback.
• Do not place a cigarette lighter on
the floor or seat. When you operate
the seat, gas may exit out of the
lighter causing a fire.
• Use extreme caution when picking
up small objects trapped under the
seats or between the seat and the
center console. Your hands might be
cut or injured by the sharp edges of
the seat mechanism.
• If there are occupants in the rear
seats, be careful while adjusting the
front seat position.
• Make sure that the seat is locked in
place after the adjustment. If not,
the seat might move unexpectedly
resulting in an accident.
CAUTION
To prevent injury:
• Do not adjust your seat while
wearing your seat belt. Moving the
seat cushion forward may cause
strong pressure on your abdomen.
• Do not allow your hands or fingers to
get caught in the seat mechanisms
while the seat is moving.
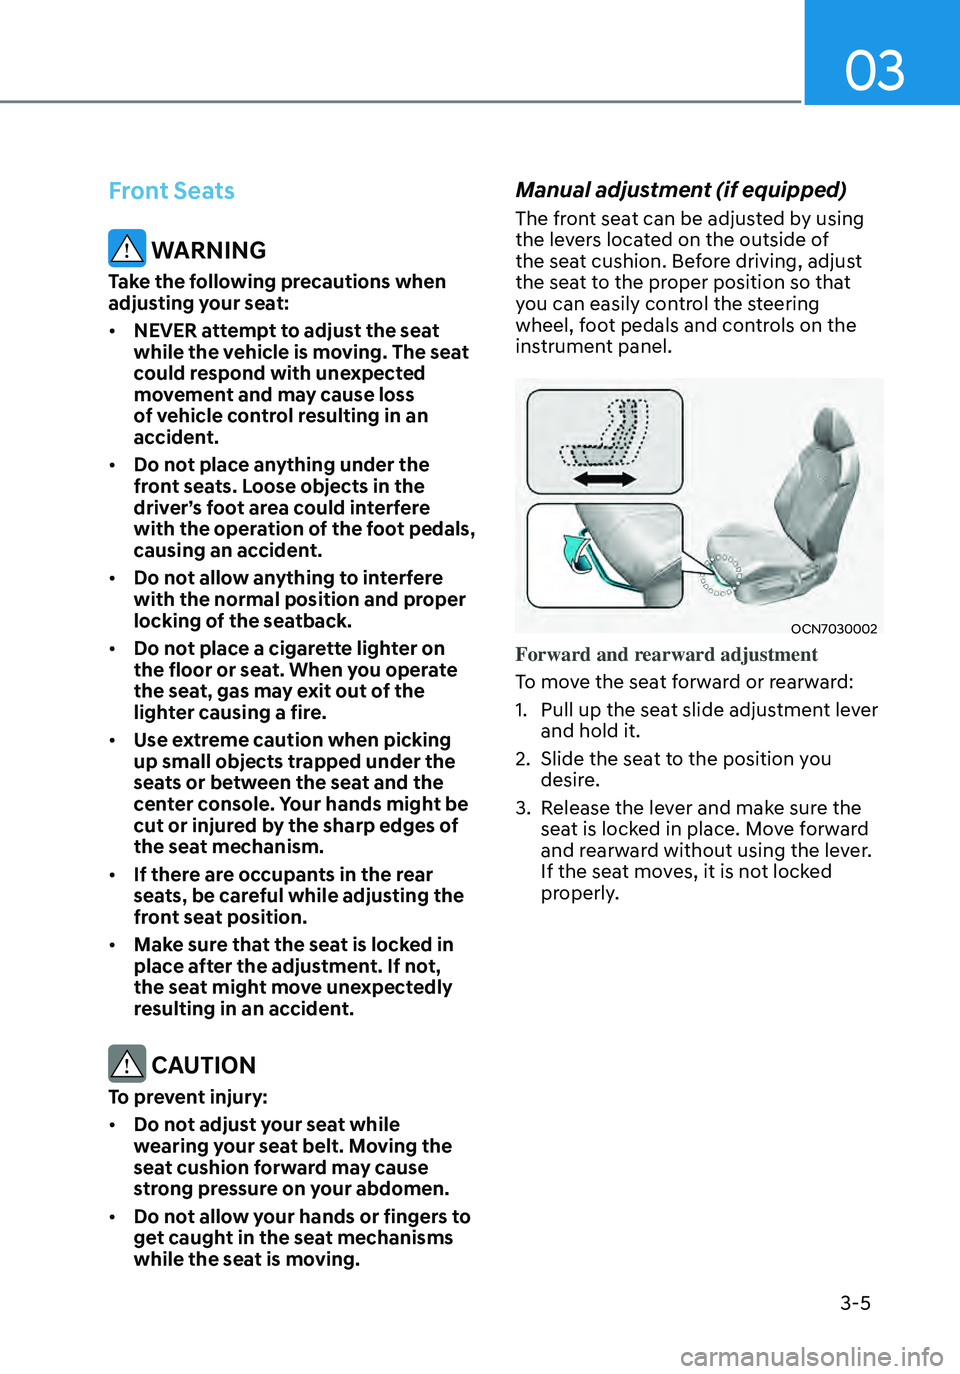
Manual adjustment (if equipped)
The front seat can be adjusted by using
the levers located on the outside of
the seat cushion. Before driving, adjust
the seat to the proper position so that
you can easily control the steering
wheel, foot pedals and controls on the
instrument panel.
OCN7030002
Forward and rearward adjustment
To move the seat forward or rearward:
1. Pull up the seat slide adjustment lever
and hold it.
2. Slide the seat to the position you
desire.
3. Release the lever and make sure the
seat is locked in place. Move forward
and rearward without using the lever.
If the seat moves, it is not locked
properly.
Page 65 of 555
3-20
Seat Belt-Driver’s 3-point system
with emergency locking retractor
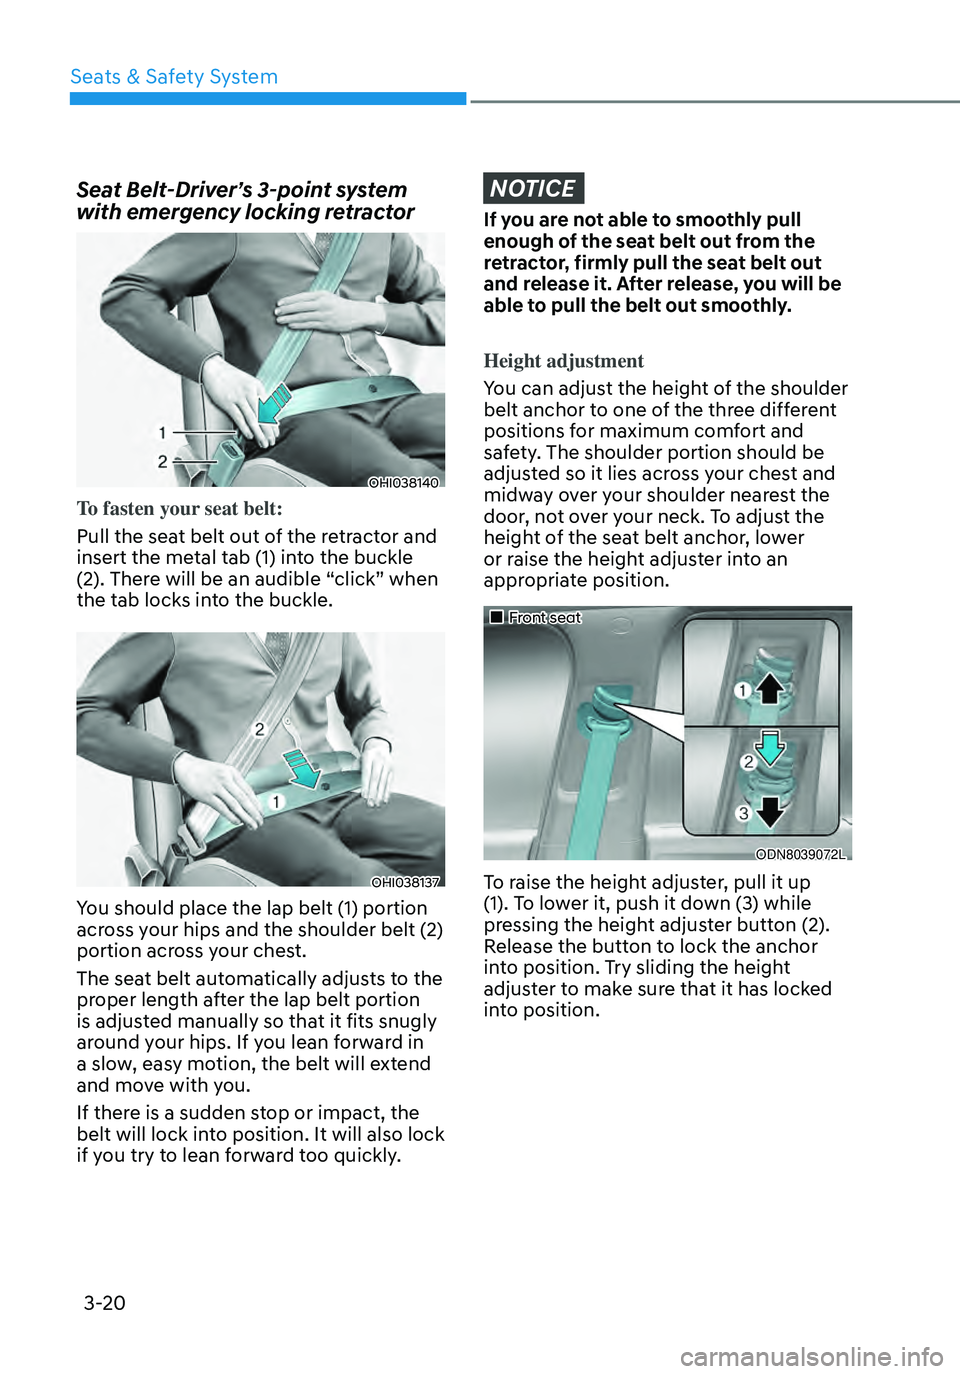
OHI038140
To fasten your seat belt:
Pull the seat belt out of the retractor and
insert the metal tab (1) into the buckle
(2). There will be an audible “click” when
the tab locks into the buckle.
OHI038137
You should place the lap belt (1) portion
across your hips and the shoulder belt (2)
portion across your chest.
The seat belt automatically adjusts to the
proper length after the lap belt portion
is adjusted manually so that it fits snugly
around your hips. If you lean forward in
a slow, easy motion, the belt will extend
and move with you.
If there is a sudden stop or impact, the
belt will lock into position. It will also lock
if you try to lean forward too quickly.
NOTICE
If you are not able to smoothly pull
enough of the seat belt out from the
retractor, firmly pull the seat belt out
and release it. After release, you will be
able to pull the belt out smoothly.
Height adjustment
You can adjust the height of the shoulder
belt anchor to one of the three different
positions for maximum comfort and
safety. The shoulder portion should be
adjusted so it lies across your chest and
midway over your shoulder nearest the
door, not over your neck. To adjust the
height of the seat belt anchor, lower
or raise the height adjuster into an
appropriate position.
„„Front seat
ODN8039072L
To raise the height adjuster, pull it up
(1). To lower it, push it down (3) while
pressing the height adjuster button (2).
Release the button to lock the anchor
into position. Try sliding the height
adjuster to make sure that it has locked
into position.
Seats & Safety System
Page 192 of 555
05
5-39
Information
• While recalling the “1” memory
position, pressing the SET or 1 button
temporarily stops the adjustment of
the recalled memory position. Pressing
the 2 button recalls the “2” memory
position.
• While recalling the “2” memory
position, pressing the SET or 2 button
temporarily stops the adjustment of
the recalled memory position. Pressing
the 1 button recalls the “1” memory
position.
• While recalling the stored positions,
pressing one of the control buttons for
the driver’s seat or instrument panel
illumination will cause the movement
of that component to stop and move in
the direction that the control button is
pressed.
Driver position memory system
reset
If the Driver position memory system
does not work properly, initialize the
system as follows.
How to initialize:
1. Stop the vehicle and open the driver’s
door with the ignition switch in the
ON position and the vehicle shifted to
P (Park).
2. Pull the driver’s seat forward as far
as possible and have the seatback
upright as much as possible using
the driver’s seat forward/backward
adjustment and seatback angle
(recline) switches.
3. Push the SET button and seat forward
movement switch for 2 seconds
simultaneously. Initialization in the process:
1. Initialization begins as the alarm
sounds.
2. The seat and seatback will
automatically move backwards. The
alarm sound will continue while the
system is in operation.
3. Initialization will be complete after
the seat and seatback move to
the center with an alarm sound. If,
however, cases as follows occur, the
initialization process will come to a
stop and the alarm sound will stop as
well.
-
When pushing driving position
memory system button
-When pushing driver’s seat height
adjustment switch
-When shifting from P (Park) to other
positions
-When driving speed exceeds 3 km/h
-When the driver’s door is closed
Page 243 of 555
Convenient Features
5-90
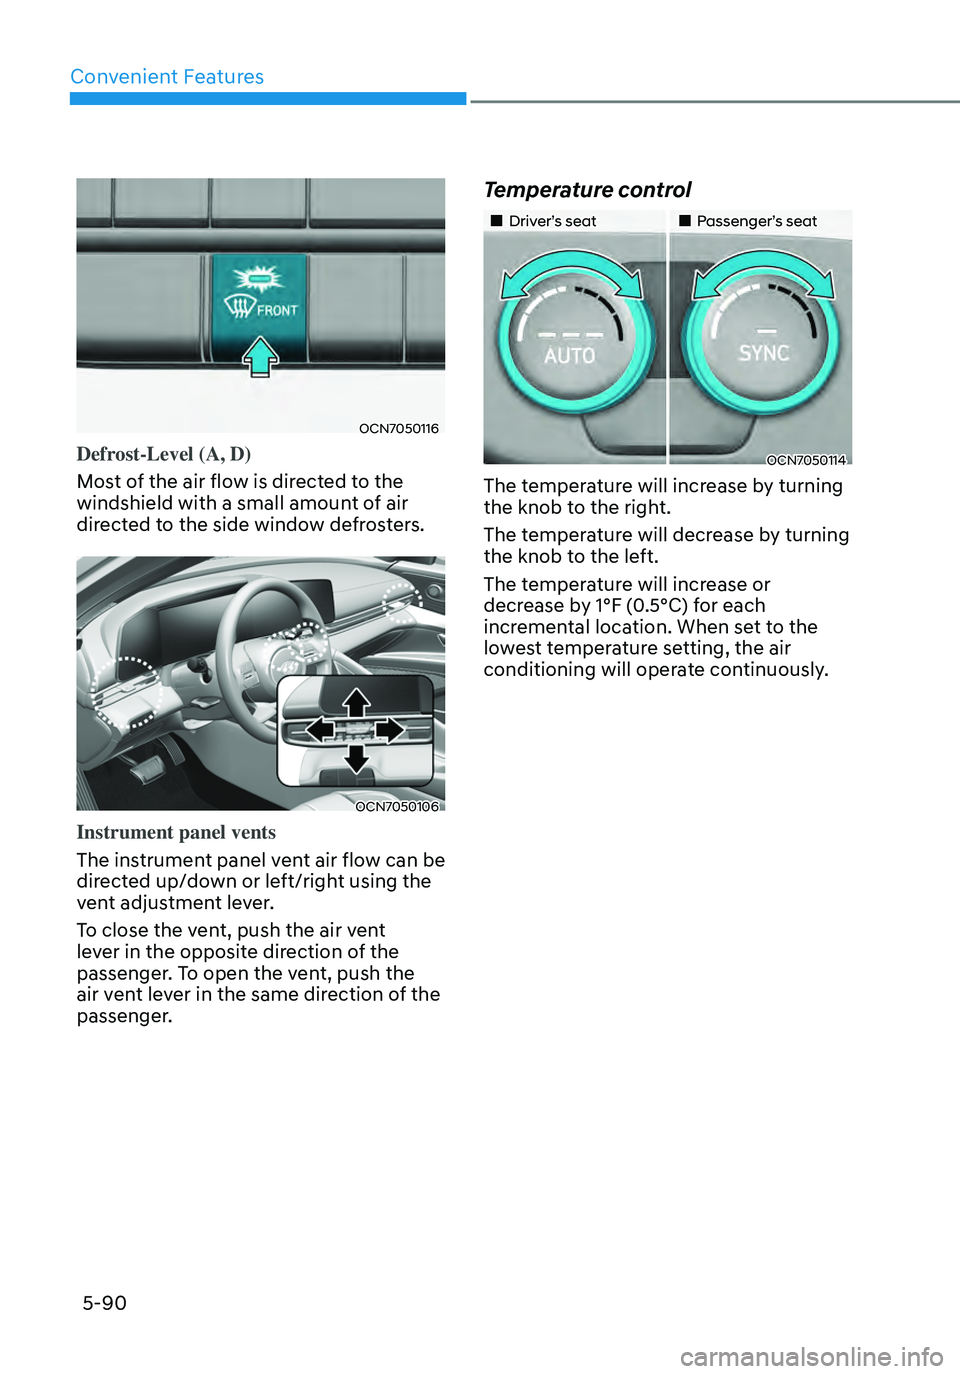
OCN7050116
Defrost-Level (A, D)
Most of the air flow is directed to the
windshield with a small amount of air
directed to the side window defrosters.
OCN7050106
Instrument panel vents
The instrument panel vent air flow can be
directed up/down or left/right using the
vent adjustment lever.
To close the vent, push the air vent
lever in the opposite direction of the
passenger. To open the vent, push the
air vent lever in the same direction of the
passenger.
Temperature control
„„Driver’s seat„„Passenger’s seat
OCN7050114
The temperature will increase by turning
the knob to the right.
The temperature will decrease by turning
the knob to the left.
The temperature will increase or
decrease by 1°F (0.5°C) for each
incremental location. When set to the
lowest temperature setting, the air
conditioning will operate continuously.