oil dipstick HYUNDAI ENTOURAGE 2009 Owners Manual
[x] Cancel search | Manufacturer: HYUNDAI, Model Year: 2009, Model line: ENTOURAGE, Model: HYUNDAI ENTOURAGE 2009Pages: 402, PDF Size: 9.08 MB
Page 326 of 402

Maintenance8 6Automatic transaxle fluid The fluid level should be in the “HOT”
range of the dipstick, after the engine
and transaxle are at normal operating
temperature. Check the automatic
transaxle fluid level with the engine run-
ning and the transaxle in neutral, with the
parking brake properly applied. Use
HYUNDAI GENUINE ATF SP-III, DIA-
MOND ATF SP-III, SK ATF SP-III or other
brands meeting the SP III specification
approved by Hyundai Motor Co. when
adding or changing fluid. Using the
wrong ATF may result in damage to the
ATM.Brake hoses and linesVisually check for proper installation,
chafing, cracks, deterioration and any
leakage. Replace any deteriorated or
damaged parts immediately.Brake fluidCheck brake fluid level in the brake fluid
reservoir. The level should be between
"MIN" and "MAX" marks on the side of
the reservoir. Use only hydraulic brake
fluid conforming to DOT 3 or DOT 4.
Rear disc brake / linings, parking
brakeCheck the rear disc brake and linings for
scoring, burning, leaking fluid, broken
parts, and excessive wear. Inspect the
parking brake system including the park-
ing brake pedal and cables. For detailed
service procedures, refer to the Shop
Manual.Brake pads, calipers and rotorsCheck the pads for excessive wear, discs
for run out and wear, and calipers for fluid
leakage.Exhaust pipe and mufflerVisually inspect the exhaust pipes, muf-
fler and hangers for cracks, deterioration,
or damage. Start the engine and listen
carefully for any exhaust gas leakage.
Tighten connections or replace parts as
necessary.Suspension mounting boltsCheck the suspension connections for
looseness or damage. Retighten to the
specified torque.
Steering gear box, linkage &
boots/lower arm ball joint, upper
arm ball jointWith the vehicle stopped and engine off,
check for excessive free-play in the steer-
ing wheel. Check the linkage for bends or
damage. Check the dust boots and ball
joints for deterioration, cracks, or dam-
age. Replace any damaged parts.Power steering pump, belt and
hosesCheck the power steering pump and
hoses for leakage and damage. Replace
any damaged or leaking parts immediate-
ly. Inspect the power steering belt (or
drive belt) for evidence of cuts, cracks,
excessive wear, oiliness and proper ten-
sion. Replace or adjust it if necessary.Drive shafts and bootsCheck the drive shafts, boots and clamps
for cracks, deterioration, or damage.
Replace any damaged parts and, if nec-
essary, repack the grease.Air conditioning refrigerantCheck the air conditioning lines and con-
nections for leakage and damage. Check
air conditioning performance according to
the relevant shop manual if necessary.
Page 329 of 402

611
Maintenance
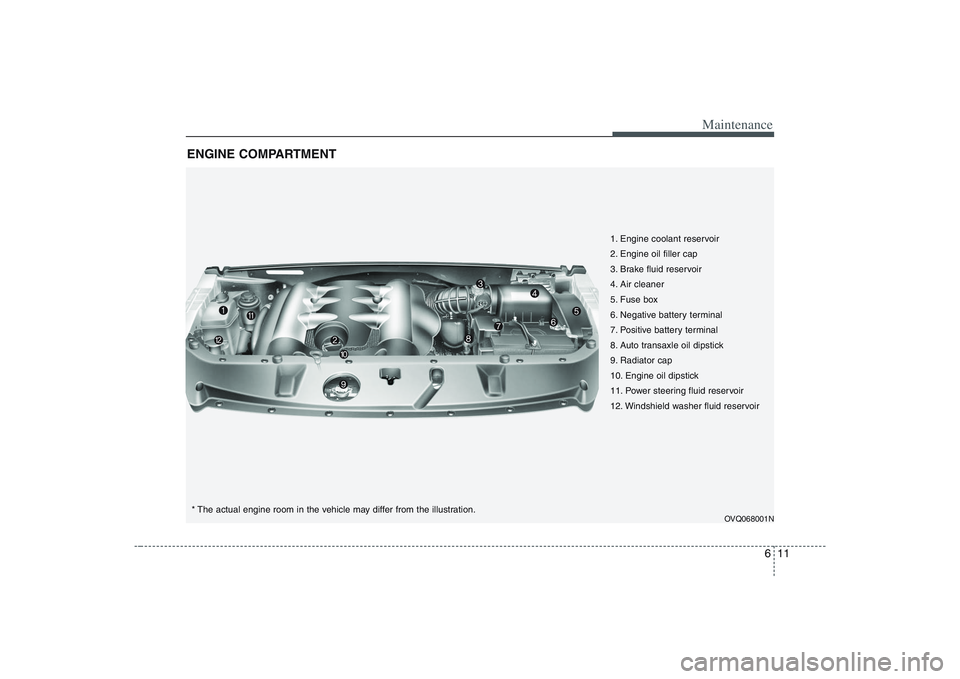
ENGINE COMPARTMENT
OVQ068001N
1. Engine coolant reservoir
2. Engine oil filler cap
3. Brake fluid reservoir
4. Air cleaner
5. Fuse box
6. Negative battery terminal
7. Positive battery terminal
8. Auto transaxle oil dipstick
9. Radiator cap
10. Engine oil dipstick
11. Power steering fluid reservoir
12. Windshield washer fluid reservoir
* The actual engine room in the vehicle may differ from the illustration.
Page 330 of 402

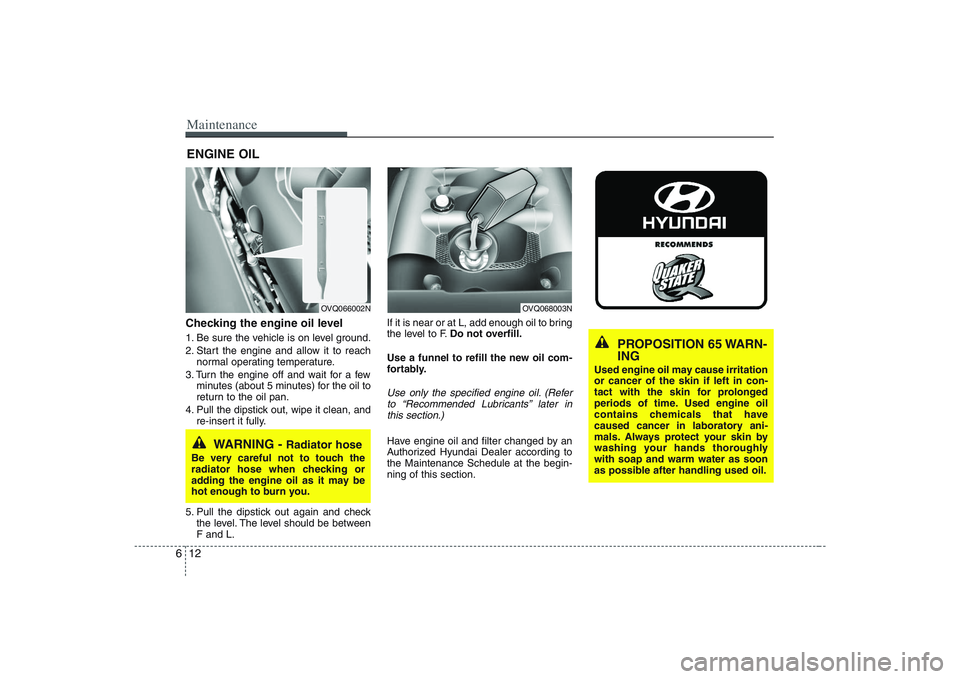
Maintenance12 6ENGINE OILChecking the engine oil level 1. Be sure the vehicle is on level ground.
2. Start the engine and allow it to reach
normal operating temperature.
3. Turn the engine off and wait for a few
minutes (about 5 minutes) for the oil to
return to the oil pan.
4. Pull the dipstick out, wipe it clean, and
re-insert it fully.
5. Pull the dipstick out again and check
the level. The level should be between
F and L.If it is near or at L, add enough oil to bring
the level to F.Do not overfill.
Use a funnel to refill the new oil com-
fortably.
Use only the specified engine oil. (Refer
to “Recommended Lubricants” later in
this section.)Have engine oil and filter changed by an
Authorized Hyundai Dealer according to
the Maintenance Schedule at the begin-
ning of this section.
WARNING -
Radiator hose
Be very careful not to touch the
radiator hose when checking or
adding the engine oil as it may be
hot enough to burn you.
OVQ066002N
OVQ068003N
PROPOSITION 65 WARN-
ING
Used engine oil may cause irritation
or cancer of the skin if left in con-
tact with the skin for prolonged
periods of time. Used engine oil
contains chemicals that have
caused cancer in laboratory ani-
mals. Always protect your skin by
washing your hands thoroughly
with soap and warm water as soon
as possible after handling used oil.
Page 378 of 402

Maintenance60 6Recommended SAE viscosity
number
Engine oil viscosity (thickness) has an
effect on fuel economy and cold weather
operating (starting and oil flow). Lower
viscosity engine oils can provide better
fuel economy and cold weather perform-
ance, however, higher viscosity engine
oils are required for satisfactory lubrica-
tion in hot weather. Using oils of any vis-
cosity other than those recommended
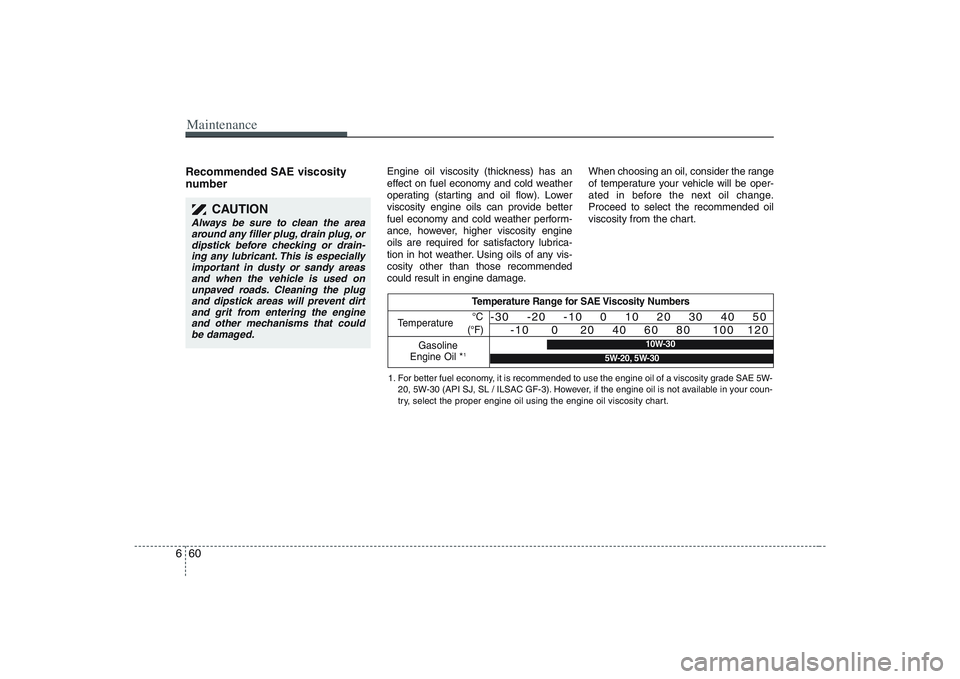
could result in engine damage.When choosing an oil, consider the range
of temperature your vehicle will be oper-
ated in before the next oil change.
Proceed to select the recommended oil
viscosity from the chart.
Temperature Range for SAE Viscosity Numbers
Temperature
Gasoline
Engine Oil *
1°C
(°F)
-30 -20 -10 0 10 20 30 40 50
-10 0 20 40 60 80 100 120
1. For better fuel economy, it is recommended to use the engine oil of a viscosity grade SAE 5W-
20, 5W-30 (API SJ, SL / ILSAC GF-3). However, if the engine oil is not available in your coun-
try, select the proper engine oil using the engine oil viscosity chart.
10W-30
5W-20, 5W-30
CAUTION
Always be sure to clean the area
around any filler plug, drain plug, or
dipstick before checking or drain-
ing any lubricant. This is especially
important in dusty or sandy areas
and when the vehicle is used on
unpaved roads. Cleaning the plug
and dipstick areas will prevent dirt
and grit from entering the engine
and other mechanisms that could
be damaged.