tow Hyundai Equus 2012 User Guide
[x] Cancel search | Manufacturer: HYUNDAI, Model Year: 2012, Model line: Equus, Model: Hyundai Equus 2012Pages: 385, PDF Size: 10.67 MB
Page 93 of 385
411
Features of your vehicle
Operating door locks from out-
side the vehicle
• To lock the doors, press the button of
the outside door handle while carrying
the smart key with you or press the
lock button on the smart key.• To unlock the doors, put your hand in
the outside door handle for approxi-
mately 0.5 second or press the unlock
button on the smart key.
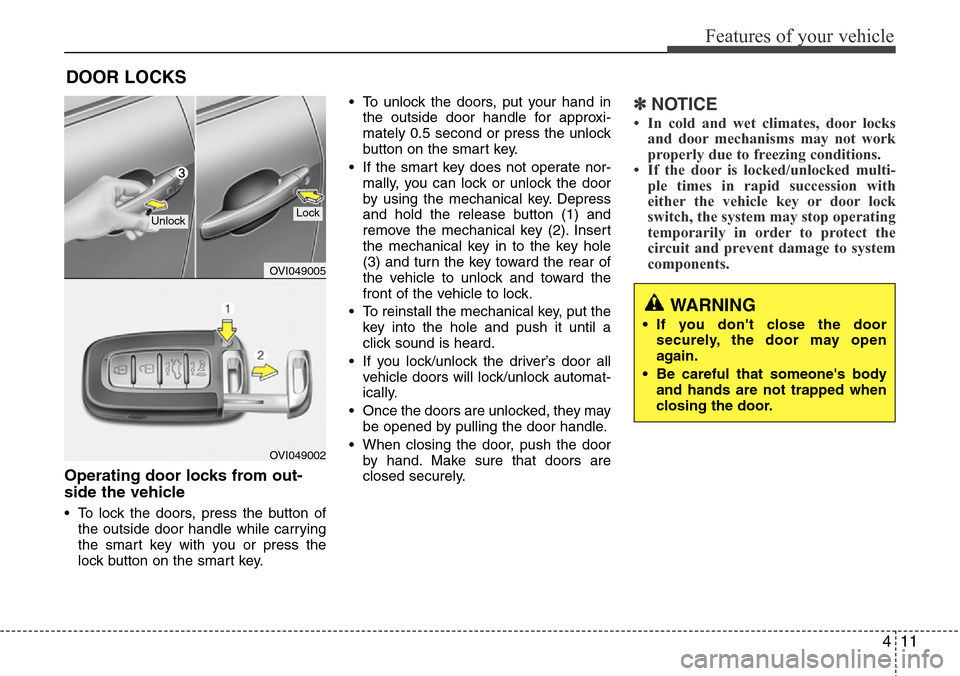
• If the smart key does not operate nor-
mally, you can lock or unlock the door
by using the mechanical key. Depress
and hold the release button (1) and
remove the mechanical key (2). Insert
the mechanical key in to the key hole
(3) and turn the key toward the rear of
the vehicle to unlock and toward the
front of the vehicle to lock.
• To reinstall the mechanical key, put the
key into the hole and push it until a
click sound is heard.
• If you lock/unlock the driver’s door all
vehicle doors will lock/unlock automat-
ically.
• Once the doors are unlocked, they may
be opened by pulling the door handle.
• When closing the door, push the door
by hand. Make sure that doors are
closed securely.
✽NOTICE
• In cold and wet climates, door locks
and door mechanisms may not work
properly due to freezing conditions.
• If the door is locked/unlocked multi-
ple times in rapid succession with
either the vehicle key or door lock
switch, the system may stop operating
temporarily in order to protect the
circuit and prevent damage to system
components.
DOOR LOCKS
OVI049005
OVI049002
UnlockLock
WARNING
• If you don't close the door
securely, the door may open
again.
• Be careful that someone's body
and hands are not trapped when
closing the door.
Page 120 of 385
Features of your vehicle
38 4
Easy access function
(if equipped)
The steering wheel will move away from
the driver and the seat will move rear-
ward, when the engine start/stop button
is turned to the OFF position or when you
pull out the smart key from the smart key
holder with the shift lever in the P posi-
tion.
The steering wheel will move toward the
driver and the seat will move forward,
when the engine start/stop button is
turned to the ACC position or when you
insert the smart key into the smart key
holder with the shift lever in the P posi-
tion.
✽NOTICE
You can activate or deactivate the easy
access function in the INFO menu of
DIS (Driver Information System, if
equipped) as follows (if equipped);
• Seat easy access
• Steering easy access
If you want detailed informations, refer
to the DIS manual (if equipped) sup-
plied separately.
Reverse parking aid function
(if equipped)
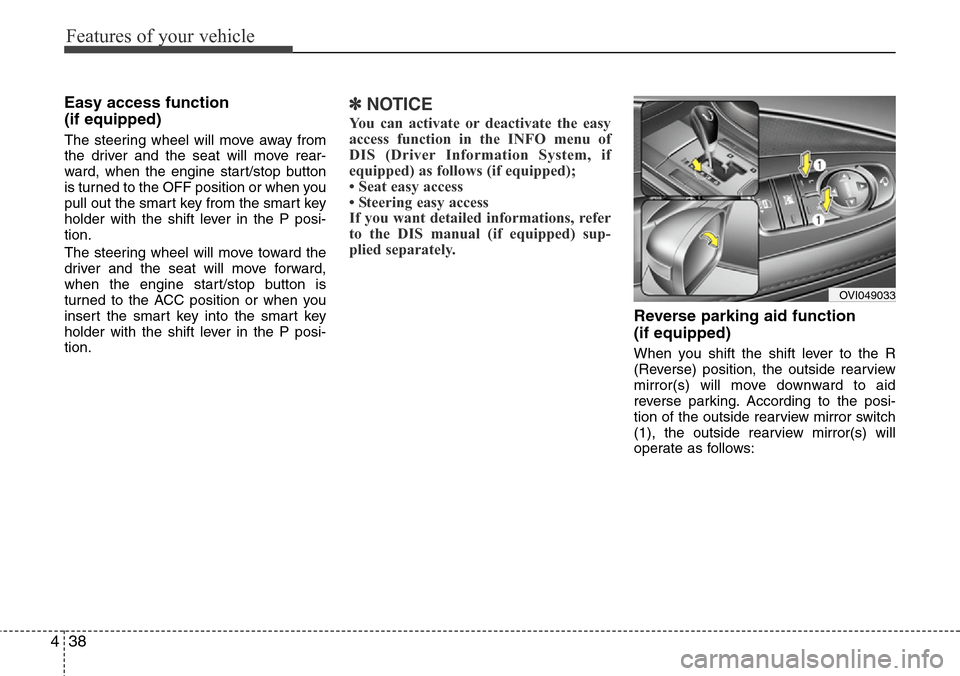
When you shift the shift lever to the R
(Reverse) position, the outside rearview
mirror(s) will move downward to aid
reverse parking. According to the posi-
tion of the outside rearview mirror switch
(1), the outside rearview mirror(s) will
operate as follows:
OVI049033
Page 125 of 385
443
Features of your vehicle
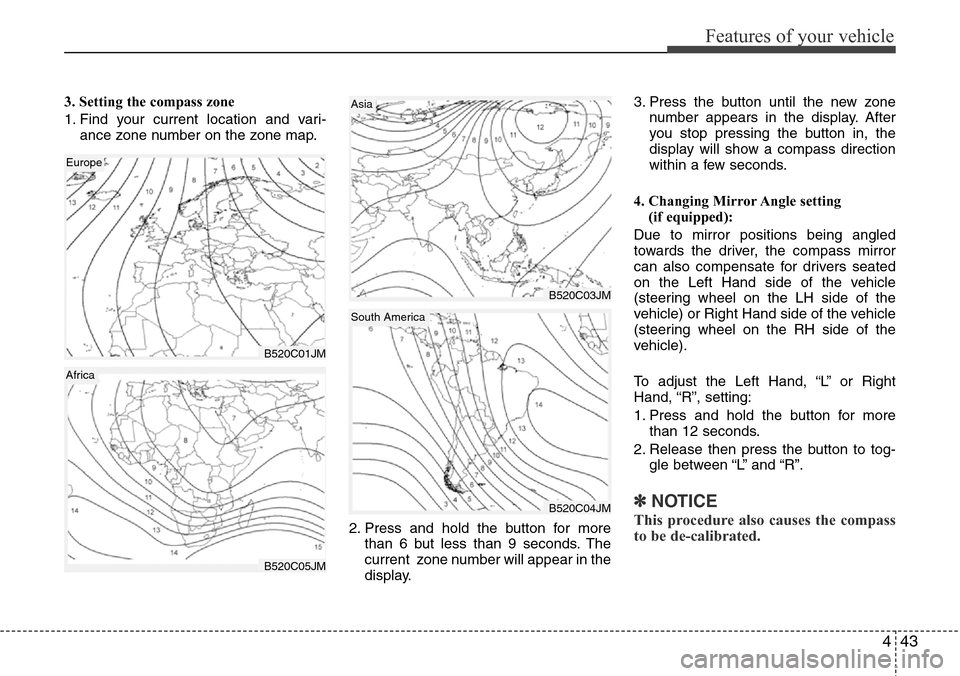
3. Setting the compass zone
1. Find your current location and vari-
ance zone number on the zone map.
2. Press and hold the button for more
than 6 but less than 9 seconds. The
current zone number will appear in the
display.3. Press the button until the new zone
number appears in the display. After
you stop pressing the button in, the
display will show a compass direction
within a few seconds.
4. Changing Mirror Angle setting
(if equipped):
Due to mirror positions being angled
towards the driver, the compass mirror
can also compensate for drivers seated
on the Left Hand side of the vehicle
(steering wheel on the LH side of the
vehicle) or Right Hand side of the vehicle
(steering wheel on the RH side of the
vehicle).
To adjust the Left Hand, “L” or Right
Hand, “R”, setting:
1. Press and hold the button for more
than 12 seconds.
2. Release then press the button to tog-
gle between “L” and “R”.
✽NOTICE
This procedure also causes the compass
to be de-calibrated.
B520C01JM
Europe
B520C03JM
Asia
B520C04JM
South America
B520C05JM
Africa
Page 126 of 385
Features of your vehicle
44 4
3. To re-calibrate the compass, drive the
vehicle in 2 complete circles at less
than 8km/h (5mph).
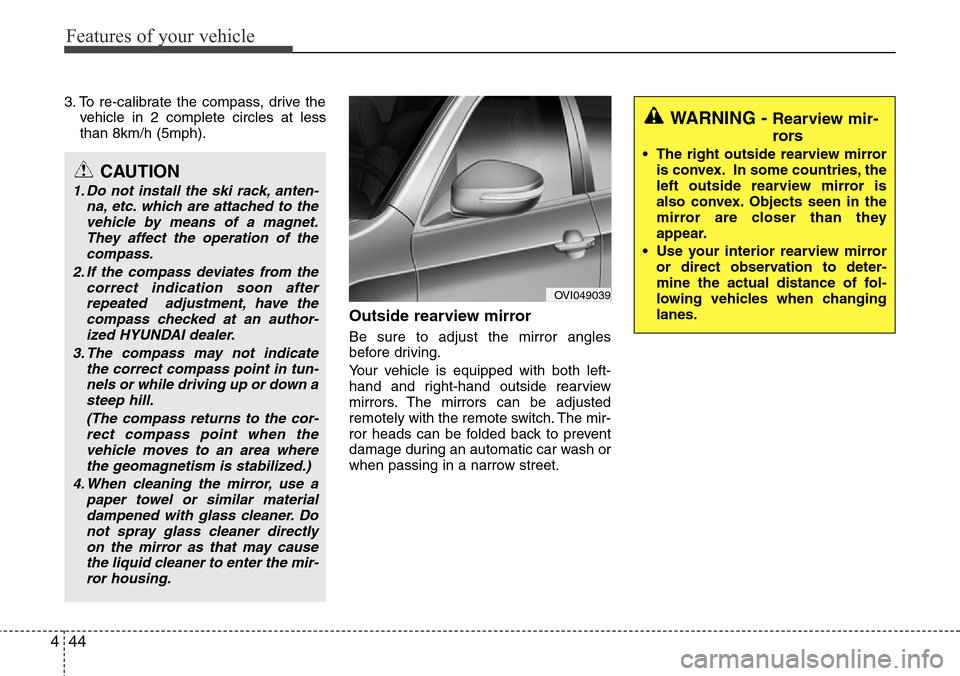
Outside rearview mirror
Be sure to adjust the mirror angles
before driving.
Your vehicle is equipped with both left-
hand and right-hand outside rearview
mirrors. The mirrors can be adjusted
remotely with the remote switch. The mir-
ror heads can be folded back to prevent
damage during an automatic car wash or
when passing in a narrow street.
CAUTION
1. Do not install the ski rack, anten-
na, etc. which are attached to the
vehicle by means of a magnet.
They affect the operation of the
compass.
2. If the compass deviates from the
correct indication soon after
repeated adjustment, have the
compass checked at an author-
ized HYUNDAI dealer.
3. The compass may not indicate
the correct compass point in tun-
nels or while driving up or down a
steep hill.
(The compass returns to the cor-
rect compass point when the
vehicle moves to an area where
the geomagnetism is stabilized.)
4. When cleaning the mirror, use a
paper towel or similar material
dampened with glass cleaner. Do
not spray glass cleaner directly
on the mirror as that may cause
the liquid cleaner to enter the mir-
ror housing.
OVI049039
WARNING - Rearview mir-
rors
• The right outside rearview mirror
is convex. In some countries, the
left outside rearview mirror is
also convex. Objects seen in the
mirror are closer than they
appear.
• Use your interior rearview mirror
or direct observation to deter-
mine the actual distance of fol-
lowing vehicles when changing
lanes.
Page 128 of 385
Features of your vehicle
46 4
Electric chromic mirror (ECM)
(if equipped)
The electric chromic mirror automatically
controls the glare from the headlights of
the car behind you in nighttime or low
light driving conditions. The sensor
mounted in the mirror senses the light
level around the vehicle, and automati-
cally controls the headlight glare from
vehicles behind you.
When the engine is running, the glare is
automatically controlled by the sensor
mounted in the rearview mirror.
Whenever the shift lever is shifted into R
(Reverse), the mirror will automatically
go to the brightest setting in order to
improve the drivers view behind the vehi-
cle. If the ECM of inside rear view mirror
operates, it will be working
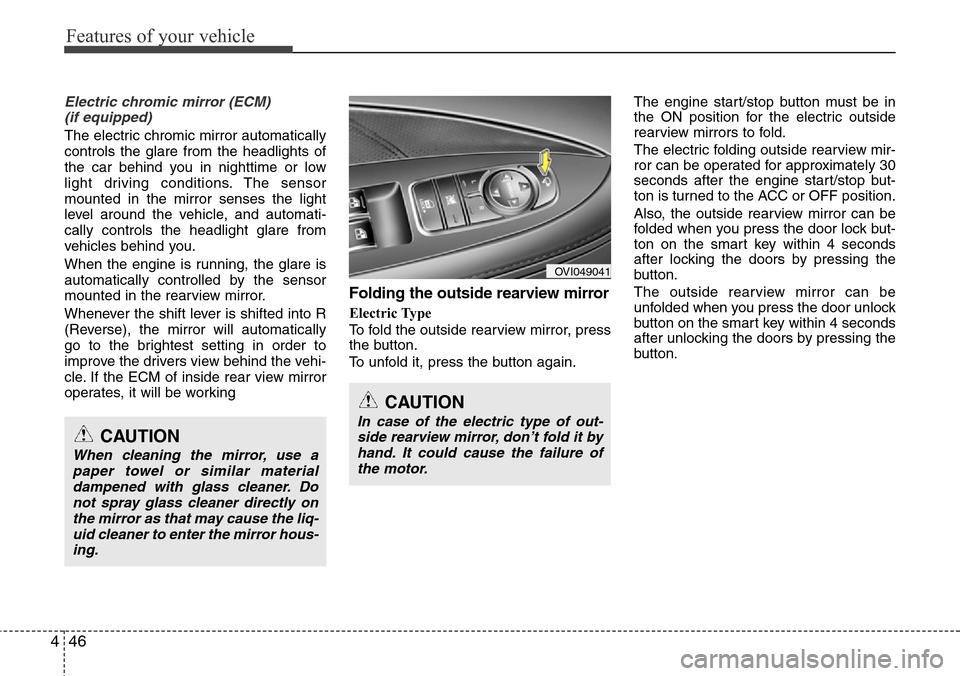
Folding the outside rearview mirror
Electric Type
To fold the outside rearview mirror, press
the button.
To unfold it, press the button again.The engine start/stop button must be in
the ON position for the electric outside
rearview mirrors to fold.
The electric folding outside rearview mir-
ror can be operated for approximately 30
seconds after the engine start/stop but-
ton is turned to the ACC or OFF position.
Also, the outside rearview mirror can be
folded when you press the door lock but-
ton on the smart key within 4 seconds
after locking the doors by pressing the
button.
The outside rearview mirror can be
unfolded when you press the door unlock
button on the smart key within 4 seconds
after unlocking the doors by pressing the
button.
OVI049041
CAUTION
In case of the electric type of out-
side rearview mirror, don’t fold it by
hand. It could cause the failure of
the motor.CAUTION
When cleaning the mirror, use a
paper towel or similar material
dampened with glass cleaner. Do
not spray glass cleaner directly on
the mirror as that may cause the liq-
uid cleaner to enter the mirror hous-
ing.
Page 131 of 385
449
Features of your vehicle
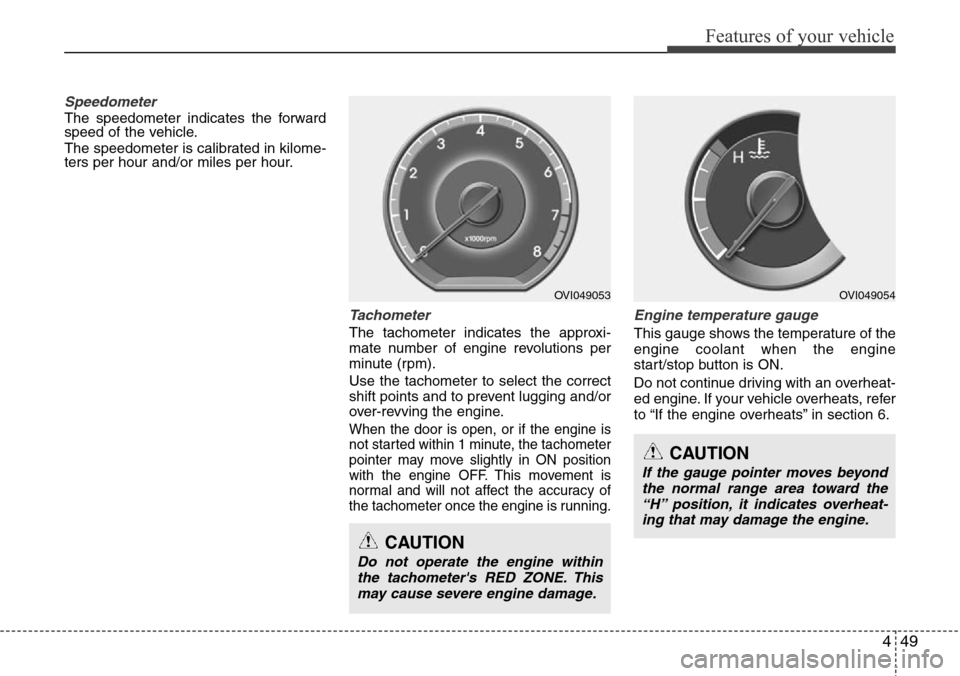
Speedometer
The speedometer indicates the forward
speed of the vehicle.
The speedometer is calibrated in kilome-
ters per hour and/or miles per hour.
Tachometer
The tachometer indicates the approxi-
mate number of engine revolutions per
minute (rpm).
Use the tachometer to select the correct
shift points and to prevent lugging and/or
over-revving the engine.
When the door is open, or if the engine is
not started within 1 minute, the tachometer
pointer may move slightly in ON position
with the engine OFF. This movement is
normal and will not affect the accuracy of
the tachometer once the engine is running.
Engine temperature gauge
This gauge shows the temperature of the
engine coolant when the engine
start/stop button is ON.
Do not continue driving with an overheat-
ed engine. If your vehicle overheats, refer
to “If the engine overheats” in section 6.
CAUTION
If the gauge pointer moves beyond
the normal range area toward the
“H” position, it indicates overheat-
ing that may damage the engine.
CAUTION
Do not operate the engine within
the tachometer's RED ZONE. This
may cause severe engine damage.
OVI049053OVI049054
Page 142 of 385
Features of your vehicle
60 4
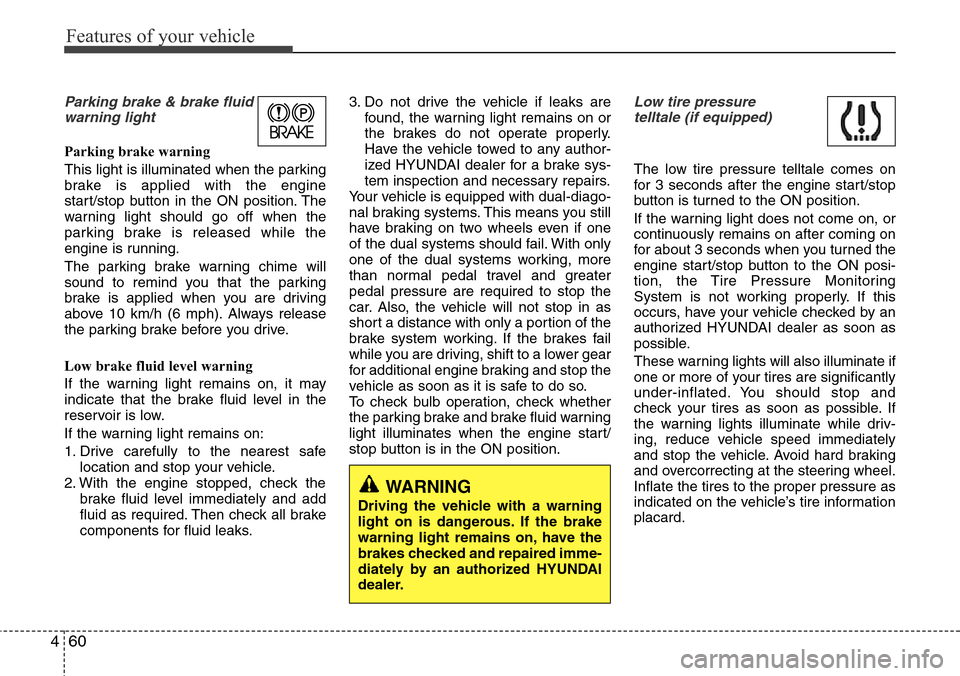
Parking brake & brake fluid
warning light
Parking brake warning
This light is illuminated when the parking
brake is applied with the engine
start/stop button in the ON position. The
warning light should go off when the
parking brake is released while the
engine is running.
The parking brake warning chime will
sound to remind you that the parking
brake is applied when you are driving
above 10 km/h (6 mph). Always release
the parking brake before you drive.
Low brake fluid level warning
If the warning light remains on, it may
indicate that the brake fluid level in the
reservoir is low.
If the warning light remains on:
1. Drive carefully to the nearest safe
location and stop your vehicle.
2. With the engine stopped, check the
brake fluid level immediately and add
fluid as required. Then check all brake
components for fluid leaks.3. Do not drive the vehicle if leaks are
found, the warning light remains on or
the brakes do not operate properly.
Have the vehicle towed to any author-
ized HYUNDAI dealer for a brake sys-
tem inspection and necessary repairs.
Your vehicle is equipped with dual-diago-
nal braking systems. This means you still
have braking on two wheels even if one
of the dual systems should fail. With only
one of the dual systems working, more
than normal pedal travel and greater
pedal pressure are required to stop the
car. Also, the vehicle will not stop in as
short a distance with only a portion of the
brake system working. If the brakes fail
while you are driving, shift to a lower gear
for additional engine braking and stop the
vehicle as soon as it is safe to do so.
To check bulb operation, check whether
the parking brake and brake fluid warning
light illuminates when the engine start/
stop button is in the ON position.
Low tire pressure
telltale (if equipped)
The low tire pressure telltale comes on
for 3 seconds after the engine start/stop
button is turned to the ON position.
If the warning light does not come on, or
continuously remains on after coming on
for about 3 seconds when you turned the
engine start/stop button to the ON posi-
tion, the Tire Pressure Monitoring
System is not working properly. If this
occurs, have your vehicle checked by an
authorized HYUNDAI dealer as soon as
possible.
These warning lights will also illuminate if
one or more of your tires are significantly
under-inflated. You should stop and
check your tires as soon as possible. If
the warning lights illuminate while driv-
ing, reduce vehicle speed immediately
and stop the vehicle. Avoid hard braking
and overcorrecting at the steering wheel.
Inflate the tires to the proper pressure as
indicated on the vehicle’s tire information
placard.
WARNING
Driving the vehicle with a warning
light on is dangerous. If the brake
warning light remains on, have the
brakes checked and repaired imme-
diately by an authorized HYUNDAI
dealer.
Page 166 of 385
Features of your vehicle
84 4
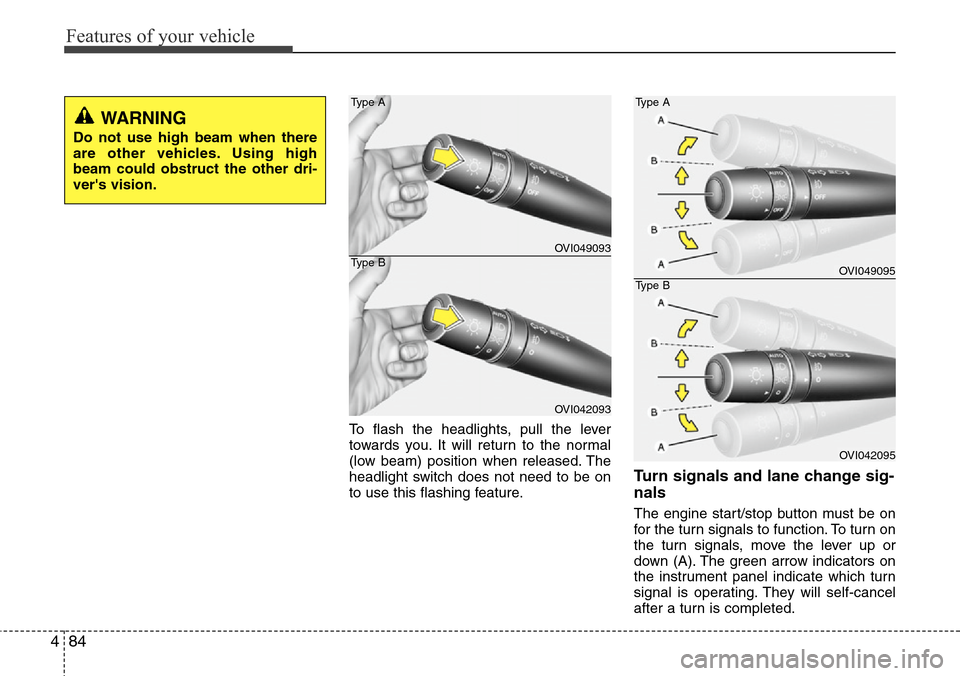
To flash the headlights, pull the lever
towards you. It will return to the normal
(low beam) position when released. The
headlight switch does not need to be on
to use this flashing feature.
Turn signals and lane change sig-
nals
The engine start/stop button must be on
for the turn signals to function. To turn on
the turn signals, move the lever up or
down (A). The green arrow indicators on
the instrument panel indicate which turn
signal is operating. They will self-cancel
after a turn is completed.
WARNING
Do not use high beam when there
are other vehicles. Using high
beam could obstruct the other dri-
ver's vision.
OVI049093
OVI042093 Type A
Type B
OVI049095
OVI042095 Type A
Type B
Page 172 of 385
Features of your vehicle
90 4
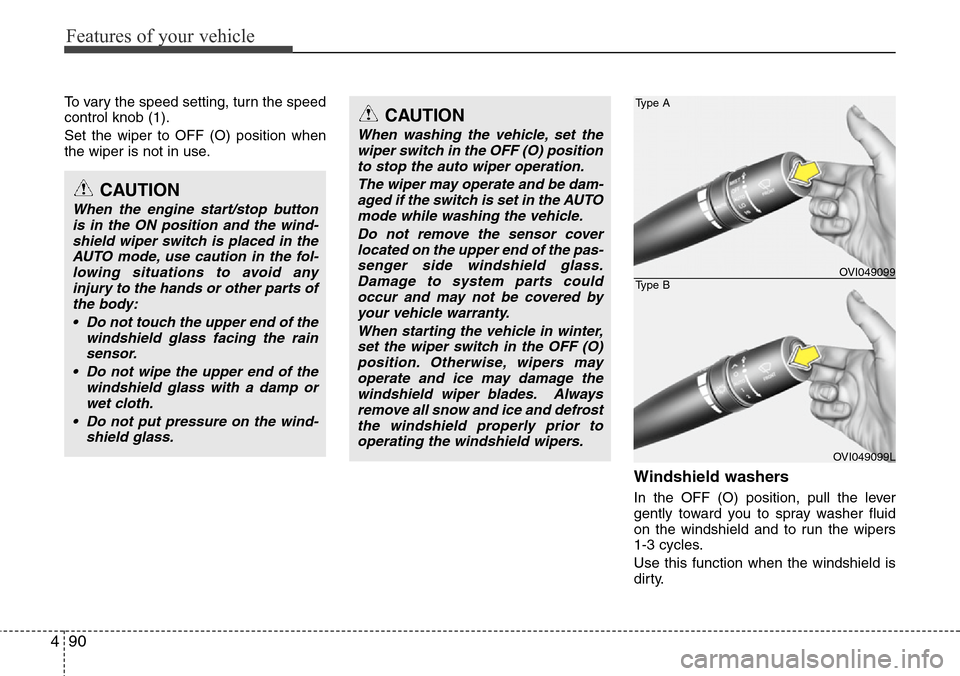
To vary the speed setting, turn the speed
control knob (1).
Set the wiper to OFF (O) position when
the wiper is not in use.
Windshield washers
In the OFF (O) position, pull the lever
gently toward you to spray washer fluid
on the windshield and to run the wipers
1-3 cycles.
Use this function when the windshield is
dirty.
CAUTION
When the engine start/stop button
is in the ON position and the wind-
shield wiper switch is placed in the
AUTO mode, use caution in the fol-
lowing situations to avoid any
injury to the hands or other parts of
the body:
• Do not touch the upper end of the
windshield glass facing the rain
sensor.
• Do not wipe the upper end of the
windshield glass with a damp or
wet cloth.
• Do not put pressure on the wind-
shield glass.
CAUTION
When washing the vehicle, set the
wiper switch in the OFF (O) position
to stop the auto wiper operation.
The wiper may operate and be dam-
aged if the switch is set in the AUTO
mode while washing the vehicle.
Do not remove the sensor cover
located on the upper end of the pas-
senger side windshield glass.
Damage to system parts could
occur and may not be covered by
your vehicle warranty.
When starting the vehicle in winter,
set the wiper switch in the OFF (O)
position. Otherwise, wipers may
operate and ice may damage the
windshield wiper blades. Always
remove all snow and ice and defrost
the windshield properly prior to
operating the windshield wipers.
Type A
Type BOVI049099
OVI049099L
Page 181 of 385
499
Features of your vehicle
❈ Rear outlet vents (F)
• The air flow of the Rear outlet vents is
controlled by the front climate control
system and delivered through the
inside air duct of the front doors. If the
door is open or not closed completely,
the air flow of the Rear outlet vent is
not delivered properly. Make sure the
front doors are closed completely.
• The air flow of the Rear outlet vents
may be weaker than the instrument
panel vents for the long air duct in the
front doors.
• Close the air vents in cold weather. The
air flow of the Rear outlet vents may
cool a little during heating operation.
(Use the Rear outlet vents during cool-
ing operation.)
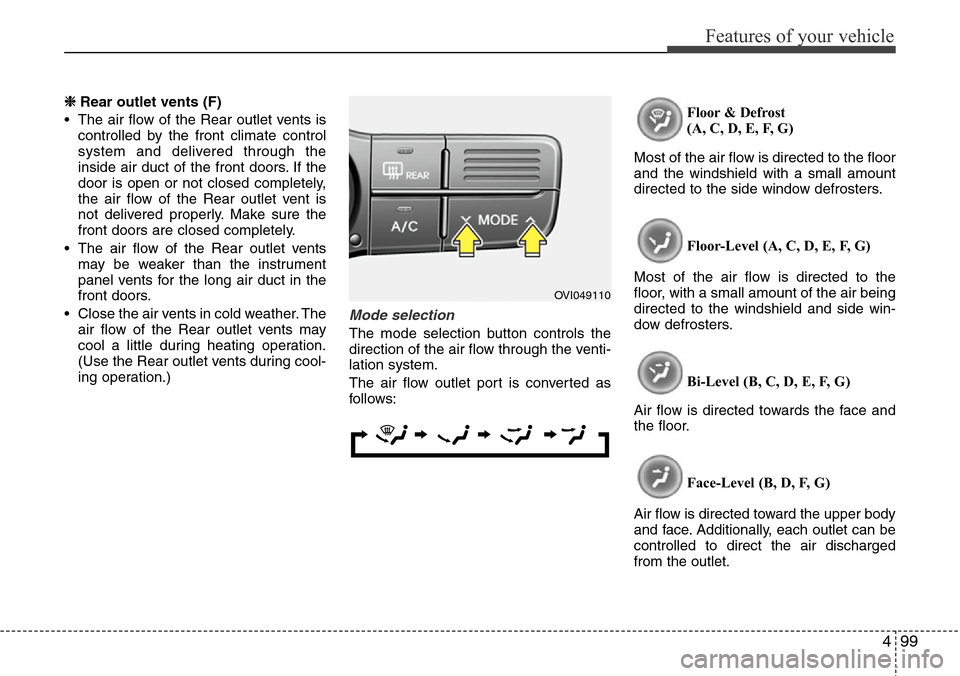
Mode selection
The mode selection button controls the
direction of the air flow through the venti-
lation system.
The air flow outlet port is converted as
follows:Floor & Defrost
(A, C, D, E, F, G)
Most of the air flow is directed to the floor
and the windshield with a small amount
directed to the side window defrosters.
Floor-Level (A, C, D, E, F, G)
Most of the air flow is directed to the
floor, with a small amount of the air being
directed to the windshield and side win-
dow defrosters.
Bi-Level (B, C, D, E, F, G)
Air flow is directed towards the face and
the floor.
Face-Level (B, D, F, G)
Air flow is directed toward the upper body
and face. Additionally, each outlet can be
controlled to direct the air discharged
from the outlet.
OVI049110