Tow Hyundai Equus 2016 Owner's Guide
[x] Cancel search | Manufacturer: HYUNDAI, Model Year: 2016, Model line: Equus, Model: Hyundai Equus 2016Pages: 477, PDF Size: 16.25 MB
Page 288 of 477
ECS (Electronic Controlled
Suspension) malfunction
warning message
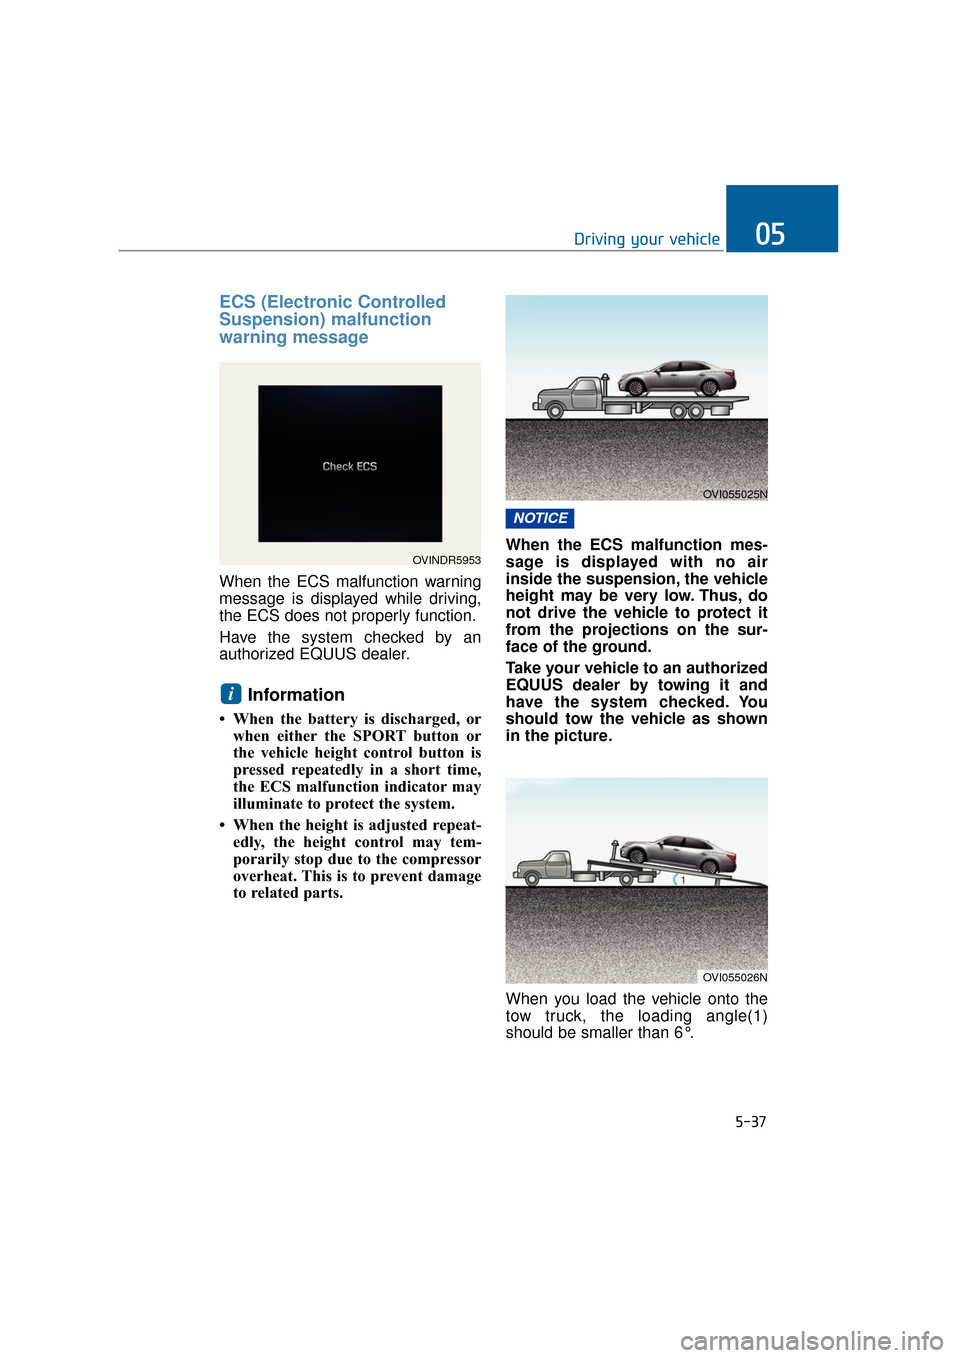
When the ECS malfunction warning
message is displayed while driving,
the ECS does not properly function.
Have the system checked by an
authorized EQUUS dealer.
Information
• When the battery is discharged, orwhen either the SPORT button or
the vehicle height control button is
pressed repeatedly in a short time,
the ECS malfunction indicator may
illuminate to protect the system.
• When the height is adjusted repeat- edly, the height control may tem-
porarily stop due to the compressor
overheat. This is to prevent damage
to related parts. When the ECS malfunction mes-
sage is displayed with no air
inside the suspension, the vehicle
height may be very low. Thus, do
not drive the vehicle to protect it
from the projections on the sur-
face of the ground.
Take your vehicle to an authorized
EQUUS dealer by towing it and
have the system checked. You
should tow the vehicle as shown
in the picture.
When you load the vehicle onto the
tow truck, the loading angle(1)
should be smaller than 6°.
NOTICE
i
5-37
Driving your vehicle05
OVINDR5953
OVI055025N
OVI055026N
Page 319 of 477
5-68
Driving your vehicle
Rocking the vehicle
When it is necessary to rock the
vehicle to escape from snow, sand,
or mud, first move the steering wheel
from side to side to clear the front-
wheel area. Then, move the shift
lever back and forth between
R(Reverse) and any forward gears.
Do not race the engine, and avoid
unnecessary wheel spins. When
your vehicle is still stuck in after try-
ing the above, have the vehicle
pulled out by a tow truck to avoid
engine overheating and transmission
damages.
A long-time rocking may overheat
the engine and damage the trans-
mission/tires.
Information
The ESC system must be turned OFF
before rocking the vehicle.
i
NOTICE
- Spinning tires
Do not spin the wheels, espe-
cially faster than 35 mph (56
km/h). Spinning the wheels at a
high speed, while parking, may
overheat a tire and injure
passers-by.
WARNING
When your vehicle is stuck in
snow, mud, sand, etc., you may
rock the vehicle to escape by
moving forwards and back-
wards. Do not attempt this,
when people or objects are any-
where near the vehicle. Rocking
the vehicle may cause it to sud-
denly move forwards or back-
wards, as it becomes unstuck,
injuring nearby people or dam-
aging objects.
WARNING
Page 326 of 477
5-75
Driving your vehicle05
To prevent the locks from
frozen
To prevent the locks from being
frozen, spray authorized de-icing
fluid or glycerin into key openings.
When a lock opening is already cov-
ered with ice, spray authorized de-
icing fluid on the ice to remove it.
When an internal part of a lock
freezes, try to thaw it with a heated
key. Carefully use the heated key to
avoid an injury.
Use authorized window-wash-
er anti-freezer solution in sys-
tem
To prevent the window washer from
being frozen, add authorized win-
dow-washer anti-freeze solution, as
instructed on the window-washer
container. Window-washer anti-
freeze solution is available from an
authorized EQUUS dealer, and so
are the most auto parts outlets. Do
not use engine coolant or other types
of anti-freezer solution, because
these may damage the vehicle paint.
Do not let your parking brake
freeze
Under some conditions, your parking
brake may freeze in the engaged
position. This is most likely to hap-
pen, when there is an accumulation
of snow or ice around/near the rear
brakes, or when the brakes are wet.
When there is the risk that your park-
ing brake may freeze, temporarily
apply it after locating the shift lever in
P(Park). Also, block the rear wheels
in advance, so the vehicle may not
roll. Then, release the parking brake.
Do not let ice and snow accu-
mulate underneath
Under some conditions, snow and
ice may build up under the fenders
and interfere with the steering. When
driving in such conditions during the
severe winter, you should check
underneath the vehicle on a regular
basis to assure that moving the front
wheels and the steering components
is unobstructed.
Carry emergency equipment
In accordance with weather condi-
tions, you should carry appropriate
emergency equipment, while driving.
Some of the items you may want to
carry include tire chains, tow straps,
chains, flashlight, emergency flares,
sand, a shovel, jumper cables, a win-
dow scraper, gloves, ground cloth,
coveralls and a blanket.
Do not place objects or materi-
als in the engine compartment
Putting objects or materials in the
engine compartment may cause an
engine failure or combustion,
because those may block the engine
cooling. The manufacturer is not
responsible for the damage caused
by such placement.
Page 327 of 477
5-76
Driving your vehicle
V
VE
EH
H I
IC
C L
LE
E
L
L O
O A
AD
D
L
L I
IM
M I
IT
T
Tire and loading information
label
The label on the driver's door sill
gives the original tire size, the rec-
ommended cold tire pressure, the
seating capacity (the number of
occupants), and load weight capaci-
ty.
Vehicle capacity weight:
5 seater
904 lbs. (410 kg)
4 seater
754 lbs. (342 kg)
The maximum weight capacity
includes occupant weights and load
weights.
Seating capacity:
5 seater
Total : 5 persons (Front seat : 2 persons, Rear seat : 3 persons)
4 seater
Total : 4 persons (Front seat : 2 persons, Rear seat : 2 persons)
Seating capacity is the maximum
number of occupants including a
driver, your vehicle may carry.
However, the seating capacity may
be reduced based upon the weight of
all of the occupants, and the weight
of the cargo being carried.
Do not overload the vehicle as there
is a limit to the total weight, or load
limit including occupants and cargo,
the vehicle can carry.
Towing capacity:
We do not recommend using this
vehicle for trailer towing.
OVI052200N
5 seater
OVI052201N
4 seater
Page 328 of 477
5-77
Driving your vehicle05
Cargo capacity:
The cargo capacity of your vehicle
will increase or decrease depending
on the weight and the number of
occupants.
Steps For Determining CorrectLoad Limit -
1. Locate the statement "The com-
bined weight of occupants and
cargo should never exceed XXX
kg or XXX lbs.'' on your vehicle's
placard.
2. Determine the combined weight of the driver and passengers that will
be riding in your vehicle.
3. Subtract the combined weight of the driver and passengers from
XXX kg or XXX lbs.
4. The resulting figure equals the available amount of cargo and lug-
gage load capacity. For example, if
the "XXX" amount equals 1400
lbs. and there will be five 150 lb
passengers in your vehicle, the
amount of available cargo and lug-
gage load capacity is 650 lbs.
(1400 - 750(5x150) = 650 lbs.)
5. Determine the combined weight of luggage and cargo being loaded
on the vehicle. That weight may
not safely exceed the available
cargo and luggage load capacity
calculated in Step 4. 6. If your vehicle will be towing a trail-
er, load from your trailer will be
transferred to your vehicle. Consult
this manual to determine how this
reduces the available cargo and
luggage load capacity of your
vehicle.Information
We do not recommend using this vehi-
cle to tow a trailer.
i
Page 333 of 477
This is to guide you to load in a prop-
er manner, and to keep the load
weight under the maximum weight
capacity. Proper loading will provide
maximum vehicle performance.
Before loading your vehicle, read the
following terms and explanation for
determining your vehicle's loading
weight, based on the vehicle's speci-
fications and the certification label:
Base curb weight
This is the weight of the vehicle, only
including a full tank of fuel and all
standard equipment. This weight
excludes optional equipment, loads,
or occupants.
Vehicle curb weight
This is the weight of your new vehi-
cle, upon being delivered from a
dealer, including any optional equip-
ment.
Load weight
This is the weight of all the addition-
al items, including the loads and
optional equipment.
GAW (Gross axle weight)
This is the total weight on each
axle(front and rear), including the
vehicle curb weight and the load
weight.
GAWR
(Gross axle weight rating)
This is the maximum weight capacity
of a single axle (front or rear). This
GAWR is shown on the certification
label. The total load weight on each
axle must never exceed its GAWR.
GVW (Gross vehicle weight)
This is the accumulated weight of the
base curb weight, the actual load
weight, and the occupants' weight.
GVWR
(Gross vehicle weight rating)
This is the maximum weight capacity
of a vehicle, including all options,
equipment, occupants and loads.
The GVWR is shown on the certifica-
tion label on the driver’s door sill.
T TR
R A
A I
IL
L E
E R
R
T
T O
O W
W I
IN
N G
G
We do not recommend using this
vehicle to tow a trailer.
V VE
EH
H I
IC
C L
LE
E
W
W E
EI
IG
G H
H T
T
Driving your vehicle
5-82
Page 334 of 477
What to do in an emergency
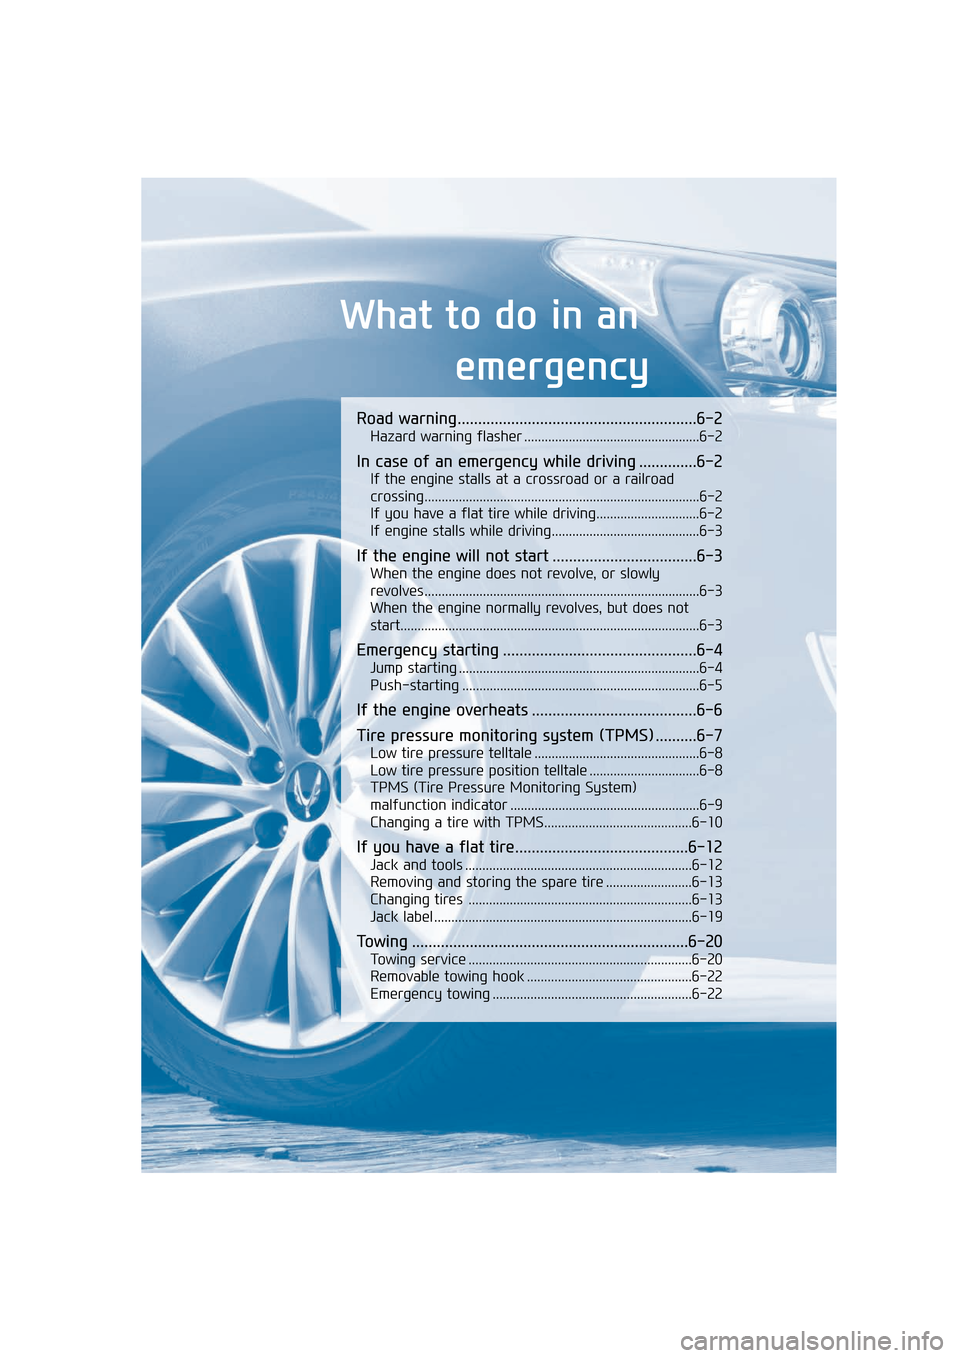
Road warning..........................................................6-2
Hazard warning flasher ...................................................6-2
In case of an emergency while driving ..............6-2
If the engine stalls at a crossroad or a railroad
crossing........................................................................\
........6-2
If you have a flat tire while driving..............................6-2
If engine stalls while driving...........................................6-3
If the engine will not start ...................................6-3
When the engine does not revolve, or slowly
revolves........................................................................\
........6-3
When the engine normally revolves, but does not
start.....................................................................\
..................6-3
Emergency starting ...............................................6-4
Jump starting ......................................................................6-\
4
Push-starting .....................................................................6-5\
If the engine overheats ........................................6-6
Tire pressure monitoring system (TPMS) ..........6-7
Low tire pressure telltale ................................................6-8
Low tire pressure position telltale ................................6-8
TPMS (Tire Pressure Monitoring System)
malfunction indicator .......................................................6-9
Changing a tire with TPMS...........................................6-10
If you have a flat tire..........................................6-12
Jack and tools ..................................................................6-12
Removing and storing the spare tire .........................6-13
Changing tires .................................................................6-13
Jack label ........................................................................\
...6-19
Towing ...................................................................6-20
Towing service .................................................................6-20
Removable towing hook ................................................6-22
Emergency towing ..........................................................6-22
Page 335 of 477
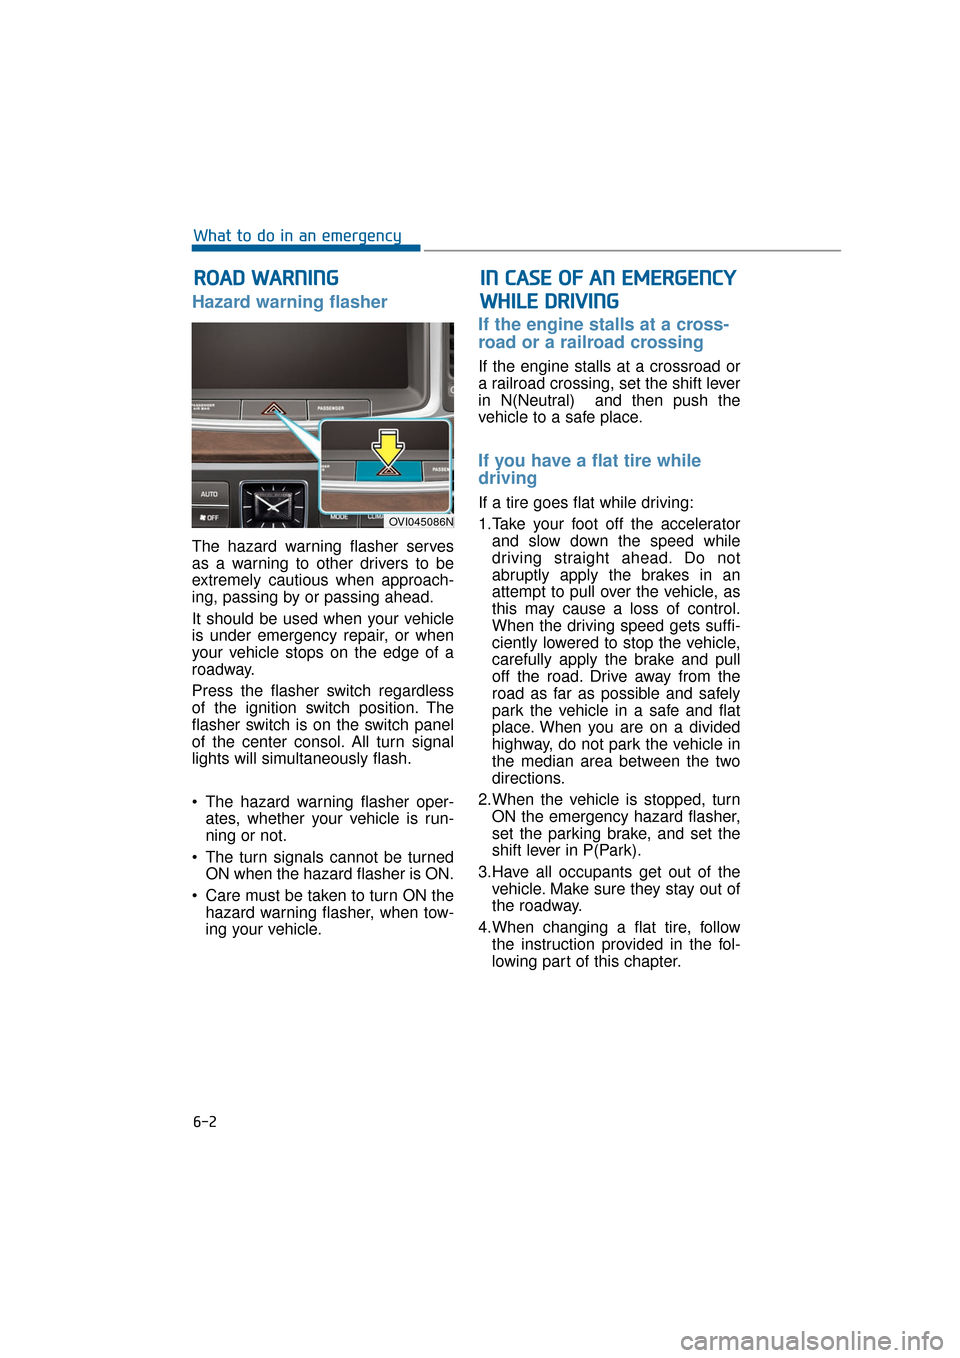
Hazard warning flasher
The hazard warning flasher serves
as a warning to other drivers to be
extremely cautious when approach-
ing, passing by or passing ahead.
It should be used when your vehicle
is under emergency repair, or when
your vehicle stops on the edge of a
roadway.
Press the flasher switch regardless
of the ignition switch position. The
flasher switch is on the switch panel
of the center consol. All turn signal
lights will simultaneously flash.
• The hazard warning flasher oper-ates, whether your vehicle is run-
ning or not.
The turn signals cannot be turned ON when the hazard flasher is ON.
Care must be taken to turn ON the hazard warning flasher, when tow-
ing your vehicle.
If the engine stalls at a cross-
road or a railroad crossing
If the engine stalls at a crossroad or
a railroad crossing, set the shift lever
in N(Neutral) and then push the
vehicle to a safe place.
If you have a flat tire while
driving
If a tire goes flat while driving:
1.Take your foot off the acceleratorand slow down the speed while
driving straight ahead. Do not
abruptly apply the brakes in an
attempt to pull over the vehicle, as
this may cause a loss of control.
When the driving speed gets suffi-
ciently lowered to stop the vehicle,
carefully apply the brake and pull
off the road. Drive away from the
road as far as possible and safely
park the vehicle in a safe and flat
place. When you are on a divided
highway, do not park the vehicle in
the median area between the two
directions.
2.When the vehicle is stopped, turn ON the emergency hazard flasher,
set the parking brake, and set the
shift lever in P(Park).
3.Have all occupants get out of the vehicle. Make sure they stay out of
the roadway.
4.When changing a flat tire, follow the instruction provided in the fol-
lowing part of this chapter.
R RO
O A
AD
D
W
W A
AR
RN
N I
IN
N G
G
6-2
What to do in an emergency
OVI045086N
I
IN
N
C
C A
A S
SE
E
O
O F
F
A
A N
N
E
E M
M E
ER
R G
G E
EN
N C
CY
Y
W
W H
HI
IL
L E
E
D
D R
RI
IV
V I
IN
N G
G
Page 337 of 477
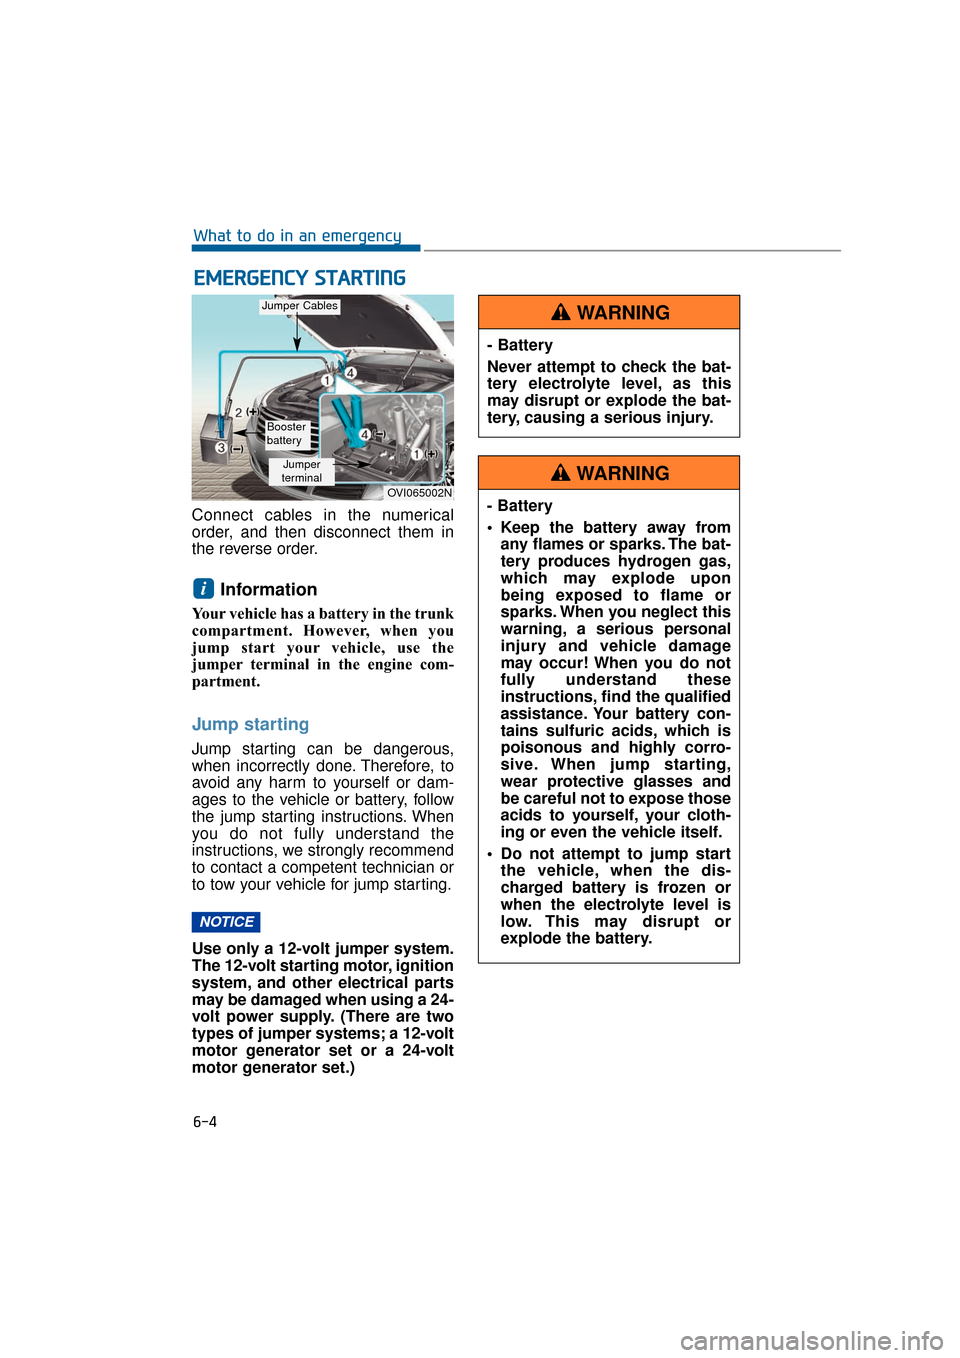
Connect cables in the numerical
order, and then disconnect them in
the reverse order.
Information
Your vehicle has a battery in the trunk
compartment. However, when you
jump start your vehicle, use the
jumper terminal in the engine com-
partment.
Jump starting
Jump starting can be dangerous,
when incorrectly done. Therefore, to
avoid any harm to yourself or dam-
ages to the vehicle or battery, follow
the jump starting instructions. When
you do not fully understand the
instructions, we strongly recommend
to contact a competent technician or
to tow your vehicle for jump starting.
Use only a 12-volt jumper system.
The 12-volt starting motor, ignition
system, and other electrical parts
may be damaged when using a 24-
volt power supply. (There are two
types of jumper systems; a 12-volt
motor generator set or a 24-volt
motor generator set.)
NOTICE
i
E EM
M E
ER
R G
G E
EN
N C
CY
Y
S
S T
T A
A R
RT
TI
IN
N G
G
6-4
What to do in an emergency
OVI065002N
Jumper
terminal
Jumper Cables
Booster
battery
- Battery
Never attempt to check the bat-
tery electrolyte level, as this
may disrupt or explode the bat-
tery, causing a serious injury.
WARNING
- Battery
• Keep the battery away from any flames or sparks. The bat-
tery produces hydrogen gas,
which may explode upon
being exposed to flame or
sparks. When you neglect this
warning, a serious personal
injury and vehicle damage
may occur! When you do not
fully understand these
instructions, find the qualified
assistance. Your battery con-
tains sulfuric acids, which is
poisonous and highly corro-
sive. When jump starting,
wear protective glasses and
be careful not to expose those
acids to yourself, your cloth-
ing or even the vehicle itself.
Do not attempt to jump start the vehicle, when the dis-
charged battery is frozen or
when the electrolyte level is
low. This may disrupt or
explode the battery.
WARNING
Page 342 of 477
Information
A tire pressure sensor is not equipped
with the spare tire.
TPMS (Tire Pressure
Monitoring System)
malfunction indicator
The TPMS malfunction indicator illu-
minates after approximately 1-
minute flashing, when the TPMS
detects the malfunction.
Immediately have the system
checked by an authorized EQUUS
dealer to find the cause of the mal-
function.
Information
If there is the TPMS malfunction, the
low tire pressure position telltale will
not illuminate even with an under-
inflated tire.
The TPMS malfunction indicatormay remain ON after approxi-
mately 1-minute flashing, when
the vehicle drives near electric
power supply cables or a radio
transmitter, such as a police sta-
tion, government/public office,
broadcasting station, military
installation, airport, or transmit-
ting tower. Those may interfere
the normal TPMS operation.
The TPMS malfunction indicator may remain ON after approxi-
mately 1-minute flashing, when
the snow chains or some of your
personal electronic devices, such
as a laptop computer, mobile
charger, remote starting device or
navigation, are used inside the
vehicle. Those may interrupt the
normal TPMS operation.
NOTICE
i
i
6-9
What to do in an emergency06
The low tire pressure telltale
may illuminate in cold weather,
when the tire pressure was
adjusted in warm weather. It
does not indicate the TPMS mal-
function, because the lower
temperature proportionally low-
ers the tire pressure.
When your vehicle drive
through the severe temperature
difference, from warm to cold
and vice versa, or the outside
temperature is greatly higher or
lower, you should check and
readjust the tire pressure to the
recommended level.
CAUTION
- Low pressure damage
Significantly under-inflated
tires makes your driving unsta-
ble, possibly increasing a brak-
ing distance and causing a loss
of vehicle control.
Long-time driving on under-
inflated tires may overheat or
fail the tires.
WARNING