tail lights Hyundai Genesis 2013 Owner's Manual
[x] Cancel search | Manufacturer: HYUNDAI, Model Year: 2013, Model line: Genesis, Model: Hyundai Genesis 2013Pages: 429, PDF Size: 8.94 MB
Page 85 of 429
Features of your vehicle
64
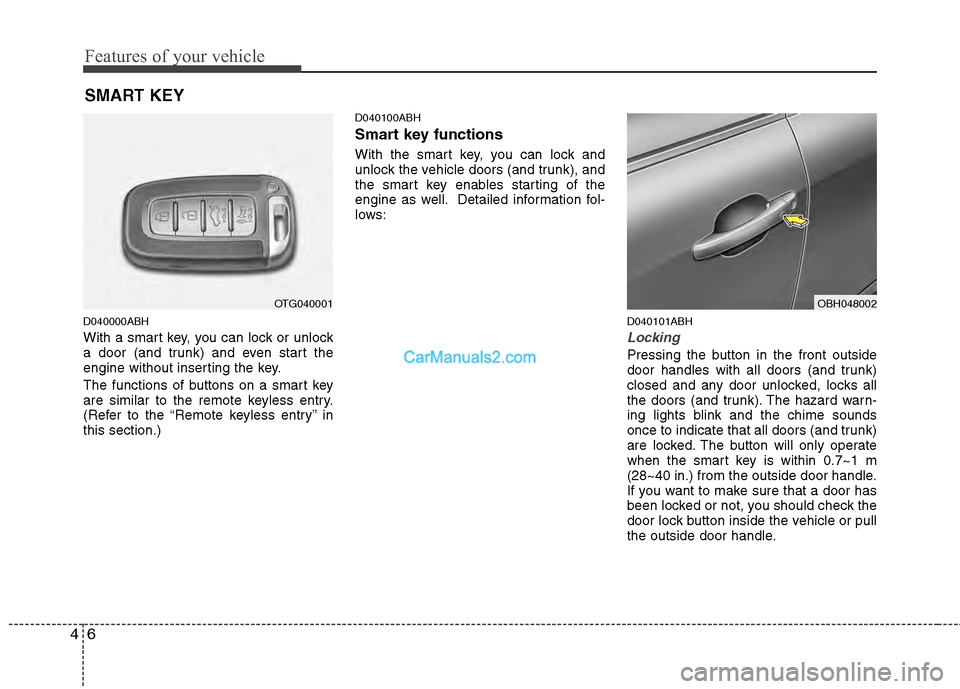
D040000ABH
With a smart key, you can lock or unlock
a door (and trunk) and even start the
engine without inserting the key.
The functions of buttons on a smart key
are similar to the remote keyless entry.
(Refer to the “Remote keyless entry” in
this section.)
D040100ABH
Smart key functions
With the smart key, you can lock and
unlock the vehicle doors (and trunk), and
the smart key enables starting of the
engine as well. Detailed information fol-
lows:
D040101ABH
Locking
Pressing the button in the front outside
door handles with all doors (and trunk)
closed and any door unlocked, locks all
the doors (and trunk). The hazard warn-
ing lights blink and the chime sounds
once to indicate that all doors (and trunk)
are locked. The button will only operate
when the smart key is within 0.7~1 m
(28~40 in.) from the outside door handle.
If you want to make sure that a door has
been locked or not, you should check the
door lock button inside the vehicle or pull
the outside door handle.
OTG040001
SMART KEY
OBH048002
Page 86 of 429
47
Features of your vehicle
Even though you press the outside door
handle buttons, the doors will not lock
and the chime will sound for 3 seconds if
any of following occur:
The smart key is in the vehicle.
The ignition switch is in ACC or ONposition.
Any door, except the trunk, is open.
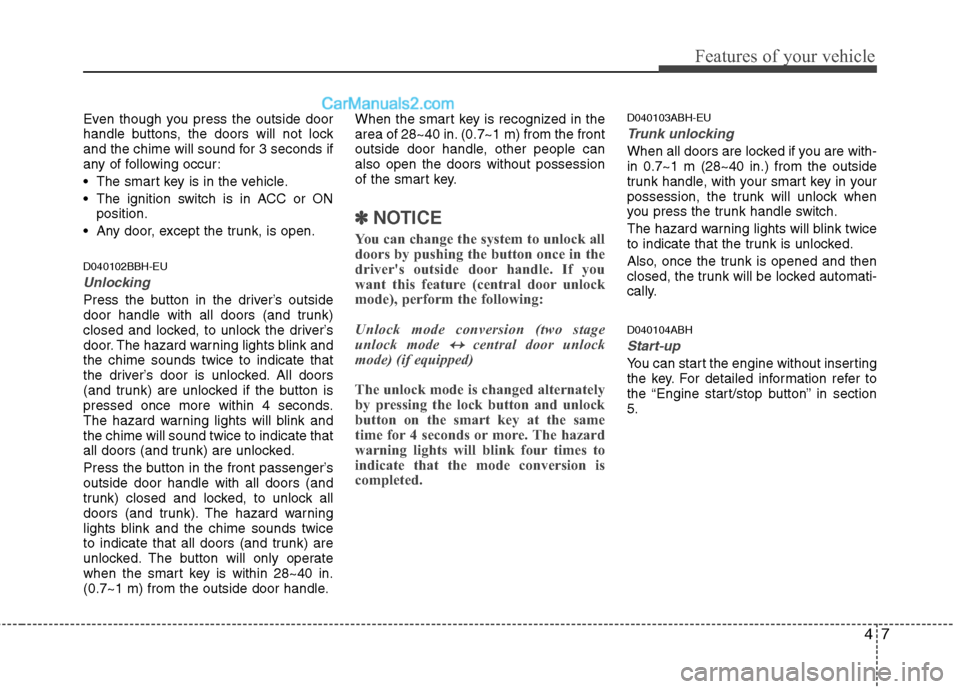
D040102BBH-EU
Unlocking
Press the button in the driver’s outside
door handle with all doors (and trunk)
closed and locked, to unlock the driver’s
door. The hazard warning lights blink and
the chime sounds twice to indicate that
the driver’s door is unlocked. All doors
(and trunk) are unlocked if the button is
pressed once more within 4 seconds.
The hazard warning lights will blink and
the chime will sound twice to indicate that
all doors (and trunk) are unlocked.
Press the button in the front passenger’s
outside door handle with all doors (and
trunk) closed and locked, to unlock all
doors (and trunk). The hazard warning
lights blink and the chime sounds twice
to indicate that all doors (and trunk) are
unlocked. The button will only operate
when the smart key is within 28~40 in.
(0.7~1 m) from the outside door handle. When the smart key is recognized in the
area of 28~40 in. (0.7~1 m) from the front
outside door handle, other people can
also open the doors without possession
of the smart key.
✽ ✽
NOTICE
You can change the system to unlock all
doors by pushing the button once in the
driver's outside door handle. If you
want this feature (central door unlock
mode), perform the following:
Unlock mode conversion (two stage
unlock mode
↔ ↔central door unlock
mode) (if equipped)
The unlock mode is changed alternately
by pressing the lock button and unlock
button on the smart key at the same
time for 4 seconds or more. The hazard
warning lights will blink four times to
indicate that the mode conversion is
completed.
D040103ABH-EU
Trunk unlocking
When all doors are locked if you are with-
in 0.7~1 m (28~40 in.) from the outside
trunk handle, with your smart key in your
possession, the trunk will unlock when
you press the trunk handle switch.
The hazard warning lights will blink twice
to indicate that the trunk is unlocked.
Also, once the trunk is opened and then
closed, the trunk will be locked automati-
cally.
D040104ABH
Start-up
You can start the engine without inserting
the key. For detailed information refer to
the “Engine start/stop button” in section
5.
Page 93 of 429
Features of your vehicle
14
4
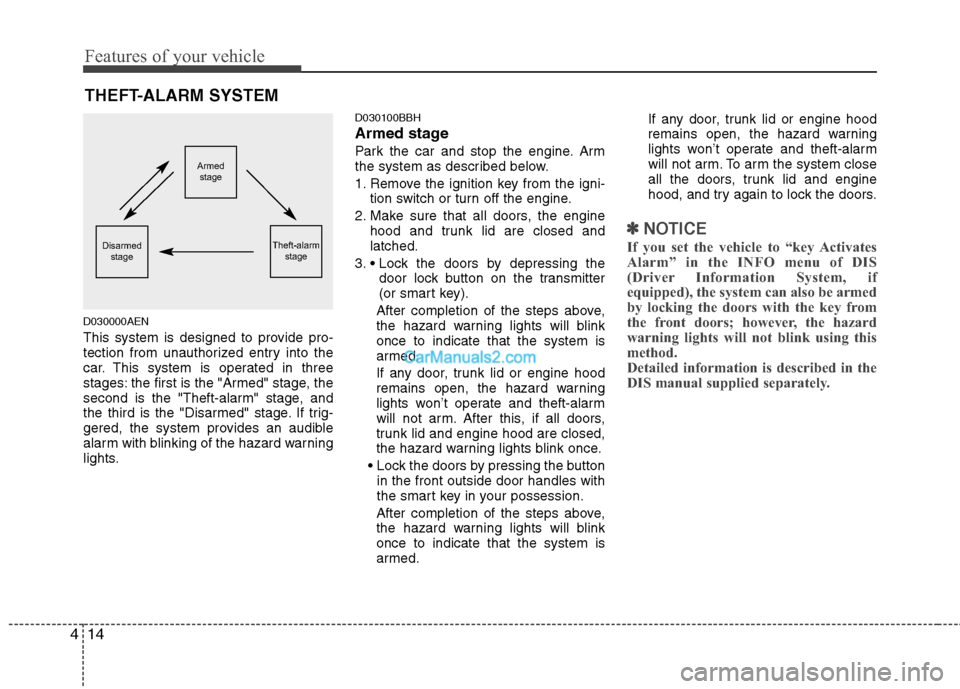
D030000AEN
This system is designed to provide pro-
tection from unauthorized entry into the
car. This system is operated in three
stages: the first is the "Armed" stage, the
second is the "Theft-alarm" stage, and
the third is the "Disarmed" stage. If trig-
gered, the system provides an audible
alarm with blinking of the hazard warning
lights.
D030100BBH
Armed stage
Park the car and stop the engine. Arm
the system as described below.
1. Remove the ignition key from the igni-
tion switch or turn off the engine.
2. Make sure that all doors, the engine hood and trunk lid are closed and
latched.
3. door lock button on the transmitter
(or smart key).
After completion of the steps above,
the hazard warning lights will blink
once to indicate that the system is
armed.
If any door, trunk lid or engine hood
remains open, the hazard warning
lights won’t operate and theft-alarm
will not arm. After this, if all doors,
trunk lid and engine hood are closed,
the hazard warning lights blink once.
in the front outside door handles with
the smart key in your possession.
After completion of the steps above,
the hazard warning lights will blink
once to indicate that the system is
armed. If any door, trunk lid or engine hood
remains open, the hazard warning
lights won’t operate and theft-alarm
will not arm. To arm the system close
all the doors, trunk lid and engine
hood, and try again to lock the doors.
✽ ✽
NOTICE
If you set the vehicle to “key Activates
Alarm” in the INFO menu of DIS
(Driver Information System, if
equipped), the system can also be armed
by locking the doors with the key from
the front doors; however, the hazard
warning lights will not blink using this
method.
Detailed information is described in the
DIS manual supplied separately.
THEFT-ALARM SYSTEM
Armed
stage
Theft-alarm stageDisarmedstage
Page 127 of 429
Features of your vehicle
48
4
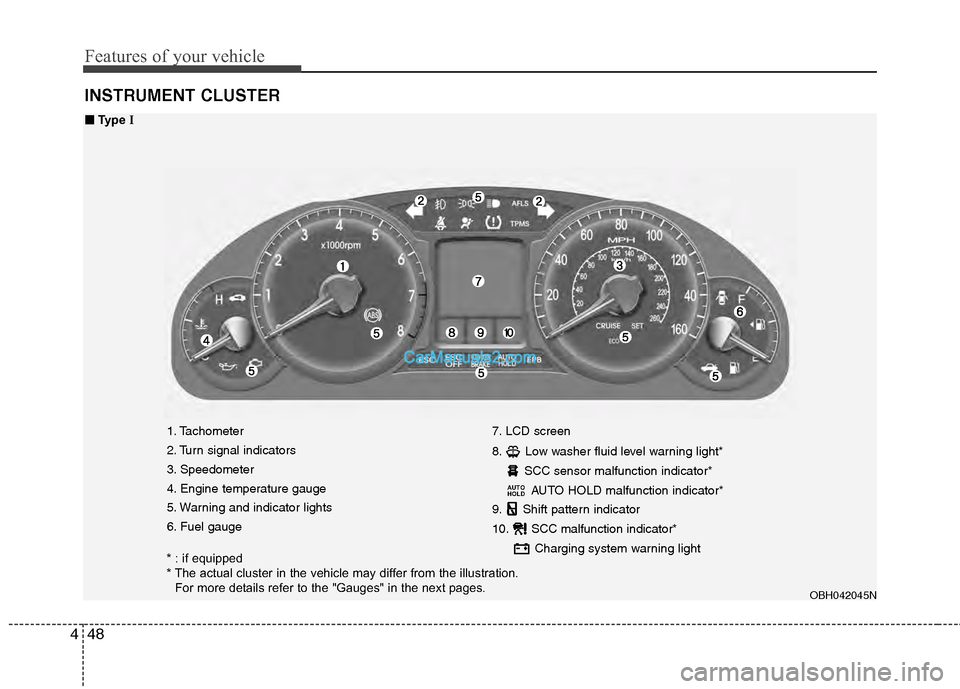
INSTRUMENT CLUSTER
1. Tachometer
2. Turn signal indicators
3. Speedometer
4. Engine temperature gauge
5. Warning and indicator lights
6. Fuel gauge 7. LCD screen
8. Low washer fluid level warning light*
SCC sensor malfunction indicator*AUTO HOLD malfunction indicator*
9. Shift pattern indicator
10. SCC malfunction indicator*
Charging system warning light
AUTO
HOLD
OBH042045N
■
■Type I
* : if equipped
* The actual cluster in the vehicle may differ from the illustration.
For more details refer to the "Gauges" in the next pages.
Page 128 of 429
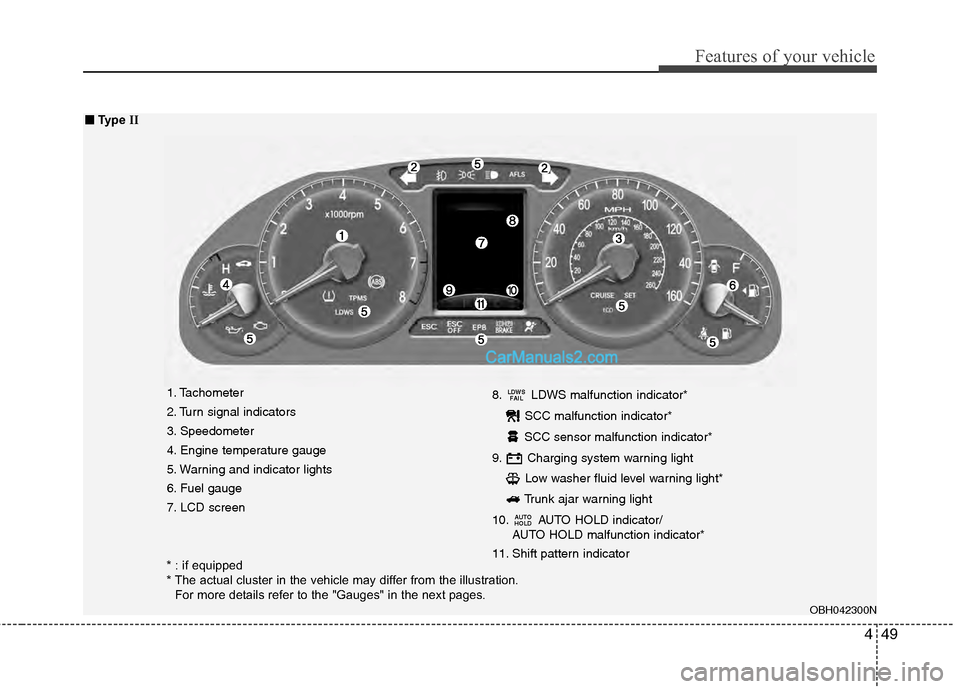
449
Features of your vehicle
1. Tachometer
2. Turn signal indicators
3. Speedometer
4. Engine temperature gauge
5. Warning and indicator lights
6. Fuel gauge
7. LCD screen8. LDWS malfunction indicator*
SCC malfunction indicator*
SCC sensor malfunction indicator*
9. Charging system warning light Low washer fluid level warning light*
Trunk ajar warning light
10. AUTO HOLD indicator/ AUTO HOLD malfunction indicator*
11. Shift pattern indicator
AUTO
HOLD
LDWS FAIL
OBH042300N
■
■ Type II
* : if equipped
* The actual cluster in the vehicle may differ from the illustration.
For more details refer to the "Gauges" in the next pages.
Page 138 of 429
459
Features of your vehicle
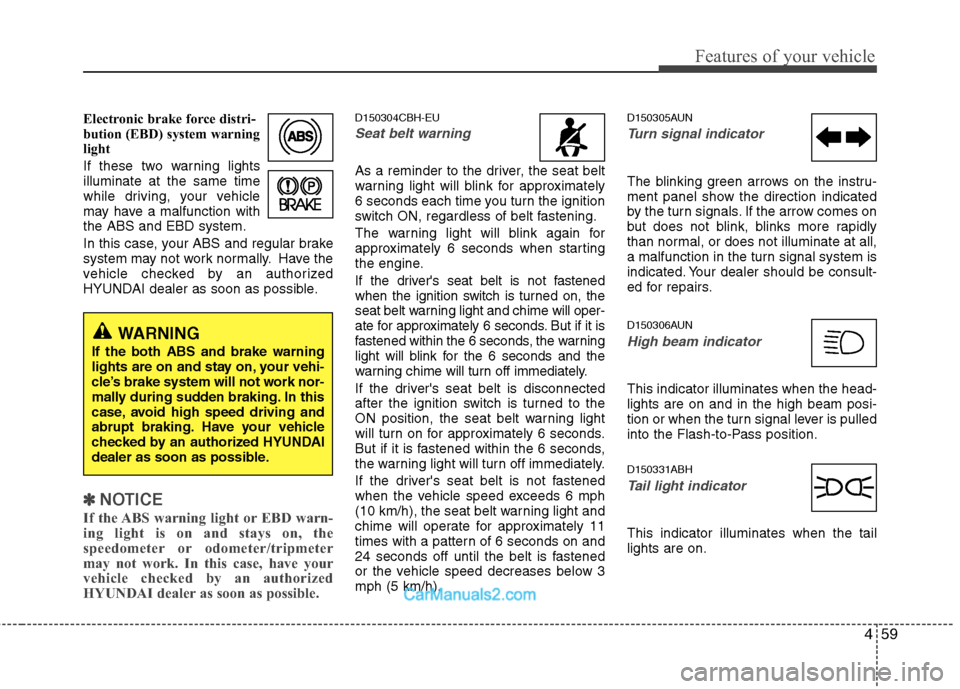
Electronic brake force distri-
bution (EBD) system warning
light
If these two warning lights
illuminate at the same time
while driving, your vehicle
may have a malfunction with
the ABS and EBD system.
In this case, your ABS and regular brake
system may not work normally. Have the
vehicle checked by an authorized
HYUNDAI dealer as soon as possible.
✽ ✽NOTICE
If the ABS warning light or EBD warn-
ing light is on and stays on, the
speedometer or odometer/tripmeter
may not work. In this case, have your
vehicle checked by an authorized
HYUNDAI dealer as soon as possible.
D150304CBH-EU
Seat belt warning
As a reminder to the driver, the seat belt
warning light will blink for approximately
6 seconds each time you turn the ignition
switch ON, regardless of belt fastening.
The warning light will blink again for
approximately 6 seconds when starting
the engine.
If the driver's seat belt is not fastened
when the ignition switch is turned on, the
seat belt warning light and chime will oper-
ate for approximately 6 seconds. But if it is
fastened within the 6 seconds, the warning
light will blink for the 6 seconds and the
warning chime will turn off immediately.
If the driver's seat belt is disconnected
after the ignition switch is turned to the
ON position, the seat belt warning light
will turn on for approximately 6 seconds.
But if it is fastened within the 6 seconds,
the warning light will turn off immediately.
If the driver's seat belt is not fastened
when the vehicle speed exceeds 6 mph
(10 km/h), the seat belt warning light and
chime will operate for approximately 11
times with a pattern of 6 seconds on and
24 seconds off until the belt is fastened
or the vehicle speed decreases below 3
mph (5 km/h).
D150305AUN
Turn signal indicator
The blinking green arrows on the instru-
ment panel show the direction indicated
by the turn signals. If the arrow comes on
but does not blink, blinks more rapidly
than normal, or does not illuminate at all,
a malfunction in the turn signal system is
indicated. Your dealer should be consult-
ed for repairs.
D150306AUN
High beam indicator
This indicator illuminates when the head-
lights are on and in the high beam posi-
tion or when the turn signal lever is pulled
into the Flash-to-Pass position.
D150331ABH
Tail light indicator
This indicator illuminates when the tail
lights are on.
WARNING
If the both ABS and brake warning
lights are on and stay on, your vehi-
cle’s brake system will not work nor-
mally during sudden braking. In this
case, avoid high speed driving and
abrupt braking. Have your vehicle
checked by an authorized HYUNDAI
dealer as soon as possible.
Page 156 of 429
477
Features of your vehicle
D190100ABH
Battery saver function
The purpose of this feature is to pre-vent the battery from being dis-
charged. The system automatically
turns off the parking lights when the
driver removes the ignition key (smart
key : turns off the engine) and opens
the driver-side door (in that order).
With this feature, the parking lights will be turned off automatically if the driver
parks on the side of the road at night.
If necessary, to keep the lights on
when the ignition key is removed
(smart key : turns off the engine), per-
form the following:
1) Open the driver-side door.
2) Turn the parking lights OFF and ON again using the light switch on the
steering column.
Headlight welcome function
(if equipped)
When the headlight switch is set to ON or
AUTO position and all doors (and trunk)
are closed and locked, if you press the
door unlock button on the transmitter (or
the smart key), the headlights will come
on for about 15 seconds. At this time, if
you press the door lock button, the head-
lights will turn off immediately.
D190200ABH
Headlight escort function
(if equipped)
If you turn the ignition switch to the ACC
or OFF position with the headlights ON,
the headlights (and/or tail lights) remain
on for about 20 minutes. However, if the
driver’s door is opened and closed, the
headlights are turned off after 30 sec-
onds.
The headlights can be turned off by
pressing the lock button on the transmit-
ter (or smart key) twice or turning the
light switch to the OFF or Auto position.
If the headlight switch is in the AUTO
position, the function can only operate at
night.
D190400AUN
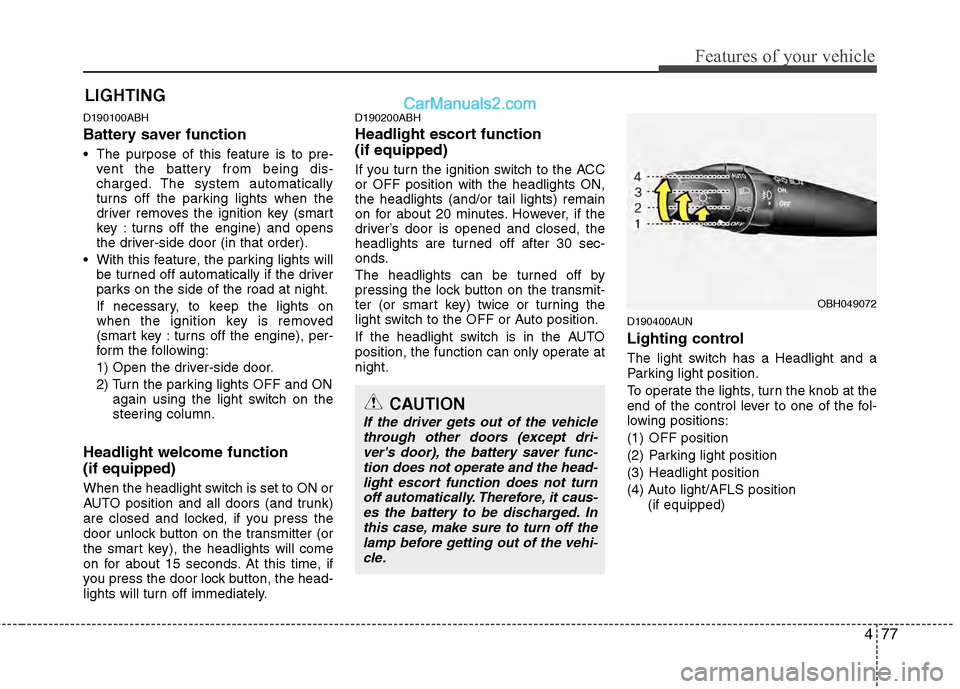
Lighting control
The light switch has a Headlight and a
Parking light position.
To operate the lights, turn the knob at the
end of the control lever to one of the fol-
lowing positions:
(1) OFF position
(2) Parking light position
(3) Headlight position
(4) Auto light/AFLS position
(if equipped)
LIGHTING
OBH049072
CAUTION
If the driver gets out of the vehiclethrough other doors (except dri-ver's door), the battery saver func-tion does not operate and the head- light escort function does not turnoff automatically. Therefore, it caus- es the battery to be discharged. Inthis case, make sure to turn off thelamp before getting out of the vehi-cle.
Page 157 of 429
Features of your vehicle
78
4
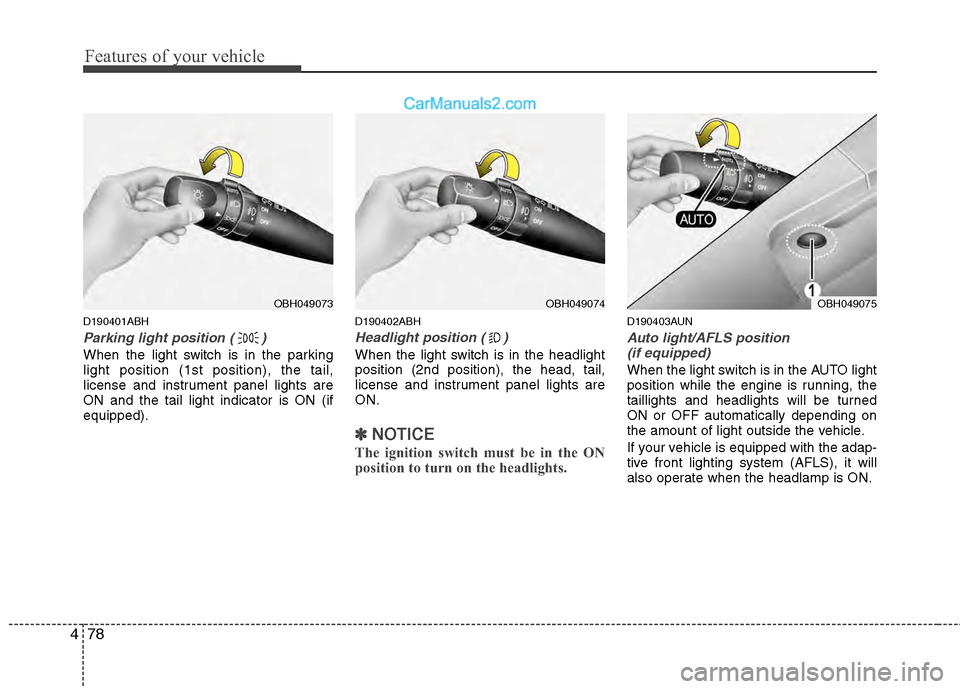
D190401ABH
Parking light position ( )
When the light switch is in the parking
light position (1st position), the tail,
license and instrument panel lights are
ON and the tail light indicator is ON (if
equipped).
D190402ABH
Headlight position ( )
When the light switch is in the headlight
position (2nd position), the head, tail,
license and instrument panel lights are
ON.
✽ ✽
NOTICE
The ignition switch must be in the ON
position to turn on the headlights.
D190403AUN
Auto light/AFLS position
(if equipped)
When the light switch is in the AUTO light
position while the engine is running, the
taillights and headlights will be turned
ON or OFF automatically depending on
the amount of light outside the vehicle.
If your vehicle is equipped with the adap-
tive front lighting system (AFLS), it will
also operate when the headlamp is ON.
OBH049074OBH049075OBH049073
Page 242 of 429
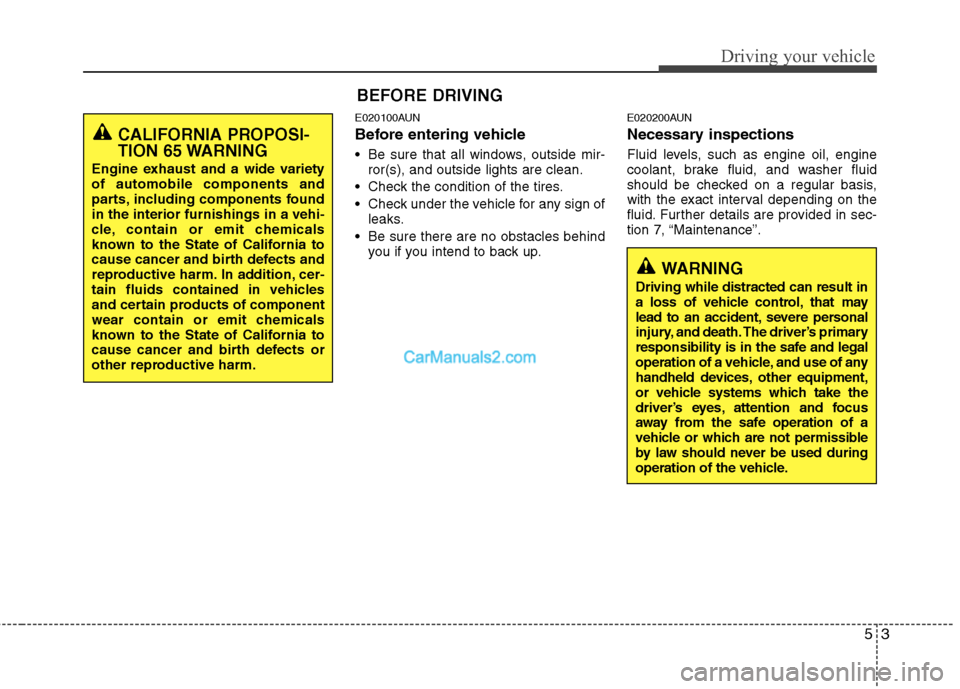
53
Driving your vehicle
E020100AUN
Before entering vehicle
• Be sure that all windows, outside mir-ror(s), and outside lights are clean.
Check the condition of the tires.
Check under the vehicle for any sign of leaks.
Be sure there are no obstacles behind you if you intend to back up.
E020200AUN
Necessary inspections
Fluid levels, such as engine oil, engine
coolant, brake fluid, and washer fluid
should be checked on a regular basis,
with the exact interval depending on the
fluid. Further details are provided in sec-
tion 7, “Maintenance”.
BEFORE DRIVING
WARNING
Driving while distracted can result in
a loss of vehicle control, that may
lead to an accident, severe personal
injury, and death. The driver’s primary
responsibility is in the safe and legal
operation of a vehicle, and use of any
handheld devices, other equipment,
or vehicle systems which take the
driver’s eyes, attention and focus
away from the safe operation of a
vehicle or which are not permissible
by law should never be used during
operation of the vehicle.
CALIFORNIA PROPOSI-
TION 65 WARNING
Engine exhaust and a wide variety
of automobile components and
parts, including components found
in the interior furnishings in a vehi-
cle, contain or emit chemicals
known to the State of California to
cause cancer and birth defects and
reproductive harm. In addition, cer-
tain fluids contained in vehicles
and certain products of component
wear contain or emit chemicals
known to the State of California to
cause cancer and birth defects or
other reproductive harm.
Page 293 of 429
Driving your vehicle
54
5
E100000AEN
Your vehicle's fuel economy depends
mainly on your style of driving, where you
drive and when you drive.
Each of these factors affects how many
miles (kilometers) you can get from a gal-
lon (liter) of fuel. To operate your vehicle
as economically as possible, use the fol-
lowing driving suggestions to help save
money in both fuel and repairs:
Drive smoothly. Accelerate at a moder-
ate rate. Don't make "jack-rabbit" starts
or full-throttle shifts and maintain a
steady cruising speed. Don't race
between stoplights. Try to adjust your
speed to that of the other traffic so you
don't have to change speeds unneces-
sarily. Avoid heavy traffic whenever
possible. Always maintain a safe dis-
tance from other vehicles so you can
avoid unnecessary braking. This also
reduces brake wear.
Drive at a moderate speed. The faster you drive the more fuel your vehicle
uses. Driving at a moderate speed, in
the highest gear appropriate for the
conditions, especially on the highway,
is one of the most effective ways to
reduce fuel consumption. Don't "ride" the brake pedal. This can
increase fuel consumption and also
increase wear on these components.
In addition, driving with your foot rest-
ing on the brake pedal may cause the
brakes to overheat, which reduces
their effectiveness and may lead to
more serious consequences.
Take care of your tires. Keep them inflated to the recommended pressure.
Incorrect inflation, either too much or
too little, results in unnecessary tire
wear. Check the tire pressures at least
once a month.
Be sure that the wheels are aligned correctly. Improper alignment can
result from hitting curbs or driving too
fast over irregular surfaces. Poor align-
ment causes faster tire wear and may
also result in other problems as well as
greater fuel consumption. Keep your car in good condition. For
better fuel economy and reduced
maintenance costs, maintain your car
in accordance with the maintenance
schedule in section 7. If you drive your
car in severe conditions, more frequent
maintenance is required (see section 7
for details).
Keep your car clean. For maximum service, your vehicle should be kept
clean and free of corrosive materials. It
is especially important that mud, dirt,
ice, etc. not be allowed to accumulate
on the underside of the car. This extra
weight can result in increased fuel con-
sumption and also contribute to corro-
sion.
Travel lightly. Don't carry unnecessary weight in your car. Weight reduces fuel
economy.
Don't let the engine idle longer than necessary. If you are waiting (and not
in traffic), turn off your engine and
restart only when you're ready to go.
ECONOMICAL OPERATION