ECO mode Hyundai Genesis Coupe 2012 Owner's Manual
[x] Cancel search | Manufacturer: HYUNDAI, Model Year: 2012, Model line: Genesis Coupe, Model: Hyundai Genesis Coupe 2012Pages: 391, PDF Size: 6.59 MB
Page 36 of 391
317
Safety features of your vehicle
C020106ABK
Seat belts - Front passenger and rearseat 3-point system with combinationlocking retractor
To fasten your seat belt:
Combination retractor type seat belts are
installed in the rear seat positions to help
accommodate the installation of child
restraint systems. Although a combina-
tion retractor is also installed in the front
passenger seat position, it is strongly
recommended that children always be
seated in the rear seat. NEVER place
any infant restraint system in the front
seat of the vehicle.
This type of seat belt combines the fea-
tures of both an emergency locking
retractor seat belt and an automatic lock-
ing retractor seat belt. To fasten your seat
belt, pull it out of the retractor and insert
the metal tab into the buckle. There will
be an audible "click" when the tab locks
into the buckle. When not securing a
child restraint, the seat belt operates in
the same way as the driver's seat belt
(Emergency Locking Retractor Type). It
automatically adjusts to the proper length
only after the lap belt portion of the seat
belt is adjusted manually so that it fits
snugly around your hips. When the seat belt is fully extended from
the retractor to allow the installation of a
child restraint system, the seat belt oper-
ation changes to allow the belt to retract,
but not to extend (Automatic Locking
Retractor Type). Refer to “Using a child
restraint system” in this section.
✽ ✽
NOTICE
Although the combination retractor
provides the same level of protection for
seated passengers in either emergency
or automatic locking modes, it is recom-
mended that seated passengers use the
emergency locking feature for improved
convenience. The automatic locking
function is intended to facilitate child
restraint installation. To convert from
the automatic locking feature to the
emergency locking operation mode,
allow the unbuckled seat belt to fully
retract.
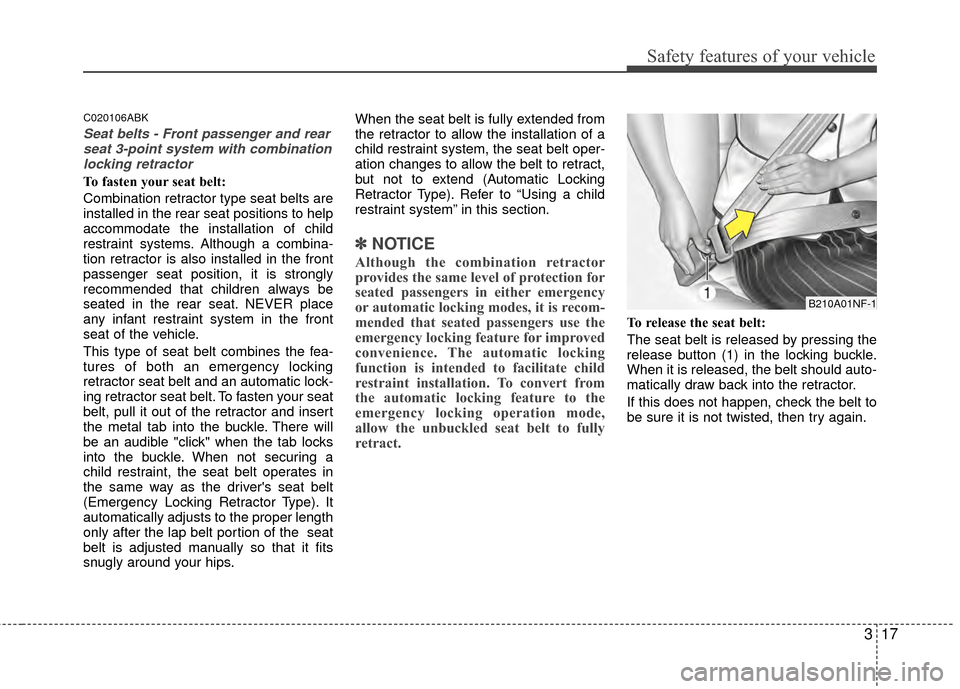
To release the seat belt:
The seat belt is released by pressing the
release button (1) in the locking buckle.
When it is released, the belt should auto-
matically draw back into the retractor.
If this does not happen, check the belt to
be sure it is not twisted, then try again.
B210A01NF-1
Page 46 of 391
327
Safety features of your vehicle
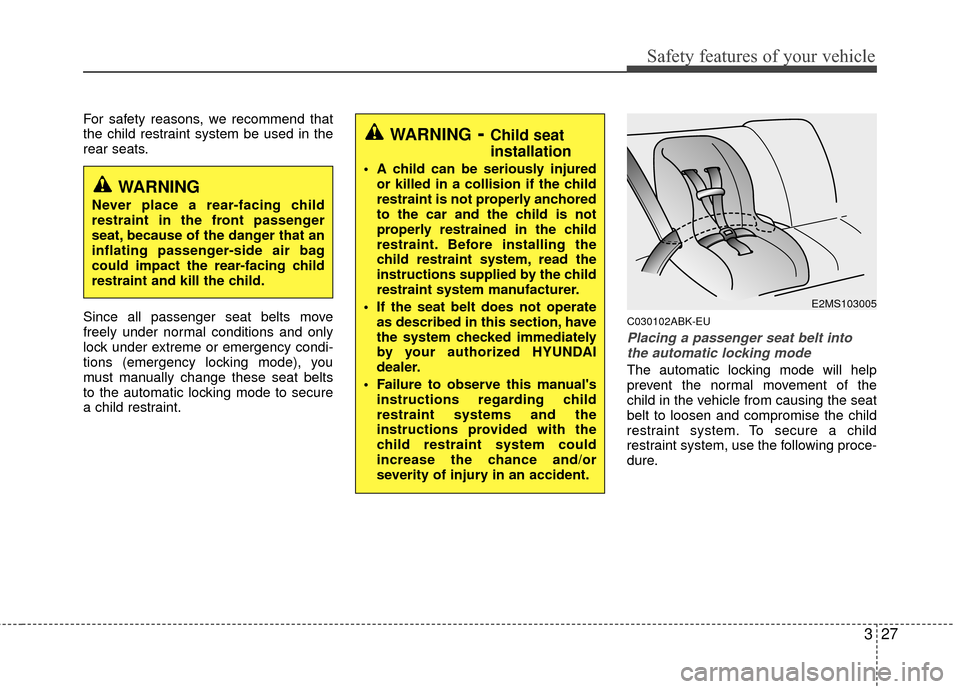
For safety reasons, we recommend that
the child restraint system be used in the
rear seats.
Since all passenger seat belts move
freely under normal conditions and only
lock under extreme or emergency condi-
tions (emergency locking mode), you
must manually change these seat belts
to the automatic locking mode to secure
a child restraint.
C030102ABK-EU
Placing a passenger seat belt intothe automatic locking mode
The automatic locking mode will help
prevent the normal movement of the
child in the vehicle from causing the seat
belt to loosen and compromise the child
restraint system. To secure a child
restraint system, use the following proce-
dure.
WARNING- Child seat
installation
A child can be seriously injured or killed in a collision if the child
restraint is not properly anchored
to the car and the child is not
properly restrained in the child
restraint. Before installing the
child restraint system, read the
instructions supplied by the child
restraint system manufacturer.
If the seat belt does not operate as described in this section, have
the system checked immediately
by your authorized HYUNDAI
dealer.
Failure to observe this manual's instructions regarding child
restraint systems and the
instructions provided with the
child restraint system could
increase the chance and/or
severity of injury in an accident.
WARNING
Never place a rear-facing child
restraint in the front passenger
seat, because of the danger that an
inflating passenger-side air bag
could impact the rear-facing child
restraint and kill the child.
E2MS103005
Page 84 of 391

47
Features of your vehicle
D040102BBK-EU
Unlocking
Pressing the button of the driver’s out-
side door handle with all doors closed
and locked, unlocks the driver’s door. The
hazard warning lights blink and the
chime sounds twice to indicate that the
driver’s door is unlocked. All doors are
unlocked if the button is pressed once
more within 4 seconds. The hazard warn-
ing lights will blink and the chime will
sound twice to indicate that all doors are
unlocked.
Pressing the button of the front passen-
ger’s outside door handle with all doors
closed and locked, unlocks all doors. The
hazard warning lights blink and the
chime sounds once to indicate that all
doors are unlocked. The button will only
operate when the smart key is within
28~40 in. (0.7~1 m) from the outside
door handle.
When the smart key is recognized in the
area of 28~40 in. (0.7~1 m) from the front
outside door handle, other people can
also open the doors without possession
of the smart key.The unlock mode is changed alter-
nately by pressing the lock button and
unlock button on the smart key at the
same time for 4 seconds or more. The
hazard warning lights will blink four
times to indicate that the mode con-
version is completed.
D040104ABH
Start-up
You can start the engine without inserting
the key. For detailed information refer to
the “Engine start/stop button” in section
5.
D040300AEN-EU
Smart key precautions
✽ ✽
NOTICE
• If, for some reason, you happen to lose
your smart key, you will not be able to
start the engine. Tow the vehicle, if
necessary, and contact an authorized
HYUNDAI dealer.
• A maximum of 2 smart keys can be registered to a single vehicle. If you
lose a smart key, you should immedi-
ately take the vehicle and key to your
authorized HYUNDAI dealer to pro-
tect it from potential theft.
• The smart key will not work if any of following occur:
- The smart key is close to a radiotransmitter such as a radio station or
an airport which can interfere with
normal operation of the smart key.
- You keep the smart key near a mobile two-way radio system or a
cellular phone.
- Another vehicle’s smart key is being operated close to your vehicle.
When the smart key does not work
correctly, open and close the door with
the mechanical key. If you have a
problem with the smart key, contact
an authorized HYUNDAI dealer.
Page 87 of 391
Features of your vehicle
10
4
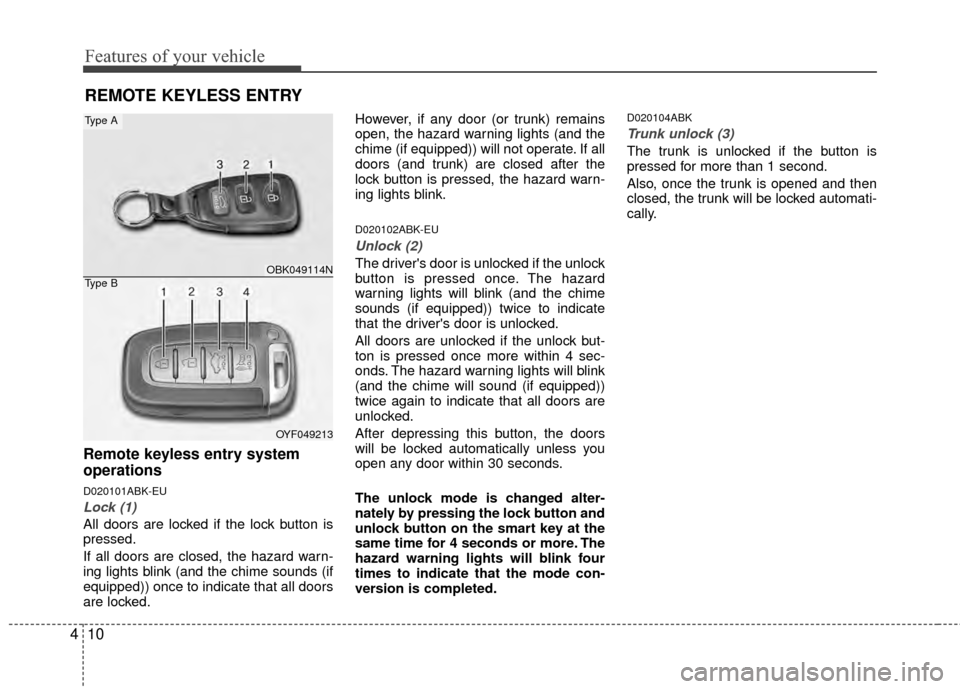
Remote keyless entry system
operations
D020101ABK-EU
Lock (1)
All doors are locked if the lock button is
pressed.
If all doors are closed, the hazard warn-
ing lights blink (and the chime sounds (if
equipped)) once to indicate that all doors
are locked. However, if any door (or trunk) remains
open, the hazard warning lights (and the
chime (if equipped)) will not operate. If all
doors (and trunk) are closed after the
lock button is pressed, the hazard warn-
ing lights blink.
D020102ABK-EU
Unlock (2)
The driver's door is unlocked if the unlock
button is pressed once. The hazard
warning lights will blink (and the chime
sounds (if equipped)) twice to indicate
that the driver's door is unlocked.
All doors are unlocked if the unlock but-
ton is pressed once more within 4 sec-
onds. The hazard warning lights will blink
(and the chime will sound (if equipped))
twice again to indicate that all doors are
unlocked.
After depressing this button, the doors
will be locked automatically unless you
open any door within 30 seconds.
The unlock mode is changed alter-
nately by pressing the lock button and
unlock button on the smart key at the
same time for 4 seconds or more. The
hazard warning lights will blink four
times to indicate that the mode con-
version is completed.
D020104ABK
Trunk unlock (3)
The trunk is unlocked if the button is
pressed for more than 1 second.
Also, once the trunk is opened and then
closed, the trunk will be locked automati-
cally.
REMOTE KEYLESS ENTRY
OBK049114N
OYF049213
Type A
Type B
Page 113 of 391
Features of your vehicle
36
4
To adjust the Zone setting:
1. Determine the desired Zone Number
based upon your current location on
the Zone Map.
2. Press and hold the button for more than 3 but less than 6 seconds, the
current Zone Number will appear on
the display.
3. Pressing and holding the button again will cause the numbers to incre-
ment (Note: they will repeat …13, 14,
15, 1, 2, …). Releasing the button
when the desired Zone Number
appears on the display will set the new
Zone.
4. Within about 5 seconds the compass will start displaying a compass head-
ing again.
There are some conditions that can
cause changes to the vehicle magnets,
such as installing a ski rack or a CB
antenna. Body repair work on the vehicle
can also cause changes to the vehicle's
magnetic field. In these situations, the
compass will need to be re-calibrated to
quickly correct for these changes. To re-
calibrate the compass: 1. Press and hold the button for more
than 6 seconds. When the compass
memory is cleared a "C" will appear in
the display.
2. To calibrate the compass, drive the vehicle in 2 complete circles at less
than 5 mph (8 km/h).
Integrated HomeLink
®Wireless Control
System
The HomeLink® Wireless Control
System provides a convenient way to
replace up to three hand-held radio-fre-
quency (RF) transmitters with a single
built-in device. This innovative feature will
learn the radio frequency codes of most
current transmitters to operate devices
such as gate operators, garage door
openers, entry door locks, security sys-
tems, even home lighting. Both standard
and rolling code-equipped transmitters
can be programmed by following the out-
lined procedures. Additional HomeLink
®
information can be found at: www.home-
link.com or by calling 1-800-355-3515. Retain the original transmitter of the RF
device you are programming for use in
other vehicles as well as for future
HomeLink
®programming. It is also sug-
gested that upon the sale of the vehicle,
the programmed HomeLink
®buttons be
erased for security purposes.
CAUTION
Before programming HomeLink®to
a garage door opener or gate oper- ator, make sure that people and objects are out of the way of thedevice to prevent potential harm ordamage. Do not use HomeLink
®
with any garage door opener thatlacks the safety stop and reverse features required by U.S. federalsafety standards (this includes any garage door opener model manu-factured before April 1, 1982). Agarage door that cannot detect anobject - signaling the door to stop and reverse - does not meet currentU.S. federal safety standards. Using a garage door opener without thesefeatures increases the risk of seri- ous injury or death.
Page 116 of 391
439
Features of your vehicle
Erasing HomeLink®buttons
Individual buttons cannot be erased.
However, to erase all three programmed
buttons:
1. Press and hold the two outer HomeLink
®buttons until the indicator
light begins to flash-after 20 seconds.
2. Release both buttons. Do not hold for longer than 30 seconds.
The Integrated HomeLink
®Wireless
Control System is now in the training
(learn) mode and can be programmed at
any time following the appropriate steps
in the Programming sections above. FCC ID: NZLZTVHL3
IC: 4112A-ZTVHL3
This device complies with Part 15 of
the FCC Rules.
Operation is subject to the following two
conditions:
1. this device may not cause harmful
interference, and
2. This device must accept any interfer- ence received, including interference
that may cause undesired operation.
NVS
®is a registered trademark and Z-
Nav™ is a trademark of the Gentex
Corporation, Zeeland, Michigan.
HomeLink
®is a registered trademark
owned by Johnson Controls,
Incorporated, Milwaukee, Wisconsin.
D140200AUN-EU
Outside rearview mirror
Be sure to adjust mirror angles before
driving.
Your vehicle is equipped with both left-
hand and right-hand outside rearview
mirrors. The mirrors can be adjusted
remotely with the remote switch. The mir-
ror heads can be folded back to prevent
damage during an automatic car wash or
when passing in a narrow street.
WARNING
The transceiver has been tested
and complies with FCC and
Industry Canada rules. Changes or
modifications not expressly
approved by the party responsible
for compliance could void the
user's authority to operate the
device.
WARNING - Rearview mir-
rors
The right outside rearview mirror is convex. Objects seen in the
mirror are closer than they
appear.
Use your interior rearview mirror or direct observation to deter-
mine the actual distance of fol-
lowing vehicles when changing
lanes.
Page 124 of 391
447
Features of your vehicle
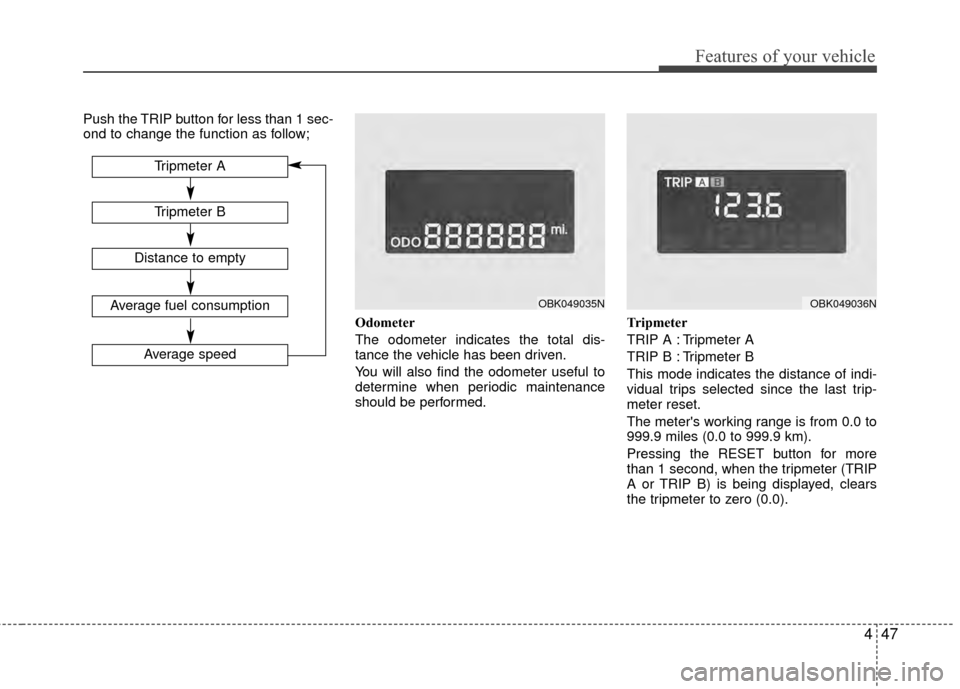
Push the TRIP button for less than 1 sec-
ond to change the function as follow;Odometer
The odometer indicates the total dis-
tance the vehicle has been driven.
You will also find the odometer useful to
determine when periodic maintenance
should be performed.Tripmeter
TRIP A : Tripmeter A
TRIP B : Tripmeter B
This mode indicates the distance of indi-
vidual trips selected since the last trip-
meter reset.
The meter's working range is from 0.0 to
999.9 miles (0.0 to 999.9 km).
Pressing the RESET button for more
than 1 second, when the tripmeter (TRIP
A or TRIP B) is being displayed, clears
the tripmeter to zero (0.0).
Tripmeter B
Tripmeter A
Distance to empty
Average fuel consumption
Average speed
OBK049035NOBK049036N
Page 125 of 391
Features of your vehicle
48
4
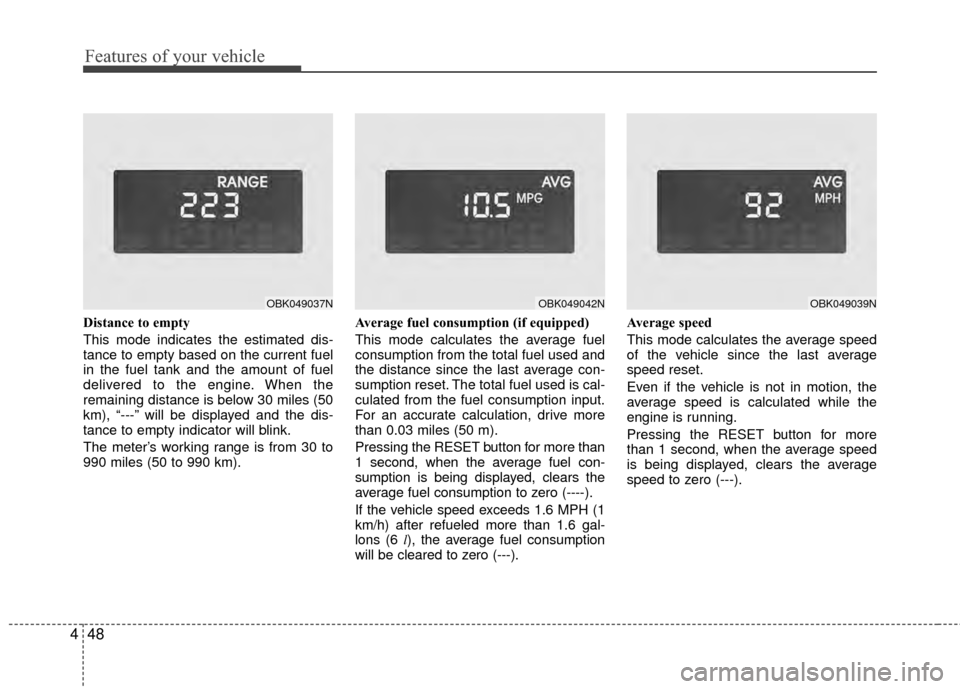
Distance to empty
This mode indicates the estimated dis-
tance to empty based on the current fuel
in the fuel tank and the amount of fuel
delivered to the engine. When the
remaining distance is below 30 miles (50
km), “---” will be displayed and the dis-
tance to empty indicator will blink.
The meter’s working range is from 30 to
990 miles (50 to 990 km). Average fuel consumption (if equipped)
This mode calculates the average fuel
consumption from the total fuel used and
the distance since the last average con-
sumption reset. The total fuel used is cal-
culated from the fuel consumption input.
For an accurate calculation, drive more
than 0.03 miles (50 m).
Pressing the RESET button for more than
1 second, when the average fuel con-
sumption is being displayed, clears the
average fuel consumption to zero (----).
If the vehicle speed exceeds 1.6 MPH (1
km/h) after refueled more than 1.6 gal-
lons (6 l
), the average fuel consumption
will be cleared to zero (---). Average speed
This mode calculates the average speed
of the vehicle since the last average
speed reset.
Even if the vehicle is not in motion, the
average speed is calculated while the
engine is running.
Pressing the RESET button for more
than 1 second, when the average speed
is being displayed, clears the average
speed to zero (---).
OBK049037NOBK049039NOBK049042N
Page 133 of 391

Features of your vehicle
56
4
D150323AUN-EU
ESC indicator (Electronic
Stability Control)
Type A
The ESC indicator will illuminate when
the ignition switch is turned ON, but
should go off after approximately 3 sec-
onds. When the ESC is on, it monitors the
driving conditions and under normal driv-
ing conditions, the ESC indicator will
remain off. When a slippery or low trac-
tion condition is encountered, the ESC
will operate, and the ESC indicator will
blink to indicate the ESC is operating.
Type B
The ESC indicator will illuminate when
the ignition switch is turned ON, but
should go off after approximately 3 sec-
onds. When the ESC is on, it monitors the
driving conditions and under normal driv-
ing conditions, the ESC indicator will
remain off. When a slippery or low trac-
tion condition is encountered, the ESC
will operate, and the ESC indicator will
blink to indicate the ESC is operating.
If ESC indicator illuminates while ESC
is operating, the ESC may have a mal-
function. Take your car to an authorized
HYUNDAI dealer and have the system
checked.
D150324AEN-EU
ESC OFF indicator
Type A
The ESC OFF indicator will illuminate
when the ignition switch is turned ON,
but should go off after approximately 3
seconds. To switch to ESC OFF mode,
press the ESC OFF button . The ESC
OFF indicator will illumi-
nate indicating the ESC is deactivated.
If this indicator stays on when ESC OFF
is not selected, the ESC may have a mal-
function. Take your car to an authorized
HYUNDAI dealer and have the system
checked.
With the ESC system in the stand by
position, if you use the parking brake to
stop the vehicle due abnormal brake
operation, the ESC system may be
stopped and ESC OFF indicator may
illuminate for about 5 minutes. Type B
The ESC OFF indicator will illuminate
when the ignition switch is turned ON,
but should go off after approximately 3
seconds. To switch to ESC OFF mode,
press the ESC OFF button . The ESC
OFF indicator will illuminate indicating
the ESC is deactivated.
With the ESC system in the stand by
position, if you use the parking brake to
stop the vehicle due abnormal brake
operation, the ESC system may be
stopped and ESC OFF indicator may
illuminate for about 5 minutes.
CAUTION
Do not use the parking brake to
stop the vehicle, except in an emer-gency situation.
Page 154 of 391
477
Features of your vehicle
Air conditioning system operation tips
If the vehicle has been parked in directsunlight during hot weather, open the
windows for a short time to let the hot
air inside the vehicle escape.
To help reduce moisture inside of the windows on rainy or humid days,
decrease the humidity inside the vehi-
cle by operating the air conditioning
system.
During air conditioning system opera- tion, you may occasionally notice a
slight change in engine speed as the
air conditioning compressor cycles.
This is a normal system operation
characteristic.
Use the air conditioning system every month, even if only for a few minutes,
to ensure maximum system perform-
ance. When using the air conditioning sys-
tem, you may notice clear water drip-
ping (or even puddling) on the ground
under the passenger side of the vehi-
cle. This is a normal system operation
characteristic.
Operating the air conditioning system in the recirculated air position provides
maximum cooling, however, continual
operation in this mode may cause the
air inside the vehicle to become stale.
During cooling operation, you may occasionally notice a misty air flow
because of rapid cooling and humid air
intake. This is a normal system opera-
tion characteristic.
D230300BEN
Climate control air filter
(if equipped)
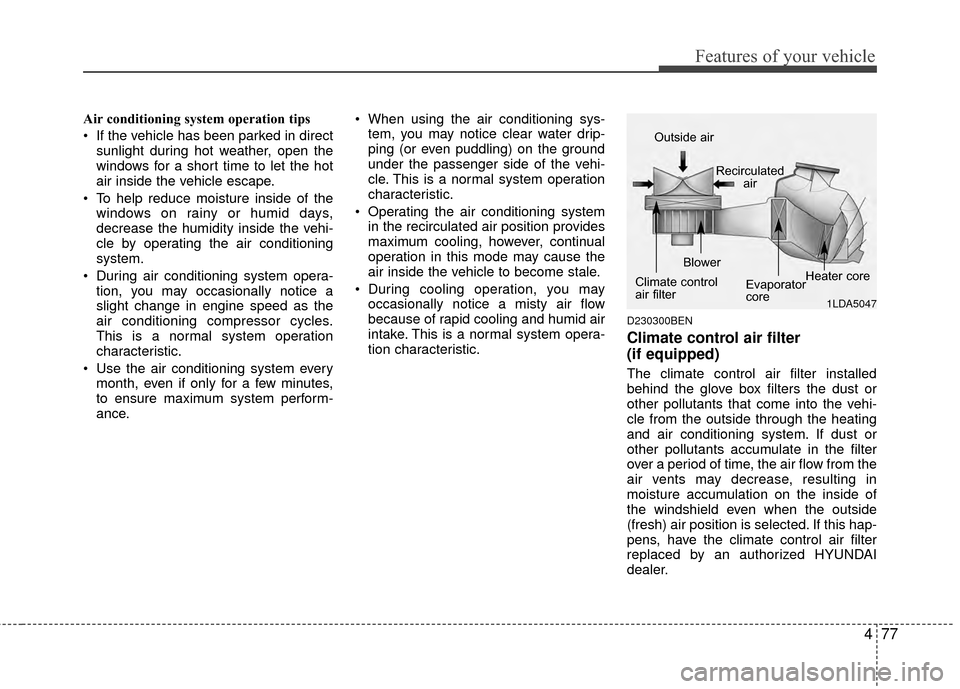
The climate control air filter installed
behind the glove box filters the dust or
other pollutants that come into the vehi-
cle from the outside through the heating
and air conditioning system. If dust or
other pollutants accumulate in the filter
over a period of time, the air flow from the
air vents may decrease, resulting in
moisture accumulation on the inside of
the windshield even when the outside
(fresh) air position is selected. If this hap-
pens, have the climate control air filter
replaced by an authorized HYUNDAI
dealer.
1LDA5047
Outside air
Recirculatedair
Climate control
air filter Blower
Evaporator
coreHeater core