buttons HYUNDAI GENESIS COUPE 2014 Owners Manual
[x] Cancel search | Manufacturer: HYUNDAI, Model Year: 2014, Model line: GENESIS COUPE, Model: HYUNDAI GENESIS COUPE 2014Pages: 438, PDF Size: 40.35 MB
Page 90 of 438
Features of your vehicle
6 4
SMART KEY (IF EQUIPPED)
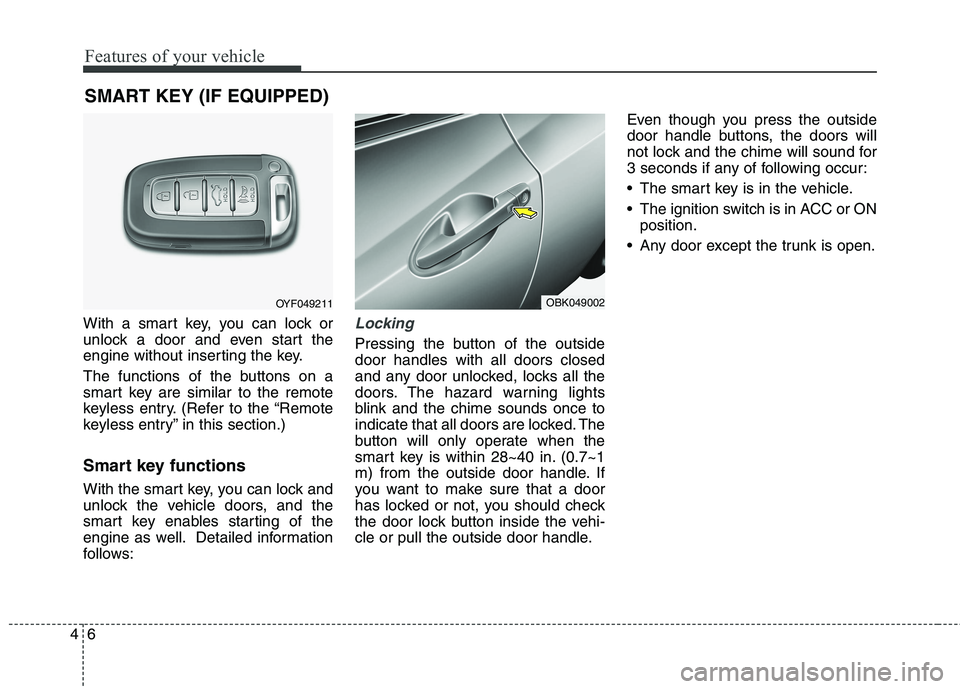
With a smart key, you can lock or
unlock a door and even start the
engine without inserting the key.
The functions of the buttons on a
smart key are similar to the remote
keyless entry. (Refer to the “Remote
keyless entry” in this section.)
Smart key functions
With the smart key, you can lock and
unlock the vehicle doors, and the
smart key enables starting of the
engine as well. Detailed information
follows:
Locking
Pressing the button of the outside
door handles with all doors closed
and any door unlocked, locks all the
doors. The hazard warning lights
blink and the chime sounds once to
indicate that all doors are locked. The
button will only operate when the
smart key is within 28~40 in. (0.7~1
m) from the outside door handle. If
you want to make sure that a door
has locked or not, you should check
the door lock button inside the vehi-
cle or pull the outside door handle.Even though you press the outside
door handle buttons, the doors will
not lock and the chime will sound for
3 seconds if any of following occur:
The smart key is in the vehicle.
The ignition switch is in ACC or ON
position.
Any door except the trunk is open.
OYF049211OBK049002
Page 123 of 438
439
Features of your vehicle
Retain the original transmitter of the
RF device you are programming for
use in other vehicles as well as for
future HomeLink
®programming. It is
also suggested that upon the sale of
the vehicle, the programmed
HomeLink
®buttons be erased for
security purposes.
✽ ✽
NOTICE - Programming
HomeLink®
• When programming a garage
door opener, it is advised to park
the vehicle outside of the garage.
• It is recommended that a new bat-
tery be placed in the hand-held
transmitter of the device being pro-
grammed to HomeLink
®for quick-
er training and accurate transmis-
sion of the radio-frequency signal.
• Some vehicles may require the
ignition switch to be turned to the
second (or "accessories") position
for programming and/or opera-
tion of HomeLink
®.
• In the event that there are still pro-
gramming difficulties or questions
after following the programming
steps listed below, contact
HomeLink
®at: www.homelink.com
or 1-800-355-3515.
WARNING
Before programming HomeLink®
to a garage door opener or gate
operator, make sure that people
and objects are out of the way of
the device to prevent potential
harm or damage. Do not use
HomeLink
®with any garage door
opener that lacks the safety stop
and reverse features required by
U.S. federal safety standards (this
includes any garage door opener
model manufactured before April
1, 1982). A garage door that can-
not detect an object - signaling
the door to stop and reverse -
does not meet current U.S. feder-
al safety standards. Using a
garage door opener without these
features increases the risk of seri-
ous injury or death.
Page 124 of 438
Features of your vehicle
40 4
Programming
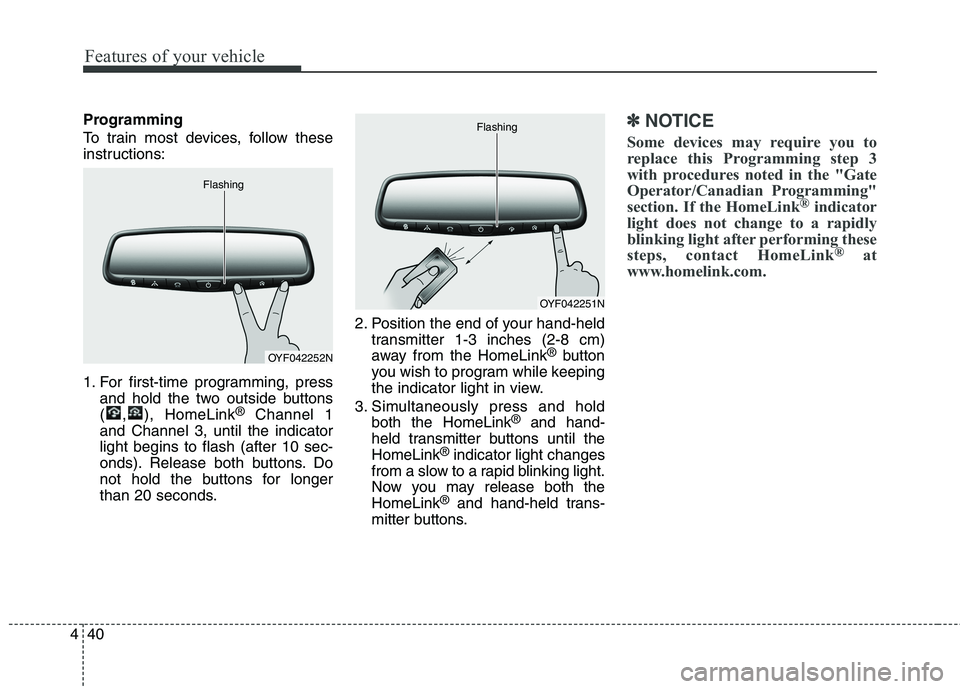
To train most devices, follow these
instructions:
1. For first-time programming, press
and hold the two outside buttons
( , ), HomeLink
®Channel 1
and Channel 3, until the indicator
light begins to flash (after 10 sec-
onds). Release both buttons. Do
not hold the buttons for longer
than 20 seconds.2. Position the end of your hand-held
transmitter 1-3 inches (2-8 cm)
away from the HomeLink
®button
you wish to program while keeping
the indicator light in view.
3. Simultaneously press and hold
both the HomeLink
®and hand-
held transmitter buttons until the
HomeLink
®indicator light changes
from a slow to a rapid blinking light.
Now you may release both the
HomeLink
®and hand-held trans-
mitter buttons.
✽ ✽
NOTICE
Some devices may require you to
replace this Programming step 3
with procedures noted in the "Gate
Operator/Canadian Programming"
section. If the HomeLink
®indicator
light does not change to a rapidly
blinking light after performing these
steps, contact HomeLink
®at
www.homelink.com.
OYF042252N Flashing
OYF042251N Flashing
Page 126 of 438
Features of your vehicle
42 4
Reprogramming a single
HomeLink®button
To program a device to HomeLink®
using a HomeLink®button previously
trained, follow these steps:
1. Press and hold the desired
HomeLink
®button. DO NOT release
the button.
2. The indicator light will begin to flash
after 20 seconds. Without releasing
the HomeLink
®button, proceed
with "Programming" step 2.
For questions or comments, contact
HomeLink
®at www.homelink.comor
1-800-355-3515.Erasing HomeLink
®buttons
Individual buttons cannot be erased.
However, to erase all three pro-
grammed buttons:
1. Press and hold the two outer
HomeLink
®buttons until the indi-
cator light begins to flash after 10
seconds.
2. Release both buttons. Do not hold
for longer than 20 seconds.
The Integrated HomeLink
®Wireless
Control System is now in the training
(learn) mode and can be pro-
grammed at any time following the
appropriate steps in the Programming
sections above.FCC ID: NZLTLMHL4
IC: 4112A-TLMHL4
This device complies with Part 15
of the FCC Rules.
Operation is subject to the following
two conditions:
1. This device may not cause harm-
ful interference, and
2. This device must accept any inter-
ference received, including inter-
ference that may cause undesired
operation.
CAUTION
The transceiver has been tested
and complies with FCC and
Industry Canada rules. Changes
or modifications not expressly
approved by the party responsi-
ble for compliance could void
the user's authority to operate
the device.
Page 182 of 438
Features of your vehicle
98 4
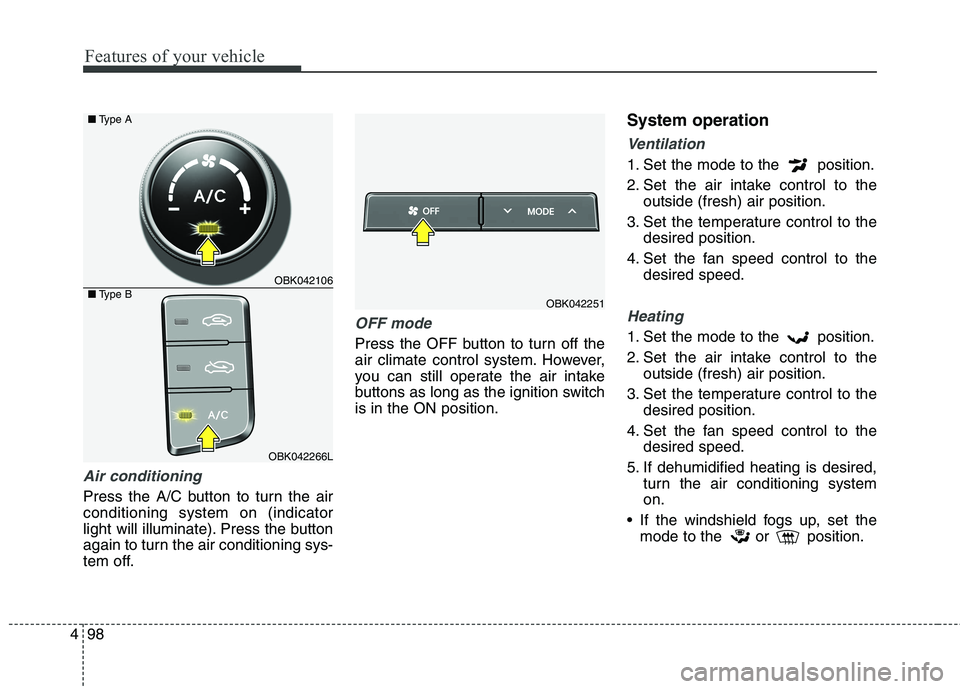
Air conditioning
Press the A/C button to turn the air
conditioning system on (indicator
light will illuminate). Press the button
again to turn the air conditioning sys-
tem off.
OFF mode
Press the OFF button to turn off the
air climate control system. However,
you can still operate the air intake
buttons as long as the ignition switch
is in the ON position.
System operation
Ventilation
1. Set the mode to the position.
2. Set the air intake control to the
outside (fresh) air position.
3. Set the temperature control to the
desired position.
4. Set the fan speed control to the
desired speed.
Heating
1. Set the mode to the position.
2. Set the air intake control to the
outside (fresh) air position.
3. Set the temperature control to the
desired position.
4. Set the fan speed control to the
desired speed.
5. If dehumidified heating is desired,
turn the air conditioning system
on.
If the windshield fogs up, set the
mode to the or position.
OBK042251
OBK042106
OBK042266L ■Type A
■Type B
Page 189 of 438
4105
Features of your vehicle
✽ ✽
NOTICE
Never place anything over the sen-
sor located on the instrument panel
to ensure better control of the heat-
ing and cooling system.
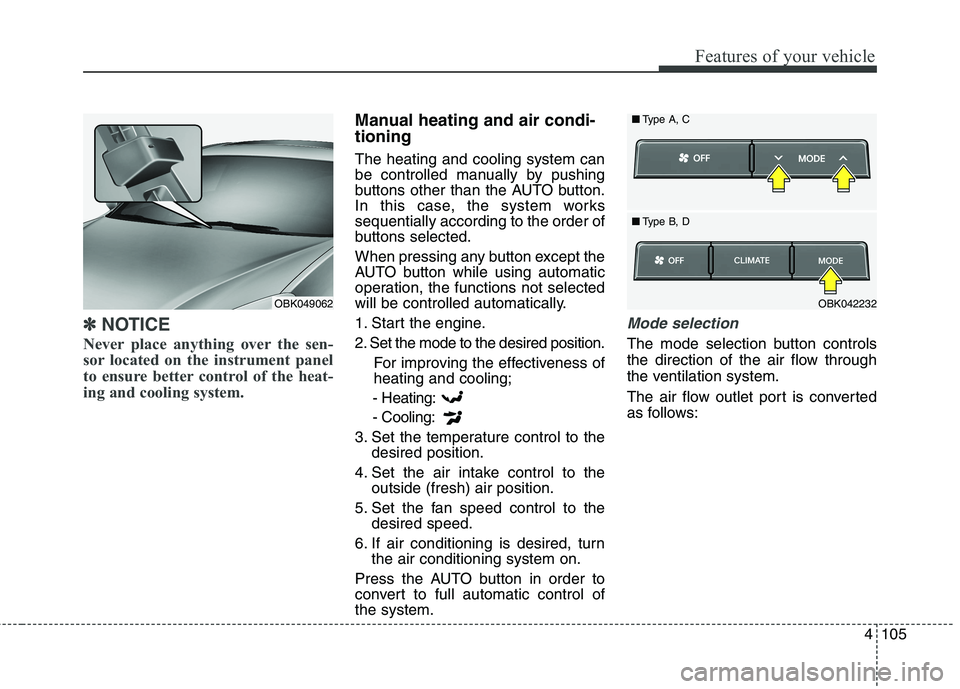
Manual heating and air condi-
tioning
The heating and cooling system can
be controlled manually by pushing
buttons other than the AUTO button.
In this case, the system works
sequentially according to the order of
buttons selected.
When pressing any button except the
AUTO button while using automatic
operation, the functions not selected
will be controlled automatically.
1. Start the engine.
2. Set the mode to the desired position.
For improving the effectiveness of
heating and cooling;
- Heating:
- Cooling:
3. Set the temperature control to the
desired position.
4. Set the air intake control to the
outside (fresh) air position.
5. Set the fan speed control to the
desired speed.
6. If air conditioning is desired, turn
the air conditioning system on.
Press the AUTO button in order to
convert to full automatic control of
the system.
Mode selection
The mode selection button controls
the direction of the air flow through
the ventilation system.
The air flow outlet port is converted
as follows:
OBK042232 ■Type A, C
■Type B, DOBK049062
Page 194 of 438
Features of your vehicle
110 4
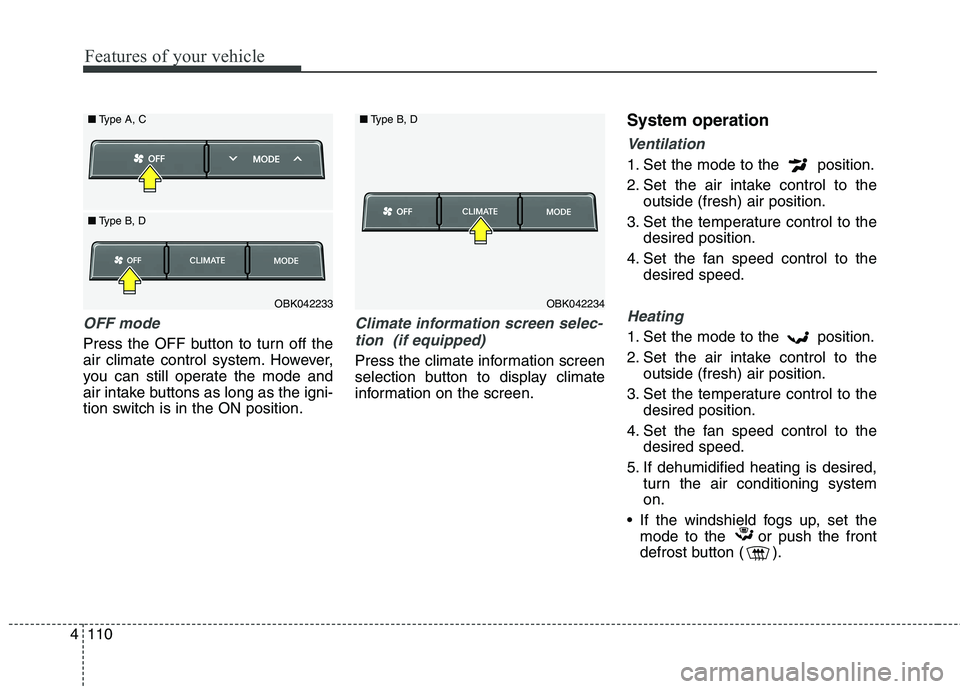
OFF mode
Press the OFF button to turn off the
air climate control system. However,
you can still operate the mode and
air intake buttons as long as the igni-
tion switch is in the ON position.
Climate information screen selec-
tion (if equipped)
Press the climate information screen
selection button to display climate
information on the screen.
System operation
Ventilation
1. Set the mode to the position.
2. Set the air intake control to the
outside (fresh) air position.
3. Set the temperature control to the
desired position.
4. Set the fan speed control to the
desired speed.
Heating
1. Set the mode to the position.
2. Set the air intake control to the
outside (fresh) air position.
3. Set the temperature control to the
desired position.
4. Set the fan speed control to the
desired speed.
5. If dehumidified heating is desired,
turn the air conditioning system
on.
If the windshield fogs up, set the
mode to the or push the front
defrost button ( ).
OBK042234 ■Type B, DOBK042233 ■Type A, C
■Type B, D
Page 213 of 438
4129
Features of your vehicle
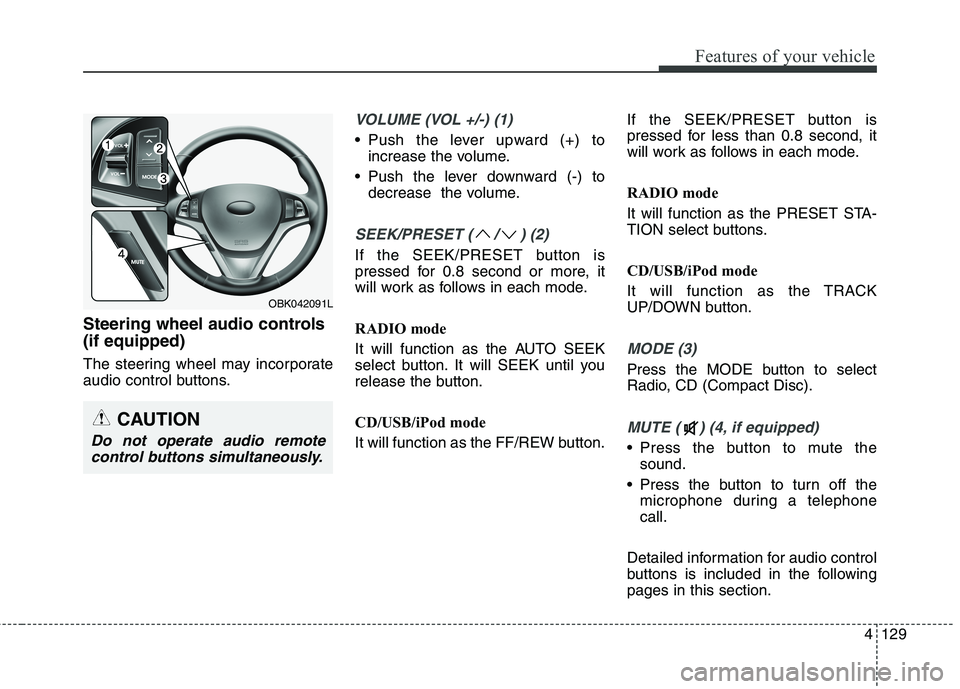
Steering wheel audio controls
(if equipped)
The steering wheel may incorporate
audio control buttons.
VOLUME (VOL +/-) (1)
Push the lever upward (+) to
increase the volume.
Push the lever downward (-) to
decrease the volume.
SEEK/PRESET ( / ) (2)
If the SEEK/PRESET button is
pressed for 0.8 second or more, it
will work as follows in each mode.
RADIO mode
It will function as the AUTO SEEK
select button. It will SEEK until you
release the button.
CD/USB/iPod mode
It will function as the FF/REW button.If the SEEK/PRESET button is
pressed for less than 0.8 second, it
will work as follows in each mode.
RADIO mode
It will function as the PRESET STA-
TION select buttons.
CD/USB/iPod mode
It will function as the TRACK
UP/DOWN button.
MODE (3)
Press the MODE button to select
Radio, CD (Compact Disc).
MUTE ( ) (4, if equipped)
Press the button to mute the
sound.
Press the button to turn off the
microphone during a telephone
call.
Detailed information for audio control
buttons is included in the following
pages in this section.
CAUTION
Do not operate audio remote
control buttons simultaneously.
OBK042091L
Page 224 of 438
Features of your vehicle
140 4
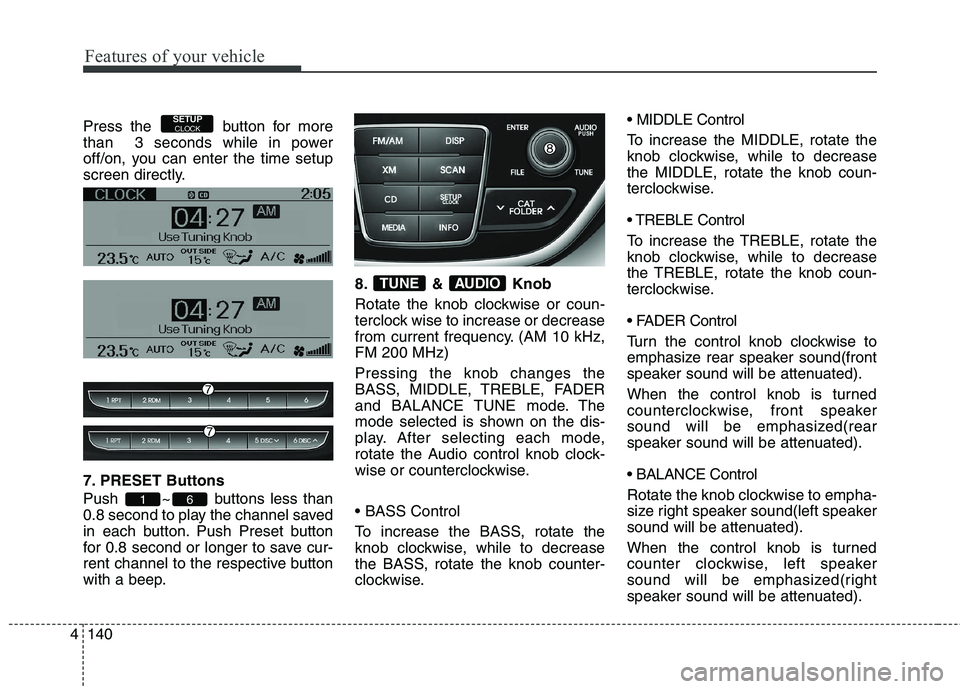
Press the button for more
than 3 seconds while in power
off/on, you can enter the time setup
screen directly.
7. PRESET Buttons
Push ~ buttons less than
0.8 second to play the channel saved
in each button. Push Preset button
for 0.8 second or longer to save cur-
rent channel to the respective button
with a beep.8. & Knob
Rotate the knob clockwise or coun-
terclock wise to increase or decrease
from current frequency. (AM 10 kHz,
FM 200 MHz)
Pressing the knob changes the
BASS, MIDDLE, TREBLE, FADER
and BALANCE TUNE mode. The
mode selected is shown on the dis-
play. After selecting each mode,
rotate the Audio control knob clock-
wise or counterclockwise.
To increase the BASS, rotate the
knob clockwise, while to decrease
the BASS, rotate the knob counter-
clockwise. MIDDLE Control
To increase the MIDDLE, rotate the
knob clockwise, while to decrease
the MIDDLE, rotate the knob coun-
terclockwise.
Control
To increase the TREBLE, rotate the
knob clockwise, while to decrease
the TREBLE, rotate the knob coun-
terclockwise.
Turn the control knob clockwise to
emphasize rear speaker sound(front
speaker sound will be attenuated).
When the control knob is turned
counterclockwise, front speaker
sound will be emphasized(rear
speaker sound will be attenuated).
Rotate the knob clockwise to empha-
size right speaker sound(left speaker
sound will be attenuated).
When the control knob is turned
counter clockwise, left speaker
sound will be emphasized(right
speaker sound will be attenuated).
AUDIOTUNE
61
SETUPCLOCK
Page 233 of 438
4149
Features of your vehicle
✽ ✽
NOTICE FOR USING
THE iPod®DEVICE
• Some iPod models might not
support the communication
protocol and the files will not be
played.
Supported iPod models:
- iPod Mini
- iPod 4th(Photo) ~ 6th(Classic)
generation
- iPod Nano 1st~4th generation
- iPod Touch 1st~2nd generation
• The order of search or playback
of songs in the iPod can be dif-
ferent from the order searched
in the audio system.
• If the iPod disabled due to its
own malfunction, reset the iPod.
(Reset: Refer to iPod manual)
• An iPod may not operate nor-
mally on low battery.
(Continued)(Continued)
• Some iPod devices, such as the
iPhone, can be connected
through the Bluetooth®
Wireless Technology interface.
The device must have audio
Bluetooth
®Wireless Technology
capability (such as for stereo
headphone Bluetooth
®Wireless
Technology). The device can
play, but it will not be controlled
by the audio system.
CAUTION IN USING
THE iPod®DEVICE
The Hyundai iPod Power
Cable is needed in order to
operate iPod with the audio
buttons on the audio system.
The USB cable provided by
Apple may cause malfunction
and should not be used for
Hyundai vehicles.
❋ ❋
The Hyundai iPod Power
Cable may be purchased
through your Hyundai
Dealership.
When connecting iPod with
the iPod Power Cable, insert
the connector to the multime-
dia socket completely. If not
inserted completely, commu-
nications between iPod and
audio may be interrupted.
(Continued)