reset HYUNDAI GENESIS G80 2009 User Guide
[x] Cancel search | Manufacturer: HYUNDAI, Model Year: 2009, Model line: GENESIS G80, Model: HYUNDAI GENESIS G80 2009Pages: 332, PDF Size: 20.46 MB
Page 161 of 332
Features of your vehicle
100
4
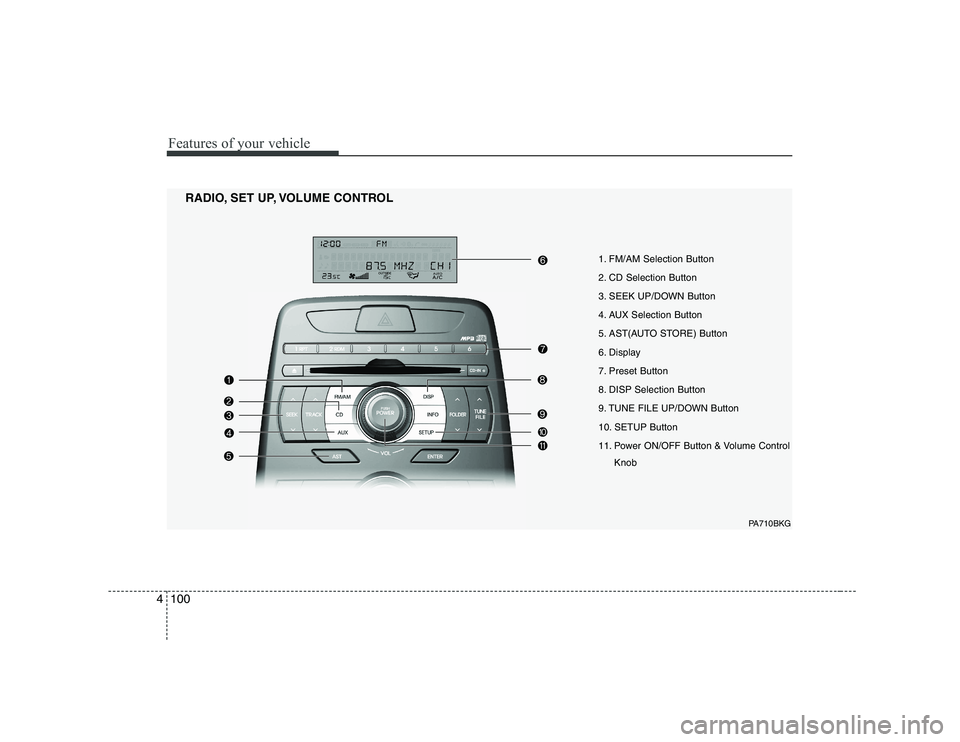
1. FM/AM Selection Button
2. CD Selection Button
3. SEEK UP/DOWN Button
4. AUX Selection Button
5. AST(AUTO STORE) Button
6. Display
7. Preset Button
8. DISP Selection Button
9. TUNE FILE UP/DOWN Button
10. SETUP Button
11. Power ON/OFF Button & Volume Control
Knob
RADIO, SET UP, VOLUME CONTROL
PA710BKG
Page 162 of 332
4101
Features of your vehicle
1. FM/AM Selection Button
Turn to FM or AM mode, and toggles in the order of FM1 ➟FM2 ➟ AM ➟ FM1...
when the button is pressed each time.
2. CD Selection Button If there is a CD in the CDP DECK, it
switches from the previous mode to CD
mode and plays the song. If there is no
CD, then it displays the message "No
Media" and returns to the previous mode.
3. SEEK UP/DOWN Button
When the [SEEK / ] button is pressed, it increases / decreases the
band frequency by 200kHz to automati-
cally select channel. Stops at the original
frequency if no channel is found.
4. AUX Selection Button
If a device is connected to AUX then it
toggles. USB ➟AUX ➟USB... when the
button is pressed each time.(It will not
turn to AUX if the auxiliary device is notconnected.) 5. AST(AUTO STORE) Button When AST is pressed, frequency is stored
on the preset memory [1]~[6] and auto-
matically plays the channel stored on thePreset [1].
If no channels have been stored because
there was no channel received, will return
to the previous channel.
6. Display
Displays the current time, mode, fre- quency AST status and preset channel.
7. Preset Button
Press [1]~[6] buttons less than 0.8 sec-
ond to play the channel saved in each
button.
Press [1]~[6] button more than 0.8 sec-
ond or longer to save current station to
the respective button with a beep.
8. DISP Selection Button
Turns on/off the displayed data and light
on LCD.
9. TUNE FILE UP/DOWN Button
When the [TUNE / ] button is pressed, it increases / decreases the
band frequency by 200kHz from current
frequency.
10. SETUP Button
Press the button to change the CLOCK,
TONE, POSITION, AVC, TEMP and
SCROLL option modes.
11. Power ON/OFF Button &
Volume Control Knob
Turn on/off the set When the IGNITION
SWITCH is on ACC or ON. If the button
is turned to the right, it increases the vol-
ume and left, decreases the volume.
Page 173 of 332
Features of your vehicle
112
4
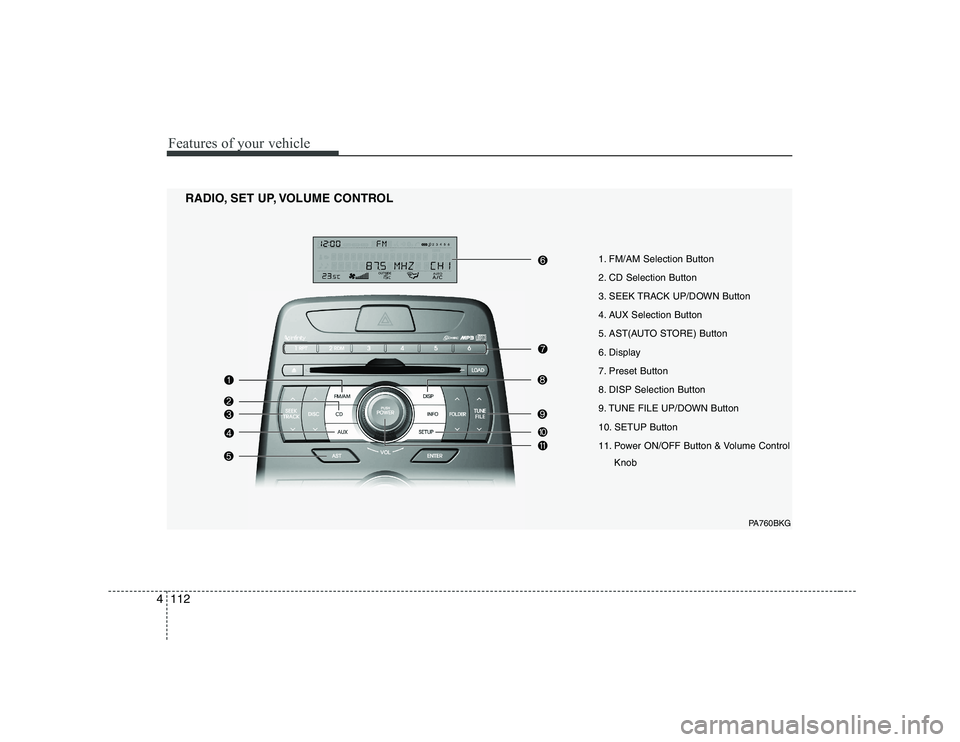
1. FM/AM Selection Button
2. CD Selection Button
3. SEEK TRACK UP/DOWN Button
4. AUX Selection Button
5. AST(AUTO STORE) Button
6. Display
7. Preset Button
8. DISP Selection Button
9. TUNE FILE UP/DOWN Button
10. SETUP Button
11. Power ON/OFF Button & Volume Control
Knob
RADIO, SET UP, VOLUME CONTROL
PA760BKG
Page 174 of 332
4113
Features of your vehicle
1. FM/AM Selection Button
Turn to FM or AM mode, and toggles in the order of FM1 ➟FM2 ➟ AM ➟ FM1...
when the button is pressed each time.
2. CD Selection Button If there is a CD in the CDP DECK, it
switches from the previous mode to CD
mode and plays the song. If there is no
CD, then it displays the message "No
Media" and returns to the previous mode.
3. SEEK TRACK UP/DOWN Button
When the [SEEK / ] button is pressed, it increases / decreases the
band frequency by 200kHz to automati-
cally select channel. Stops at the original
frequency if no channel is found.
4. AUX Selection Button
If a device is connected to AUX then it
toggles. USB ➟AUX ➟USB... when the button is
pressed each time.(It will not turn to AUX
if the auxiliary device is not connected.) 5. AST(AUTO STORE) Button When AST is pressed, frequency is stored
on the preset memory [1]~[6] and auto-
matically plays the channel stored on thePreset [1].
If no channels have been stored because
there was no channel received, will return
to the previous channel.
6. Display
Displays the current time, mode, frequen- cy AST status and preset channel.
7. Preset Button
Press [1] ~ [6] buttons less than 0.8 sec-
ond to play the channel saved in each
button. Press [1]~[6] button more than
0.8 second or longer to save current sta-
tion to the respective button with a beep.
8. DISP Selection Button
Turns on/off the displayed data and light
on LCD.
9. TUNE FILE UP/DOWN Button
When the [TUNE / ] button is pressed, it increases / decreases the
band frequency by 200kHz from current
frequency.
10. SETUP Button
Press the button to change the CLOCK,
TONE, POSITION, AVC, TEMP and
SCROLL option modes.
11. Power ON/OFF Button &
Volume Control Knob
Turn on/off the set When the IGNITION
SWITCH is on ACC or ON. If the button
is turned to the right, it increases the vol-
ume and left, decreases the volume.
Page 219 of 332
535
Driving your vehicle
Operate the parking brake. Do notoperate the parking brake while driving
except in an emergency situation.
Each of these actions will cancel cruise
control operation (the SET indicator light in the instrument cluster will go off), but itwill not turn the system off. If you wish to
resume cruise control operation, movethe lever up (to RES+). You will return to your previously preset speed.
E090600ABH
To resume cruising speed at
more than approximately 40 km/h(25 mph):
If any method other than the cruise
ON/OFF switch was used to cancel cruis-
ing speed and the system is still activat-ed, the most recent set speed will auto-
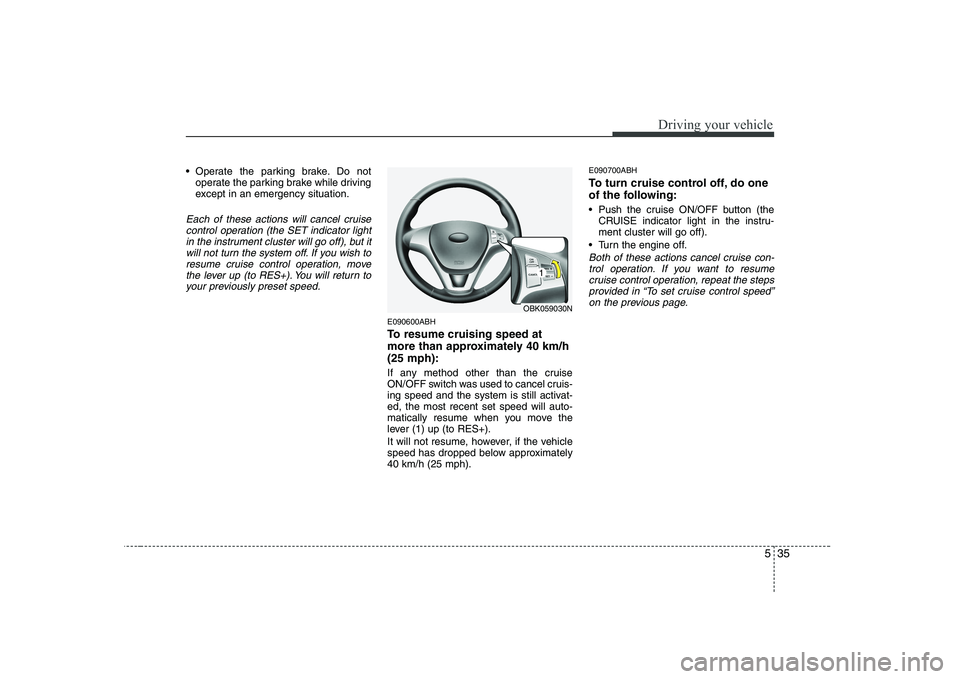
matically resume when you move the
lever (1) up (to RES+).
It will not resume, however, if the vehicle
speed has dropped below approximately40 km/h (25 mph). E090700ABH
To turn cruise control off, do one
of the following:
Push the cruise ON/OFF button (the
CRUISE indicator light in the instru- ment cluster will go off).
Turn the engine off.
Both of these actions cancel cruise con- trol operation. If you want to resumecruise control operation, repeat the stepsprovided in “To set cruise control speed”
on the previous page.
OBK059030N
1
Page 283 of 332
733
Maintenance
G190300ABK Reset items
Items should be reset after the battery
has been discharged or the battery hasbeen disconnected.
Sunroof (See section 4)
Trip computer (See section 4)
Climate control system (See section 4)
Clock (See section 4)
Audio (See section 4)
WARNING
Before performing maintenance or recharging the battery, turn off all accessories and stop the
engine.
The negative battery cable must be removed first and installed
last when the battery is discon-nected.
Operation related to the battery should be done in an authorized
HYUNDAI dealer.
CAUTION
Keep the battery away from water
or any liquid.
For your safety, use the authentic- ity by approved authorized
HYUNDAI dealer, when you replace the battery.
Page 287 of 332
737
Maintenance
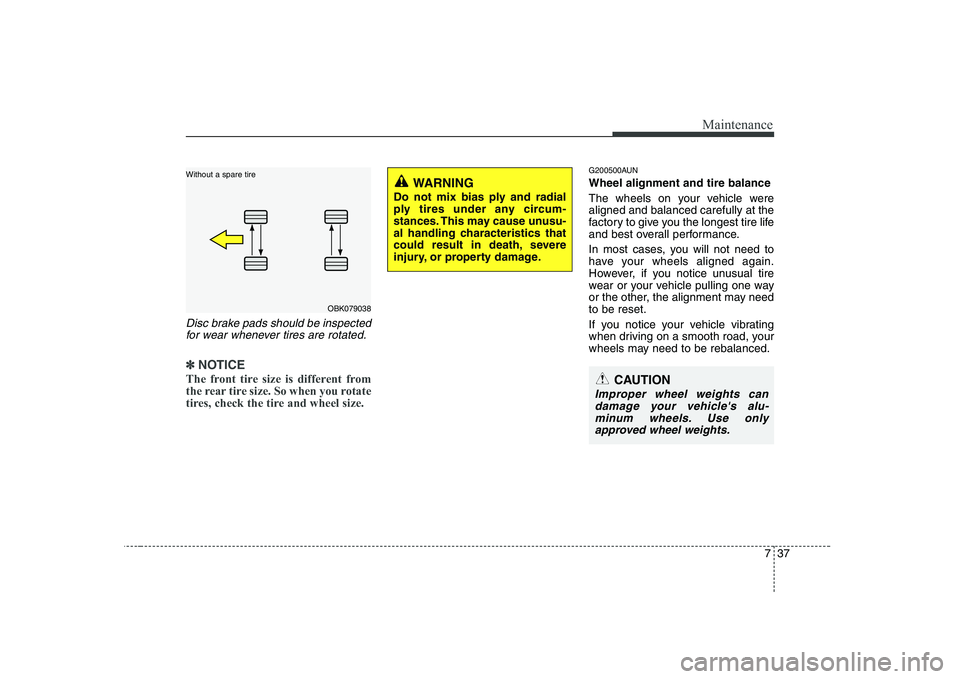
Disc brake pads should be inspectedfor wear whenever tires are rotated.
✽✽ NOTICE
The front tire size is different from
the rear tire size. So when you rotate
tires, check the tire and wheel size.
G200500AUN Wheel alignment and tire balance
The wheels on your vehicle were aligned and balanced carefully at the
factory to give you the longest tire life
and best overall performance.
In most cases, you will not need to
have your wheels aligned again.
However, if you notice unusual tire
wear or your vehicle pulling one way
or the other, the alignment may needto be reset.
If you notice your vehicle vibrating
when driving on a smooth road, your
wheels may need to be rebalanced.
OBK079038
Without a spare tire
WARNING
Do not mix bias ply and radial
ply tires under any circum-
stances. This may cause unusu-
al handling characteristics that
could result in death, severe
injury, or property damage.
CAUTION
Improper wheel weights can damage your vehicle's alu-minum wheels. Use only approved wheel weights.