torque Hyundai Getz 2002 Owner's Manual
[x] Cancel search | Manufacturer: HYUNDAI, Model Year: 2002, Model line: Getz, Model: Hyundai Getz 2002Pages: 428, PDF Size: 6.13 MB
Page 153 of 428
WHAT TO DO IN AN EMERGENCY 3- 11
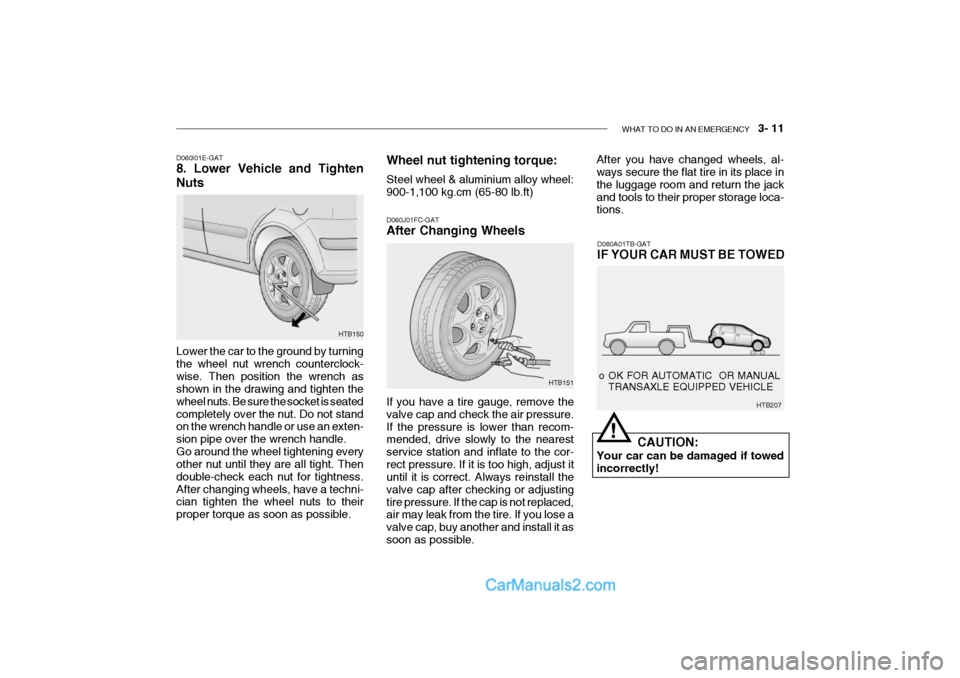
Lower the car to the ground by turning the wheel nut wrench counterclock-wise. Then position the wrench as shown in the drawing and tighten the wheel nuts. Be sure the socket is seatedcompletely over the nut. Do not stand on the wrench handle or use an exten- sion pipe over the wrench handle.Go around the wheel tightening every other nut until they are all tight. Then double-check each nut for tightness.After changing wheels, have a techni- cian tighten the wheel nuts to their proper torque as soon as possible.
D060I01E-GAT 8. Lower Vehicle and Tighten Nuts
D060J01FC-GAT After Changing Wheels If you have a tire gauge, remove the valve cap and check the air pressure.If the pressure is lower than recom- mended, drive slowly to the nearest service station and inflate to the cor-rect pressure. If it is too high, adjust it until it is correct. Always reinstall the valve cap after checking or adjustingtire pressure. If the cap is not replaced, air may leak from the tire. If you lose a valve cap, buy another and install it assoon as possible.
Wheel nut tightening torque: Steel wheel & aluminium alloy wheel: 900-1,100 kg.cm (65-80 lb.ft)
HTB150
HTB151 After you have changed wheels, al- ways secure the flat tire in its place in the luggage room and return the jackand tools to their proper storage loca- tions.
D080A01TB-GAT IF YOUR CAR MUST BE TOWED
CAUTION:
Your car can be damaged if towed incorrectly! o OK FOR AUTOMATIC OR MANUAL
TRANSAXLE EQUIPPED VEHICLE
HTB207
!
Page 172 of 428
5- 10 VEHICLE MAINTENANCE REQUIREMENTS
F070L01A-AAT
o Suspension Mounting Bolts
Check the suspension connections
for looseness or damage. Retighten to the specified torque. F070M01A-AAT
o Steering Gear Box, Linkage &
Boots/Lower arm Ball Joint
With the vehicle stopped and engine
off, check for excessive free-play inthe steering wheel. Check the linkage for bends or damage. Check the dust boots and ball joints for deterioration,cracks, or damage. Replace any dam- aged parts.
F070N01A-AAT
o Power Steering Pump, Belt and
Hoses
Check the power steering pump and
hoses for leakage and damage. Re- place any damaged or leaking parts immediately. Inspect the power steer- ing belt for evidence of cuts, cracks,excessive wear, oiliness and proper tension. Replace or adjust it if neces- sary.
F070J01A-AAT
o Brake Pads, Calipers and
Rotors
Check the pads for excessive wear,
discs for run out and wear, and cali-pers for fluid leakage.
F070K01A-AAT
o Exhaust Pipe and Muffler
Visually inspect the exhaust pipes,
muffler and hangers for cracks, dete-rioration, or damage. Start the engineand listen carefully for any exhaust gas leakage. Tighten connections or replace parts as necessary.
F070F01A-AAT
o Brake Hoses and Lines Visually check for proper installation, chafing, cracks, deterioration and any leakage. Replace any deteriorated or damaged parts immediately. F070G02A-AAT
o Brake Fluid Check brake fluid level in the brake fluid reservoir. The level should be between "MIN" and "MAX" marks onthe side of the reservoir. Use only hydraulic brake fluid conforming to DOT 3 or DOT 4. F070H01A-AAT
o Rear Brake Drums/Linings
Parking Brake
Check the rear brake drums and lin- ings for scoring, burning, leaking fluid, broken parts, and excessive wear. Inspect the parking brake system in-cluding the parking brake lever and cables. For detailed service proce- dures, refer to the Shop Manual.
Page 183 of 428

6- 10 DO-IT-YOURSELF MAINTENANCE
The engine oil and filter should be changed at those intervals specified in the maintenance schedule in Section 5.If the car is being driven in severe conditions, more frequent oil and filter changes are required.1.6L
F040A02TB
Oil filler cap
Drain plug
Oil filter The procedure for changing the oil and filter is as follows:
1. Park the car on level ground and set
the parking brake. Start the engine and let it warm up until the needle onthe coolant temperature gauge moves above the lowest mark. Turn the engine off and place the gear selec-tor lever in "P" (automatic) or reverse gear (manual transaxle). Set the park- ing brake.
2. Open the hood and remove the en- gine oil filler cap.
3. Slide underneath the car and loosen the drain plug by turning it counter- clockwise with a wrench of the proper size. Be sure that a drain pan is inposition to catch the oil as it drains out, then remove the drain plug.
WARNING:
Be very careful when draining theengine oil as it may be hot enough to burn you!
!
4. When the oil has stopped draining, replace the drain plug using a new washer and retighten by turning itclockwise. Tightening torque is: 3.5 ~ 4.5 kgf.m
5. Remove the oil filter by turning it counterclockwise with a oil filter wrench of the proper size. A certain amount of oil will come out when you remove the filter. So be sure tohave your drain pan in place under- neath it.
6. Install a new oil filter in accordance with the instructions on the cartonor on the filter itself. Do not over- tighten. Tightening torque: Gasoline - 1.2 ~ 1.6 kgf.m
Diesel(LHD(Except E.C), RHD) - 2.3 ~ 2.5 kgf.m Be sure that the mounting surface on the engine is clean and that the old gasket is removed completely.Lubricate the new gasket on the filter with clean engine oil before installation.
.........
Diesel (RHD)
KCHB001A-1
Engine oil drain plugOil filter................
Diesel Engine (LHD(Except E.C), RHD)
Page 184 of 428

DO-IT-YOURSELF MAINTENANCE 6- 11
G040B03FC-GAT CHANGING THE OIL AND FILTER
(Diesel Engine: Left hand drivetype (E.C only)) The engine oil and filter should be changed at those intervals specified in the maintenance schedule in Section 5. If the car is being driven in severeconditions, more frequent oil and filter changes are required. The procedure for changing the oil and filter is as follows: 1. Park the car on level ground and set
the parking brake. Start the engine and let it warm up until the needle onthe coolant temperature gauge moves above the lowest mark. Turn the engine off and place the gearselector lever in "P" (automatic) or reverse gear (manual transaxle).
2. Open the hood and remove the en- gine oil filler cap.
3. Slide underneath the car and loosen
the oil pan drain plug by turning it counterclockwise oil pan with a wrench of the proper size. Be sure that a drain pan is in position tocatch the oil as it drains out, then remove the drain plug.
7. Refill the crankcase with the recom-
mended engine oil. Refer to the specification in chapter 9 for engineoil capacity.
8. Start the engine and check to be
sure no oil is leaking from the drainplug or oil filter.
9. Shut off the engine and recheck the
oil level.
NOTE: Always dispose of used engine oil in an environmentally acceptablemanner. It is suggested that it be placed in a sealed container and taken to a service station for recla-mation. Do not pour the oil on the ground or put it into the household trash.
WARNING:
Used motor oil may cause irritationor cancer of the skin if left in con-tact with the skin for prolonged periods of time. Wash your hands thoroughly with soap and warmwater as soon as possible after han- dling used oil.
!
Engine oil drain plug Oil filter
KCHB01A
WARNING:
Be very careful when draining the engine oil as it may be hot enough to burn you!!
4. When the oil has stopped draining, replace the drain plug using a new washer and retighten by turning it clockwise. Oil pan drain plug tightening torque: 3.5 ~ 4.5 kgf.m
............
Page 185 of 428

6- 12 DO-IT-YOURSELF MAINTENANCE
5. Loosen the oil filter drain plug by
turning it counterclockwise with a wrench of the proper size and drain out some oil in the oil filter. Be sure that a drain pan is in position tocatch the oil.
6. Loosen the oil filter upper cap with a
proper tool from the lower case untilan O-ring is seen. Then, drain the oil completely.
7. Pull out the oil filter upper cap with element from the lower case.Using a clean cloth, remove any dirt or oil accumulated around the lowercase.
8. Install a new copper washer of the
oil filter drain plug by the side oflower case and retighten by turning it clockwise. Tightening torque : 0.8 ~ 1.0 kgf.m
9. After mounting a new oil filter ele- ment and new O-ring to upper cap,install the upper cap to lower case and retighten by turning it clock-wise. Do not over-tighten. Tightening torque : 2.3 ~ 2.5 kgf.m
10.Refill the crankcase with the rec- ommended engine oil. Refer to the specification in chapter 9 for engine oil capacity.
11.Start the engine and check to be sure no oil is leaking from the drainplug or oil filter.
12.Shut off the engine and recheck the oil level.
NOTE: It is recommended that the engine oil and filter should be changed by an authorized Hyundai dealer.
G040B01FC
Oil filter drain plug O-ring
Oil filter element
Washer
Upper cap
Lower case NOTE: Always dispose of used engine oil in an environmentally acceptable manner. It is suggested that it beplaced in a sealed container and taken to a service station for maybe reclaimation. Do not pour the oil onthe ground or put it into the house- hold trash.
WARNING:
Used motor oil may cause irritation or cancer of the skin if left in con- tact with the skin for prolonged periods of time. Wash your handsthoroughly with soap and warm water as soon as possible after han- dling used oil.
!
Page 344 of 428
2- 18 DRIVING YOUR HYUNDAI
C190E02L
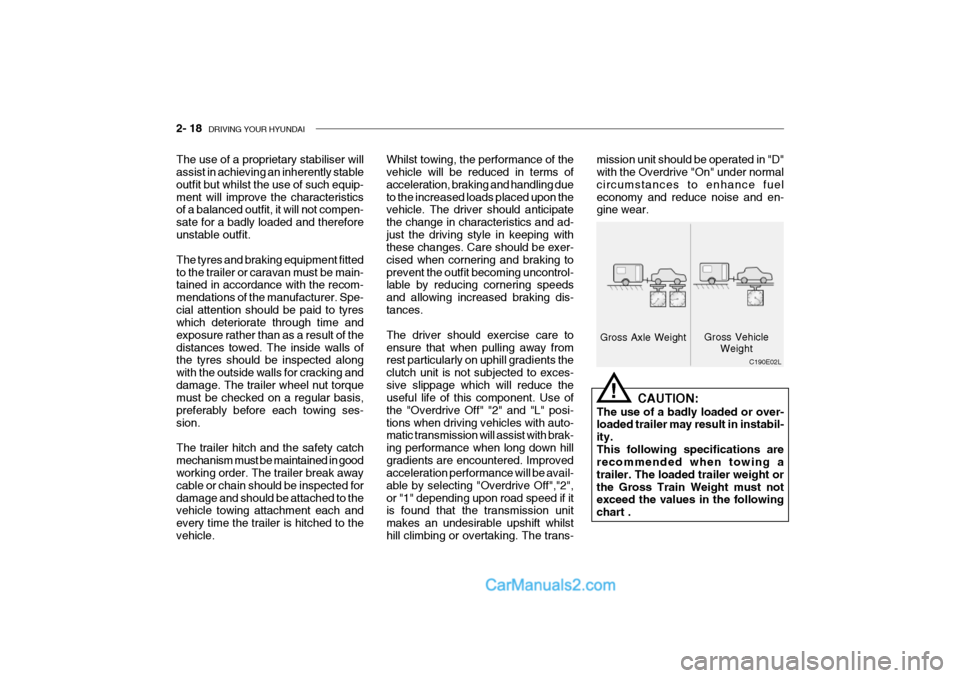
Gross Axle Weight
Gross Vehicle
Weight
The use of a proprietary stabiliser will assist in achieving an inherently stable outfit but whilst the use of such equip-ment will improve the characteristics of a balanced outfit, it will not compen- sate for a badly loaded and thereforeunstable outfit. The tyres and braking equipment fitted to the trailer or caravan must be main- tained in accordance with the recom- mendations of the manufacturer. Spe-cial attention should be paid to tyres which deteriorate through time and exposure rather than as a result of thedistances towed. The inside walls of the tyres should be inspected along with the outside walls for cracking anddamage. The trailer wheel nut torque must be checked on a regular basis, preferably before each towing ses-sion. The trailer hitch and the safety catch mechanism must be maintained in good working order. The trailer break away cable or chain should be inspected fordamage and should be attached to the vehicle towing attachment each and every time the trailer is hitched to thevehicle. Whilst towing, the performance of the vehicle will be reduced in terms of acceleration, braking and handling dueto the increased loads placed upon the vehicle. The driver should anticipate the change in characteristics and ad-just the driving style in keeping with these changes. Care should be exer- cised when cornering and braking toprevent the outfit becoming uncontrol- lable by reducing cornering speeds and allowing increased braking dis-tances. The driver should exercise care to ensure that when pulling away from rest particularly on uphill gradients the clutch unit is not subjected to exces-sive slippage which will reduce the useful life of this component. Use of the "Overdrive Off" "2" and "L" posi-tions when driving vehicles with auto- matic transmission will assist with brak- ing performance when long down hillgradients are encountered. Improved acceleration performance will be avail- able by selecting "Overdrive Off","2",or "1" depending upon road speed if it is found that the transmission unit makes an undesirable upshift whilsthill climbing or overtaking. The trans- mission unit should be operated in "D" with the Overdrive "On" under normal circumstances to enhance fueleconomy and reduce noise and en- gine wear.
CAUTION:
The use of a badly loaded or over-loaded trailer may result in instabil- ity.This following specifications are recommended when towing a trailer. The loaded trailer weight orthe Gross Train Weight must not exceed the values in the following chart .
!
Page 356 of 428
3- 10 WHAT TO DO IN AN EMERGENCY
HTB150
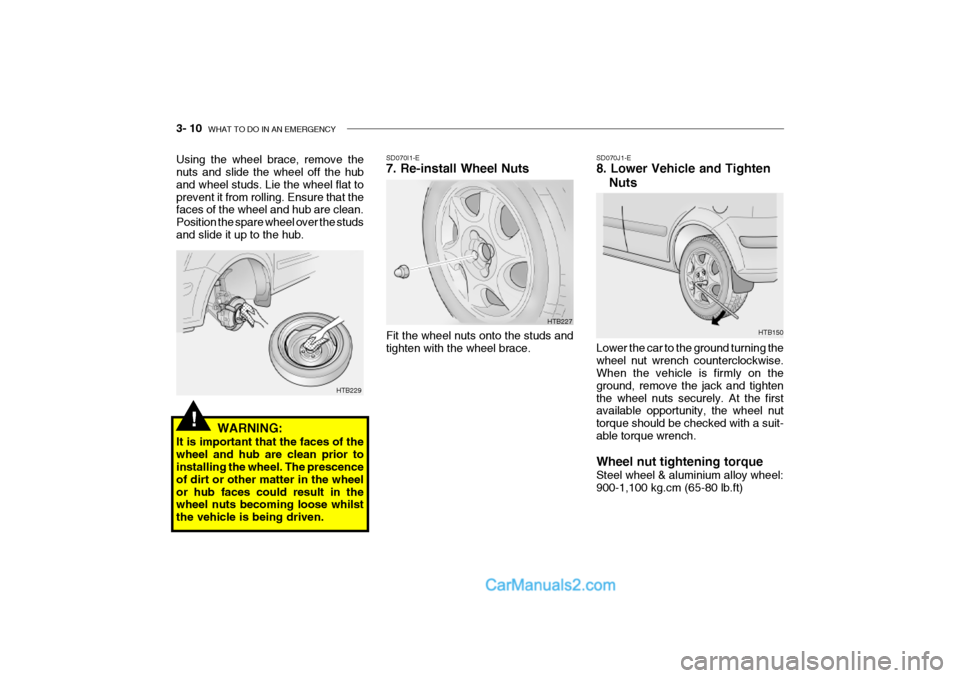
SD070J1-E 8. Lower Vehicle and Tighten
Nuts
Lower the car to the ground turning the wheel nut wrench counterclockwise. When the vehicle is firmly on the ground, remove the jack and tightenthe wheel nuts securely. At the first available opportunity, the wheel nut torque should be checked with a suit-able torque wrench. Wheel nut tightening torque Steel wheel & aluminium alloy wheel: 900-1,100 kg.cm (65-80 lb.ft)
SD070I1-E 7. Re-install Wheel NutsFit the wheel nuts onto the studs and tighten with the wheel brace.
HTB227
Using the wheel brace, remove the nuts and slide the wheel off the hub and wheel studs. Lie the wheel flat toprevent it from rolling. Ensure that the faces of the wheel and hub are clean. Position the spare wheel over the studsand slide it up to the hub.
!
HTB229
WARNING:
It is important that the faces of the wheel and hub are clean prior to installing the wheel. The prescence of dirt or other matter in the wheelor hub faces could result in the wheel nuts becoming loose whilst the vehicle is being driven.
Page 373 of 428
VEHICLE MAINTENANCE REQUIREMENTS 5- 9
6ZF070F1-A
o Brake hoses and lines
Visually check for proper installation, chafing, cracks, deterioration and any leakage. Replace any deteriorated or damaged parts immediately. 6ZF070G2-A
o Brake fluid
Check brake fluid level in the brake fluid reservoir. The level should bebetween "MIN" and "MAX" marks on the side of the reservoir. Use only hydraulic brake fluid conforming toDOT 3 or DOT 4. 6ZF070H1-A
o Rear brake drums and linings/ parking brake
Check the rear brake drums and lin- ings for scoring, burning, leaking fluid,broken parts, and excessive wear. Inspect the parking brake system in- cluding the parking brake lever andcables. For detailed service proce- dures, refer to the Shop Manual. 6ZF070J1-A
o Brake pads, calipers and
rotors
Check the pads for excessive wear,
discs for run out and wear, and cali- pers for fluid leakage.
6ZF070K1-A
o Exhaust pipe and muffler
Visually inspect the exhaust pipes,
muffler and hangers for cracks, dete- rioration, or damage. Start the engine and listen carefully for any exhaustgas leakage. Tighten connections or replace parts as necessary.
6ZF070L1-A
o Suspension mounting bolts
Check the suspension connections
for looseness or damage. Retightento the specified torque. 6ZF070M1-A o Steering gear box, linkage &
boots/lower arm ball joint
With the vehicle stopped and engine off, check for excessive freeplay inthe steering wheel.Check the linkage for bends or dam-age. Check the dust boots and ball joints for deterioration, cracks, or dam- age. Replace any damaged parts. 6ZF070N1-A
o Power steering pump, belt and hoses
Check the power steering pump and hoses for leakage and damage. Re-place any damaged or leaking parts immediately. Inspect the power steer- ing belt for evidence of cuts, cracks,excessive wear, oiliness and proper tension. Replace or adjust it if neces- sary.
Page 384 of 428

6- 10 DO-IT-YOURSELF MAINTENANCE
HTB170
Petrol engine SG050A1-E ENGINE COOLANT CHECKING AND REPLACING
SG050B1-E Coolant recommendations WARNING:
Do not remove the radiator cap when the engine is hot, since the system is pressurized and coolant may beejected from the radiator resulting in scalding.
!
!
3. Prepare a suitable receptacle to col- lect the displaced oil and remove the drain plug from the sump.
4. When the oil has drained from the sump, replace the drain plug using anew washer ensuring that the plug is not over tightened. Tightening torque is: 3.5 ~ 4.5 kgf.m
5. Remove the oil filter by rotating coun- terclockwise, using a proprietary oil filter removal tool if necessary. Notethat the oil filter will contain approxi- mately 0.5 litres of oil and this should be collected in a suitable receptacle.
6. Install a new oil filter having smeared the sealing ring with clean oil androtating clockwise until the filter con-tacts the mounting and then a further one half turn. Do not over-tighten CAUTION:
The oil being drained from the en- gine will be hot. Care should beexercised to prevent scalding.
! Tightening torque: Petrol -
1.2 ~ 1.6 kgf.m
Diesel(RHD) - 2.3 ~ 2.5 kgf.m
7. Pour the specified quantity of the recommended oil into the engine and replace the filler cap. Start the en- gine and ensure that no oil leaks exist. Turn off the engine and after acouple minutes, recheck the oil level.
WARNING:
Prolonged and repeated contact with used engine oils may result in seri- ous skin disorders including derma-titis and cancer. Avoid contact with skin as far as possible and always wash thoroughly after any contact.Keep used oils out of reach of chil- dren. It is illegal to pollute drains, water courses and soil. Use onlyauthorized waste collection facili- ties including civic amenity sites and garages for the disposal of usedoil and oil filters. If in doubt, contact the local authority for disposal in- structions.