check oil Hyundai Getz 2004 Owner's Manual
[x] Cancel search | Manufacturer: HYUNDAI, Model Year: 2004, Model line: Getz, Model: Hyundai Getz 2004Pages: 445, PDF Size: 12.16 MB
Page 58 of 445
FEATURES OF YOUR HYUNDAI 1- 45
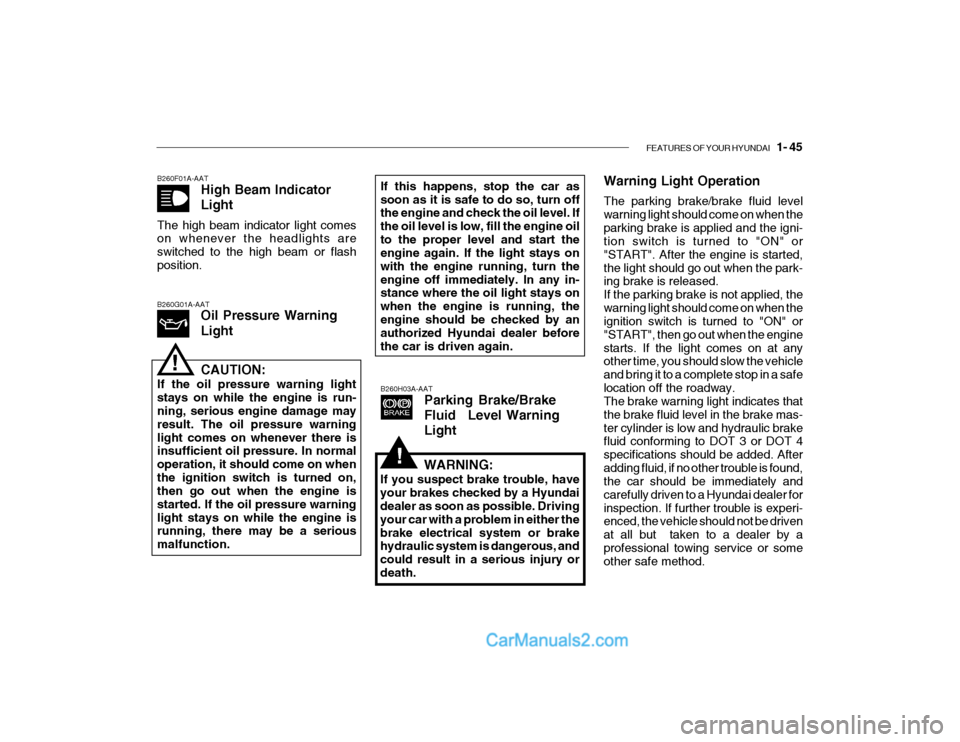
B260F01A-AAT
High Beam Indicator Light
The high beam indicator light comes on whenever the headlights are switched to the high beam or flashposition.
B260H03A-AATParking Brake/Brake
Fluid Level WarningLight
B260G01A-AATOil Pressure Warning Light
!CAUTION:
If the oil pressure warning light stays on while the engine is run- ning, serious engine damage may result. The oil pressure warninglight comes on whenever there is insufficient oil pressure. In normal operation, it should come on whenthe ignition switch is turned on, then go out when the engine is started. If the oil pressure warninglight stays on while the engine is running, there may be a serious malfunction. If this happens, stop the car assoon as it is safe to do so, turn off the engine and check the oil level. If the oil level is low, fill the engine oilto the proper level and start the engine again. If the light stays on with the engine running, turn theengine off immediately. In any in- stance where the oil light stays on when the engine is running, theengine should be checked by an authorized Hyundai dealer before the car is driven again.
Warning Light Operation The parking brake/brake fluid level warning light should come on when theparking brake is applied and the igni- tion switch is turned to "ON" or "START". After the engine is started,the light should go out when the park- ing brake is released. If the parking brake is not applied, thewarning light should come on when the ignition switch is turned to "ON" or "START", then go out when the enginestarts. If the light comes on at any other time, you should slow the vehicle and bring it to a complete stop in a safelocation off the roadway. The brake warning light indicates that the brake fluid level in the brake mas-ter cylinder is low and hydraulic brake fluid conforming to DOT 3 or DOT 4 specifications should be added. Afteradding fluid, if no other trouble is found, the car should be immediately and carefully driven to a Hyundai dealer forinspection. If further trouble is experi- enced, the vehicle should not be driven at all but taken to a dealer by aprofessional towing service or some other safe method.
WARNING:
If you suspect brake trouble, have your brakes checked by a Hyundai dealer as soon as possible. Driving your car with a problem in either thebrake electrical system or brake hydraulic system is dangerous, and could result in a serious injury ordeath.
!
Page 137 of 445
2- 2 DRIVING YOUR HYUNDAI
C010A01O-AAT
WARNING: ENGINE EXHAUST CAN BE DANGEROUS!
Engine exhaust fumes can be extremely dangerous. If, at any time, you smell exhaust fumes inside the vehicle, open the windows immediately. o Do not inhale exhaust fumes. Exhaust fumes contain carbon monoxide, a colorless, odorless gas that can cause unconsciousness and death by asphyxiation. o Be sure the exhaust system does not leak. The exhaust system should be checked whenever the vehicle is raised to change the oil or for any other purpose. If you hear a change in the sound of the exhaust or if you drive over something that strikes the underneath side of the car, have the exhaust system checked as soon as possible by your Hyundai dealer. o Do not run the engine in an enclosed area. Letting the engine idle in your garage, even with the garage door open, is a hazardous practice. Never run the engine in your garage any longer than it takes to start the engine and back the car out. o Avoid idling the engine for prolonged periods with people inside the car. If it is necessary to idle the engine for a prolonged period with people inside the car, be sure to do so only in an open area with the air intake set at "Fresh" and fan operating at one of the higher speeds so fresh air is drawn into the interior. If you must drive with the tail gate open because you are carrying objects that make this necessary: 1. Close all windows. 2. Open side vents. 3. Set the air intake control at "Fresh", the air flow control at "Floor" or "Face" and the fan at one of the higher speeds.
To assure proper operation of the ventilation system, be sure the ventilation air intakes located just in front ofthe windshield are kept clear of snow, ice, leaves or other obstructions.
!
Page 138 of 445
DRIVING YOUR HYUNDAI 2- 3
C020A01O-GAT BEFORE STARTING THE EN- GINE Before you start the engine, you should always:
1. Look around the vehicle to be sure
there are no flat tires, puddles of oil, water or other indications of pos-sible trouble.
2. After entering the car, check to be
sure the parking brake is engaged.
3. Check that all windows, and lights are clean.
4. Check that the interior and exterior mirrors are clean and in position.
5. Check your seat, seatback and
headrest to be sure they are in theirproper positions.
6. Lock all the doors.
7. Fasten your seat belt and be sure
that all other occupants have fas- tened theirs.
8. Turn off all lights and accessories that are not needed.
9. When you turn the ignition switch to
"ON", check that all appropriate warning lights are operating and that you have sufficient fuel. 10.Check the operation of warning
lights and all bulbs when key is in the "ON" position.
!WARNING: (DIESEL ENGINE)
To ensure that sufficient vacuum exists within the brake system dur-ing cold weather start-up condi- tions, it is necessary to run the engine at idle for several secondsafter starting the engine. C030A01A-GAT COMBINATION IGNITION SWITCHTo Start the Engine
o If your Hyundai is equipped with a
manual transaxle, place the shift lever in neutral and depress theclutch pedal fully.
o If your Hyundai has an automatic
transaxle, place the shift lever in "P"(park).
o To start the engine, insert the igni-
tion key and turn it to the "START"position. Release it as soon as the engine starts. Do not hold the key in the "START" position for more than15 seconds.
NOTE: For safety, the engine will not start if the shift lever is not in "P" or "N"Position (Automatic transaxle).
Page 151 of 445
2- 16 DRIVING YOUR HYUNDAI
C160G01A-GAT To Keep Locks from Freezing To keep the locks from freezing, squirt an approved de-icer fluid or glycerineinto the key opening. If a lock is cov- ered with ice, squirt it with an approved de-icing fluid to remove the ice. If thelock is frozen internally, you may be able to thaw it out by using a heated key. Handle the heated key with careto avoid burning your fingers. NOTE: The proper temperature for using the immobilizer key is from -40°C to 80°C. If you heat the immobilizer key over 80°C to open the frozenlock, it may cause damage to the transponder in its head.
C160F01A-AAT Check Spark Plugs and Ignition System Inspect your spark plugs as described in Section 6 and replace them if neces- sary. Also check all ignition wiring andcomponents to be sure they are not cracked, worn or damaged in any way.
chains on the tire will provide a greaterdriving force, but will not prevent side skids. NOTE: Tire chains are not legal in all prov- inces. Check province laws beforefitting tire chains. C160C01A-AAT Use High Quality Ethylene Glycol Coolant Your Hyundai is delivered with high quality ethylene glycol coolant in the cooling system. It is the only type ofcoolant that should be used because it helps prevent corrosion in the cooling system, lubricates the water pump andprevents freezing. Be sure to replace or replenish your coolant in accor- dance with the maintenance schedulein Section 5. Before winter, have your coolant tested to assure that its freez- ing point is sufficient for the tempera-tures anticipated during the winter. C160D01A-AAT Check Battery and Cables Winter puts additional burdens on the battery system. Visually inspect thebattery and cables as described in Section 6. The level of charge in your battery can be checked by your Hyun-dai dealer or a service station. C160E01A-AAT Change to "Winter Weight" Oil if Necessary In some climates it is recommended that a lower viscosity "winter weight" oil be used during cold weather. See Section 9 for recommendations. If youaren't sure what weight oil you should use, consult your Hyundai dealer.
Page 152 of 445
DRIVING YOUR HYUNDAI 2- 17
C160K01A-AAT Carry Emergency Equipment Depending on the severity of the weather where you drive your car, you should carry appropriate emergencyequipment. Some of the items you may want to carry include tire chains, tow straps or chains, flashlight, emer-gency flares, sand, a shovel, jumper cables, a window scraper, gloves, ground cloth, coveralls, a blanket, etc.
C160H01A-AAT Use Approved Anti-Freeze in
Window Washer System To keep the water in the window washer system from freezing, add an approved anti-freeze solution in accordance withinstructions on the container. Window washer anti-freeze is available from Hyundai dealers and most auto partsoutlets. Do not use engine coolant or other types of anti-freeze as these may damage the finish. C160I01A-AAT Don't Let Your Parking Brake Freeze Under some conditions your parking brake can freeze in the engaged posi- tion. This is most likely to happenwhen there is an accumulation of snow or ice around or near the rear brakes or if the brakes are wet. If there is a riskthe parking brake may freeze, apply it only temporarily while you put the gear selector lever in "P" (automatic) or infirst or reverse gear (manual transaxle) and block the rear wheels so the car cannot roll. Then release the parkingbrake. C160J01A-AAT Don't Let Ice and Snow Accumu- late Underneath Under some conditions, snow and ice can build up under the fenders and interfere with the steering. When driv-ing in severe winter conditions where this may happen, you should periodi- cally check underneath the car to besure the movement of the front wheels and the steering components is not obstructed.
C170A01A-AAT HIGHER SPEED MOTORING Pre-Trip Inspections 1. Tires: Adjust the tire inflation pressures to specification. Low tire inflation pres- sures will result in overheating andpossible failure of the tires. Avoid using worn or damaged tires which may result in reduced traction ortire failure. NOTE: Never exceed the maximum tire in- flation pressure shown on the tires. 2. Fuel, engine coolant and en- gine oil: High speed travel consumes 1.5 times more fuel than urban motoring. Do not forget to check both engine coolantand engine oil. 3. Drive belt: A loose or damaged drive belt may result in overheating of the engine.
Page 158 of 445
3- 2 WHAT TO DO IN AN EMERGENCY
HTB165
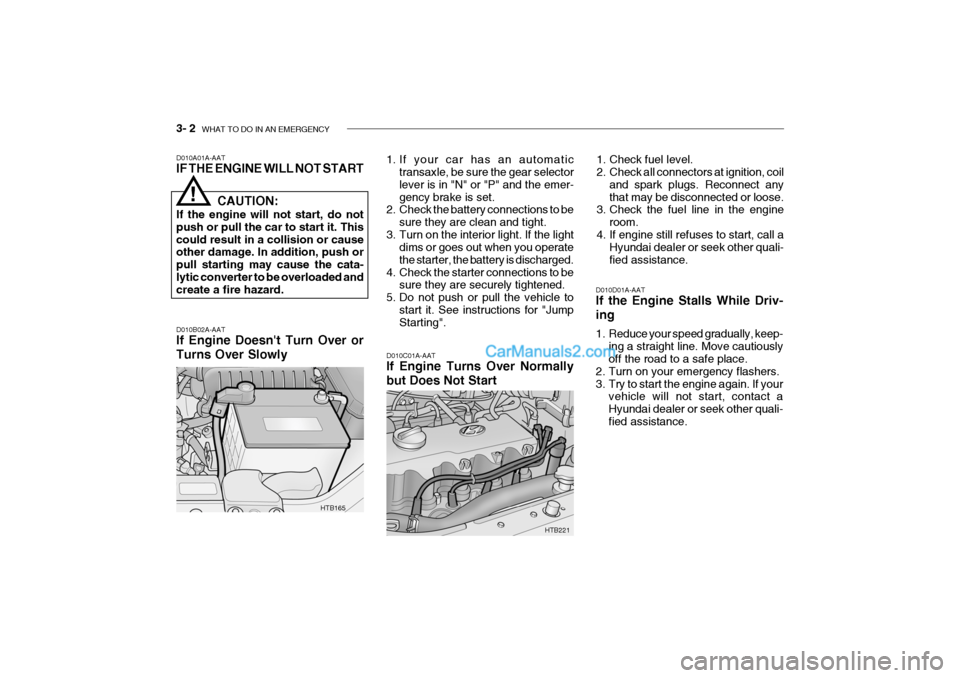
D010B02A-AAT If Engine Doesn't Turn Over or Turns Over Slowly 1. If your car has an automatic
transaxle, be sure the gear selector lever is in "N" or "P" and the emer-gency brake is set.
2. Check the battery connections to be
sure they are clean and tight.
3. Turn on the interior light. If the light dims or goes out when you operatethe starter, the battery is discharged.
4. Check the starter connections to be sure they are securely tightened.
5. Do not push or pull the vehicle to start it. See instructions for "Jump Starting".
D010C01A-AAT If Engine Turns Over Normally but Does Not Start 1. Check fuel level.
2. Check all connectors at ignition, coil
and spark plugs. Reconnect any that may be disconnected or loose.
3. Check the fuel line in the engine
room.
4. If engine still refuses to start, call a Hyundai dealer or seek other quali-fied assistance.
D010D01A-AAT If the Engine Stalls While Driv- ing
1. Reduce your speed gradually, keep- ing a straight line. Move cautiously off the road to a safe place.
2. Turn on your emergency flashers.
3. Try to start the engine again. If your vehicle will not start, contact aHyundai dealer or seek other quali-fied assistance.
D010A01A-AAT IF THE ENGINE WILL NOT START
CAUTION:
If the engine will not start, do not push or pull the car to start it. Thiscould result in a collision or cause other damage. In addition, push or pull starting may cause the cata-lytic converter to be overloaded and create a fire hazard.
!
HTB221
Page 178 of 445
5- 2 VEHICLE MAINTENANCE REQUIREMENTS
F010C01A-GAT
Specified Scheduled Procedures
These are the procedures such as
inspections, adjustments and replace- ments that are listed in the mainte- nance charts starting on page 5-4.These procedures must be performed at the intervals shown in the mainte- nance schedule to assure that yourwarranty remains in effect. Although it is strongly recommended that they be performed by the factory-trained ordistributor-trained technicians at your Hyundai dealer, these procedures may be performed at any qualified servicefacility. It is suggested that genuine Hyundai F010D01A-GAT
General Checks
These are the regular checks youshould perform when you drive your Hyundai or you fill the fuel tank. A list of these items will be found on page6-6.
F010A01A-GAT MAINTENANCE INTERVALS Service Requirements To assure that you receive the great- est number of kilometers of satisfyingoperation from your Hyundai, certain maintenance procedures must be performed. Although careful designand engineering have reduced these to a minimum, those that are required are of the utmost importance.It is your responsibility to have thesemaintenance procedures performedto comply with the terms of the war- ranties covering your new Hyundai. The Service Passport supplied withyour new vehicle provides further in- formation about these warranties.
F010B01A-AAT
Maintenance Requirements
The maintenance required for your
Hyundai can be divided into threemain areas:
o Specified scheduled procedures
o General checks
o Do-it-yourself maintenance service parts be used for any required repairs or replacements. Other parts of equivalent quality such as engineoil, engine coolant, manual or auto transaxle oil, brake fluid and so on which are not supplied by HyundaiMotor Company or its distributor may be used without affecting your war- ranty coverage but you should alwaysbe sure these are equivalent to the quality of the original Hyundai parts. Your Service Passport provides fur-ther information about your warranty coverage.
Page 184 of 445
5- 8 VEHICLE MAINTENANCE REQUIREMENTS
F060A01A-AAT EXPLANATION OF SCHEDULED MAINTENANCE ITEMS F060M01A-AAT
o Engine Oil and Filter The engine oil and filter should be changed at the intervals specified in the maintenance schedule. If the car is being driven in severe conditions,more frequent oil and filter changes are required. F060B01A-AAT
o Drive Belts Inspect all drive belts for evidence of cuts, cracks, excessive wear or oil and replace if necessary. Drive beltsshould be checked periodically for proper tension and adjusted as nec- essary. placement more frequently.
After installing a new filter, run the
engine for several minutes, and check for leaks at the connections. Fuel fil- ters should be installed by trainedtechnicians.
F060D01TB-AAT
o Fuel Lines, Fuel Hoses and
Connections
Check the fuel lines, fuel hoses and
connections for leakage and damage.Have a trained technician replace anydamaged or leaking parts immedi- ately. F060E01A-AAT
o Timing Belt
Inspect all parts related to the timingbelt for damage and deformation. Replace any damaged parts immedi-ately. F060G01A-AAT
o Vapor Hose and Fuel Filler Cap
The vapor hose and fuel filler cap should be inspected at those intervals specified in the maintenance sched-ule. Make sure that a new vapor hose or fuel filler cap is correctly replaced.
F060C01A-AAT
o Fuel Filter A clogged filter can limit the speed at which the vehicle may be driven, dam- age the emission system and cause hard starting. If an excessive amountof foreign matter accumulates in the fuel tank, the filter may require re-
!WARNING (Diesel only):
Never work on injection system with
engine running or within 30 sec- onds after shutting off engine. High pressure pump, rail, injectors and high pressure pipes are subjectedto high pressure even after the en- gine has been switched off. The fuel jet produced by fuel leaks maycause serious injury, if it contacts with the body. People using pace- makers should not move closerthan 30cm to the ECU or wiring harness within the engine room with the engine running, since the high currents in the Common Railsystem produce considerable mag- netic fields.
Page 185 of 445
VEHICLE MAINTENANCE REQUIREMENTS 5- 9
F060H01A-AAT
o Air Cleaner Filter
A Genuine Hyundai air cleaner filter is recommended when filter is replaced. F060J01A-AAT
o Spark Plugs
Make sure to install new spark plugs
of the correct heat range. F070C01A-AAT o Engine Coolant The coolant should be changed at the intervals specified in the mainte- nance schedule. F070D01A-AAT
o Manual Transaxle Oil Inspect the manual transaxle oil ac- cording to the maintenance schedule. NOTE: If the oil level is low, check for possible leaks before adding oil. Do not overfill. F070E03A-AAT
o Automatic Transaxle Fluid and
Filter
The fluid level should be in the "HOT" range of the dipstick, after the engineand transaxle are at normal operating temperature. Check the automatic transaxle fluid level with the enginerunning and the transaxle in neutral, with the parking brake properly ap- plied. Use DIAMOND ATF SP-III orSK ATF SP-III when adding or chang- ing fluid.
F060F01A-AAT
o Vacuum, Crankcase Ventila-
tion Hoses
Inspect the surface of hoses for evi- dence of heat and/or mechanical dam-age. Hard and brittle rubber, cracking, tears, cuts, abrasions, and excessive swelling indicate deterioration. Partic-ular attention should be paid to exam- ine those hose surfaces nearest to high heat sources, such as the ex-haust manifold.Inspect the hose routing to assurethat the hoses do not come in contact with any heat source, sharp edges or moving component which might causeheat damage or mechanical wear. Inspect all hose connections, such as clamps and couplings, to make surethey are secure, and that no leaks are present. Hoses should be replaced immediately if there is any evidenceof deterioration or damage. F070B01A-GAT
o Cooling System
Check the cooling system part, such
as radiator, coolant reservoir, hosesand connections for leakage and dam- age. Replace any damaged parts. F060N01X-GAT
o Valve clearances (1.1 L)
Incorrect valve clearance will not only
result in unsteady engine operation,but will also cause excessive noise and reduced engine performance. In-spect valve clearance and adjust as required while the engine is hot.
Valve-to-rocker arm clearance Intake valves ..... 0.2 mm (0.008 in.) Exhaust valves ... 0.25 mm (0.010 in.)
Page 186 of 445
5- 10 VEHICLE MAINTENANCE REQUIREMENTS
F070L01A-AAT
o Suspension Mounting Bolts
Check the suspension connections
for looseness or damage. Retighten to the specified torque. F070M01A-AAT
o Steering Gear Box, Linkage &
Boots/Lower arm Ball Joint
With the vehicle stopped and engine
off, check for excessive free-play inthe steering wheel. Check the linkage for bends or damage. Check the dust boots and ball joints for deterioration,cracks, or damage. Replace any dam- aged parts.
F070N01A-AAT
o Power Steering Pump, Belt and
Hoses
Check the power steering pump and
hoses for leakage and damage. Re- place any damaged or leaking parts immediately. Inspect the power steer- ing belt for evidence of cuts, cracks,excessive wear, oiliness and proper tension. Replace or adjust it if neces- sary.
F070J01A-AAT
o Brake Pads, Calipers and
Rotors
Check the pads for excessive wear,
discs for run out and wear, and cali-pers for fluid leakage.
F070K01A-AAT
o Exhaust Pipe and Muffler
Visually inspect the exhaust pipes,
muffler and hangers for cracks, dete-rioration, or damage. Start the engineand listen carefully for any exhaust gas leakage. Tighten connections or replace parts as necessary.
F070F01A-AAT
o Brake Hoses and Lines Visually check for proper installation, chafing, cracks, deterioration and any leakage. Replace any deteriorated or damaged parts immediately. F070G02A-AAT
o Brake Fluid Check brake fluid level in the brake fluid reservoir. The level should be between "MIN" and "MAX" marks onthe side of the reservoir. Use only hydraulic brake fluid conforming to DOT 3 or DOT 4. F070H01A-AAT
o Rear Brake Drums/Linings
Parking Brake
Check the rear brake drums and lin- ings for scoring, burning, leaking fluid, broken parts, and excessive wear. Inspect the parking brake system in-cluding the parking brake lever and cables. For detailed service proce- dures, refer to the Shop Manual.