Hood Hyundai Getz 2005 User Guide
[x] Cancel search | Manufacturer: HYUNDAI, Model Year: 2005, Model line: Getz, Model: Hyundai Getz 2005Pages: 437, PDF Size: 11.19 MB
Page 348 of 437
3- 4 WHAT TO DO IN AN EMERGENCY
D030A02TB-AAT IF THE ENGINE OVERHEATS If your temperature gauge indicates overheating, you experience a loss of power, or hear loud pinging or knock- ing, the engine is probably too hot. Ifthis happens to you, you should:
1. Pull off the road and stop as soon as
it is safe to do so.
2. Place the gear selector lever in "P"
(automatic), or neutral (manual transaxle) and set the parking brake. If the air conditioning is on, turn it off.
6. Carefully remove the jumper cables
in the reverse order of attachment.
If you do not know why your battery became discharged (because the lights were left on, etc.), have the chargingsystem checked by your Hyundai dealer. 3. If engine coolant is running out un-
der the car or steam is coming out from the hood, stop the engine. Donot open the hood until the engine coolant has stopped running or the steaming has stopped. If there is novisible loss of engine coolant and no steam, leave the engine running and check to be sure the enginecooling fan is operating. If the fan is not running, turn the engine off.
4. Check to see if the water pump drive
belt is missing. If it is not missing,check to see that it is tight. If the drive belt seems to be satisfactory,check for coolant leaking from the radiator, hoses or under the car. (If the air conditioning had been in use,it is normal for cold water to be draining from it when you stop). WARNING (Diesel only):
Never work on injection system with engine running or within 30 sec- onds after shutting off engine. High pressure pump, rail, injectors andhigh pressure pipes are subject to high pressure even after the engine stopped. The fuel jet produced byfuel leaks may cause serious in- jury, if it touch the body. People using pacemakers should not movethan 30cm closer to the ECU or wiring harness within the engine room while engine is running, sincethe high currents in the Common Rail system produce considerable magnetic fields.
WARNING:
While the engine is running, keep hair, hands, and clothing away from moving parts such as the fan anddrive belts to prevent injury.
!
!
5. If the water pump drive belt is bro- ken or coolant is leaking out, stop the engine immediately and call the nearest Hyundai dealer for assis-tance.
TBENG_3.P65 3/9/2005, 5:01 PM
4
Page 381 of 437

6- 6 DO-IT-YOURSELF MAINTENANCE
G020A01A-AAT GENERAL CHECKS Engine Compartment The following should be checked regu-larly:
o Engine oil level and condition
o Transaxle fluid level and condition
o Brake fluid level
o Clutch fluid level
o Engine coolant level
o Windshield washer fluid level
o Accessory drive belt condition
o Engine coolant hose condition
o Fluid leaks (on or below compo-
nents)
o Power steering fluid level
o Battery condition G020C01A-AAT Vehicle Interior The following should be checked each time when the vehicle is driven:
o Lights operation
o Windshield wiper operation
o Horn operation
o Defroster, heater system operation
(and air conditioning, if installed)
o Steering operation and condition
o Mirror condition and operation
o Turn signal operation
o Accelerator pedal operation
o Brake operation, including parking brake
o Manual transaxle operation, includ- ing clutch operation
o Automatic transaxle operation, in- cluding "Park" mechanism opera-tion
o Seat control condition and opera- tion
o Seat belt condition and operation
o Sunvisor operation If you notice anything that does not operate correctly or appears to befunctioning incorrectly, inspect it care- fully and seek assistance from your Hyundai dealer if service is needed.
G020B01A-AAT Vehicle Exterior The following should be checked monthly:
o Overall appearance and condition
o Wheel condition and wheel nut
torgue
o Air filter condition
o Exhaust system condition
o Light condition and operation
o Windshield glass condition
o Wiper blade condition
o Paint condition and body corrosion
o Fluid leaks
o Door and hood lock condition
o Tire pressure and condition (including spare tire)
TBENG_6.P65 3/9/2005, 5:03 PM
6
Page 385 of 437
6- 10 DO-IT-YOURSELF MAINTENANCE
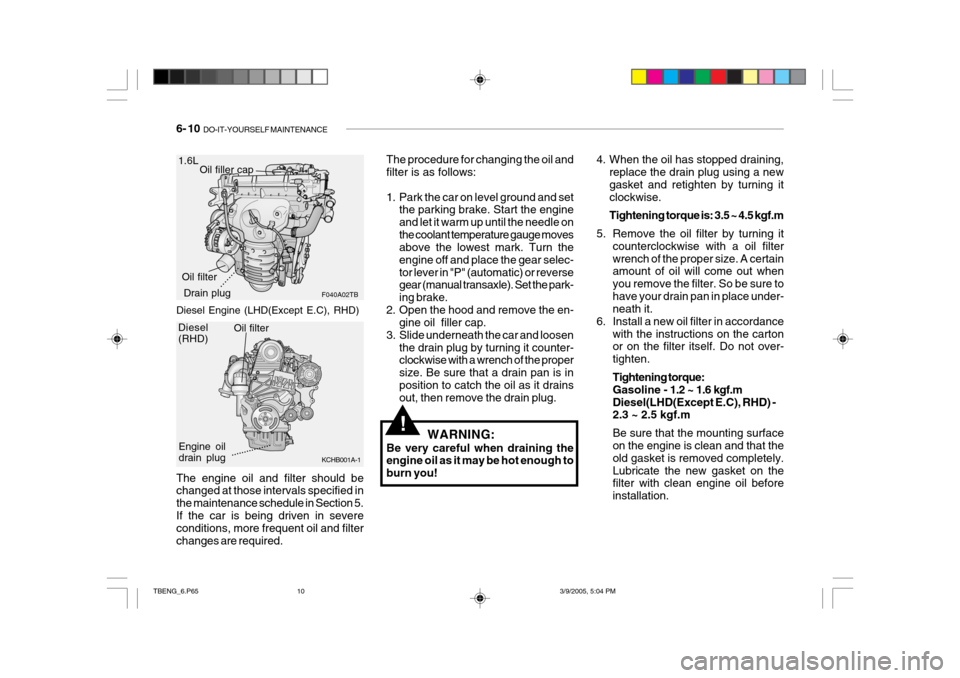
The engine oil and filter should be changed at those intervals specified in the maintenance schedule in Section 5.If the car is being driven in severe conditions, more frequent oil and filter changes are required.1.6L
F040A02TB
Oil filler cap
Drain plug
Oil filter The procedure for changing the oil and filter is as follows:
1. Park the car on level ground and set
the parking brake. Start the engine and let it warm up until the needle onthe coolant temperature gauge moves above the lowest mark. Turn the engine off and place the gear selec-tor lever in "P" (automatic) or reverse gear (manual transaxle). Set the park- ing brake.
2. Open the hood and remove the en- gine oil filler cap.
3. Slide underneath the car and loosen
the drain plug by turning it counter- clockwise with a wrench of the proper size. Be sure that a drain pan is inposition to catch the oil as it drains out, then remove the drain plug.
WARNING:
Be very careful when draining theengine oil as it may be hot enough to burn you!
!
4. When the oil has stopped draining, replace the drain plug using a new gasket and retighten by turning itclockwise. Tightening torque is: 3.5 ~ 4.5 kgf.m
5. Remove the oil filter by turning it counterclockwise with a oil filter wrench of the proper size. A certain amount of oil will come out when you remove the filter. So be sure tohave your drain pan in place under- neath it.
6. Install a new oil filter in accordance
with the instructions on the cartonor on the filter itself. Do not over- tighten. Tightening torque: Gasoline - 1.2 ~ 1.6 kgf.m
Diesel(LHD(Except E.C), RHD) - 2.3 ~ 2.5 kgf.m Be sure that the mounting surface on the engine is clean and that the old gasket is removed completely.Lubricate the new gasket on the filter with clean engine oil before installation.
.........
Diesel (RHD)
KCHB001A-1
Engine oil drain plugOil filter................
Diesel Engine (LHD(Except E.C), RHD)
TBENG_6.P65
3/9/2005, 5:04 PM
10
Page 386 of 437
DO-IT-YOURSELF MAINTENANCE 6- 11
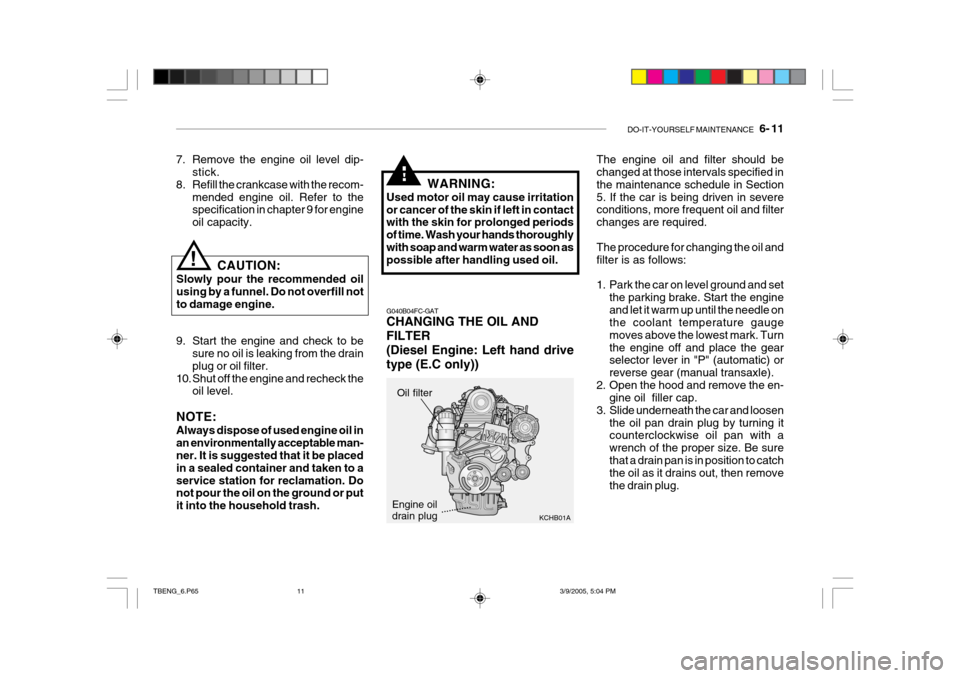
G040B04FC-GAT CHANGING THE OIL AND FILTER
(Diesel Engine: Left hand drive type (E.C only)) The engine oil and filter should be changed at those intervals specified in the maintenance schedule in Section5. If the car is being driven in severe conditions, more frequent oil and filter changes are required. The procedure for changing the oil and filter is as follows:
1. Park the car on level ground and set
the parking brake. Start the engine and let it warm up until the needle on the coolant temperature gauge moves above the lowest mark. Turnthe engine off and place the gear selector lever in "P" (automatic) or reverse gear (manual transaxle).
2. Open the hood and remove the en- gine oil filler cap.
3. Slide underneath the car and loosen the oil pan drain plug by turning it counterclockwise oil pan with a wrench of the proper size. Be surethat a drain pan is in position to catch the oil as it drains out, then remove the drain plug.
7. Remove the engine oil level dip-
stick.
8. Refill the crankcase with the recom-
mended engine oil. Refer to the specification in chapter 9 for engine oil capacity.
!
Engine oil drain plugOil filter
KCHB01A............
WARNING:
Used motor oil may cause irritation or cancer of the skin if left in contact with the skin for prolonged periods of time. Wash your hands thoroughlywith soap and warm water as soon as possible after handling used oil.
CAUTION:
Slowly pour the recommended oil using by a funnel. Do not overfill notto damage engine.!
9. Start the engine and check to be sure no oil is leaking from the drain plug or oil filter.
10. Shut off the engine and recheck the oil level.
NOTE: Always dispose of used engine oil in an environmentally acceptable man- ner. It is suggested that it be placed in a sealed container and taken to aservice station for reclamation. Do not pour the oil on the ground or put it into the household trash.
TBENG_6.P65 3/9/2005, 5:04 PM
11
Page 395 of 437
6- 20 DO-IT-YOURSELF MAINTENANCE
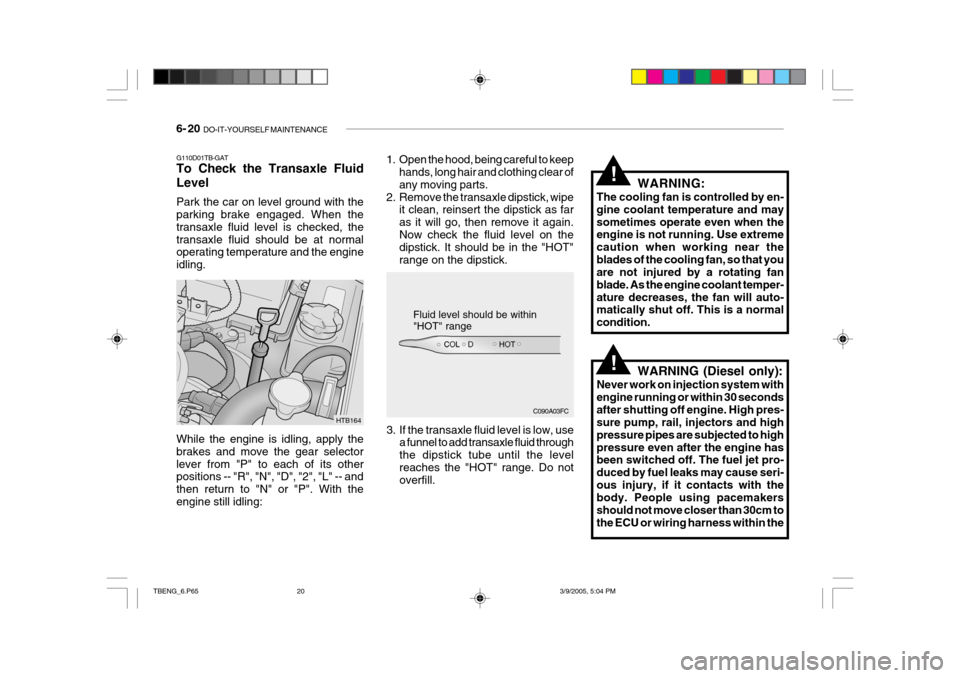
G110D01TB-GAT To Check the Transaxle Fluid Level Park the car on level ground with the parking brake engaged. When the transaxle fluid level is checked, thetransaxle fluid should be at normal operating temperature and the engine idling. While the engine is idling, apply the brakes and move the gear selectorlever from "P" to each of its other positions -- "R", "N", "D", "2", "L" -- and then return to "N" or "P". With theengine still idling: 3. If the transaxle fluid level is low, use
a funnel to add transaxle fluid throughthe dipstick tube until the levelreaches the "HOT" range. Do not overfill. WARNING:
The cooling fan is controlled by en- gine coolant temperature and maysometimes operate even when the engine is not running. Use extreme caution when working near theblades of the cooling fan, so that you are not injured by a rotating fan blade. As the engine coolant temper-ature decreases, the fan will auto- matically shut off. This is a normal condition.
C090A03FC
Fluid level should be within "HOT" range
HTB164 1. Open the hood, being careful to keep
hands, long hair and clothing clear of any moving parts.
2. Remove the transaxle dipstick, wipe it clean, reinsert the dipstick as faras it will go, then remove it again.Now check the fluid level on the dipstick. It should be in the "HOT" range on the dipstick.
!
WARNING (Diesel only):
Never work on injection system with engine running or within 30 secondsafter shutting off engine. High pres- sure pump, rail, injectors and high pressure pipes are subjected to highpressure even after the engine has been switched off. The fuel jet pro- duced by fuel leaks may cause seri-ous injury, if it contacts with the body. People using pacemakers should not move closer than 30cm tothe ECU or wiring harness within the!
TBENG_6.P65 3/9/2005, 5:04 PM
20
Page 406 of 437
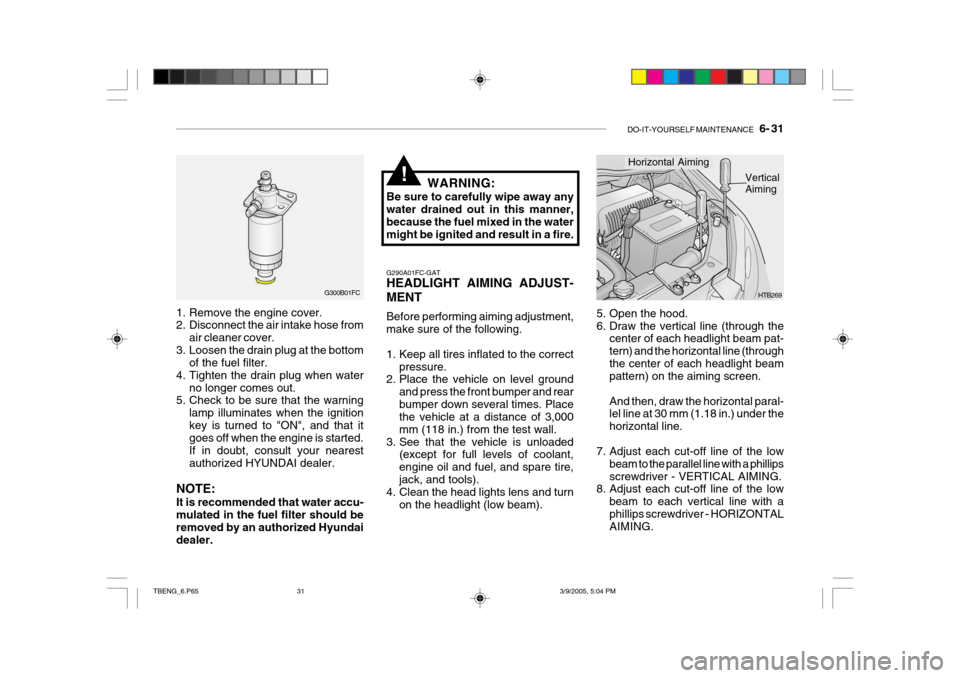
DO-IT-YOURSELF MAINTENANCE 6- 31
1. Remove the engine cover.
2. Disconnect the air intake hose from
air cleaner cover.
3. Loosen the drain plug at the bottom of the fuel filter.
4. Tighten the drain plug when water
no longer comes out.
5. Check to be sure that the warning
lamp illuminates when the ignition key is turned to "ON", and that it goes off when the engine is started. If in doubt, consult your nearestauthorized HYUNDAI dealer.
NOTE: It is recommended that water accu- mulated in the fuel filter should beremoved by an authorized Hyundai dealer. G300B01FC
WARNING:
Be sure to carefully wipe away anywater drained out in this manner, because the fuel mixed in the watermight be ignited and result in a fire.
!
5. Open the hood.
6. Draw the vertical line (through the center of each headlight beam pat-tern) and the horizontal line (throughthe center of each headlight beam pattern) on the aiming screen. And then, draw the horizontal paral- lel line at 30 mm (1.18 in.) under the horizontal line.
7. Adjust each cut-off line of the low beam to the parallel line with a phillipsscrewdriver - VERTICAL AIMING.
8. Adjust each cut-off line of the low
beam to each vertical line with aphillips screwdriver - HORIZONTAL AIMING. HTB269
Horizontal Aiming
Vertical Aiming
G290A01FC-GAT HEADLIGHT AIMING ADJUST- MENT Before performing aiming adjustment, make sure of the following.
1. Keep all tires inflated to the correct pressure.
2. Place the vehicle on level ground
and press the front bumper and rear bumper down several times. Place the vehicle at a distance of 3,000 mm (118 in.) from the test wall.
3. See that the vehicle is unloaded (except for full levels of coolant,engine oil and fuel, and spare tire,jack, and tools).
4. Clean the head lights lens and turn
on the headlight (low beam).
TBENG_6.P65 3/9/2005, 5:04 PM
31
Page 433 of 437

10- 4 INDEX
H Hazard Warning Syst em ........................................... 1-55
Headlight Aiming Adjustment ....................................6-31
Headlight Leveling Device Syst em ...........................1-58
Heating and cooling control ...................................... 1-74
Heating and Ventilation ............................................. 1-75
Air flow control ....................................................... 1-76
Air intake control .................................................... 1-76
Bi-level heating ....................................................... 1-79
Fan speed control .................................................. 1-77
Temperature control ............................................... 1-78
High-Mounted Rear Stop Light................................. 1-66
Hood Release ........................................................... 1-66
How to use luggage room .. ......................................1-69
Horn .......................................................................... 1-73
IIgnition Sw itch ............................................................. 2-3
Immobilizer S ystem ..................................................... 1-5
Instrument Cluster and Indicator ..............................1-41
IInterior Light Interior light ............................................................ 1-62
Map light ................................................................ 1-61
Intermittent Wiper ..................................................... 1-54
JJump Starting .............................................................. 3-3 K
Key .............................................................................. 1-4
If you lose your keys ............................................. 3-14
Positions ................................................................... 2-4
L Lubrication Chart ......................................................... 9-4
Luggage Net ............................................................. 1-71
Luggage Board .......................................................... 1-71
Luggage Under Tray ................................................. 1-70
MMaintenance Intervals Explanation of scheduled maintenance items
................................................................................. 5-8
Maintenance under severe usage conditions .......... 5-7Scheduled maintenance ........................................... 5-4
Service requ irements............................................... 5-2
Mirrors Day-night inside rearview ....................................... 1-65
Outside rearview mirror heater .............................. 1-65
O Odometer .................................................................. 1-49
Outside rear view...................................................... 1-63
TBENG_10.P65 3/9/2005, 4:56 PM
4