check engine light Hyundai Getz 2005 User Guide
[x] Cancel search | Manufacturer: HYUNDAI, Model Year: 2005, Model line: Getz, Model: Hyundai Getz 2005Pages: 437, PDF Size: 11.19 MB
Page 146 of 437

6. Do-It-Yourself Maintenance
Engine compartment ........................................................................ 6-2
Daily operating checks ..................................................................... 6-6
Engine oil .......................................................................................... 6-6
Engine and filter Replacement ......................................................... 6-9
Engine coolant Checking and Replacing .......................................6-10
Spark plug Replacement ................................................................ 6-13
Changing the air cleaner filter ......................................................... 6-14
Manual Transaxle Lubricant........................................................... 6-15
Automatic Transaxle fluid ............................................................... 6-16
Brake System Checking ................................................................ 6-18
Air conditioning System .................................................................. 6-19
Drive belts ...................................................................................... 6-23
Individual Circuit Fuses .................................................................. 6-24
Power steering fluid level ............................................................... 6-26
Replacing Light Bulbs .................................................................... 6-28
Fuse panel description ................................................................... 6-34
6
Page 151 of 437

6- 6 DO-IT-YOURSELF MAINTENANCE
SG020B1-E DAILY OPERATING CHECKS The following items should be checked on a daily basis or whenever the vehicleis refuelled, whichever occurs sooner.
o Engine oil level.
o Engine coolant level.
o Power steering fluid level.
o Brake fluid level.
o Windscreen washer fluid level.
o Battery condition.
o Tyre condition and pressures.
o Operation and cleanliness of all light-
ing equipment.
o Windscreen wiper and washer opera- tion.
o Horn operation.
o Warning light operation.
o Adjustment and cleanliness of mir- rors.
o Seat and seat belt adjustment and operation.
o Fluid leakage. The vehicle must not be driven if the daily operating checks indicate that any item of equipment related to thesafety or roadworthiness of the vehicle is not functioning correctly. G030B03A-EAT Recommended Oil
1. Petrol engine The engine oil quality should meet the following classification. API SJ, SL or ABOVE, ILSAC GF-3 or ABOVE The oil viscosity should be selected according to the operating environment of the engine by means of the table shown above. The engine oil recom-mendations are complete in themselves and the use of additives is neither required nor recommended. The use ofengine oil additives may result in invali- dation of the vehicle warranty.
G030A01FC-EAT ENGINE OIL The correct engine oil level is of para- mount importance. An excessively highor low oil level may result in irreparable damage being sustained by the engine. The engine oil level must be checkedon a daily basis, whenever the vehicle is refuelled or before starting a long trip, whichever occurs sooner.In addition, it is imperative that only an approved grade and specification of oil is used to avoid the possibility of seri-ous engine damage and premature wear. The use of "budget price" oil is a false economy that must be avoided if themaximum reliability and useful life is to be obtained from the vehicle.
G030B01L
Page 158 of 437

DO-IT-YOURSELF MAINTENANCE 6- 13
SG060A1-E SPARKING PLUG REPLACE- MENT
G060A01L
0.039 ~ 0.043 in. (1.0 ~ 1.1 mm )
This operation should only be performed when the engine is cold.
1. Remove the centre cover from the engine rocker cover.
2. Remove plug lead from the sparking plug to be replaced, pulling the lead by the rubber cap. (Pulling the lead may damage the carbon conductor).
3. Clean around the base of the plug to be removed, and install the plugsocket ensuring that the ceramicinsulator does not become damaged. Turn the socket counterclockwise to remove the plug. CAUTION:
Sparking plugs must only be cleaned using purpose designed equipment. Wire brushing may damage the cen-tre electrode-insulator causing mis- firing to occur. Only the correct grade of sparking plug should be used.Use of an incorrect grade may result in serious engine damage. Prior to installing a sparking plug, the gap between the centre and outer elec- trodes must be checked and adjusted as necessary. Adjustment is facilitated by bending the outer electrode towards or away fromthe centre electrode. Under no circum- stances should attempts be made to adjust the position of the centre elec-trode.
4. Insert the sparking plug into the cyl- inder head and screw by the wrench and until the plug contacts the seat- ing area. Tighten the plug with the socket by a further 1/2 to 3/4 of a turnonly. 5. Replace the plug lead ensuring that
the cap is pushed firmly into place.Confirm that the cap is correctlyseated by lightly pulling upon it.
NOTE: When replacing the spark plug, al- ways use the genuine parts recom- mended. Recommended Spark Plugs
CHAMPION NGKRC10YC4 BKR5ES-11
!
Page 163 of 437

6- 18 DO-IT-YOURSELF MAINTENANCE
G120E01TB-EAT Brake Fluid Level
SG120A1-EBRAKE SYSTEM CHECKINGcurrents in the Common Rail system produce considerable magnetic fields.
!
CAUTION:
The automatic transaxle unit is a precision engineered assembly andcorrect operation is dependant upon the exclusion of dirt and lint from the unit. Therefore, it is imperative thatonly lint free cloth (eg nylon) is used for wiping the dipstick and that the area around the dipstick is thor-oughly clean prior to level checking or adding fluid. Fluid Capacity The total fluid capacity of the transaxle unit is 6.1 litres. SG120C2-E Brake Fluid Recommendations Only brake fluid conforming to DOT 3 or DOT 4 specifications or higher may be used in the braking system. Care shouldbe taken to observe the instructions and precautions printed upon the con- tainer.
!
CAUTION:
Correct operation of the braking sys- tem is essential to the safe operation of the vehicle and therefore, any main-tenance operations other than those listed below should be entrusted to a Hyundai authorised repairer.
The fluid level in the brake fluid reser-voir should be checked periodically.The level should be between the "MIN" and "MAX" marks on the side of the reservoir. If the level is at or below the"MIN" mark, fluid should be added. It should be borne in mind that the brake fluid level will decrease slightly as thefriction linings of the pads and shoes become worn and that this is a normal condition.
HTB166
Page 172 of 437

DO-IT-YOURSELF MAINTENANCE 6- 27
!
5. Open the bonnet.
6. Draw the vertical line (through the
center of each headlight beam pat-tern) and the horizontal line (throughthe center of each headlight beam pattern) on the aiming screen. And then, draw the horizontal paral- lel line at 1.18 in. (30 mm ) under the horizontal line.
7. Adjust each cut-off line of the low beam to the parallel line with a phillipsscrewdriver - VERTICAL AIMING.
8. Adjust each cut-off line of the low
beam to each vertical line with aphillips screwdriver - HORIZONTAL AIMING. HTB269
Horizontal Aiming
Vertical Aiming
G290A01FC-EAT HEADLIGHT AIMING ADJUST- MENT Before performing aiming adjustment, make sure of the following.
1. Keep all tyres inflated to the correct pressure.
2. Place the vehicle on level ground
and press the front bumper and rear bumper down several times. Place the vehicle at a distance of 118 in. (3,000 mm) from the test wall.
3. See that the vehicle is unloaded (except for full levels of coolant,engine oil and fuel, and spare tyre,jack, and tools).
4. Clean the head lights lens and turn
on the headlight (low beam). WARNING:
Be sure to carefully wipe away anywater drained out in this manner, because the fuel mixed in the water might be ignited and result in a fire.
1. Remove the engine cover.
2. Disconnect the air intake hose from air cleaner cover.
3. Loosen the drain plug at the bottom
of the fuel filter.
4. Tighten the drain plug when water no longer comes out.
5. Check to be sure that the warning lamp illuminates when the ignition key is turned to "ON", and that it goes off when the engine is started.If in doubt, consult your nearest Hyundai authorised repairer.
G300B01FC
Page 196 of 437

10- 2 INDEX
A AIR BAG ................................................................... 1-30
AIR CONDITIONING SWITCH .................................1-74
AIR CONDITIONING SYSTEM MAINTENANCE ..... 6-19
AIR CLEANER FILTER ............................................. 6-14
ANTENNA ................................................................. 1-84
ANTI-LOCK BRAKE SYSTEM .................................. 2-13
ANTI-THEFT ALARM SYSTEM .................................. 1-7
ASHTRAY ................................................................. 1-54
AUTO FUEL CUT SW ITCH...................................... 1-68
AUTOMATIC TRANSAXLE ......................................... 2-9AUTOMATIC TRANSAXLE FLUID ...........................6-16
BBATTERY MAINTENANCE ......................................6-25
BEFORE STARTING THE ENGINE ...........................2-3
BONNET RE LEASE.................................................. 1-62
BRAKE PEDAL FREEPLAY .....................................6-22
BRAKE SYSTEM CHECKING ..................................6-18
CCARE OF DISC ......................................................... 1-82
CARE OF SEAT BELTS .... .......................................1-19
CARGO AREA COVER ............................................ 1-66
CATALYTIC CONVERTOR OPERATING PRECAUTIONS ...................................................... 7-3
CENTRAL DOOR LOCKS .......................................... 1-5
CHANGING A FLAT TYRE ......................................... 3-6 CHILD-PROOF REAR DOOR
LOCK .......................... 1-5
CHILD RESTRAINT SYSTEM ..................................1-22
CIGAR LIGHTER ...................................................... 1-53
CLUTCH PEDAL FR EEPLAY................................... 6-22
COMBINATION IGNITION SWITCH AND STEERING LOCK ................................................... 2-3
CONSOLE TRAY ...................................................... 1-54
COOLANT TEMPERATURE GAUGE .......................1-44
DDAILY OPERATING CHECKS .................................... 6-6
DIGITAL CLOCK ....................................................... 1-53
DOOR LOCK S ............................................................ 1-5
DOOR WINDOWS .................................................... 1-10
DRINK HOLDER ....................................................... 1-54
DRIVE BELTS ........................................................... 6-23
DRIVING FOR ECONOMY .......................................2-14
EEFFECTIVE BRA KING............................................. 2-13
ELECTRIC COOLING FANS ....................................6-25
EMERGENCY TOWING .... .......................................3-12
EMISSION CONTROL SYSTEM ................................ 7-2
ENGINE COMPARTMENT .................... ..................... 6-2
ENGINE COOLANT CHECKING AND REPLACING ......................................................... 6-10
ENGINE OIL AND FILTER REPLACEMENT .............. 6-9
ENGINE OIL CONSUMPTION ................................... 6-8
Page 255 of 437

FEATURES OF YOUR HYUNDAI 1- 43
B260B01S-GAT
SRS (Airbag) Service Reminder Indicator (SRI)(If Installed)
The SRS service reminder indicator (SRI) comes on and flashes for about 6 seconds after the ignition key isturned to the "ON" position or after the engine is started, after which it will go out. This light also comes on when the SRS is not working properly. If the SRI doesnot come on, or continuously remains on after flashing for about 6 seconds when you turned the ignition key to the"ON" position or started the engine, or if it comes on while driving, have the SRS inspected by an authorizedHyundai Dealer. B260P02Y-GAT
ABS Service Reminder Indicator (SRI)(If Installed)
When the key is turned to the "ON" position, the Anti-Lock Brake System will come on and then go off in a fewseconds. If the ABS SRI remains on, comes on while driving, or does not come on when the key is turned to the"ON" position, this indicates that there may be a problem with the ABS. If this occurs, have your vehiclechecked by your Hyundai dealer as soon as possible. The normal braking system will still be operational, butwithout the assistance of the anti-lock brake system. B260C01A-AAT
O/D OFF Indicator (Automatic transaxle
only) (If Installed)
When the overdrive switch is turned on, the overdrive off indicator will go out. This amber indicator will be illumi-nated when the overdrive switch is turned off. B260D01A-AAT Turn Signal Indicator Lights
The blinking green arrows on the in- strument panel show the direction indi-cated by the turn signals. If the arrow comes on but does not blink, blinks more rapidly than normal, or does notilluminate at all, a malfunction in the turn signal system is indicated. Your dealer should be consulted for repairs.
WARNING:
If both ABS SRI and Parking Brake/Brake fluid level warning lights re-main "ON" or come on while driv- ing, there may be a problem with E.B.D (Electronic Brake Force Dis-tribution). If this occurs, avoid sudden stops and have your vehicle checked byyour Hyundai dealer as soon as possible.
!
TBENG_1A.P65 3/9/2005, 4:57 PM
43
Page 256 of 437

1- 44 FEATURES OF YOUR HYUNDAI
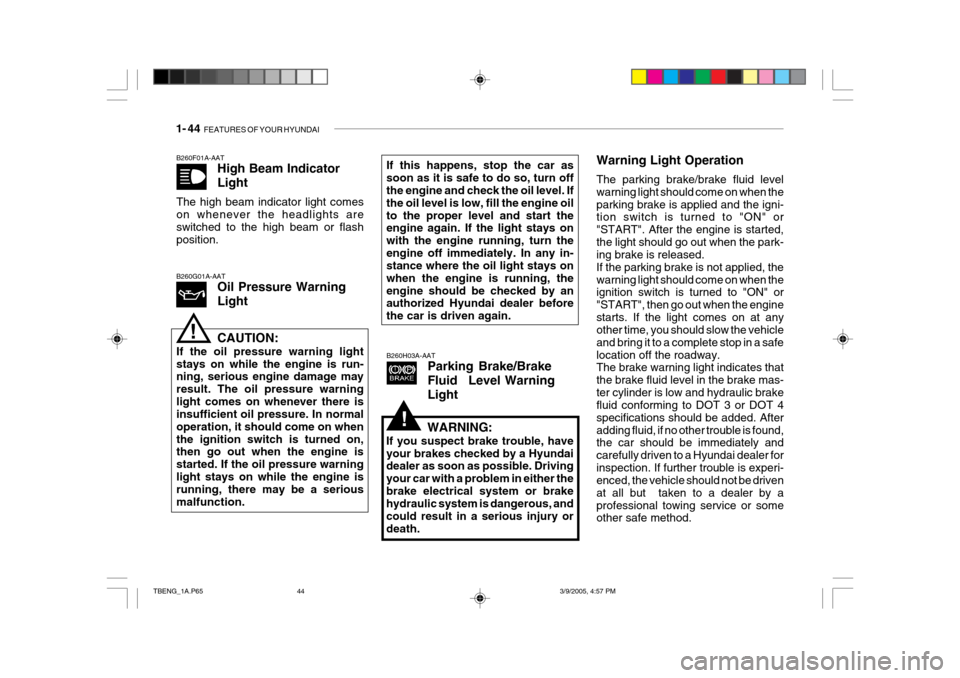
B260F01A-AAT
High Beam Indicator Light
The high beam indicator light comes on whenever the headlights are switched to the high beam or flashposition.
B260H03A-AATParking Brake/Brake
Fluid Level WarningLight
B260G01A-AATOil Pressure Warning Light
!CAUTION:
If the oil pressure warning light stays on while the engine is run- ning, serious engine damage may result. The oil pressure warninglight comes on whenever there is insufficient oil pressure. In normal operation, it should come on whenthe ignition switch is turned on, then go out when the engine is started. If the oil pressure warninglight stays on while the engine is running, there may be a serious malfunction. If this happens, stop the car assoon as it is safe to do so, turn off the engine and check the oil level. If the oil level is low, fill the engine oilto the proper level and start the engine again. If the light stays on with the engine running, turn theengine off immediately. In any in- stance where the oil light stays on when the engine is running, theengine should be checked by an authorized Hyundai dealer before the car is driven again.
Warning Light Operation The parking brake/brake fluid level warning light should come on when theparking brake is applied and the igni- tion switch is turned to "ON" or "START". After the engine is started,the light should go out when the park- ing brake is released. If the parking brake is not applied, thewarning light should come on when the ignition switch is turned to "ON" or "START", then go out when the enginestarts. If the light comes on at any other time, you should slow the vehicle and bring it to a complete stop in a safelocation off the roadway. The brake warning light indicates that the brake fluid level in the brake mas-ter cylinder is low and hydraulic brake fluid conforming to DOT 3 or DOT 4 specifications should be added. Afteradding fluid, if no other trouble is found, the car should be immediately and carefully driven to a Hyundai dealer forinspection. If further trouble is experi- enced, the vehicle should not be driven at all but taken to a dealer by aprofessional towing service or some other safe method.
WARNING:
If you suspect brake trouble, have your brakes checked by a Hyundai dealer as soon as possible. Driving your car with a problem in either thebrake electrical system or brake hydraulic system is dangerous, and could result in a serious injury ordeath.
!
TBENG_1A.P65 3/9/2005, 4:57 PM
44
Page 257 of 437

FEATURES OF YOUR HYUNDAI 1- 45
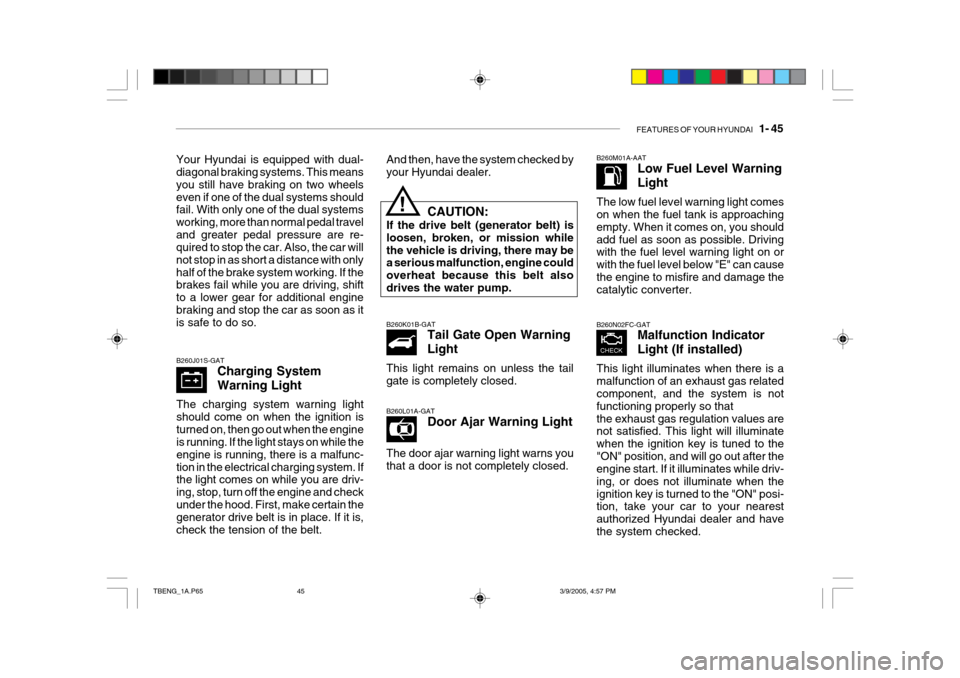
B260J01S-GAT
Charging System Warning Light
The charging system warning light should come on when the ignition isturned on, then go out when the engine is running. If the light stays on while the engine is running, there is a malfunc-tion in the electrical charging system. If the light comes on while you are driv- ing, stop, turn off the engine and checkunder the hood. First, make certain the generator drive belt is in place. If it is, check the tension of the belt. B260L01A-GAT
Door Ajar Warning Light
The door ajar warning light warns youthat a door is not completely closed.
B260K01B-GAT
Tail Gate Open Warning Light
This light remains on unless the tail gate is completely closed. B260M01A-AAT
Low Fuel Level Warning Light
The low fuel level warning light comes on when the fuel tank is approaching empty. When it comes on, you shouldadd fuel as soon as possible. Driving with the fuel level warning light on or with the fuel level below "E" can causethe engine to misfire and damage the catalytic converter.
Your Hyundai is equipped with dual-diagonal braking systems. This means you still have braking on two wheelseven if one of the dual systems should fail. With only one of the dual systems working, more than normal pedal traveland greater pedal pressure are re- quired to stop the car. Also, the car will not stop in as short a distance with onlyhalf of the brake system working. If the brakes fail while you are driving, shift to a lower gear for additional enginebraking and stop the car as soon as it is safe to do so.
And then, have the system checked by your Hyundai dealer.
CAUTION:
If the drive belt (generator belt) is loosen, broken, or mission whilethe vehicle is driving, there may be a serious malfunction, engine could overheat because this belt alsodrives the water pump.
!
B260N02FC-GAT Malfunction Indicator Light (If installed)
This light illuminates when there is a malfunction of an exhaust gas related component, and the system is not functioning properly so thatthe exhaust gas regulation values are not satisfied. This light will illuminate when the ignition key is tuned to the"ON" position, and will go out after the engine start. If it illuminates while driv- ing, or does not illuminate when theignition key is turned to the "ON" posi- tion, take your car to your nearest authorized Hyundai dealer and havethe system checked.
TBENG_1A.P65 3/9/2005, 4:57 PM
45
Page 279 of 437

FEATURES OF YOUR HYUNDAI 1- 67
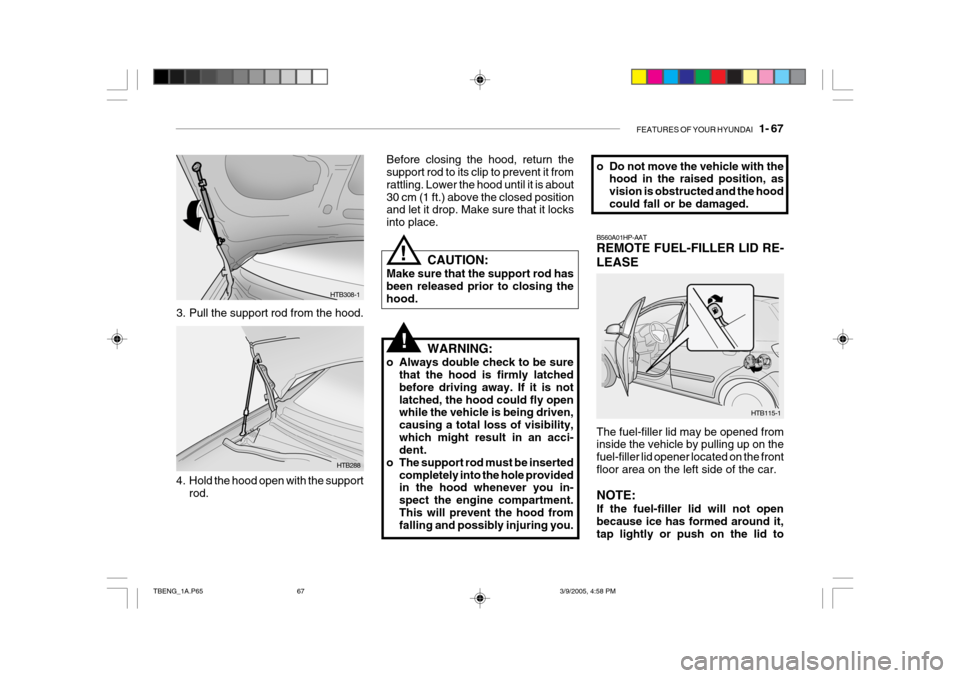
B560A01HP-AAT REMOTE FUEL-FILLER LID RE- LEASE The fuel-filler lid may be opened from inside the vehicle by pulling up on the fuel-filler lid opener located on the frontfloor area on the left side of the car. NOTE: If the fuel-filler lid will not open because ice has formed around it,tap lightly or push on the lid to
WARNING:
o Always double check to be sure that the hood is firmly latchedbefore driving away. If it is notlatched, the hood could fly open while the vehicle is being driven, causing a total loss of visibility,which might result in an acci- dent.
o The support rod must be inserted completely into the hole providedin the hood whenever you in- spect the engine compartment.This will prevent the hood from falling and possibly injuring you.
Before closing the hood, return thesupport rod to its clip to prevent it from rattling. Lower the hood until it is about30 cm (1 ft.) above the closed position and let it drop. Make sure that it locks into place.
!
!
3. Pull the support rod from the hood.
HTB308-1
4. Hold the hood open with the support rod. CAUTION:
Make sure that the support rod has been released prior to closing thehood. o Do not move the vehicle with the
hood in the raised position, asvision is obstructed and the hoodcould fall or be damaged.
HTB115-1
HTB288
TBENG_1A.P65 3/9/2005, 4:58 PM
67