check engine light Hyundai Getz 2006 User Guide
[x] Cancel search | Manufacturer: HYUNDAI, Model Year: 2006, Model line: Getz, Model: Hyundai Getz 2006Pages: 455, PDF Size: 11.23 MB
Page 155 of 455
2- 22 DRIVING YOUR HYUNDAI
6. Check the condition and air pres-
sure of all tires on the trailer and your car. Low tire pressure canseriously affect the handling. Also check the spare tire.
7. The vehicle/trailer combination is more affected by crosswind andbuffeting. When being passed by a largevehicle, keep a constant speed and steer straight ahead. If there is too much wind buffeting slow downto get out of the other vehicle's air turbulence.
8. When parking your car and trailer, especially on a hill, be sure to fol-low all the normal precautions. Turn your front wheel into the curb, setthe parking brake firmly, and put the transaxle in 1st or Reverse (manual) or Park (automatic). Inaddition, place wheel chocks at each of the trailer's tires.
9. If the trailer has electric brakes, start your vehicle and trailer mov-ing, and then apply the trailer brake controller by hand to be sure thebrakes are working. This lets you check your electrical connection at the same time. 10. During your trip, check occasion-
ally to be sure that the load issecure, and that the lights andany trailer brakes are still working.
11. Avoid jerky starts, sudden accel-
eration or sudden stops.
12. Avoid sharp turns and rapid lane changes.
13. Avoid holding the brake pedal down
too long or too frequently. This could cause the brakes to over- heat, resulting in reduced brakingefficiency.
14. When going down a hill, shift into a
lower gear and use the engine brak-ing effect. When ascending a long grade, downshift the transaxle to a lowergear and reduce speed to reduce chances of engine overloading and/ or overheating.
15. If you have to stop while going uphill, do not hold the vehicle inplace by pressing on the accelera-tor. This can cause the automatic transaxle to overheat. Use the park- ing brake or footbrake.
C190F02A-GAT Trailer or Vehicle Towing Tips
1. Before towing, check hitch and
safety chain connections as well as proper operation of the trailerrunning lights, brake lights, and turn signals.
2. Always drive your vehicle at a mod- erate speed (Less than 100 km/h).
3. Trailer towing requires more fuel
than normal conditions.
4. To maintain engine braking effi- ciency and electrical charging per- formance, do not use fifth gear(manual transaxle) or overdrive (au- tomatic transaxle).
5. Always secure items in the trailer to prevent load shift while driving.
!WARNING:
Improperly loading your car and trailer can serious affect its steering and braking performance causing a crash in which could cause seriousinjury or death.
Page 158 of 455
3- 2 WHAT TO DO IN AN EMERGENCY
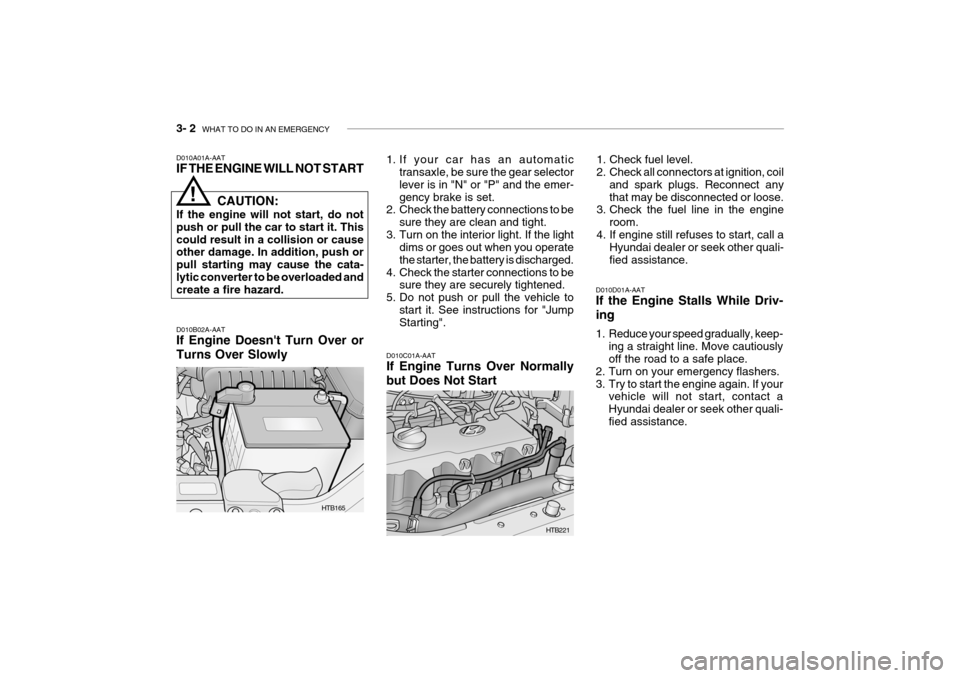
HTB165
D010B02A-AAT If Engine Doesn't Turn Over or Turns Over Slowly 1. If your car has an automatic
transaxle, be sure the gear selector lever is in "N" or "P" and the emer-gency brake is set.
2. Check the battery connections to be
sure they are clean and tight.
3. Turn on the interior light. If the light dims or goes out when you operatethe starter, the battery is discharged.
4. Check the starter connections to be sure they are securely tightened.
5. Do not push or pull the vehicle to start it. See instructions for "Jump Starting".
D010C01A-AAT If Engine Turns Over Normally but Does Not Start 1. Check fuel level.
2. Check all connectors at ignition, coil
and spark plugs. Reconnect any that may be disconnected or loose.
3. Check the fuel line in the engine
room.
4. If engine still refuses to start, call a Hyundai dealer or seek other quali-fied assistance.
D010D01A-AAT If the Engine Stalls While Driv- ing
1. Reduce your speed gradually, keep- ing a straight line. Move cautiously off the road to a safe place.
2. Turn on your emergency flashers.
3. Try to start the engine again. If your vehicle will not start, contact aHyundai dealer or seek other quali-fied assistance.
D010A01A-AAT IF THE ENGINE WILL NOT START
CAUTION:
If the engine will not start, do not push or pull the car to start it. Thiscould result in a collision or cause other damage. In addition, push or pull starting may cause the cata-lytic converter to be overloaded and create a fire hazard.
!
HTB221
Page 160 of 455
3- 4 WHAT TO DO IN AN EMERGENCY
D030A02TB-AAT IF THE ENGINE OVERHEATS If your temperature gauge indicates overheating, you experience a loss of power, or hear loud pinging or knock- ing, the engine is probably too hot. Ifthis happens to you, you should:
1. Pull off the road and stop as soon as
it is safe to do so.
2. Place the gear selector lever in "P"
(automatic), or neutral (manual transaxle) and set the parking brake. If the air conditioning is on, turn it off.
6. Carefully remove the jumper cables
in the reverse order of attachment.
If you do not know why your battery became discharged (because the lights were left on, etc.), have the chargingsystem checked by your Hyundai dealer. 3. If engine coolant is running out un-
der the car or steam is coming out from the hood, stop the engine. Donot open the hood until the engine coolant has stopped running or the steaming has stopped. If there is novisible loss of engine coolant and no steam, leave the engine running and check to be sure the enginecooling fan is operating. If the fan is not running, turn the engine off.
4. Check to see if the water pump drive belt is missing. If it is not missing,check to see that it is tight. If the drive belt seems to be satisfactory,check for coolant leaking from the radiator, hoses or under the car. (If the air conditioning had been in use,it is normal for cold water to be draining from it when you stop). WARNING (Diesel only):
Never work on injection system with engine running or within 30 sec- onds after shutting off engine. High pressure pump, rail, injectors andhigh pressure pipes are subject to high pressure even after the engine stopped. The fuel jet produced byfuel leaks may cause serious in- jury, if it touch the body. People using pacemakers should not movethan 30cm closer to the ECU or wiring harness within the engine room while engine is running, sincethe high currents in the Common Rail system produce considerable magnetic fields.
WARNING:
While the engine is running, keep hair, hands, and clothing away from moving parts such as the fan anddrive belts to prevent injury.
!
!
5. If the water pump drive belt is bro- ken or coolant is leaking out, stop the engine immediately and call the nearest Hyundai dealer for assis-tance.
Page 192 of 455

DO-IT-YOURSELF MAINTENANCE 6- 5
G020A01A-AAT GENERAL CHECKS Engine Compartment The following should be checked regu-larly:
o Engine oil level and condition
o Transaxle fluid level and condition
o Brake fluid level
o Clutch fluid level
o Engine coolant level
o Windshield washer fluid level
o Accessory drive belt condition
o Engine coolant hose condition
o Fluid leaks (on or below compo-
nents)
o Power steering fluid level
o Battery condition G020C01A-AAT Vehicle Interior The following should be checked each time when the vehicle is driven:
o Lights operation
o Windshield wiper operation
o Horn operation
o Defroster, heater system operation
(and air conditioning, if installed)
o Steering operation and condition
o Mirror condition and operation
o Turn signal operation
o Accelerator pedal operation
o Brake operation, including parking brake
o Manual transaxle operation, includ- ing clutch operation
o Automatic transaxle operation, in- cluding "Park" mechanism opera-tion
o Seat control condition and opera- tion
o Seat belt condition and operation
o Sunvisor operation If you notice anything that does not operate correctly or appears to befunctioning incorrectly, inspect it care- fully and seek assistance from your Hyundai dealer if service is needed.
G020B01A-AAT Vehicle Exterior The following should be checked monthly:
o Overall appearance and condition
o Wheel condition and wheel nut
torgue
o Air filter condition
o Exhaust system condition
o Light condition and operation
o Windshield glass condition
o Wiper blade condition
o Paint condition and body corrosion
o Fluid leaks
o Door and hood lock condition
o Tire pressure and condition (including spare tire)
Page 208 of 455
DO-IT-YOURSELF MAINTENANCE 6- 21
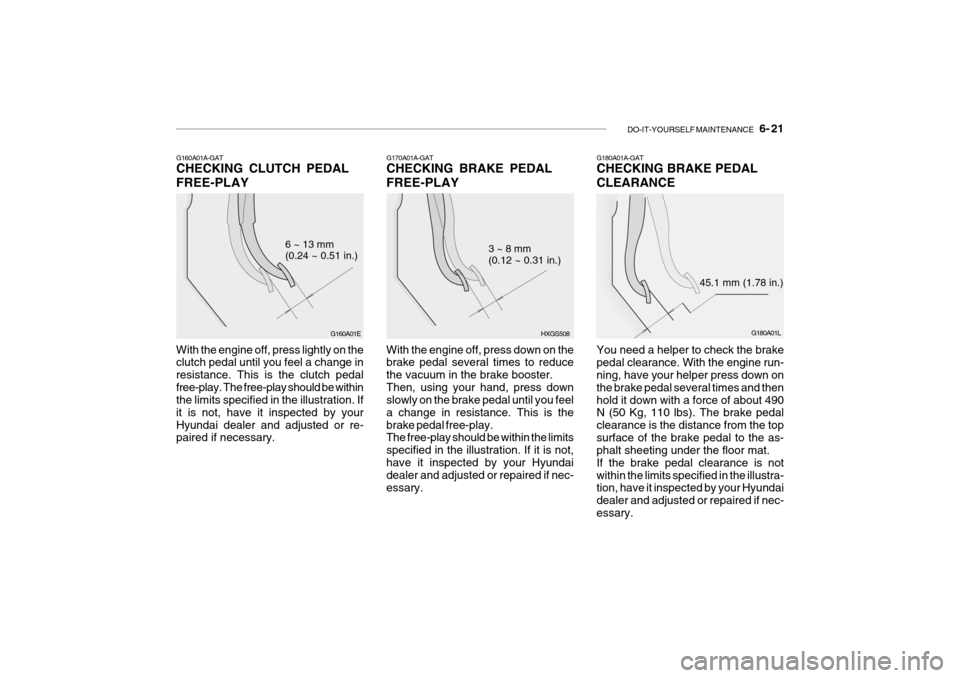
G160A01A-GAT CHECKING CLUTCH PEDAL FREE-PLAY
G160A01E
6 ~ 13 mm (0.24 ~ 0.51 in.)
With the engine off, press lightly on the clutch pedal until you feel a change in resistance. This is the clutch pedalfree-play. The free-play should be within the limits specified in the illustration. If it is not, have it inspected by yourHyundai dealer and adjusted or re- paired if necessary.G180A01A-GAT CHECKING BRAKE PEDAL CLEARANCE
G180A01L
45.1 mm (1.78 in.)
You need a helper to check the brake pedal clearance. With the engine run- ning, have your helper press down on the brake pedal several times and thenhold it down with a force of about 490 N (50 Kg, 110 lbs). The brake pedal clearance is the distance from the topsurface of the brake pedal to the as- phalt sheeting under the floor mat. If the brake pedal clearance is notwithin the limits specified in the illustra- tion, have it inspected by your Hyundai dealer and adjusted or repaired if nec-essary.G170A01A-GAT CHECKING BRAKE PEDAL FREE-PLAY
HXGS508
3 ~ 8 mm (0.12 ~ 0.31 in.)
With the engine off, press down on the brake pedal several times to reduce the vacuum in the brake booster.Then, using your hand, press down slowly on the brake pedal until you feel a change in resistance. This is thebrake pedal free-play. The free-play should be within the limits specified in the illustration. If it is not,have it inspected by your Hyundai dealer and adjusted or repaired if nec- essary.
Page 215 of 455
6- 28 DO-IT-YOURSELF MAINTENANCE
HTB287
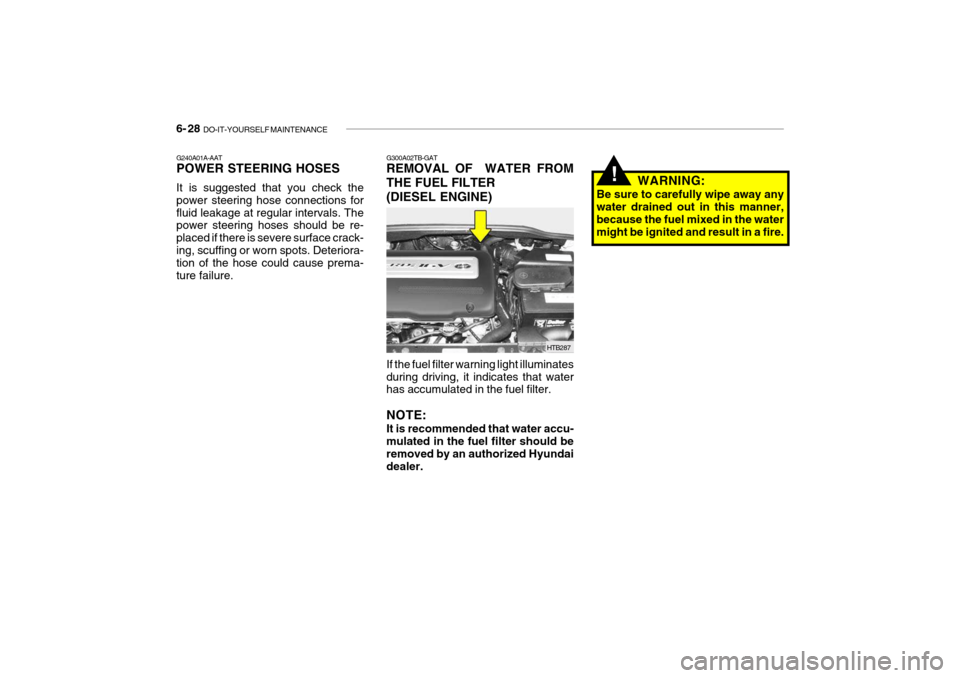
G240A01A-AAT POWER STEERING HOSES It is suggested that you check the power steering hose connections forfluid leakage at regular intervals. The power steering hoses should be re- placed if there is severe surface crack-ing, scuffing or worn spots. Deteriora- tion of the hose could cause prema- ture failure.
G300A02TB-GAT REMOVAL OF WATER FROM THE FUEL FILTER(DIESEL ENGINE) If the fuel filter warning light illuminates during driving, it indicates that water has accumulated in the fuel filter. NOTE: It is recommended that water accu- mulated in the fuel filter should be removed by an authorized Hyundai dealer. WARNING:
Be sure to carefully wipe away anywater drained out in this manner,because the fuel mixed in the water might be ignited and result in a fire.
!
Page 216 of 455
DO-IT-YOURSELF MAINTENANCE 6- 29
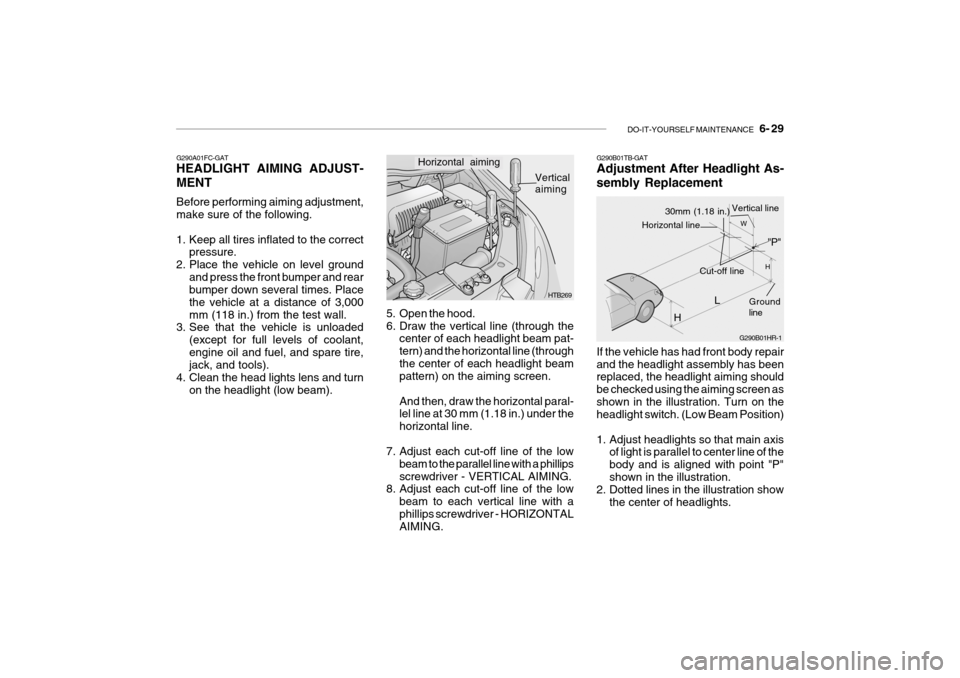
If the vehicle has had front body repair and the headlight assembly has been replaced, the headlight aiming should be checked using the aiming screen asshown in the illustration. Turn on the headlight switch. (Low Beam Position)
1. Adjust headlights so that main axis
of light is parallel to center line of the body and is aligned with point "P"shown in the illustration.
2. Dotted lines in the illustration show
the center of headlights.
G290B01TB-GAT Adjustment After Headlight As- sembly Replacement
G290B01HR-1
L
W
H
H Cut-off line
Ground line
"P"
Horizontal line
30mm (1.18 in.) Vertical line
5. Open the hood.
6. Draw the vertical line (through the
center of each headlight beam pat-tern) and the horizontal line (throughthe center of each headlight beam pattern) on the aiming screen. And then, draw the horizontal paral- lel line at 30 mm (1.18 in.) under the horizontal line.
7. Adjust each cut-off line of the low beam to the parallel line with a phillipsscrewdriver - VERTICAL AIMING.
8. Adjust each cut-off line of the low
beam to each vertical line with aphillips screwdriver - HORIZONTAL AIMING. HTB269
Horizontal aiming
Vertical aiming
G290A01FC-GAT HEADLIGHT AIMING ADJUST- MENT Before performing aiming adjustment, make sure of the following.
1. Keep all tires inflated to the correct
pressure.
2. Place the vehicle on level ground and press the front bumper and rear bumper down several times. Place the vehicle at a distance of 3,000mm (118 in.) from the test wall.
3. See that the vehicle is unloaded
(except for full levels of coolant,engine oil and fuel, and spare tire, jack, and tools).
4. Clean the head lights lens and turn on the headlight (low beam).
Page 242 of 455

10- 2 INDEX
A Active Headrests ........................................................ 1-15
Adjustable headrests .................................................. 1-14
Adjusting arm rest angle .............................................. 1-16
Air Bag ....................................................................... 1-37
Passenger's front airbag O N/OFF switch ................1-41
Side impact airbag ................................................... 1-43
Air Cleaner Filter ......................................................... 6-11
Air Conditioning Care ......................................................................... 6-18
Operation ................................................................. 1-93
Switch ...................................................................... 1-92
Antenna .................................................................... 1-120
Ashtray ....................................................................... 1-67
Audio remote control switch .......................................1-84
Auto Fuel cut Switch .................................................. 1-82
B Battery .............................................................. 2-17, 6-28
Before starting the engine ........................................... 2-3Brake Anti-lock system ...................................................... 2-13
Checking the brakes ................................................ 6-17
Fluid ......................................................................... 6-17
Pedal clearance ....................................................... 6-21
Pedal free play .......................................................... 6-21
Practices ................................................................. 2-12
Breaking-In your New Hyundai .................................... 1-3
Bulbs Replacem ent ..................................................... 6-30
Bulbs wa ttage ............................................................. 6-35C
Care of Cassette Tapes ...........................................
1-118
Cargo area cover ........................................................ 1-80
Cassette Tape Player Operation
(K220, K240, M280) ........................1-100, 1-105, 1-110
Catalytic Converter ...................................................... 7-3
Central Door Lock ........................................................ 1-8
Child-Protector Rear Door Lock ................................... 1-8
Child Restraint System ............................................... 1-28
Cigarette Lighter ......................................................... 1-66
Climate Control Air Filter .................................. 1-94, 6-19
Clock .......................................................................... 1-66
Clutch Pedal freep lay .......................................................... 6-21
Combination Light Headlight flasher ...................................................... 1-62
Headlight swi tch ...................................................... 1-62
High-beam switch .................................................... 1-62
Lane change si gnal .................................................. 1-61
Turn signal operation ............................................... 1-61
Compact Disc Player Operation (M280) ................... 1-113
Console tray ............................................................... 1-68
Cooling Fans .............................................................. 6-26
Corrosion protection
Cleaning the interior .................................................. 4-5
Protecting your Hyundai from corrosion ................... 4-2
Washing and waxing ................................................. 4-3
Page 243 of 455

INDEX 10- 3
D Day/Night inside rearview mirror ................................. 1-76
Defrosting / Defogging ................................................ 1-91
Digital clock ................................................................ 1-66
Door Door locks ................................................................ 1-7 Locking, unlocking front doors with a key ................ 1-7
Locking from the inside ............................................ 1-8
Locking from the outside .......................................... 1-7
Drink Holder ................................................................ 1-68
Drive Belts .................................................................. 6-22
Driving
Economical driving .................................................. 2-15
Smooth corneri ng ..................................................... 2-16
Winter driving ........................................................... 2-16
E Electronic stability program (ESP) ..............................2-14
Emission Contro l System ............................................ 7-2
Engine
Before starting the engine ........................................ 2-3Compartment ............................................................ 6-2
Coolant .................................................................... 6-10
Coolant temperature gauge ......................................1-56
If the engine overheats ............................................. 3-4
Number ..................................................................... 8-2
Oil ............................................................................. 6-7Starting ..................................................................... 2-3
Engine Exhaust Can Be Dangerous ............................ 2-2 FFog Light
Front ........................................................................ 1-65
Rear ......................................................................... 1-66
Folding the outside rearview mirror .............................1-75
Front Seats
Adjustable front seats .............................................. 1-13
Adjustable headrests ............................................... 1-14
Adjusting seat forward and rearward ........................1-13
Adjusting seatback angle .. ......................................1-13
Lumbar support control ............................................ 1-15
Seat cushion height adjustment .............................. 1-16
Seat warmer ............................................................ 1-20
Fuel
Capacity ................................................................... 9-2
Gauge ...................................................................... 1-57
recommendations ...................................................... 1-2
Fuel Filler Lid
Remote release ....................................................... 1-78
Fuses ......................................................................... 6-23
Fuse Panel description ............................................... 6-36
GGeneral Checks ........................................................... 6-5
Glove Box .................................................................. 1-73
Page 305 of 455
1- 48 FEATURES OF YOUR HYUNDAI
Warning light operation The parking brake/brake fluid level warn- ing light will be illuminated wheneverthe ignition switch is turned to the "ON" position irrespective of whether or not the parking brake is applied and mustbe extinguished when the engine starts and the parking brake released. If the warning light fails to extinguish orilluminates at any other time, the ve- hicle must be brought to rest in a safe location and the level of brake fluid inthe reservoir checked. If the fluid level is incorrect, fluid conforming to DOT 3 or DOT 4 specifications should be added.If, after correcting the brake fluid level, the warning light continues to be illumi- nated, the advice of the nearest Hyundaiauthorised repairer must be sought be- fore the vehicle is driven again. Your Hyundai is equipped with a diago-nally split dual braking system which will ensure that in the event of one of the brake circuits becoming defective, ap-proximately fifty per cent of the normal braking performance will be available.
!
B260H03A-EAT
PARKING BRAKE/ BRAKE FLUID LEVELWARNING LIGHT
SB210K1-E
OIL PRESSURE WARNING LIGHT
!CAUTION:
If the oil pressure light illuminates when the engine is running, an in- sufficient oil pressure level for con-tinued safe operation of the engine exists. Continued operation of the engine in this condition may resultin serious engine damage. Under normal circumstances, the light will illuminate when the igni- tion is turned "on" and will be extin-guished when the engine is started. If the oil pressure warning light illu- minates whilst the engine is run-ning, stop the engine immediately and check the engine oil level. If the level is insufficient, add the requiredamount of oil as indicated by the engine oil dipstick. If the light fails to extinguish when the engine is re-started, do not continue to operate the vehicle. If the oil pressure light illuminates during normal operation and the cause is not an insufficient oil level, or the light fails to illuminate whenthe ignition is turned "on", contact the nearest Hyundai authorised re- pairer before further operating thevehicle.
WARNING:
In the event of problems being sus- pected with the braking system, the advice of the nearest Hyundai authorised repairer must be soughtbefore the vehicle is driven. Driving the vehicle with either an electrical or hydraulic braking system defectmay be dangerous, resulting in acci- dent or personal injury.
tbuk-1a.p65 3/6/2007, 10:22 AM
48