ECU Hyundai Getz 2009 Owner's Manual
[x] Cancel search | Manufacturer: HYUNDAI, Model Year: 2009, Model line: Getz, Model: Hyundai Getz 2009Pages: 254, PDF Size: 7.8 MB
Page 18 of 254
1- 6 FEATURES OF YOUR HYUNDAI
HNF2011
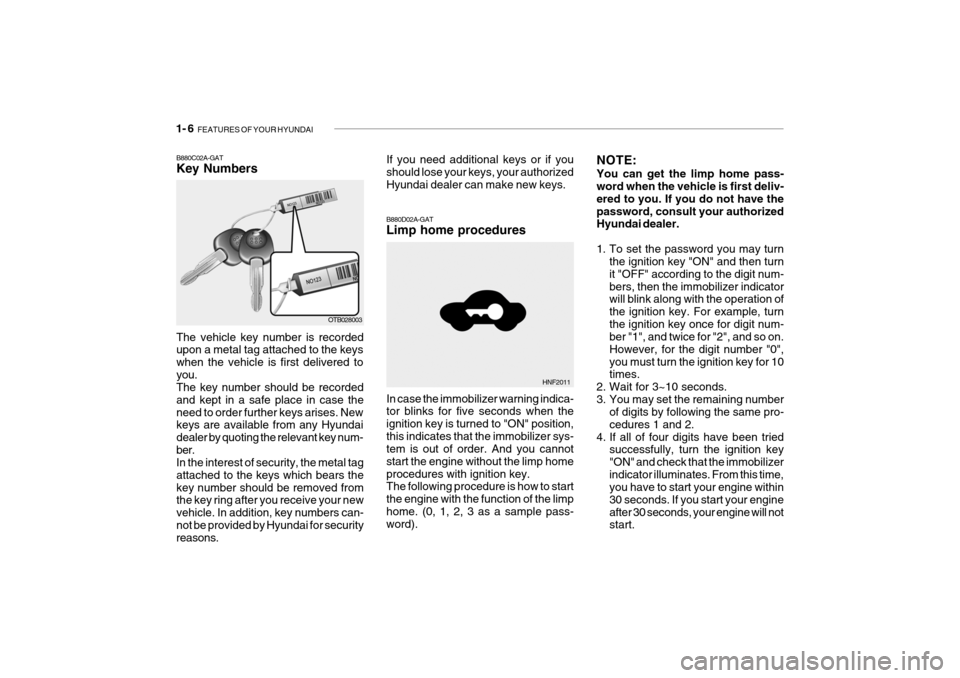
B880D02A-GAT Limp home procedures In case the immobilizer warning indica- tor blinks for five seconds when the ignition key is turned to "ON" position,this indicates that the immobilizer sys- tem is out of order. And you cannot start the engine without the limp homeprocedures with ignition key. The following procedure is how to start the engine with the function of the limphome. (0, 1, 2, 3 as a sample pass- word).
B880C02A-GAT Key Numbers
OTB028003
The vehicle key number is recorded upon a metal tag attached to the keys when the vehicle is first delivered toyou. The key number should be recorded and kept in a safe place in case theneed to order further keys arises. New keys are available from any Hyundai dealer by quoting the relevant key num-ber. In the interest of security, the metal tag attached to the keys which bears thekey number should be removed from the key ring after you receive your new vehicle. In addition, key numbers can-not be provided by Hyundai for security reasons. If you need additional keys or if youshould lose your keys, your authorized Hyundai dealer can make new keys.
NOTE: You can get the limp home pass- word when the vehicle is first deliv- ered to you. If you do not have thepassword, consult your authorized Hyundai dealer.
1. To set the password you may turn
the ignition key "ON" and then turn it "OFF" according to the digit num-bers, then the immobilizer indicator will blink along with the operation of the ignition key. For example, turnthe ignition key once for digit num- ber "1", and twice for "2", and so on. However, for the digit number "0",you must turn the ignition key for 10 times.
2. Wait for 3~10 seconds.
3. You may set the remaining number of digits by following the same pro-cedures 1 and 2.
4. If all of four digits have been tried successfully, turn the ignition key"ON" and check that the immobilizerindicator illuminates. From this time, you have to start your engine within 30 seconds. If you start your engineafter 30 seconds, your engine will not start.
Page 19 of 254
FEATURES OF YOUR HYUNDAI 1- 7
NOTE: If the engine dies while driving after limp home procedure, you can start your engine within 8 seconds with-out limp home procedure again.
5. If the immobilizer indicator blinks for
five seconds, you have to try the limp home procedure again from the beginning.
After doing the limp home procedure,you have to consult with your autho-rized Hyundai dealer as soon as pos- sible.
! CAUTION:
o If you fail to try the limp home procedure with the sequence of three times, you have to wait forabout one hour to do the limp home procedure again.
o If you cannot start your engine in spite of limp home procedure,have your vehicle towed by an authorized Hyundai dealer.
UNLOCK
B040A02Y-AAT DOOR LOCKS
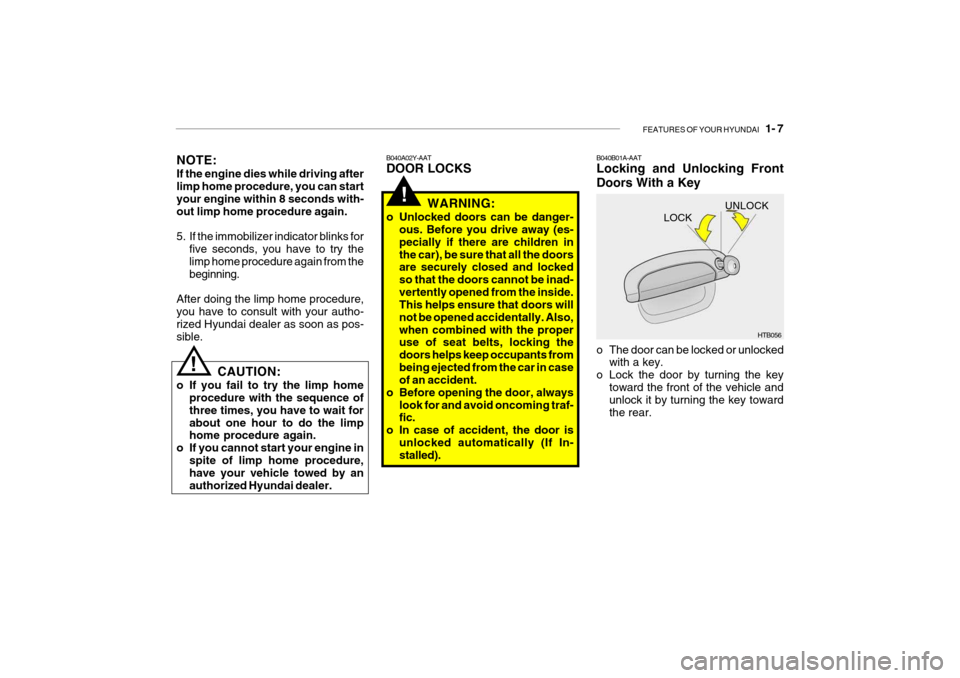
B040B01A-AATLocking and Unlocking Front Doors With a Key
HTB056
LOCK!WARNING:
o Unlocked doors can be danger- ous. Before you drive away (es- pecially if there are children inthe car), be sure that all the doors are securely closed and locked so that the doors cannot be inad-vertently opened from the inside. This helps ensure that doors will not be opened accidentally. Also,when combined with the proper use of seat belts, locking the doors helps keep occupants frombeing ejected from the car in case of an accident.
o Before opening the door, always look for and avoid oncoming traf-fic.
o In case of accident, the door is unlocked automatically (If In-stalled). o The door can be locked or unlocked
with a key.
o Lock the door by turning the key
toward the front of the vehicle andunlock it by turning the key toward the rear.
Page 31 of 254
FEATURES OF YOUR HYUNDAI 1- 19
WARNING:
o When you return the folded down seatback to its upright position, make sure the seat belts are in position to be accessible and tofunction properly.
o When you return the folded down
seatback to its upright position,be careful not to get your fingers or legs in.
o The purpose of the fold down rear seatback and the fold for-ward rear seat cushion is to in- crease cargo space. Do not allowpassengers to sit in the cargo area while the car is moving. This is not a proper seating positionand no seat belts are available for use when the seatback is folded down. Passengers whoare not properly seated and wear- ing seat belts could sustain seri- ous injuries or death in case ofan accident or a sudden stop.
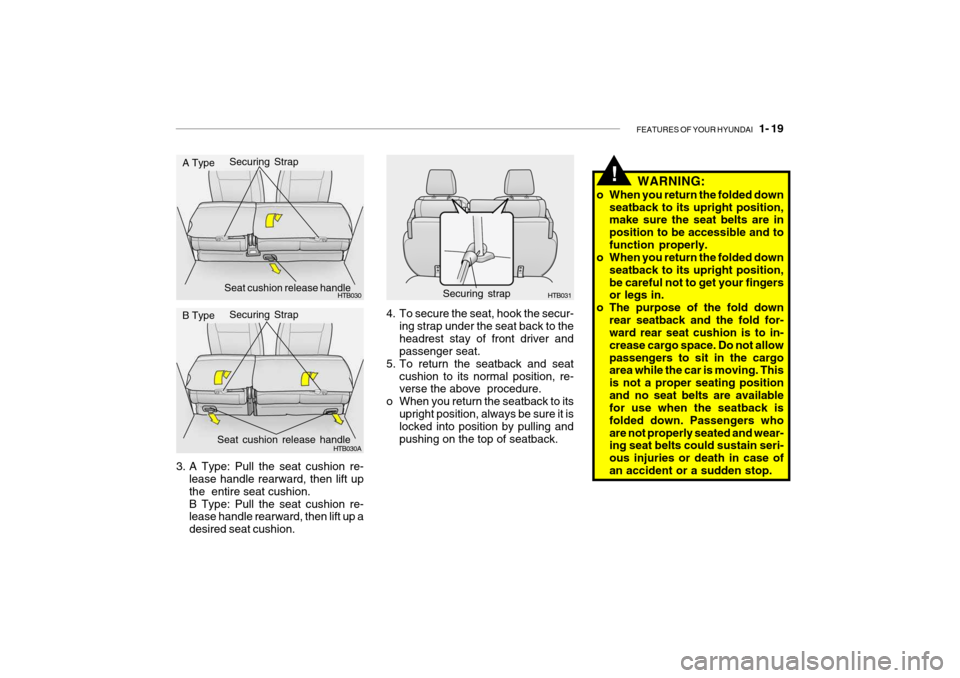
3. A Type: Pull the seat cushion re-
lease handle rearward, then lift upthe entire seat cushion.B Type: Pull the seat cushion re- lease handle rearward, then lift up a desired seat cushion.
A Type B Type 4. To secure the seat, hook the secur-
ing strap under the seat back to the headrest stay of front driver and passenger seat.
5. To return the seatback and seat cushion to its normal position, re-verse the above procedure.
o When you return the seatback to its upright position, always be sure it islocked into position by pulling and pushing on the top of seatback.
HTB030
Seat cushion release handle
HTB030A
Seat cushion release handle
HTB031Securing strap
!
Securing Strap Securing Strap
Page 33 of 254

FEATURES OF YOUR HYUNDAI 1- 21
B150A02A-GAT SEAT BELT PRECAUTIONS All occupants of the vehicle should wear their seat belts at all times. In-deed, your province's laws may re- quire that some or all occupants of the vehicle use seat belts.The possibility of injury or the severity of injury in an accident will be de- creased if this elementary safety pre-caution is observed. In addition, the following recommendations are made: B150B01Y-GAT Infant or Small Child Some countries require the use of child restraint systems for infants and small children. Whether this is requiredby law or not, it is strongly recom- mended that a child restraint seat or infant restraint system be used forinfants or small children weighing less than 18 kilograms (40 pounds). NOTE: Small children are best protected in an accident when properly re- strained by a child restraint sys-tem. B150C02A-AAT Larger Children Children who are too large for child restraint systems should occupy therear seat and use the available lap/ shoulder belts. The lap portion should be fastened snug on the hips and aslow as possible. Check belt fit periodi- cally. A child's squirming could put the belt out of position. Children are af-forded the most safety in the event of an accident when they are restrained by a proper restraint system in the rearseat. If a larger child (over age 13) must be seated in the front seat, the child should be securely restrained bythe available lap/shoulder belt and the seat should be placed in the rearmost position. Children under the age of 13should be restrained securely in the rear seat. NEVER place a rear facing child seat in the front seat of a vehicle.
B150D01S-AAT Pregnant Women The use of a seat belt is recommended for pregnant women to lessen thechance of injury in an accident. When a seat belt is used, it should be placed as low and snugly as possible on thehips, not across the abdomen. For specific recommendations, consult a physician. B150E01A-AAT Injured Person A seat belt should be used when an injured person is being transported. When this is necessary, you should consult a physician for recommenda-tions. B150F01A-AAT One Person Per Belt Two people (including children) should never attempt to use a single seat belt.This could increase the severity of injuries in case of an accident.
Page 40 of 254
1- 28 FEATURES OF YOUR HYUNDAI
o Children who are too large to be in
a child restraint should sit in the rear seat and be restrained with the available lap/shoulder belts. Never allow children to ride in thefront passenger seat.
o Always make sure that the shoul- der belt portion of the outboard lap/shoulder belt is positioned midway over the shoulder, neveracross the neck or behind the back. Moving the child closer to the center of the vehicle may helpprovide a good shoulder belt fit. The lap belt portion of the lap/ shoulder belt or the center seat lap belt must always be posi- tioned as low as possible on thechild's hips and as snug as pos- sible.
o If the seat belt will not properly fit the child, Hyundai recommends the use of an approved boosterseat in the rear seat in order to raise the child's seating height so that the seat belt will properly fitthe child.B230A04A-GAT CHILD RESTRAINT SYSTEM (If Installed) Children riding in the car should sit in the rear seat and must always be properly restrained to minimize therisk of injury in an accident, sudden stop or sudden maneuver. According to accident statistics, children are saferwhen properly restrained in the rear seats than in the front seat. Larger children not in a child restraint shoulduse one of the seat belts provided. You are required by law to use safety restraints for children. If small childrenride in your vehicle you must put them in a child restraint system (safety seat). Child restraint systems are designed tobe secured in vehicle seats by lap belts or the lap belt portion of a lap/shoulder belt, or by a tether anchor and/or ISOFIXanchors (if installed). Children could be injured or killed in a crash if their restraints are not properlysecured. For small children and babies, a child seat or infant seat must be used. Before buying a particular child restraintsystem, make sure it fits your car and seat belts, and fits your child. Follow all the instructions provided by the manu-facturer when installing the child re- straint system. WARNING:
o A child restraint system must be placed in the rear seat. Neverinstall a child or infant seat on the front passenger's seat.Should an accident occur and cause the passenger side airbag to deploy, it could severely in-jure or kill an infant or child seated in an infant or child seat. Thus, only use a child restraint in therear seat of your vehicle.
o Since a safety belt or child re- straint system can become very hot if it is left in a closed vehicle, be sure to check the seat coverand buckles before placing a child there.
o When the child restraint system is not in use, store it in the luggage compartment or fasten it with asafety belt so that it will not be thrown forward in the case of a sudden stop or an accident.
!
Page 41 of 254
FEATURES OF YOUR HYUNDAI 1- 29
o Never allow a child to stand up or
kneel on the seat.
o Never use an infant carrier or child safety seat that "hooks" over a seatback; it may not provide ad- equate security in an accident.
o Never allow a child to be held in a person's arms while they are in a moving vehicle, as this could re-sult in serious injury to the child in the event of an accident or a sudden stop. Holding a child in amoving vehicle does not provide the child with any means of pro- tection during an accident, even if the person holding the child is wearing a seat belt.
o If the child restaint seat is not anchored properly, the risk of achild being seriously injured or killed in a collision greatly in- creases.
OTB039101
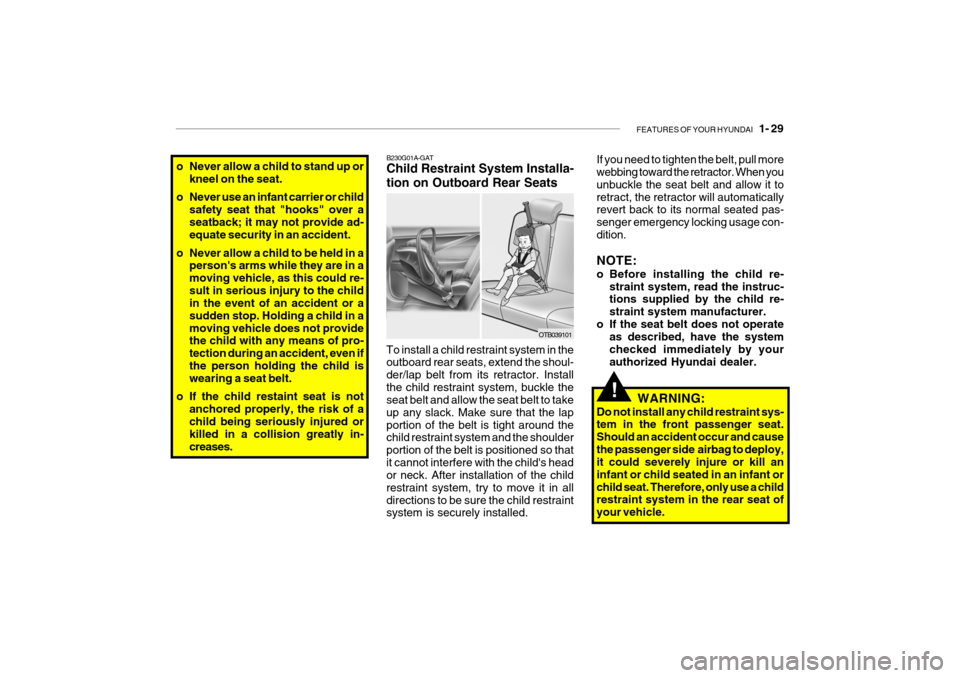
To install a child restraint system in the outboard rear seats, extend the shoul- der/lap belt from its retractor. Installthe child restraint system, buckle the seat belt and allow the seat belt to take up any slack. Make sure that the lapportion of the belt is tight around the child restraint system and the shoulder portion of the belt is positioned so thatit cannot interfere with the child's head or neck. After installation of the child restraint system, try to move it in alldirections to be sure the child restraint system is securely installed. B230G01A-GAT Child Restraint System Installa- tion on Outboard Rear Seats
WARNING:
Do not install any child restraint sys- tem in the front passenger seat. Should an accident occur and causethe passenger side airbag to deploy, it could severely injure or kill an infant or child seated in an infant orchild seat. Therefore, only use a child restraint system in the rear seat of your vehicle.
If you need to tighten the belt, pull more webbing toward the retractor. When you unbuckle the seat belt and allow it toretract, the retractor will automatically revert back to its normal seated pas- senger emergency locking usage con-dition. NOTE:
o Before installing the child re-
straint system, read the instruc- tions supplied by the child re- straint system manufacturer.
o If the seat belt does not operate as described, have the systemchecked immediately by yourauthorized Hyundai dealer.!
Page 43 of 254
FEATURES OF YOUR HYUNDAI 1- 31
B230E01TB
Back panel
Front of Vehicle
Attaching clip
Covering shelf
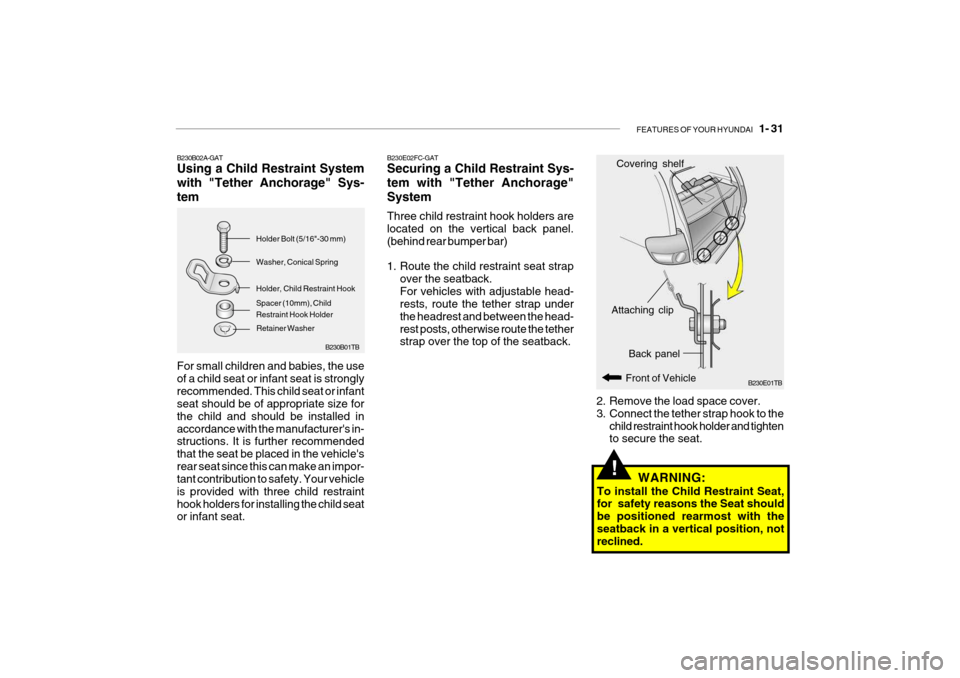
2. Remove the load space cover.
3. Connect the tether strap hook to the child restraint hook holder and tighten to secure the seat.
B230B01TB
B230B02A-GAT Using a Child Restraint System with "Tether Anchorage" Sys-tem For small children and babies, the use of a child seat or infant seat is stronglyrecommended. This child seat or infant seat should be of appropriate size for the child and should be installed inaccordance with the manufacturer's in- structions. It is further recommended that the seat be placed in the vehicle'srear seat since this can make an impor- tant contribution to safety. Your vehicle is provided with three child restrainthook holders for installing the child seat or infant seat. Spacer (10mm), Child Restraint Hook Holder
Holder Bolt (5/16"-30 mm) Washer, Conical Spring Holder, Child Restraint Hook
Retainer Washer B230E02FC-GAT Securing a Child Restraint Sys- tem with "Tether Anchorage"System Three child restraint hook holders are located on the vertical back panel. (behind rear bumper bar)
1. Route the child restraint seat strap
over the seatback. For vehicles with adjustable head- rests, route the tether strap under the headrest and between the head-rest posts, otherwise route the tether strap over the top of the seatback.
!WARNING:
To install the Child Restraint Seat, for safety reasons the Seat should be positioned rearmost with theseatback in a vertical position, not reclined.
Page 44 of 254
1- 32 FEATURES OF YOUR HYUNDAI
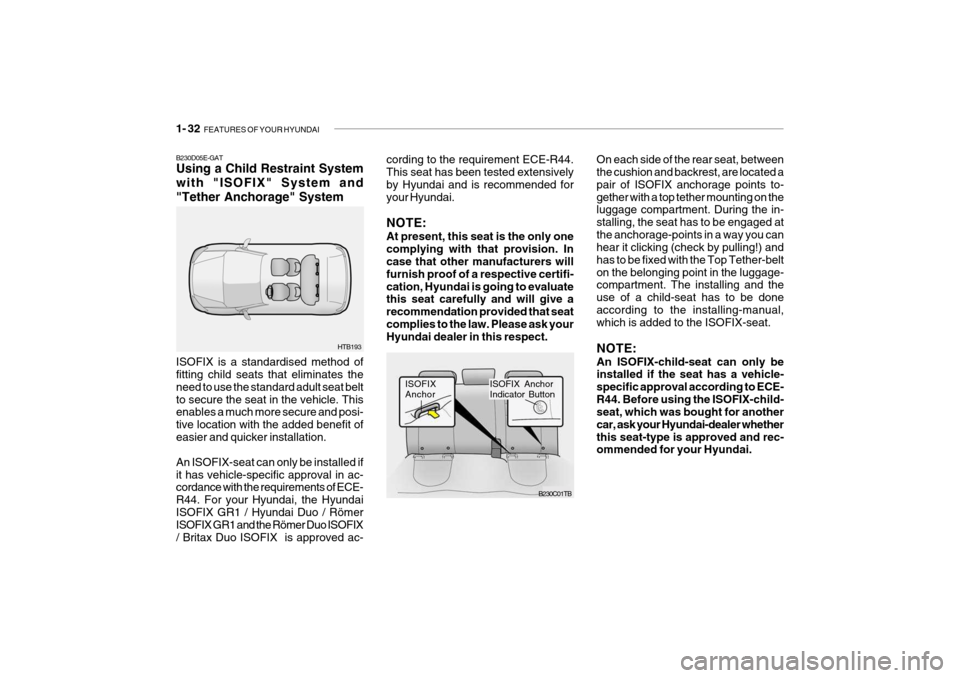
B230D05E-GAT Using a Child Restraint System with "ISOFIX" System and"Tether Anchorage" System ISOFIX is a standardised method of fitting child seats that eliminates the need to use the standard adult seat beltto secure the seat in the vehicle. This enables a much more secure and posi- tive location with the added benefit ofeasier and quicker installation. An ISOFIX-seat can only be installed if it has vehicle-specific approval in ac- cordance with the requirements of ECE- R44. For your Hyundai, the HyundaiISOFIX GR1 / Hyundai Duo / Römer ISOFIX GR1 and the Römer Duo ISOFIX / Britax Duo ISOFIX is approved ac-
HTB193 cording to the requirement ECE-R44. This seat has been tested extensively by Hyundai and is recommended foryour Hyundai. NOTE: At present, this seat is the only one complying with that provision. In case that other manufacturers will furnish proof of a respective certifi-cation, Hyundai is going to evaluate this seat carefully and will give a recommendation provided that seatcomplies to the law. Please ask your Hyundai dealer in this respect.
B230C01TB
ISOFIX Anchor
ISOFIX Anchor Indicator Button On each side of the rear seat, between the cushion and backrest, are located a pair of ISOFIX anchorage points to-gether with a top tether mounting on the luggage compartment. During the in- stalling, the seat has to be engaged atthe anchorage-points in a way you can hear it clicking (check by pulling!) and has to be fixed with the Top Tether-belton the belonging point in the luggage- compartment. The installing and the use of a child-seat has to be doneaccording to the installing-manual, which is added to the ISOFIX-seat. NOTE: An ISOFIX-child-seat can only be installed if the seat has a vehicle- specific approval according to ECE-R44. Before using the ISOFIX-child- seat, which was bought for another car, ask your Hyundai-dealer whetherthis seat-type is approved and rec- ommended for your Hyundai.
Page 45 of 254
FEATURES OF YOUR HYUNDAI 1- 33
WARNING:
o Do not install a child restraint seat at the center of the rear seat using the vehicle's outboard rear seat ISOFIX anchors. The ISOFIX an-chors are only provided for the left and right outboard rear seating positions. Do not misuse theISOFIX anchors by attempting to attach a child restraint seat in the middle of the rear seat to the ISOFIXanchors. In a crash, the child re- straint seat ISOFIX attachments may not be strong enough to se-cure the child restraint seat prop- erly in the center of the rear seat and may break, causing seriousinjury or death.!
B230C02TB
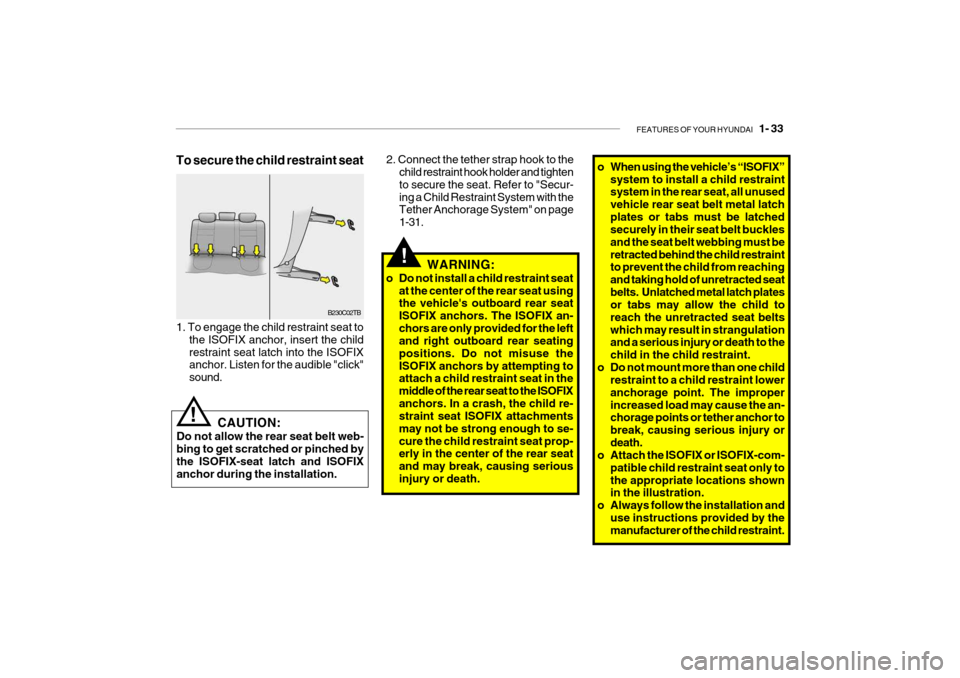
1. To engage the child restraint seat to the ISOFIX anchor, insert the child restraint seat latch into the ISOFIX anchor. Listen for the audible "click" sound.
To secure the child restraint seat
2. Connect the tether strap hook to the
child restraint hook holder and tighten to secure the seat. Refer to "Secur-ing a Child Restraint System with the Tether Anchorage System" on page 1-31.
! CAUTION:
Do not allow the rear seat belt web- bing to get scratched or pinched by the ISOFIX-seat latch and ISOFIX anchor during the installation.
o When using the vehicle’s “ISOFIX” system to install a child restraint system in the rear seat, all unused vehicle rear seat belt metal latchplates or tabs must be latched securely in their seat belt buckles and the seat belt webbing must beretracted behind the child restraint to prevent the child from reaching and taking hold of unretracted seat
belts. Unlatched metal latch plates or tabs may allow the child to reach the unretracted seat beltswhich may result in strangulation and a serious injury or death to the child in the child restraint.
o Do not mount more than one child restraint to a child restraint loweranchorage point. The improperincreased load may cause the an- chorage points or tether anchor to break, causing serious injury ordeath.
o Attach the ISOFIX or ISOFIX-com-
patible child restraint seat only tothe appropriate locations shown in the illustration.
o Always follow the installation and use instructions provided by themanufacturer of the child restraint.
Page 91 of 254
FEATURES OF YOUR HYUNDAI 1- 79
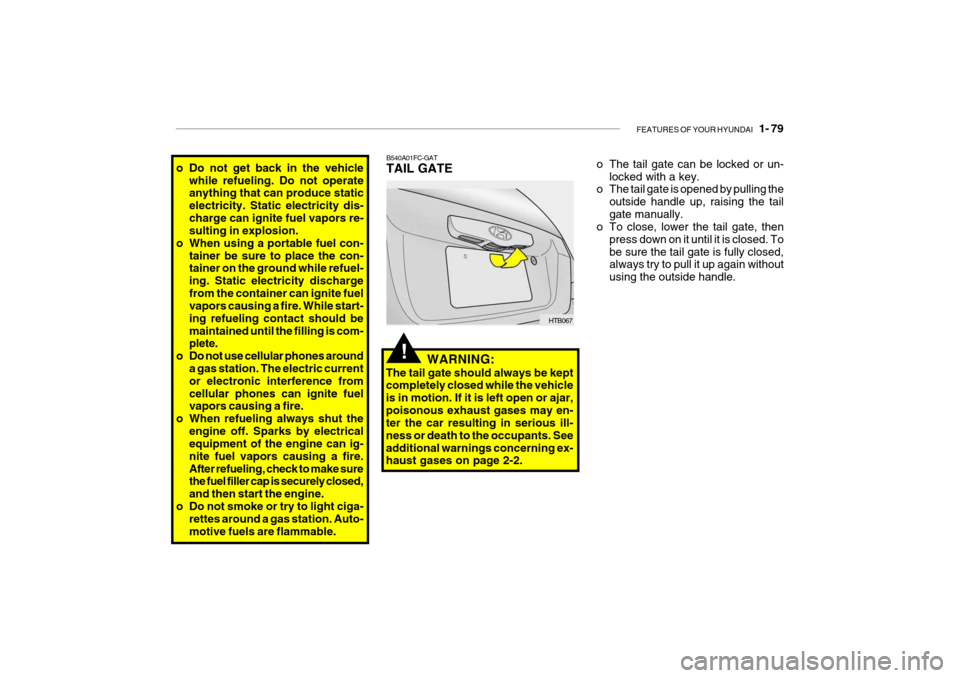
B540A01FC-GAT TAIL GATE
HTB067
o Do not get back in the vehicle
while refueling. Do not operate anything that can produce static electricity. Static electricity dis-charge can ignite fuel vapors re- sulting in explosion.
o When using a portable fuel con-
tainer be sure to place the con-tainer on the ground while refuel- ing. Static electricity dischargefrom the container can ignite fuel vapors causing a fire. While start- ing refueling contact should bemaintained until the filling is com- plete.
o Do not use cellular phones around a gas station. The electric current or electronic interference fromcellular phones can ignite fuel vapors causing a fire.
o When refueling always shut the
engine off. Sparks by electricalequipment of the engine can ig- nite fuel vapors causing a fire.After refueling, check to make sure the fuel filler cap is securely closed, and then start the engine.
o Do not smoke or try to light ciga- rettes around a gas station. Auto-motive fuels are flammable. WARNING:
The tail gate should always be kept completely closed while the vehicle is in motion. If it is left open or ajar,poisonous exhaust gases may en- ter the car resulting in serious ill- ness or death to the occupants. Seeadditional warnings concerning ex- haust gases on page 2-2.
!
o The tail gate can be locked or un- locked with a key.
o The tail gate is opened by pulling the
outside handle up, raising the tail gate manually.
o To close, lower the tail gate, then
press down on it until it is closed. Tobe sure the tail gate is fully closed, always try to pull it up again without using the outside handle.