fuel Hyundai Grand i10 2015 Owner's Manual
[x] Cancel search | Manufacturer: HYUNDAI, Model Year: 2015, Model line: Grand i10, Model: Hyundai Grand i10 2015Pages: 343, PDF Size: 29.47 MB
Page 1 of 343
Introduction
HOW TO USE THIS MANUAL . . . . . . . . . . . . . . . 1-2
FUEL REQUIREMENTS . . . . . . . . . . . . . . . . . . . . 1-3
VEHICLE BREAK-IN PROCESS . . . . . . . . . . . . . 1-51
Page 3 of 343
13
Introduction
Unleaded
Your new vehicle is designed to use only
unleaded fuel having an Octane Rating
of RON (Research Octane Number) 91 /
AKI (Anti-Knock Index) 87 or higher.
Your new vehicle is designed to obtain
maximum performance with UNLEADED
FUEL, as well as minimize exhaust emis-
sions and spark plug fouling.
Leaded (if equipped)
For some countries, your vehicle is
designed to use leaded gasoline. When
you are going to use leaded gasoline, we
recommend that you ask an authorzied
HYUNDAI dealer whether leaded gaso-
line in your vehicle is available or not.Octane Rating of leaded gasoline is
same with unleaded one.
FUEL REQUIREMENTSCAUTION
NEVER USE LEADED FUEL. The
use of leaded fuel is detrimental to
the catalytic converter and willdamage the engine control sys-tem’s oxygen sensor and affect emission control.
Never add any fuel system cleaningagents to the fuel tank other thanwhat has been specified. (We rec-ommend that you contact an
authorized HYUNDAI dealer fordetails)
WARNING
Do not "top off" after the nozzle automatically shuts off when refueling.
Always check that the fuel cap is installed securely to prevent fuel
spillage in the event of an acci-dent.
Page 4 of 343
Introduction
4
1
Gasoline containing alcohol and
methanol
Gasohol, a mixture of gasoline and
ethanol (also known as grain alcohol),and gasoline or gasohol containing
methanol (also known as wood alcohol)
are being marketed along with or instead
of leaded or unleaded gasoline.Do not use gasohol containing more than10% ethanol, and do not use gasoline or
gasohol containing any methanol. Either
of these fuels may cause drivability prob-lems and damage the fuel system.
Discontinue using gasohol of any kind if
drivability problems occur. Vehicle dam-
age or driveability problems may not be
covered by the manufacturer’s warranty if
they result from the use of:
1. Gasohol containing more than 10% ethanol.
2. Gasoline or gasohol containing methanol.
3. Leaded fuel or leaded gasohol. (Except for vehicle designed to use
leaded gasoline for some countries)
Use of MTBE
HYUNDAI recommends avoiding fuels
containing MTBE (Methyl Tertiary Butyl
Ether) over 15.0% vol. (Oxygen Content
2.7% weight) in your vehicle.
Fuel containing MTBE over 15.0% vol.
(Oxygen Content 2.7% weight) may
reduce vehicle performance and produce
vapor lock or hard starting.
Do not use methanol
Fuels containing methanol (wood alco-
hol) should not be used in your vehicle.
This type of fuel can reduce vehicle per-
formance and damage components ofthe fuel system.
CAUTION
Never use gasohol which contains
methanol. Discontinue use of anygasohol product which impairs dri-vability.
CAUTION
Your New Vehicle Limited Warrantymay not cover damage to the fuelsystem and any performance prob-lems that are caused by the use of
fuels containing methanol or fuelscontaining MTBE (Methyl Tertiary Butyl Ether) over 15.0% vol.(Oxygen Content 2.7% weight.)
CAUTION
Your New Vehicle Limited Warrantymay not cover damage to the fuelsystem and performance problems
that are caused by the use ofmethanol or fuels containing methanol.
Page 5 of 343
15
Introduction
Gasolines for cleaner air
To help contribute to cleaner air,
HYUNDAI recommends that you usegasolines treated with detergent addi-
tives, which help prevent deposit forma-
tion in the engine. These gasolines will
help the engine run cleaner and enhance
performance of the Emission ControlSystem.
Operation in foreign countries
If you are going to drive your vehicle in
another country, be sure to:
Observe all regulations regarding reg-istration and insurance.
Determine that acceptable fuel is avail- able. No special break-in period is needed. By
following a few simple precautions for the
first 1,000 km (600 miles) you may add to
the performance, economy and life of
your vehicle.
Do not race the engine.
While driving, keep your engine speed
(rpm, or revolutions per minute)
between 2,000 rpm and 4,000 rpm.
Do not maintain a single speed for long periods of time, either fast or slow.
Varying engine speed is needed to
properly break-in the engine.
Avoid hard stops, except in emergen- cies, to allow the brakes to seat prop-
erly.
Don't let the engine idle longer than 3 minutes at one time.
VEHICLE BREAK-IN PROCESS
Page 7 of 343
Your vehicle at a glance
2
2
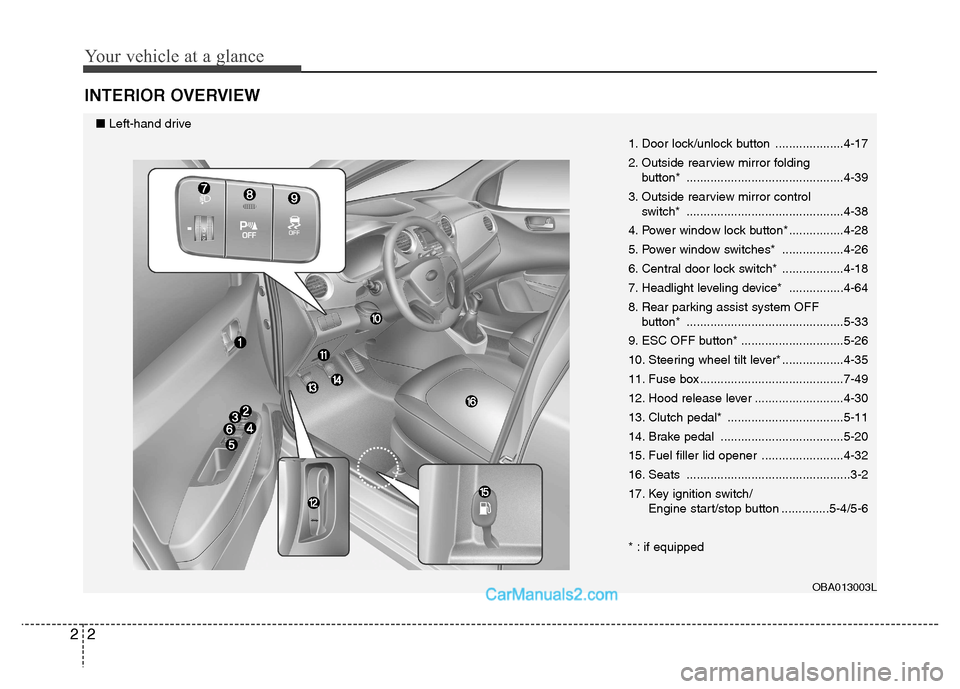
INTERIOR OVERVIEW
1. Door lock/unlock button ....................4-17
2. Outside rearview mirror folding
button* ..............................................4-39
3. Outside rearview mirror control switch* ..............................................4-38
4. Power window lock button* ................4-28
5. Power window switches* ..................4-26
6. Central door lock switch* ..................4-18
7. Headlight leveling device* ................4-64
8. Rear parking assist system OFF button* ..............................................5-33
9. ESC OFF button* ..............................5-26
10. Steering wheel tilt lever* ..................4-35
11. Fuse box ..........................................7-49
12. Hood release lever ..........................4-30
13. Clutch pedal* ..................................5-11
14. Brake pedal ....................................5-20
15. Fuel filler lid opener ........................4-32
16. Seats ................................................3-2
17. Key ignition switch/ Engine start/stop button ..............5-4/5-6
* : if equipped
OBA013003L
■Left-hand drive
Page 8 of 343
23
Your vehicle at a glance
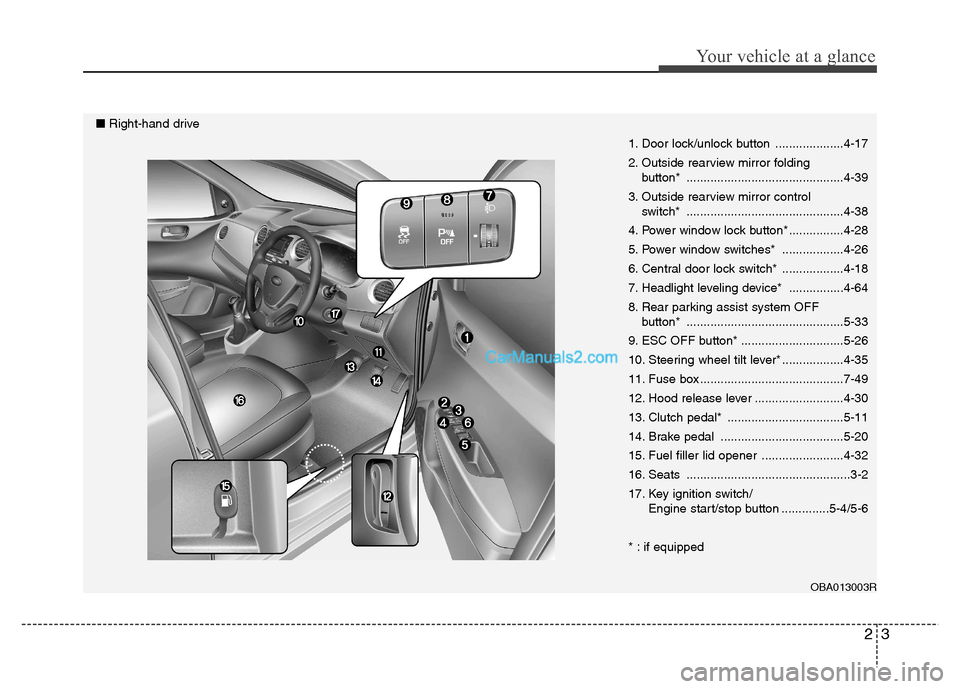
1. Door lock/unlock button ....................4-17
2. Outside rearview mirror folding button* ..............................................4-39
3. Outside rearview mirror control switch* ..............................................4-38
4. Power window lock button* ................4-28
5. Power window switches* ..................4-26
6. Central door lock switch* ..................4-18
7. Headlight leveling device* ................4-64
8. Rear parking assist system OFF button* ..............................................5-33
9. ESC OFF button* ..............................5-26
10. Steering wheel tilt lever* ..................4-35
11. Fuse box ..........................................7-49
12. Hood release lever ..........................4-30
13. Clutch pedal* ..................................5-11
14. Brake pedal ....................................5-20
15. Fuel filler lid opener ........................4-32
16. Seats ................................................3-2
17. Key ignition switch/ Engine start/stop button ..............5-4/5-6
* : if equipped
OBA013003R
■Right-hand drive
Page 57 of 343
Features of your vehicle
KEYS . . . . . . . . . . . . . . . . . . . . . . . . . . . . . . . . . . . . . 4-3• Record your key number . . . . . . . . . . . . . . . . . . . . . . . 4-3
. . . . . . . . . . . . . . . . . . . . . . . . . . . . . . . . 4-3
. . . . . . . . . . . . . . . . . . . . . . . . . . . . 4-4
REMOTE KEYLESS ENTRY . . . . . . . . . . . . . . . . 4-7 . . . . . . . . . . . 4-7
. . . . . . . . . . . . . . . . . . . . . . . . . . . 4-9
SMART KEY . . . . . . . . . . . . . . . . . . . . . . . . . . . . . 4-11 . . . . . . . . . . . . . . . . . . . . . . . . . . . 4-11
. . . . . . 4-13
THEFT-ALARM SYSTEM . . . . . . . . . . . . . . . . . . 4-14 . . . . . . . . . . . . . . . . . . . . . . . . . . . . . . . . . 4-14
. . . . . . . . . . . . . . . . . . . . . . . . . . . . 4-15
DOOR LOCKS . . . . . . . . . . . . . . . . . . . . . . . . . . . 4-16 . . . . . . . . . . . . . . . . . . . . . . 4-16
. . . . . . . . . . . . . . . . . . . . . . . . 4-17
. . . . . . . . . . . . . . 4-20
. . . . . . . . . . . . . . . . . 4-20
. . . . . . . . . . . . . . . . . 4-20
TRUNK . . . . . . . . . . . . . . . . . . . . . . . . . . . . . . . . . . 4-21 . . . . . . . . . . . . . . . . . . . . . . . . . . . . 4-21
. . . . . . . . . . . . . . . . . . . . . . . . . . . . . 4-22 TAILGATE . . . . . . . . . . . . . . . . . . . . . . . . . . . . . . . 4-23
. . . . . . . . . . . . . . . . . . . . . . . . . . 4-23
. . . . . . . . . . . . . . . . . . . . . . . . . . . 4-23
WINDOWS . . . . . . . . . . . . . . . . . . . . . . . . . . . . . . 4-24 . . . . . . . . . . . . . . . . . . . . . . . . . . . . . . 4-26
. . . . . . . . . . . . . . . . . . . . . . . . . . . . . 4-29
HOOD . . . . . . . . . . . . . . . . . . . . . . . . . . . . . . . . . . . 4-30 . . . . . . . . . . . . . . . . . . . . . . . . . . . . 4-30
. . . . . . . . . . . . . . . . . . . . . . . . . . . . . 4-31
FUEL FILLER LID . . . . . . . . . . . . . . . . . . . . . . . 4-32 . . . . . . . . . . . . . . . . . . . . . . 4-32
. . . . . . . . . . . . . . . . . . . . . . . 4-33
STEERING WHEEL . . . . . . . . . . . . . . . . . . . . . . . 4-35 . . . . . . . . . . . . . . . . . . . . . . . . 4-35
. . . . . . . . . . . . . . . . . . . . . . . . . . . . . . . . . . . . . . . 4-36
MIRRORS . . . . . . . . . . . . . . . . . . . . . . . . . . . . . . . 4-37 . . . . . . . . . . . . . . . . . . . . . . . . 4-37
INSTRUMENT CLUSTER . . . . . . . . . . . . . . . . . . 4-41 . . . . . . . . . . . . . . . . . . . . . . . . . . . . . . . . . . . . . 4-42
HAZARD WARNING FLASHER . . . . . . . . . . . . 4-58
4
Page 88 of 343
Features of your vehicle
32
4
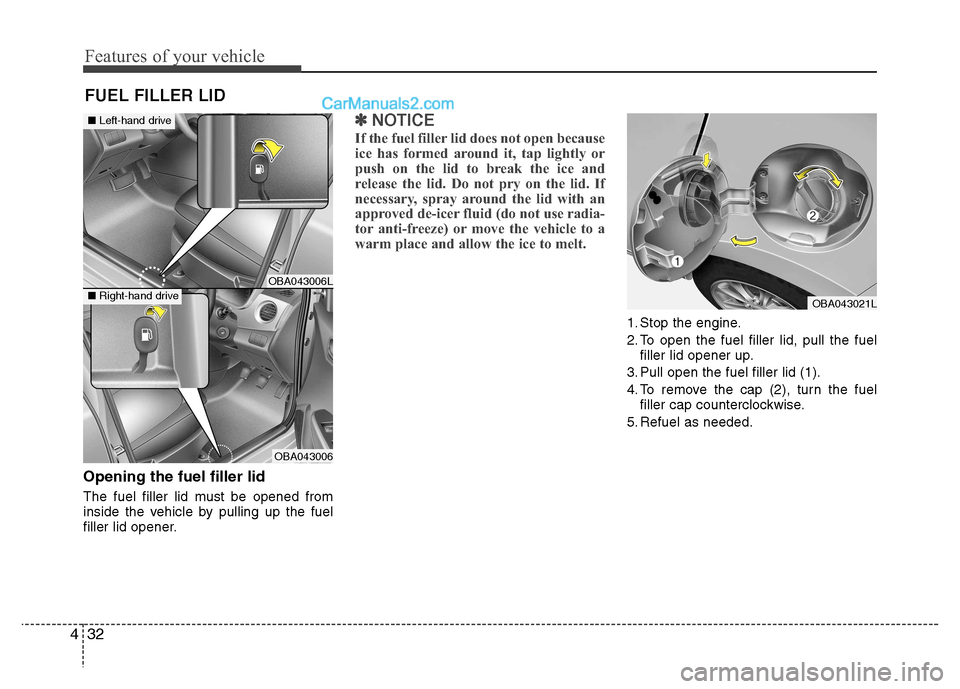
Opening the fuel filler lid
The fuel filler lid must be opened from
inside the vehicle by pulling up the fuel
filler lid opener.
✽✽
NOTICE
If the fuel filler lid does not open because
ice has formed around it, tap lightly or
push on the lid to break the ice and
release the lid. Do not pry on the lid. If
necessary, spray around the lid with an
approved de-icer fluid (do not use radia-
tor anti-freeze) or move the vehicle to a
warm place and allow the ice to melt.
1. Stop the engine.
2. To open the fuel filler lid, pull the fuel filler lid opener up.
3. Pull open the fuel filler lid (1).
4. To remove the cap (2), turn the fuel filler cap counterclockwise.
5. Refuel as needed.
FUEL FILLER LID
OBA043021L
OBA043006L
OBA043006
■
Left-hand drive
■Right-hand drive
Page 89 of 343
433
Features of your vehicle
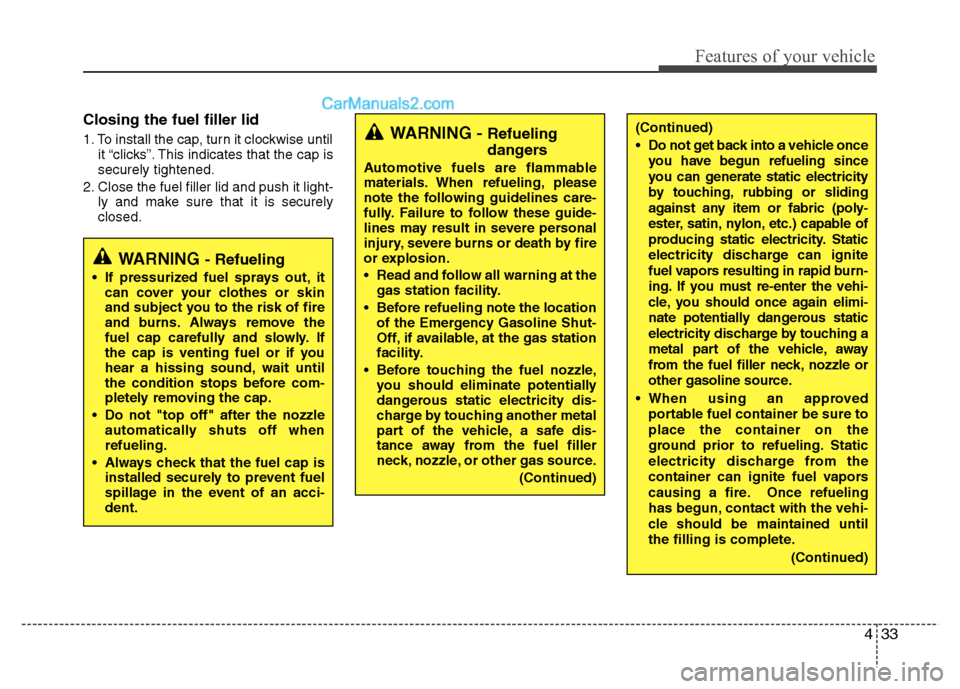
Closing the fuel filler lid
1. To install the cap, turn it clockwise untilit “clicks”. This indicates that the cap is securely tightened.
2. Close the fuel filler lid and push it light- ly and make sure that it is securelyclosed.WARNING - Refueling
dangers
Automotive fuels are flammable
materials. When refueling, please
note the following guidelines care-
fully. Failure to follow these guide-
lines may result in severe personal
injury, severe burns or death by fire
or explosion.
Read and follow all warning at the gas station facility.
Before refueling note the location of the Emergency Gasoline Shut-
Off, if available, at the gas station
facility.
Before touching the fuel nozzle, you should eliminate potentially
dangerous static electricity dis-
charge by touching another metal
part of the vehicle, a safe dis-
tance away from the fuel filler
neck, nozzle, or other gas source.
(Continued)
WARNING - Refueling
If pressurized fuel sprays out, it can cover your clothes or skin
and subject you to the risk of fire
and burns. Always remove the
fuel cap carefully and slowly. If
the cap is venting fuel or if you
hear a hissing sound, wait until
the condition stops before com-
pletely removing the cap.
Do not "top off" after the nozzle automatically shuts off whenrefueling.
Always check that the fuel cap is installed securely to prevent fuel
spillage in the event of an acci-dent.
(Continued)
Do not get back into a vehicle once
you have begun refueling since
you can generate static electricity
by touching, rubbing or sliding
against any item or fabric (poly-
ester, satin, nylon, etc.) capable of
producing static electricity. Static
electricity discharge can ignite
fuel vapors resulting in rapid burn-
ing. If you must re-enter the vehi-
cle, you should once again elimi-
nate potentially dangerous static
electricity discharge by touching a
metal part of the vehicle, away
from the fuel filler neck, nozzle or
other gasoline source.
When using an approved portable fuel container be sure toplace the container on the
ground prior to refueling. Static
electricity discharge from the
container can ignite fuel vapors
causing a fire. Once refueling
has begun, contact with the vehi-
cle should be maintained until
the filling is complete.
(Continued)
Page 90 of 343
Features of your vehicle
34
4
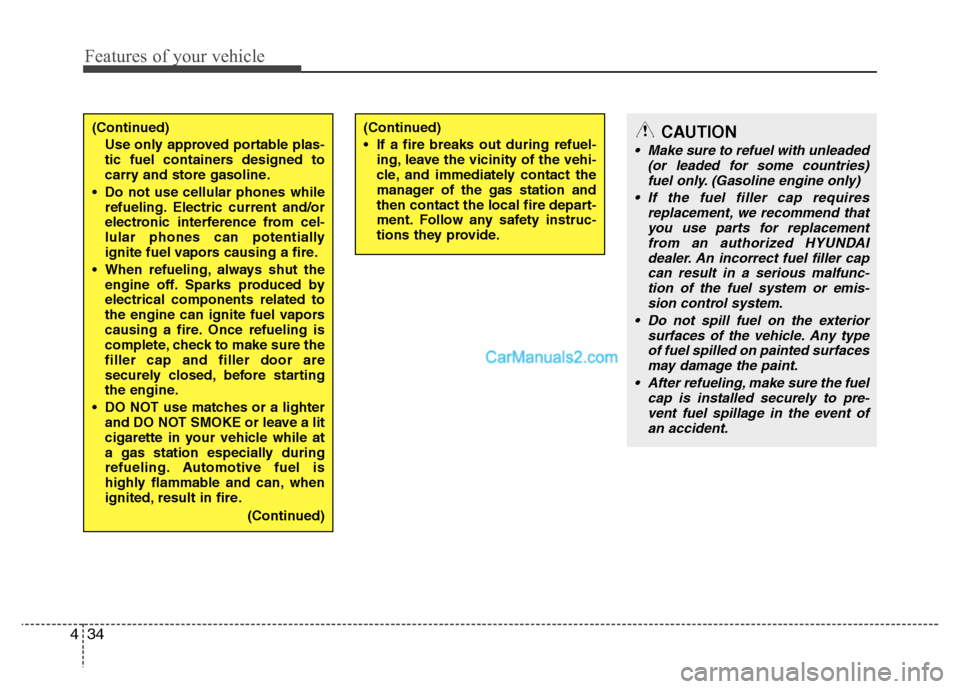
(Continued)
Use only approved portable plas-
tic fuel containers designed to
carry and store gasoline.
Do not use cellular phones while refueling. Electric current and/or
electronic interference from cel-
lular phones can potentially
ignite fuel vapors causing a fire.
When refueling, always shut the engine off. Sparks produced byelectrical components related to
the engine can ignite fuel vapors
causing a fire. Once refueling is
complete, check to make sure thefiller cap and filler door are
securely closed, before starting
the engine.
DO NOT use matches or a lighter and DO NOT SMOKE or leave a lit
cigarette in your vehicle while at
a gas station especially during
refueling. Automotive fuel is
highly flammable and can, when
ignited, result in fire.
(Continued)(Continued)
If a fire breaks out during refuel-ing, leave the vicinity of the vehi-
cle, and immediately contact the
manager of the gas station and
then contact the local fire depart-
ment. Follow any safety instruc-
tions they provide.CAUTION
Make sure to refuel with unleaded
(or leaded for some countries)
fuel only. (Gasoline engine only)
If the fuel filler cap requires replacement, we recommend thatyou use parts for replacement
from an authorized HYUNDAI dealer. An incorrect fuel filler capcan result in a serious malfunc- tion of the fuel system or emis-
sion control system.
Do not spill fuel on the exterior surfaces of the vehicle. Any typeof fuel spilled on painted surfaces may damage the paint.
After refueling, make sure the fuel cap is installed securely to pre-vent fuel spillage in the event of an accident.