audio Hyundai Grandeur 2002 Owner's Manual
[x] Cancel search | Manufacturer: HYUNDAI, Model Year: 2002, Model line: Grandeur, Model: Hyundai Grandeur 2002Pages: 230, PDF Size: 3.82 MB
Page 10 of 230
YOUR VEHICLE AT A GLANCE
1. Headlight Leveling Switch (If installed)
2. Rear Fog Light Switch (If installed)
3. Panel Brightness Control Knob(Rheostat Switch)
4. Traction Control Switch (If installed)
5. Multi-Function Light Switch
6. Cruise Control Main Switch (If installed)
7. Horn and Driver's Airbag
8. Cruise Control Switch/ Audio Remote Control Switch
(If installed)
9. Windshield Wiper/Washer Switch
10. Ignition Switch
CAUTION:
When installing a container of liquid air freshener inside the vehicle, do not place it near theinstrument cluster nor on the instrument panel pad surface. If there is any leakage from the air freshener onto these areas (Instrument cluster, instrument panel pad or air ventilator), it may damage these parts. If the liquid from air freshener does leak onto these areas, wash themwith water immediately. 11. Hazard Warning Switch
12. Digital Clock
13. Audio System (If installed)
14. Passenger's Airbag (If installed)
15. Hood Release Lever
16. Parking Brake Release Lever/Parking Brake (Foot type)
17. Heater/Air Conditioning Control Panel
18. Shift Lever (If installed)
19. Ashtray
20. Accessory Box
21. Glove Box
!
Page 12 of 230
YOUR VEHICLE AT A GLANCE
1. Passenger's Airbag (If installed)
2. Digital Clock
3. Hazard Warning Switch
4. Cruise Control Main Switch (If installed)
5. Multi-Function Light Switch
6. Traction Control Switch (If installed)
7. Horn and Driver's Airbag
8. Cruise Control Switch/ Audio Remote Control Switch(If installed)
9. Ignition Switch
10. Windshield Wiper/Washer Switch 11. Panel Brightness Control Knob
(Rheostat Switch)
12. Rear Fog Light Switch (If installed)
13. Headlight Leveling Switch (If installed)
14. Glove Box
15. Audio System (If installed)
16. Heater/Air Conditioning Control Panel
17. Shift Lever (If installed)
18. Ashtray
19. Accessory Box
20. Parking Brake Release Lever/Parking Brake
(Foot type)
21. Hood Release Lever
CAUTION:
When installing a container of liquid air freshener inside the vehicle, do not place it near theinstrument cluster nor on the instrument panel pad surface. If there is any leakage from theair freshener onto these areas (Instrument cluster, instrument panel pad or air ventilator), itmay damage these parts. If the liquid from air freshener does leak onto these areas, wash them with water immediately.
!
Page 14 of 230
1. FEATURES OF YOUR HYUNDAI
Fuel Recommendations .................................................................. 1-2
Breaking In Your New Hyundai ...................................................... 1-3
Key (Immobilizer System) ............................................................... 1-4
Door Locks (Theft-Alarm System) .................................................. 1-6
Power Windows ............................................................................1-10
Seat (Power Seat) ........................................................................ 1-11
I.M.S (Integrated Memory System) ............................................... 1-15
Seat Belt ....................................................................................... 1-18
Child Restraint System ................................................................. 1-23
Supplemental Restraint (AIRBAG) System .................................. 1-31
Instrument Cluster and Indicator Lights ........................................ 1-39
Warning Light and Indicator ......................................................... 1-41
Multi-function Light Switch ............................................................ 1-48
Windshield Wiper/Washer Switch .................................................1-50
Trip Computer ............................................................................... 1-53
Sunroof ......................................................................................... 1-57
Mirror ............................................................................................. 1-62
Hood Release ............................................................................... 1-68
Cruise Control ............................................................................... 1-72
Audio Rmote Control Switch ......................................................... 1-75
Heating and Cooling Control ........................................................ 1-76
Stereo Sound System ................................................................... 1-91
Audio Syste m ................................................................................ 1-93
Antenna ...................................................................................... 1-115
1
Page 88 of 230
FEATURES OF YOUR HYUNDAI 1- 75
SEEK ( / ) Switch Press the SEEK switch 1 sec. or more.
1. RADIO mode When the SEEK ( ) is pressed, the unit will automatically tune to the nexthigher frequency and when the SEEK( ) switch is pressed, it will automati- cally tune to the next lower frequency.
2. TAPE mode
o Pressing the SEEK ( ) will play the
beginning of the next music seg- ment.
o Pressing the SEEK ( ) will start
replay at the beginning of the musicjust listened to.
3. CD (compact disc)/CDC (compact disc changer) mode
o Press the SEEK ( ) once to skip forward to the beginning of the next track.
o Press the SEEK ( ) once to skip back to the beginning of the track.B610A01L-GAT AUDIO REMOTE CONTROL
SWITCH (If installed) The steering wheel audio remote con- trol switch is installed to promote safe driving. However, do not operate au- dio remote control switches simulta-neously. MODE Switch
Press the MODE switch to select Ra- dio, Tape, CD (compact disc) and CDC. (compact disc changer)Each press of the switch changes thedisplay as follows: FM1 � FM2 � AM(LW) � TAPE � CD � CDC
HXGS266MUTE Switch
o Press the MUTE switch to disap-
pear the sound.
o Once again press the MUTE switch to reproduce the sound.
VOL ( / ) Switch
o Press the VOL ( ) button to in- crease volume.
o Press the VOL ( ) button to de- cease volume.
Page 104 of 230
FEATURES OF YOUR HYUNDAI 1- 91
Ionosphere
B750A02L
AM reception
Mountains
Buildings Unobstructed
area
FM radio station
B750A03L
Ionosphere
FM reception
B750A01L Obstructed area
Iron bridges
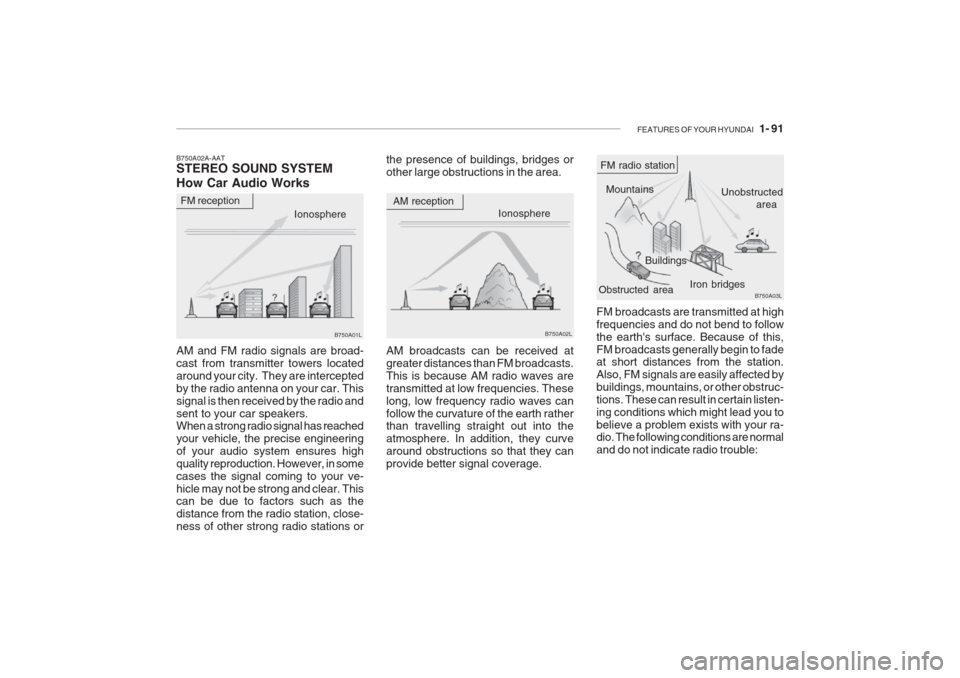
FM broadcasts are transmitted at high frequencies and do not bend to followthe earth's surface. Because of this,FM broadcasts generally begin to fade at short distances from the station. Also, FM signals are easily affected bybuildings, mountains, or other obstruc-tions. These can result in certain listen-ing conditions which might lead you tobelieve a problem exists with your ra- dio. The following conditions are normal and do not indicate radio trouble:
AM broadcasts can be received atgreater distances than FM broadcasts.This is because AM radio waves aretransmitted at low frequencies. Theselong, low frequency radio waves canfollow the curvature of the earth rather than travelling straight out into the atmosphere. In addition, they curvearound obstructions so that they canprovide better signal coverage.
B750A02A-AAT STEREO SOUND SYSTEM How Car Audio Works AM and FM radio signals are broad- cast from transmitter towers locatedaround your city. They are interceptedby the radio antenna on your car. Thissignal is then received by the radio andsent to your car speakers. When a strong radio signal has reached your vehicle, the precise engineeringof your audio system ensures highquality reproduction. However, in somecases the signal coming to your ve-hicle may not be strong and clear. This can be due to factors such as the distance from the radio station, close-ness of other strong radio stations or the presence of buildings, bridges orother large obstructions in the area.
Page 105 of 230
1- 92 FEATURES OF YOUR HYUNDAI
B750A04L B750A05L
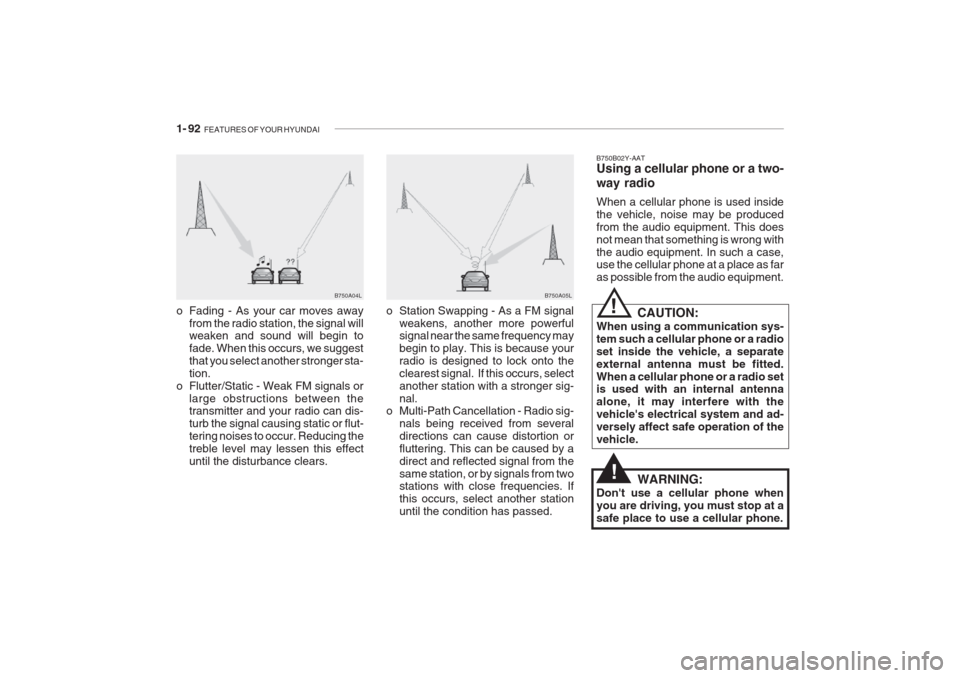
o Station Swapping - As a FM signal weakens, another more powerful signal near the same frequency may begin to play. This is because yourradio is designed to lock onto theclearest signal. If this occurs, selectanother station with a stronger sig-nal.
o Multi-Path Cancellation - Radio sig-
nals being received from severaldirections can cause distortion orfluttering. This can be caused by adirect and reflected signal from thesame station, or by signals from two stations with close frequencies. If this occurs, select another stationuntil the condition has passed.
o Fading - As your car moves away
from the radio station, the signal will weaken and sound will begin to fade. When this occurs, we suggestthat you select another stronger sta-tion.
o Flutter/Static - Weak FM signals or large obstructions between the transmitter and your radio can dis- turb the signal causing static or flut-tering noises to occur. Reducing thetreble level may lessen this effectuntil the disturbance clears. B750B02Y-AAT Using a cellular phone or a two- way radio When a cellular phone is used inside the vehicle, noise may be producedfrom the audio equipment. This doesnot mean that something is wrong withthe audio equipment. In such a case, use the cellular phone at a place as far as possible from the audio equipment.
!
!
CAUTION:
When using a communication sys- tem such a cellular phone or a radioset inside the vehicle, a separateexternal antenna must be fitted.When a cellular phone or a radio set is used with an internal antenna alone, it may interfere with thevehicle's electrical system and ad-versely affect safe operation of thevehicle.
WARNING:
Don't use a cellular phone whenyou are driving, you must stop at asafe place to use a cellular phone.
Page 125 of 230
1- 112 FEATURES OF YOUR HYUNDAI
INDICATION
Er2 Er3Er6 Er8
HHH
no CD
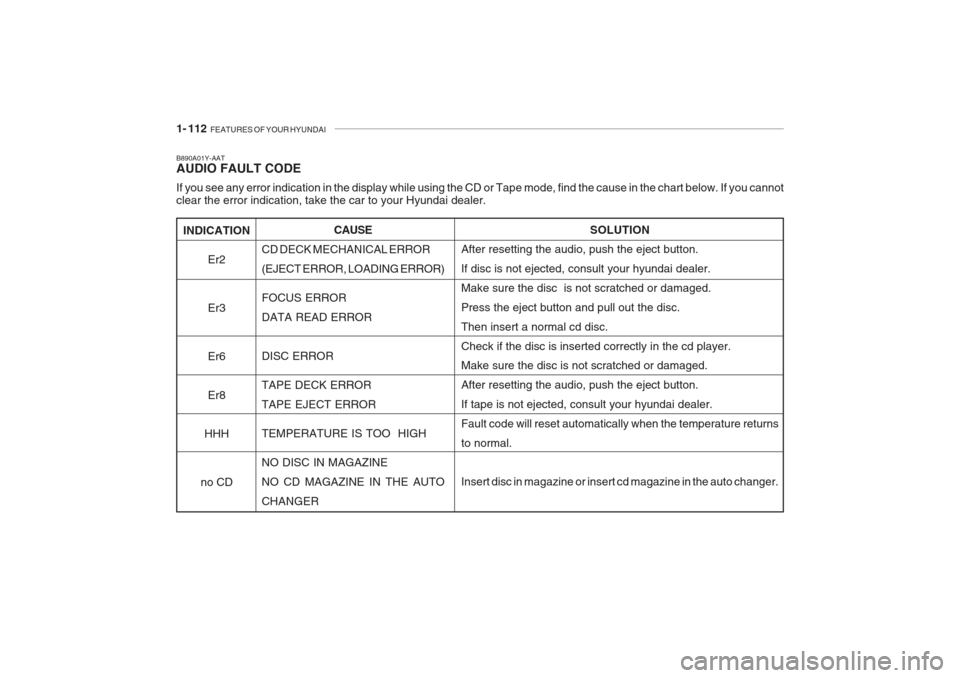
B890A01Y-AAT AUDIO FAULT CODE If you see any error indication in the display while using the CD or Tape mode, find the cause in the chart below. If you canno t
clear the error indication, take the car to your Hyundai dealer.
SOLUTION
After resetting the audio, push the eject button. If disc is not ejected, consult your hyundai dealer.Make sure the disc is not scratched or damaged.Press the eject button and pull out the disc.Then insert a normal cd disc.Check if the disc is inserted correctly in the cd player. Make sure the disc is not scratched or damaged. After resetting the audio, push the eject button.If tape is not ejected, consult your hyundai dealer.Fault code will reset automatically when the temperature returnsto normal. Insert disc in magazine or insert cd magazine in the auto changer.
CAUSE
CD DECK MECHANICAL ERROR (EJECT ERROR, LOADING ERROR) FOCUS ERROR DATA READ ERROR DISC ERROR TAPE DECK ERROR TAPE EJECT ERROR TEMPERATURE IS TOO HIGHNO DISC IN MAGAZINE NO CD MAGAZINE IN THE AUTOCHANGER
Page 127 of 230
1- 114 FEATURES OF YOUR HYUNDAI
Head
Cotton applicator
B860B02L
B860A02L
o Be sure that the cassette label is not
loose or peeling off or tape ejection may be difficult.
o Never touch or soil the actual audio
tape surfaces.
o Keep all magnetized objects, such as electric motors, speakers or trans- formers away from your cassette tapes and tape player unit.
o Store cassettes in a cool, dry place with the open side facing down toprevent dust from setting in the cas-sette body.
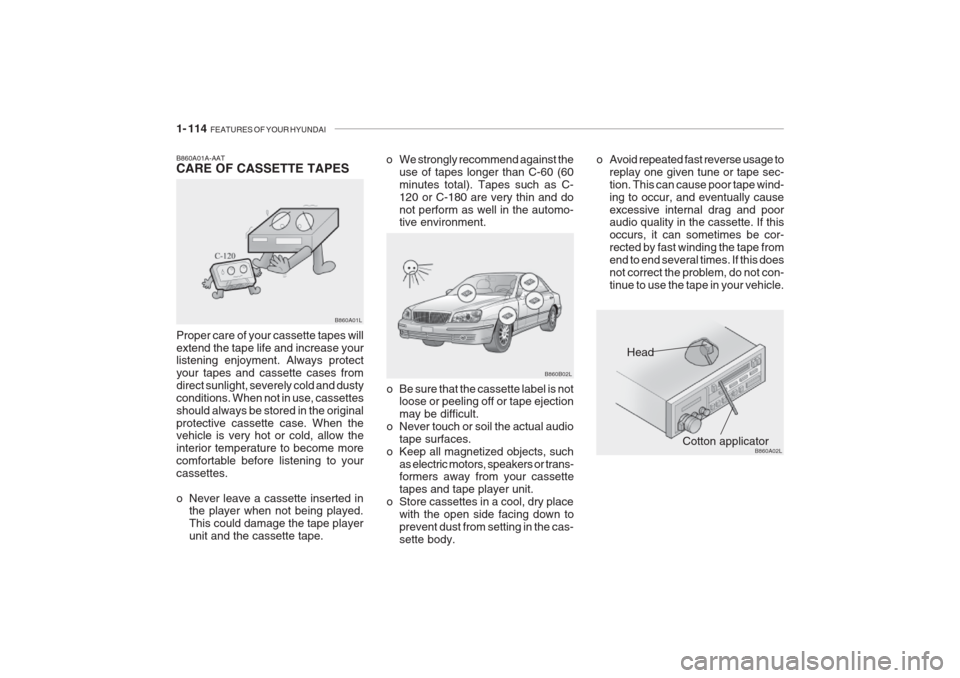
o We strongly recommend against the
use of tapes longer than C-60 (60minutes total). Tapes such as C-120 or C-180 are very thin and donot perform as well in the automo- tive environment. o Avoid repeated fast reverse usage to
replay one given tune or tape sec- tion. This can cause poor tape wind-ing to occur, and eventually causeexcessive internal drag and poor audio quality in the cassette. If this occurs, it can sometimes be cor-rected by fast winding the tape fromend to end several times. If this doesnot correct the problem, do not con-tinue to use the tape in your vehicle.
B860A01A-AAT CARE OF CASSETTE TAPES Proper care of your cassette tapes will extend the tape life and increase your listening enjoyment. Always protect your tapes and cassette cases fromdirect sunlight, severely cold and dustyconditions. When not in use, cassettesshould always be stored in the originalprotective cassette case. When the vehicle is very hot or cold, allow the interior temperature to become morecomfortable before listening to yourcassettes.
o Never leave a cassette inserted inthe player when not being played. This could damage the tape playerunit and the cassette tape. B860A01L
Page 128 of 230
FEATURES OF YOUR HYUNDAI 1- 115
o The playback head, capstan and
pinch rollers will develop a coating of tape residue that can result in dete-rioration of sound quality, such as awavering sound. They should be cleaned monthly using a commer- cially available head cleaning tape orspecial solution available from audiospecialty shops. Follow the supplier'sdirections carefully and never oil anypart of the tape player unit.
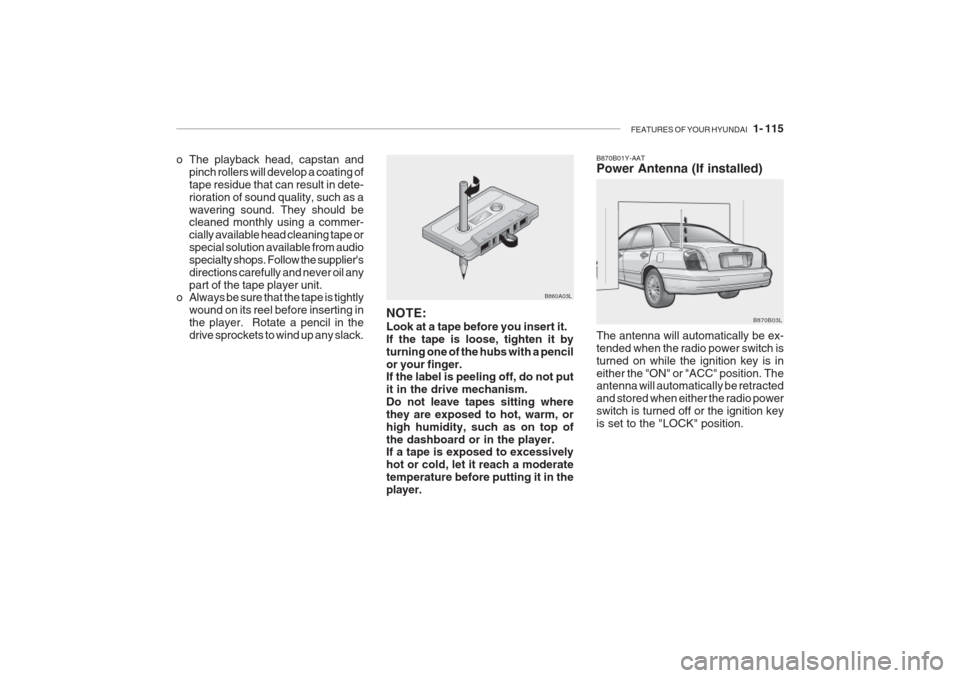
o Always be sure that the tape is tightly
wound on its reel before inserting inthe player. Rotate a pencil in thedrive sprockets to wind up any slack. B860A03L
NOTE: Look at a tape before you insert it. If the tape is loose, tighten it byturning one of the hubs with a pencilor your finger. If the label is peeling off, do not put it in the drive mechanism.Do not leave tapes sitting wherethey are exposed to hot, warm, orhigh humidity, such as on top ofthe dashboard or in the player. If a tape is exposed to excessively hot or cold, let it reach a moderatetemperature before putting it in theplayer.B870B01Y-AAT Power Antenna (If installed) The antenna will automatically be ex- tended when the radio power switch isturned on while the ignition key is ineither the "ON" or "ACC" position. The antenna will automatically be retracted and stored when either the radio powerswitch is turned off or the ignition keyis set to the "LOCK" position. B870B03L
Page 211 of 230

6- 34 DO-IT-YOURSELF MAINTENANCE
G200C01L-GAT JUNCTION BOX DESCRIPTION Under Hood Junction Box
G200C01L
NOTE: Not all junction box description in this manual
may be applicable to your vehicle. It is accurate at the time of printing. When you inspect the junction box on your vehicle, refer to the junction box label. DESCRIPTION
FUEL PUMP
HEAD LIGHT(Lo-LH) ABS
INJECTOR
A/C COMPRESSOR A/T
MAIN
IGNITION COIL
OXYGEN SENSOR EGR
HORN
HEAD LIGHT(HI)
HEAD LIGHT(Lo-RH) DRL
FOG LIGHT DIODE 1
SPARE
SPARE
SPARE
SPARE
DIODE 2
BLOWER
POWER FUSE 2 POWER AMPSUNROOF
TAIL LIGHT
POWER FUSE 1 ECU
REAR DEFOGGER CONDENSER
POWER WINDOW IGNITION1/2ABS 1/2
RADIATOR FUSE
RATING
20A15A10A10A10A20A30A 20A 15A 15A10A15A20A15A15A 30A 20A15A10A 30A 30A20A15A20A30A10A30A20A40A
30A/30A30A/30A 30A PROTECTED COMPONENTS
Fuel pump relay
Head light relay (Low-LH)
ABS controls, Cruise control module, ETS control module
Limp home valve, ETS controls, Injector
A/C relay
A/T control relay, TCM, Engine control relayMFI controls
Ignition coil, A/T pulse generator, ECM, Ignition failure
sensor, E/TCM
ETS relay, MFI controls
A/C relay, MFI controls, EGR solenoid
Horn relay
Head light relay (High)
HID head light relay
DRL control module, Siren
Fog light relay - -----
Blower relayFuse 4, 20, 24, 25
Audio amp module
Data link connector, Sunroof relay, Home link connector
Tail light relayFuse 1, 7, 17, 18, 19
ETS control module, ECM, E/TCM, Generator
Rear window defogger relay
A/C fan relay #1
Power window relay, IMS controls
Ignition switchABS controlsRadiator fan relay