torque Hyundai Grandeur 2002 Owner's Manual
[x] Cancel search | Manufacturer: HYUNDAI, Model Year: 2002, Model line: Grandeur, Model: Hyundai Grandeur 2002Pages: 230, PDF Size: 3.82 MB
Page 160 of 230

3- 10 WHAT TO DO IN AN EMERGENCY
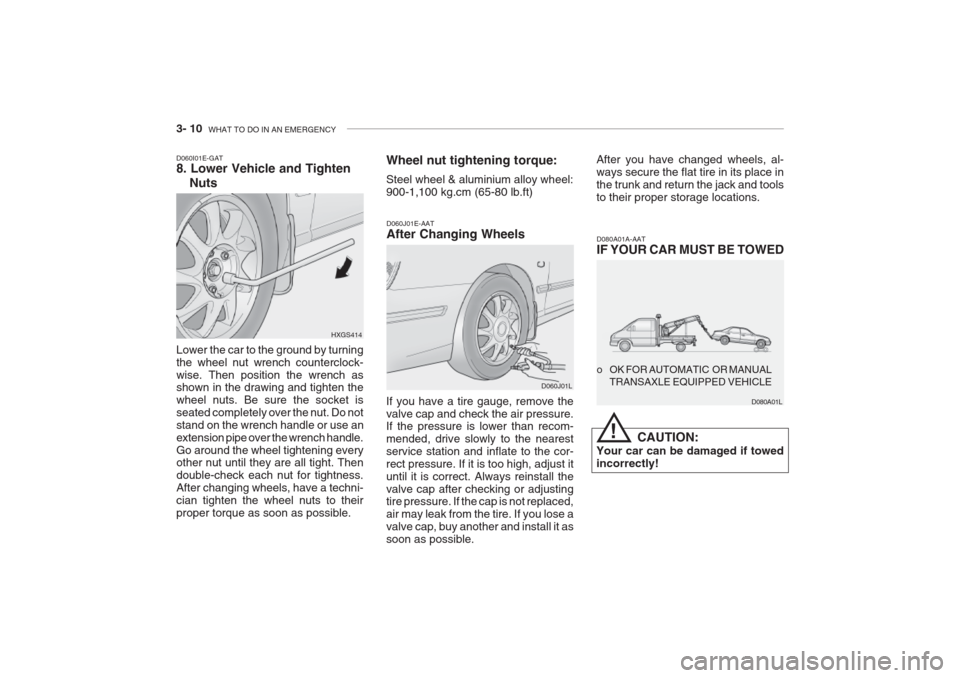
Lower the car to the ground by turning the wheel nut wrench counterclock-wise. Then position the wrench as shown in the drawing and tighten the wheel nuts. Be sure the socket isseated completely over the nut. Do notstand on the wrench handle or use anextension pipe over the wrench handle.Go around the wheel tightening every other nut until they are all tight. Then double-check each nut for tightness.After changing wheels, have a techni-cian tighten the wheel nuts to theirproper torque as soon as possible.
D060I01E-GAT 8. Lower Vehicle and Tighten
Nuts
HXGS414Wheel nut tightening torque: Steel wheel & aluminium alloy wheel: 900-1,100 kg.cm (65-80 lb.ft)
D060J01E-AAT After Changing Wheels
If you have a tire gauge, remove the valve cap and check the air pressure. If the pressure is lower than recom- mended, drive slowly to the nearestservice station and inflate to the cor-rect pressure. If it is too high, adjust ituntil it is correct. Always reinstall thevalve cap after checking or adjusting tire pressure. If the cap is not replaced, air may leak from the tire. If you lose avalve cap, buy another and install it assoon as possible. D060J01LAfter you have changed wheels, al-ways secure the flat tire in its place inthe trunk and return the jack and toolsto their proper storage locations.
D080A01A-AAT IF YOUR CAR MUST BE TOWED
CAUTION:
Your car can be damaged if towed incorrectly! o OK FOR AUTOMATIC OR MANUAL
TRANSAXLE EQUIPPED VEHICLE
D080A01L
!
Page 177 of 230

VEHICLE MAINTENANCE REQUIREMENTS 5- 9
F070L01A-AAT
o Suspension Mounting Bolts Check the suspension connections for looseness or damage. Retightento the specified torque. F070M01Y-AAT
o Steering Gear Box, Linkage &
Boots / Lower Arm Ball Joint, Upper Arm Ball Joint
With the vehicle stopped and engine off, check for excessive free-play inthe steering wheel.Check the linkage for bends or dam-age. Check the dust boots and ball joints for deterioration, cracks, or dam- age. Replace any damaged parts. F070N01A-AAT
o Power Steering Pump, Belt and Hoses
Check the power steering pump and hoses for leakage and damage. Re- place any damaged or leaking parts immediately. Inspect the power steer-ing belt for evidence of cuts, cracks,excessive wear, oiliness and propertension. Replace or adjust it if neces-sary. F070P01A-AAT
o Driveshafts and Boots Check the drive shafts, boots and clamps for cracks, deterioration, ordamage. Replace any damaged partsand, if necessary, repack the grease. F070Q01A-AAT
o Air Conditioning Refrigerant Check the air conditioning lines and connections for leakage and damage. Check air conditioning performanceaccording to the relevant shop manualif necessary.
Page 185 of 230

6- 8 DO-IT-YOURSELF MAINTENANCE
4. When the oil has stopped draining,
replace the drain plug using a new washer and retighten by turning itclockwise. Oil pan drain plug tightening torque : 3.5 ~4.0 kgf.m
5. Remove the oil filter by turning it counterclockwise with a oil filter wrench of the proper size. A cer- tain amount of oil will come out when you remove the filter. So besure to have your drain pan in place underneath it.
6. Install a new oil filter in accordance with the instructions on the carton or on the filter itself. Do not over-tighten. Oil filter tightening torque : 1.2 ~ 1.6 kgf.m Be sure that the mounting surface on the engine is clean and that theold gasket is removed completely. Lubricate the new gasket on the filter with clean engine oil beforeinstallation. 7. Refill the crankcase with the rec-
ommended engine oil. Refer to thespecification in chapter 9 for en-gine oil capacity.
8. Start the engine and check to be sure no oil is leaking from the drain plug or oil filter.
9. Shut off the engine and recheck the oil level.
NOTE: Always dispose of used engine oil
in an environmentally acceptable manner. It is suggested that it beplaced in a sealed container and taken to a service station for recla- mation. Do not pour the oil on theground or put it in with the house- hold trash.
WARNING:
Used motor oil may cause irrita-
tion or cancer of the skin if left in contact with the skin for prolongedperiods of time. Wash your hands thoroughly with soap and warm water as soon as possible afterhandling used oil. G050A01A-AAT
CHECKING AND CHANGING THE ENGINE COOLANT
WARNING:
Do not remove the radiator cap
when the engine is hot. When the engine is hot, the engine coolantis under pressure and may erupt through the opening if the cap is removed. You could be seriouslyburned if you do not observe this precaution. Do not remove the ra- diator cap until the radiator is coolto the touch.
!
!
Page 219 of 230

8- 4 CONSUMER INFORMATION
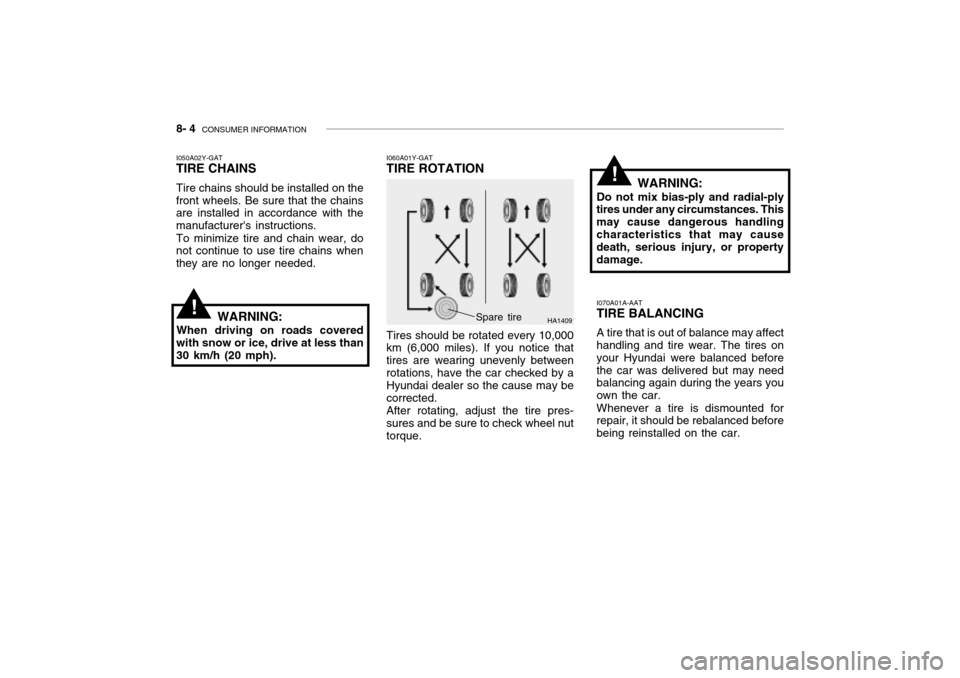
I060A01Y-GAT TIRE ROTATION Tires should be rotated every 10,000 km (6,000 miles). If you notice that tires are wearing unevenly between
rotations, have the car checked by a Hyundai dealer so the cause may be corrected.After rotating, adjust the tire pres-sures and be sure to check wheel nuttorque. HA1409
Spare tire WARNING:
Do not mix bias-ply and radial-ply
tires under any circumstances. This may cause dangerous handlingcharacteristics that may cause death, serious injury, or property damage.
!
I070A01A-AAT TIRE BALANCING A tire that is out of balance may affect handling and tire wear. The tires on your Hyundai were balanced beforethe car was delivered but may need balancing again during the years you own the car. Whenever a tire is dismounted for repair, it should be rebalanced before being reinstalled on the car.
I050A02Y-GAT
TIRE CHAINS
Tire chains should be installed on the
front wheels. Be sure that the chains are installed in accordance with the manufacturer's instructions.
To minimize tire and chain wear, do
not continue to use tire chains whenthey are no longer needed.!WARNING:
When driving on roads covered with snow or ice, drive at less than30 km/h (20 mph).