air condition Hyundai Grandeur 2003 Owner's Manual
[x] Cancel search | Manufacturer: HYUNDAI, Model Year: 2003, Model line: Grandeur, Model: Hyundai Grandeur 2003Pages: 235, PDF Size: 14.25 MB
Page 11 of 235

YOUR VEHICLE AT A GLANCE
1. Headlight Leveling Switch (If installed)
2. Rear Fog Light Switch (If installed)
3. Panel Brightness Control Knob(Rheostat Switch)
4. Traction Control Switch (If installed)
5. Multi-Function Light Switch
6. Cruise Control Main Switch (If installed)
7. Horn and Driver's Airbag
8. Cruise Control Switch/ Audio Remote Control Switch (If installed)
9. Windshield Wiper/Washer Switch
10. Ignition Switch
CAUTION:
When installing a container of liquid air freshener inside the vehicle, do not place it near theinstrument cluster nor on the instrument panel pad surface. If there is any leakage from the air freshener onto these areas (Instrument cluster, instrument panel pad or air ventilator), itmay damage these parts. If the liquid from air freshener does leak onto these areas, wash them with water immediately. 11. Hazard Warning Switch
12. Digital Clock
13. Audio System (If installed)
14. Passenger's Airbag (If installed)
15. Hood Release Lever
16. Parking Brake Release Lever/Parking Brake (Foot type)
17. Heater/Air Conditioning Control Panel
18. Shift Lever (If installed)
19. Ashtray
20. Accessory Box
21. Glove Box
!
Page 13 of 235

YOUR VEHICLE AT A GLANCE
1. Passenger's Airbag (If installed)
2. Digital Clock
3. Hazard Warning Switch
4. Cruise Control Main Switch (If installed)
5. Multi-Function Light Switch
6. Traction Control Switch (If installed)
7. Horn and Driver's Airbag
8. Cruise Control Switch/ Audio Remote Control Switch(If installed)
9. Ignition Switch
10. Windshield Wiper/Washer Switch 11. Panel Brightness Control Knob
(Rheostat Switch)
12. Rear Fog Light Switch (If installed)
13. Headlight Leveling Switch (If installed)
14. Glove Box
15. Audio System (If installed)
16. Heater/Air Conditioning Control Panel
17. Shift Lever (If installed)
18. Ashtray
19. Accessory Box
20. Parking Brake Release Lever/Parking Brake (Foot type)
21. Hood Release Lever
CAUTION:
When installing a container of liquid air freshener inside the vehicle, do not place it near theinstrument cluster nor on the instrument panel pad surface. If there is any leakage from theair freshener onto these areas (Instrument cluster, instrument panel pad or air ventilator), it may damage these parts. If the liquid from air freshener does leak onto these areas, wash them with water immediately.
!
Page 40 of 235
1- 26 FEATURES OF YOUR HYUNDAI
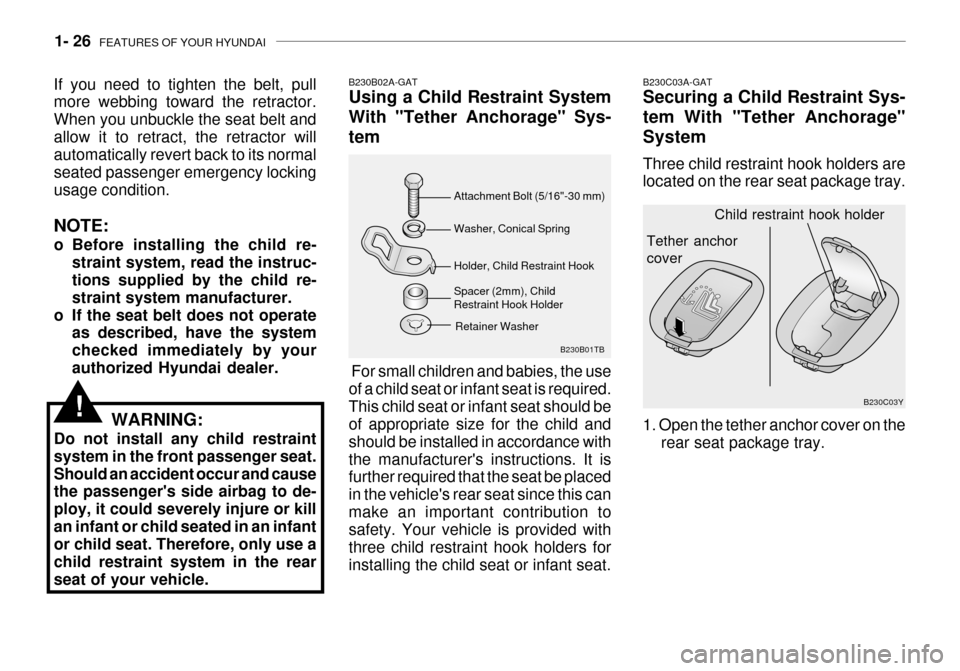
Tether anchor cover
B230C03Y
Child restraint hook holder
Spacer (2mm), Child Restraint Hook HolderB230B01TB
Attachment Bolt (5/16"-30 mm) Washer, Conical Spring Holder, Child Restraint Hook
B230B02A-GAT Using a Child Restraint System With "Tether Anchorage" Sys-tem For small children and babies, the use of a child seat or infant seat is required.This child seat or infant seat should be of appropriate size for the child and should be installed in accordance withthe manufacturer's instructions. It is further required that the seat be placed in the vehicle's rear seat since this canmake an important contribution to safety. Your vehicle is provided with three child restraint hook holders forinstalling the child seat or infant seat. B230C03A-GAT Securing a Child Restraint Sys- tem With "Tether Anchorage"System Three child restraint hook holders are located on the rear seat package tray. 1. Open the tether anchor cover on the
rear seat package tray.
Retainer Washer
If you need to tighten the belt, pull more webbing toward the retractor. When you unbuckle the seat belt andallow it to retract, the retractor will automatically revert back to its normal seated passenger emergency lockingusage condition. NOTE:
o Before installing the child re-
straint system, read the instruc- tions supplied by the child re- straint system manufacturer.
o If the seat belt does not operate as described, have the systemchecked immediately by yourauthorized Hyundai dealer.
WARNING:
Do not install any child restraintsystem in the front passenger seat.Should an accident occur and cause the passenger's side airbag to de- ploy, it could severely injure or killan infant or child seated in an infant or child seat. Therefore, only use a child restraint system in the rearseat of your vehicle.
!
Page 44 of 235
1- 30 FEATURES OF YOUR HYUNDAI
!
NOTE:
o Both the driver's and front
passenger's pre-tensioner seat belts will be activated in certain frontal collisions. The pre-tensioner seat belts can be acti- vated alone or, where the frontal collision is severe enough, to-gether with the airbags.
o When the pre-tensioner seat belts
are activated, a loud noise maybe heard and fine dust, which may appear to be smoke, may be visible in the passenger compart-ment. These are normal operat- ing conditions and are not haz- ardous. WARNING:
To obtain maximum benefit from apre-tensioner seat belt:
1. The seat belt must be worn cor- rectly.
2. The seat belt must be adjusted to the correct position.B180B02S
Driver's airbag1
2 3Passenger's airbag
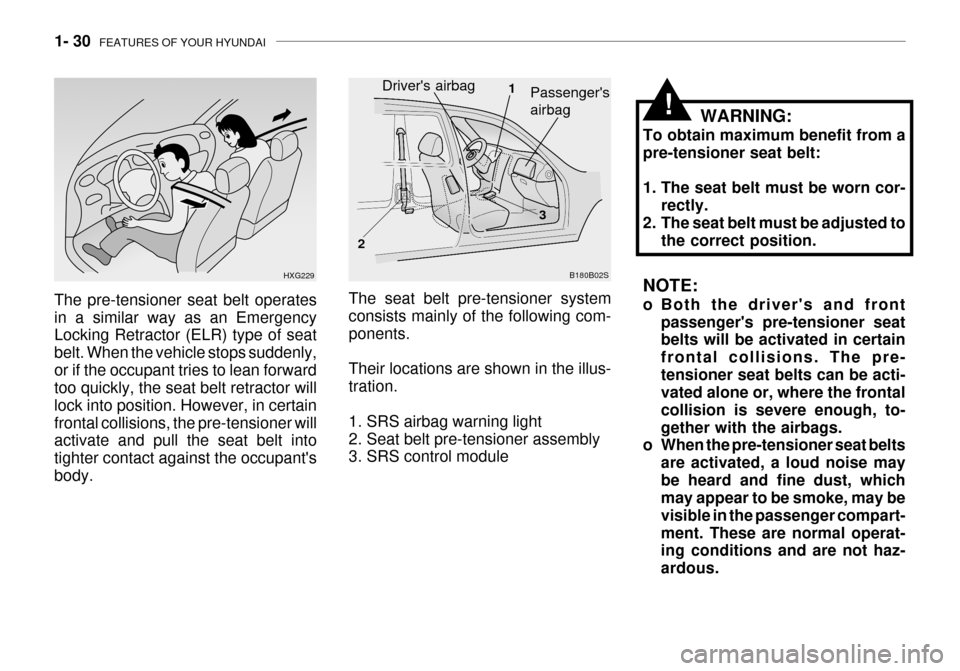
The seat belt pre-tensioner system consists mainly of the following com-ponents. Their locations are shown in the illus- tration.
1. SRS airbag warning light
2. Seat belt pre-tensioner assembly
3. SRS control module
The pre-tensioner seat belt operates in a similar way as an Emergency Locking Retractor (ELR) type of seat belt. When the vehicle stops suddenly,or if the occupant tries to lean forward too quickly, the seat belt retractor will lock into position. However, in certainfrontal collisions, the pre-tensioner will activate and pull the seat belt into tighter contact against the occupant'sbody. HXG229
Page 46 of 235
1- 32 FEATURES OF YOUR HYUNDAI
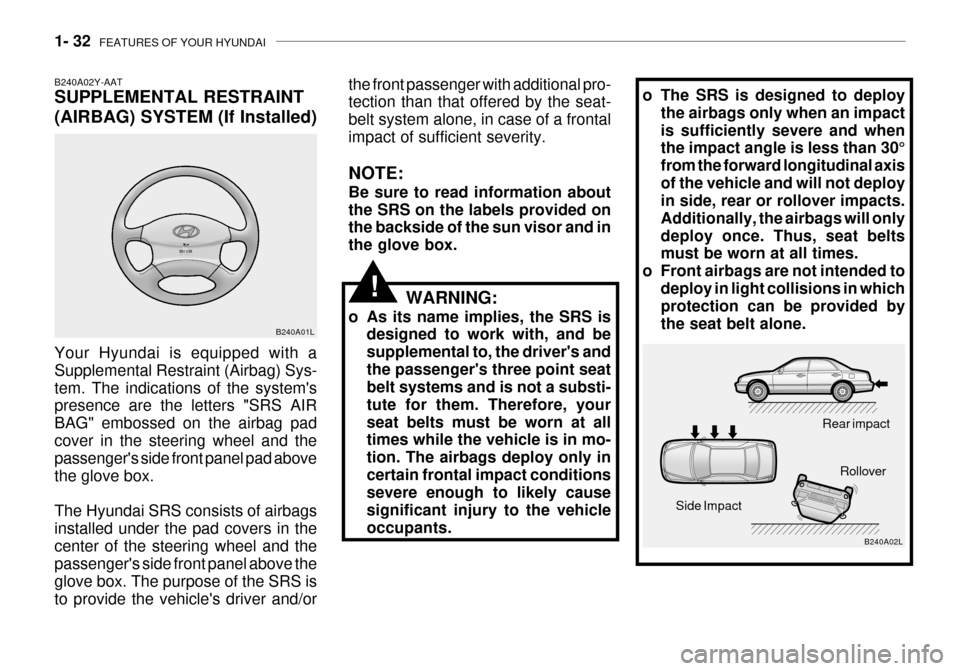
o The SRS is designed to deploy
the airbags only when an impact is sufficiently severe and when the impact angle is less than 30° from the forward longitudinal axisof the vehicle and will not deploy in side, rear or rollover impacts. Additionally, the airbags will onlydeploy once. Thus, seat belts must be worn at all times.
o Front airbags are not intended to deploy in light collisions in whichprotection can be provided by the seat belt alone.
B240A02L
Rear impact
Side Impact Rollover
the front passenger with additional pro- tection than that offered by the seat- belt system alone, in case of a frontalimpact of sufficient severity. NOTE: Be sure to read information about the SRS on the labels provided on the backside of the sun visor and in the glove box.
!WARNING:
o As its name implies, the SRS is designed to work with, and be supplemental to, the driver's andthe passenger's three point seat belt systems and is not a substi- tute for them. Therefore, yourseat belts must be worn at all times while the vehicle is in mo- tion. The airbags deploy only incertain frontal impact conditions severe enough to likely cause significant injury to the vehicleoccupants.
B240A02Y-AAT SUPPLEMENTAL RESTRAINT (AIRBAG) SYSTEM (If Installed) Your Hyundai is equipped with a Supplemental Restraint (Airbag) Sys-tem. The indications of the system's presence are the letters "SRS AIR BAG" embossed on the airbag padcover in the steering wheel and the passenger's side front panel pad above the glove box. The Hyundai SRS consists of airbags installed under the pad covers in thecenter of the steering wheel and the passenger's side front panel above the glove box. The purpose of the SRS isto provide the vehicle's driver and/or B240A01L
Page 49 of 235
FEATURES OF YOUR HYUNDAI 1- 35
o The SRS can function only when
the ignition key is in the "ON" position. If the SRS SRI does not come on, or continuously re- mains on after flashing for about6 seconds when the ignition key is turned to the "ON" position, or after the engine is started, comeson while driving, the SRS is not working properly. If this occurs, have your vehicle immediatelyinspected by your Hyundai dealer.
o Before you replace a fuse or dis- connect a battery terminal, turnthe ignition key to the "LOCK" position or remove the ignitionkey. Never remove or replace the air bag related fuse(s) when the ignition key is in the "ON" posi-tion. Failure to heed this warning will cause the SRS SRI to illumi- nate.
WARNING:
o When the SRS is activated, there may be a loud noise and fine dustwill be released throughout thevehicle. These conditions are normal and are not hazardous. However, the fine dust generatedduring airbag deployment may cause skin irritation. Wash your hands and face thoroughly withlukewarm water and a mild soap after an accident in which the airbags were deployed.
!
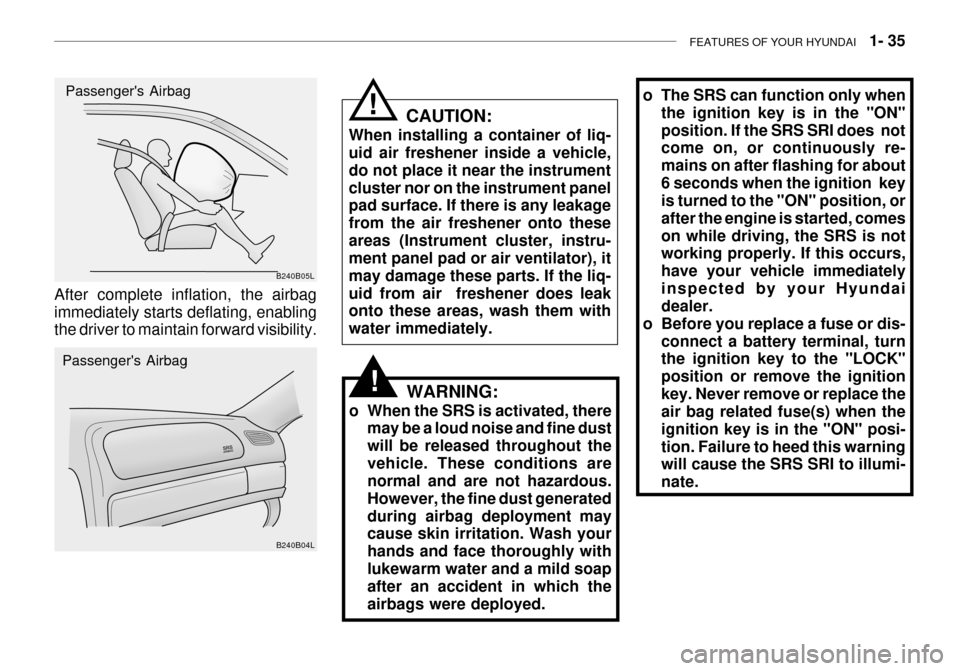
Passenger's Airbag
CAUTION:
When installing a container of liq- uid air freshener inside a vehicle, do not place it near the instrumentcluster nor on the instrument panel pad surface. If there is any leakage from the air freshener onto theseareas (Instrument cluster, instru- ment panel pad or air ventilator), it may damage these parts. If the liq-uid from air freshener does leak onto these areas, wash them with water immediately.
B240B05L
B240B04L
Passenger's Airbag
After complete inflation, the airbagimmediately starts deflating, enabling the driver to maintain forward visibility.
!
Page 51 of 235
FEATURES OF YOUR HYUNDAI 1- 37
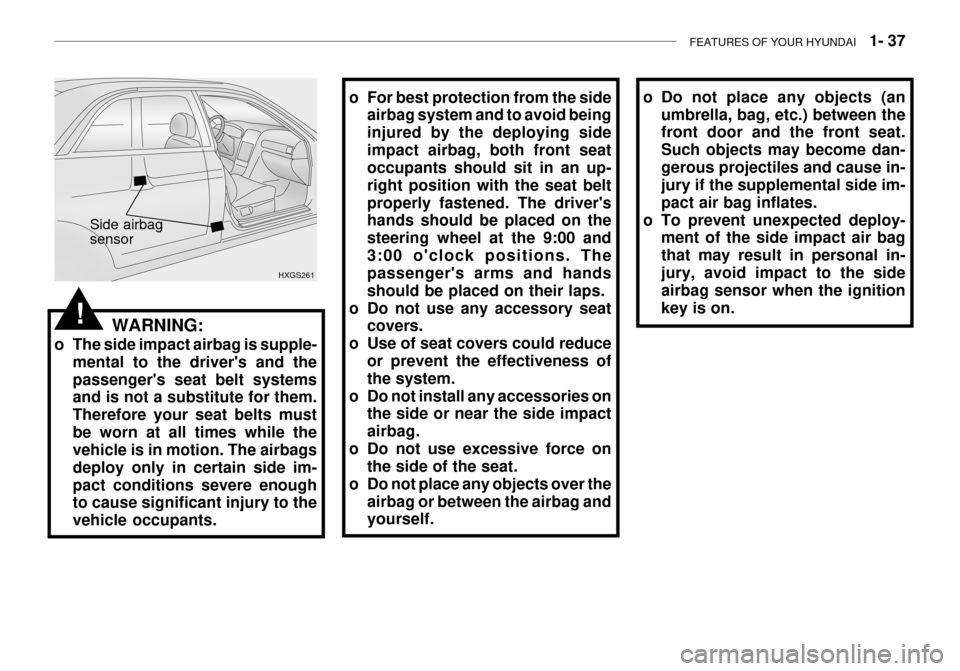
o Do not place any objects (an
umbrella, bag, etc.) between the front door and the front seat. Such objects may become dan-gerous projectiles and cause in- jury if the supplemental side im- pact air bag inflates.
o To prevent unexpected deploy- ment of the side impact air bagthat may result in personal in-jury, avoid impact to the side airbag sensor when the ignition key is on.o For best protection from the sideairbag system and to avoid being injured by the deploying sideimpact airbag, both front seat occupants should sit in an up- right position with the seat beltproperly fastened. The driver's hands should be placed on the steering wheel at the 9:00 and3:00 o'clock positions. The passenger's arms and hands should be placed on their laps.
o Do not use any accessory seat covers.
o Use of seat covers could reduce or prevent the effectiveness ofthe system.
o Do not install any accessories on the side or near the side impactairbag.
o Do not use excessive force on the side of the seat.
o Do not place any objects over the airbag or between the airbag and yourself.
WARNING:
o The side impact airbag is supple- mental to the driver's and the passenger's seat belt systems and is not a substitute for them. Therefore your seat belts mustbe worn at all times while the vehicle is in motion. The airbags deploy only in certain side im-pact conditions severe enough to cause significant injury to the vehicle occupants. HXGS261
Side airbag sensor
!
Page 56 of 235

1- 42 FEATURES OF YOUR HYUNDAI
B260C02L-GAT
TRACTION CONTROL INDICATOR LIGHT(If installed)
The traction control indicators change operations according to the switch conditions and whether the system is in operation or not. They will also illu-minate when the ignition key is turned to the "ON" or "START" position, but should go out after three seconds. Ifthe TCS indicator stays on, take your car to your authorized Hyundai dealer and have the system checked. Seesection 2 for more information about the TCS system.
B260D01A-AAT TURN SIGNAL INDICATOR LIGHTS
The blinking green arrows on the in- strument panel show the direction indi- cated by the turn signals. If the arrowcomes on but does not illuminate, blinks more rapidly than normal, or does not illuminate at all, a malfunction in theturn signal system is indicated. Your dealer should be consulted for repairs. B260F01A-AAT
HIGH BEAM INDICATOR LIGHT
The high beam indicator light comes on whenever the headlights areswitched to the high beam or flash position.
B260E01L-GAT
SEAT BELT WARNING LIGHT
The seat belt warning light blinks for about 6 seconds when the ignition key is turned from the "OFF" position to"ON" or "START". B260K01S-AAT TRUNK LID OPEN WARNING LIGHT
This light remains on unless the trunk lid is completely closed.
B260P01L-GAT
ABS SERVICE REMINDER INDICATOR
When the key is turned to the "ON" position, the Anti-Lock Brake System SRI will come on and then go off in a few seconds. If the ABS SRI remainson, comes on while driving, or does not come on when the key is turned to the "ON" position, this indicates that theremay be a problem with the ABS. If this occurs, have your vehicle checked by your Hyundai dealer assoon as possible. The normal braking system will still be operational, but without the assistance of the anti-lockbrake system. WARNING:
If the both ABS SRI and ParkingBrake/Brake fluid level warninglights remain "ON" or come on while driving, there may be a problem
with E.B.D. (Electronic Brake ForceDistribution). If this occurs, avoid sudden stops and have your vehicle checked byyour Hyundai dealer as soon as possible.
!
Page 94 of 235
1- 80 FEATURES OF YOUR HYUNDAI
NOTE:
o It should be noted that prolonged
operation of the heating system in " " mode will give rise tomisting of the windshield and side windows and the air within the passenger compartment willbecome stale. In addition pro- longed use of the air condition- ing with the " " mode selectedmay result in the air within the passenger compartment becom- ing excessively dry.
o When the ignition switch is turned "ON", the air intake con-trol will change to " " mode(regardless of switch position). This is normal operation.
HEF030
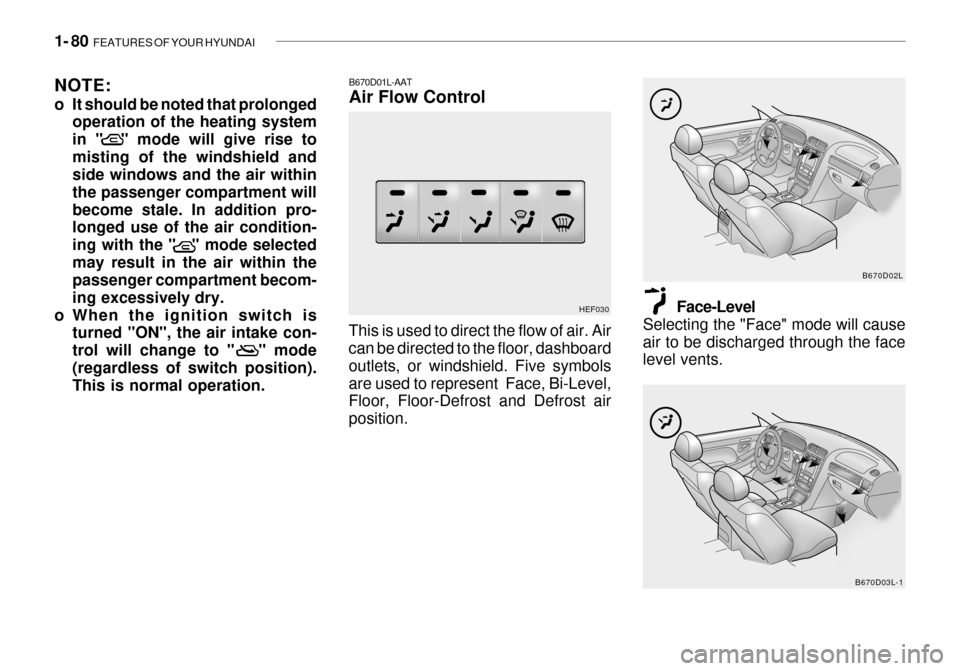
B670D01L-AAT Air Flow Control
This is used to direct the flow of air. Air can be directed to the floor, dashboard outlets, or windshield. Five symbolsare used to represent Face, Bi-Level, Floor, Floor-Defrost and Defrost air position. Face-Level
Selecting the "Face" mode will causeair to be discharged through the face level vents.
B670D03L-1B670D02L
Page 98 of 235
1- 84 FEATURES OF YOUR HYUNDAI
o To prevent interior fog on the wind-
shield, set the air intake control to the fresh air ( ) position, fan spe-ed to the desired position, turn on the air conditioning system, and adjust temperature control to desired tem-perature.
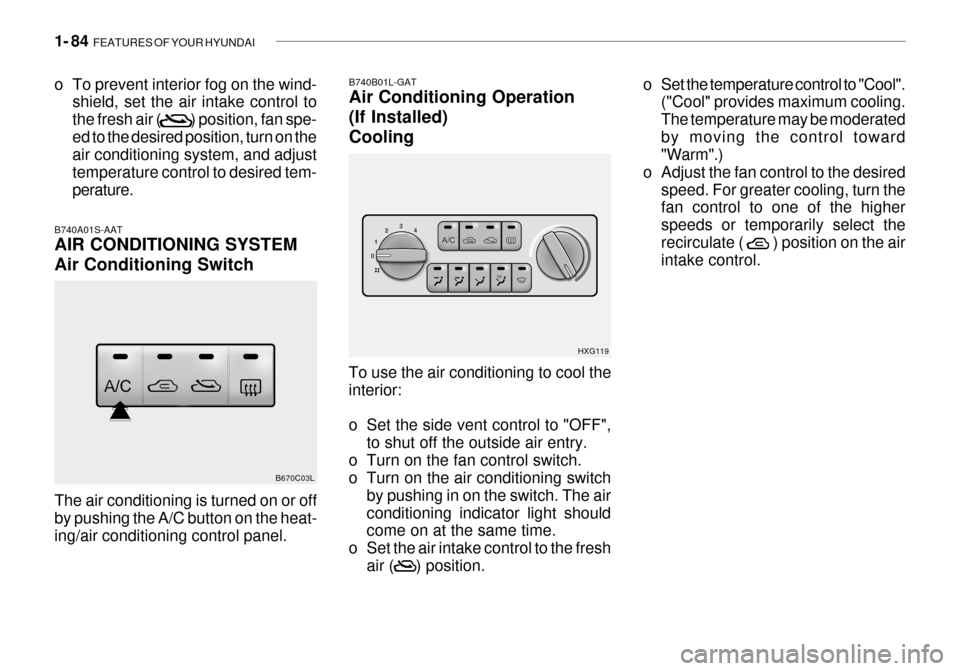
B740A01S-AAT AIR CONDITIONING SYSTEM Air Conditioning Switch The air conditioning is turned on or off by pushing the A/C button on the heat- ing/air conditioning control panel. B670C03LTo use the air conditioning to cool theinterior:
o Set the side vent control to "OFF",
to shut off the outside air entry.
o Turn on the fan control switch.
o Turn on the air conditioning switch
by pushing in on the switch. The air conditioning indicator light should come on at the same time.
o Set the air intake control to the fresh air ( ) position.
B740B01L-GAT Air Conditioning Operation (If Installed)Cooling
HXG119o Set the temperature control to "Cool".
("Cool" provides maximum cooling. The temperature may be moderatedby moving the control toward "Warm".)
o Adjust the fan control to the desired speed. For greater cooling, turn thefan control to one of the higher speeds or temporarily select therecirculate ( ) position on the air intake control.