ECU Hyundai H-1 (Grand Starex) 2006 Owner's Manual
[x] Cancel search | Manufacturer: HYUNDAI, Model Year: 2006, Model line: H-1 (Grand Starex), Model: Hyundai H-1 (Grand Starex) 2006Pages: 284, PDF Size: 12.21 MB
Page 23 of 284
1
BEFORE DRIVING YOUR VEHICLE
9
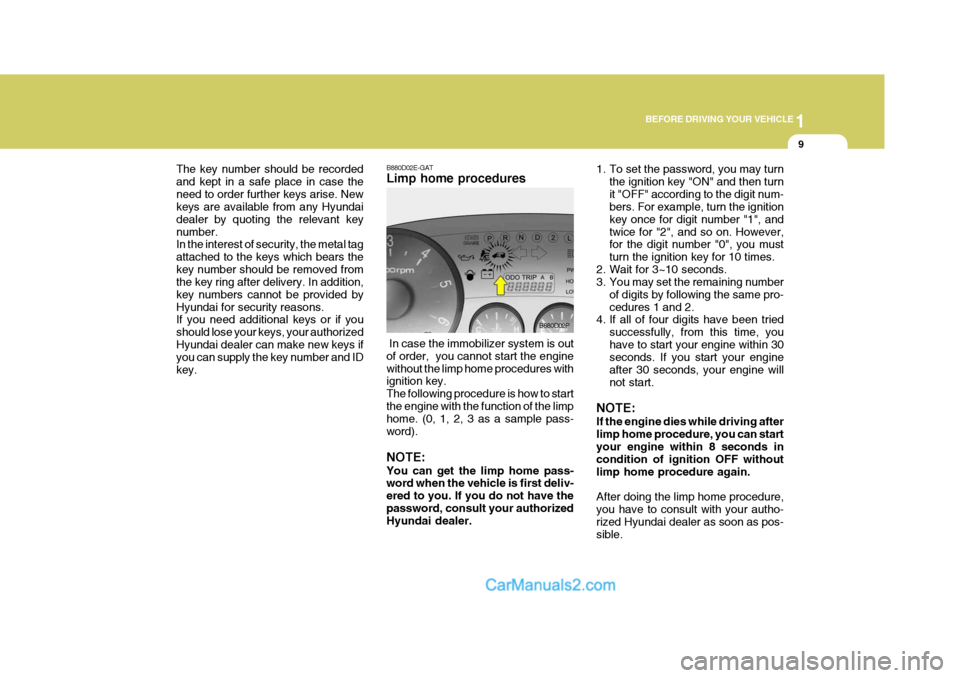
The key number should be recorded and kept in a safe place in case theneed to order further keys arise. New keys are available from any Hyundai dealer by quoting the relevant keynumber. In the interest of security, the metal tag attached to the keys which bears thekey number should be removed from the key ring after delivery. In addition, key numbers cannot be provided byHyundai for security reasons. If you need additional keys or if you should lose your keys, your authorizedHyundai dealer can make new keys if you can supply the key number and ID key. B880D02E-GAT Limp home procedures
1. To set the password, you may turn
the ignition key "ON" and then turn it "OFF" according to the digit num- bers. For example, turn the ignition key once for digit number "1", andtwice for "2", and so on. However, for the digit number "0", you must turn the ignition key for 10 times.
2. Wait for 3~10 seconds.
3. You may set the remaining number
of digits by following the same pro- cedures 1 and 2.
4. If all of four digits have been tried
successfully, from this time, youhave to start your engine within 30 seconds. If you start your engine after 30 seconds, your engine willnot start.
NOTE: If the engine dies while driving after limp home procedure, you can startyour engine within 8 seconds in condition of ignition OFF without limp home procedure again. After doing the limp home procedure, you have to consult with your autho-rized Hyundai dealer as soon as pos- sible.
B880D02P
In case the immobilizer system is out of order, you cannot start the enginewithout the limp home procedures with ignition key. The following procedure is how to startthe engine with the function of the limp home. (0, 1, 2, 3 as a sample pass- word). NOTE: You can get the limp home pass- word when the vehicle is first deliv- ered to you. If you do not have thepassword, consult your authorized Hyundai dealer.
Page 25 of 284
1
BEFORE DRIVING YOUR VEHICLE
11
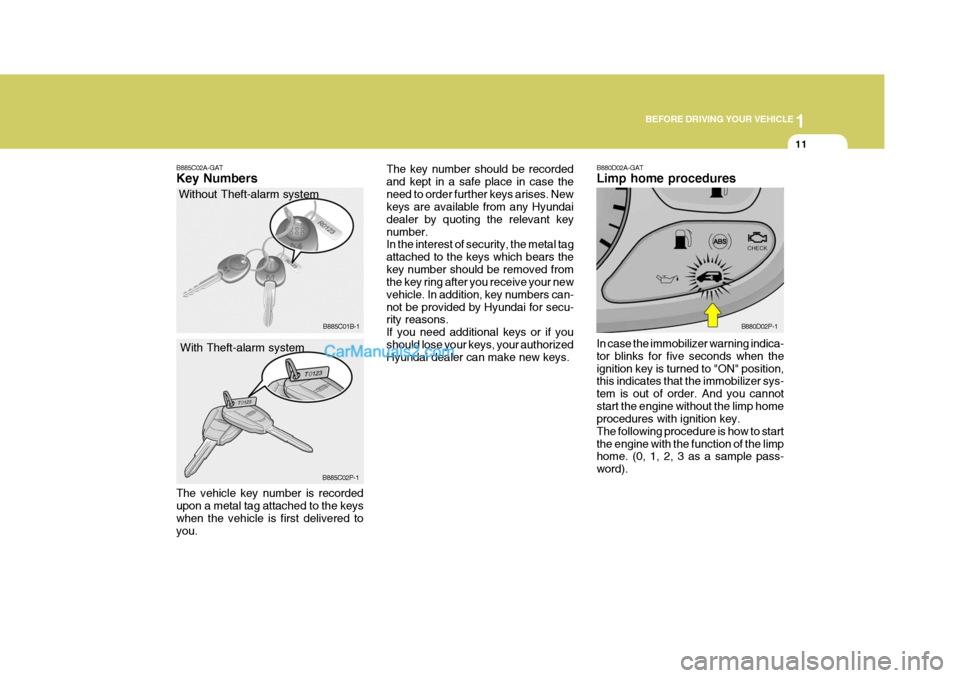
B885C02A-GAT Key Numbers
Without Theft-alarm system
With Theft-alarm system
The vehicle key number is recorded upon a metal tag attached to the keys when the vehicle is first delivered toyou. The key number should be recordedand kept in a safe place in case theneed to order further keys arises. New keys are available from any Hyundai dealer by quoting the relevant keynumber. In the interest of security, the metal tag attached to the keys which bears thekey number should be removed from the key ring after you receive your new vehicle. In addition, key numbers can-not be provided by Hyundai for secu- rity reasons. If you need additional keys or if youshould lose your keys, your authorized Hyundai dealer can make new keys.
B880D02A-GAT Limp home procedures In case the immobilizer warning indica- tor blinks for five seconds when theignition key is turned to "ON" position, this indicates that the immobilizer sys- tem is out of order. And you cannotstart the engine without the limp home procedures with ignition key. The following procedure is how to startthe engine with the function of the limp home. (0, 1, 2, 3 as a sample pass- word).
B885C01B-1
B885C02P-1 B880D02P-1
Page 27 of 284
1
BEFORE DRIVING YOUR VEHICLE
13DOOR
!
B040A01A-AAT DOOR LOCKS
WARNING:
o Unlocked doors can be danger- ous. Before you drive away (es- pecially if there are children in the car), be sure that all the doorsare securely closed and locked so that the doors cannot be inad- vertently opened from the inside.This helps assure that doors will not be opened accidentally. Also, when combined with theproper use of seat belts, locking the doors helps keep occupants from being ejected from the carin case of an accident.
o Before opening the door, always
look for and avoid oncoming traf-fic. B040B01A-AAT Locking and Unlocking Front Doors With a Key
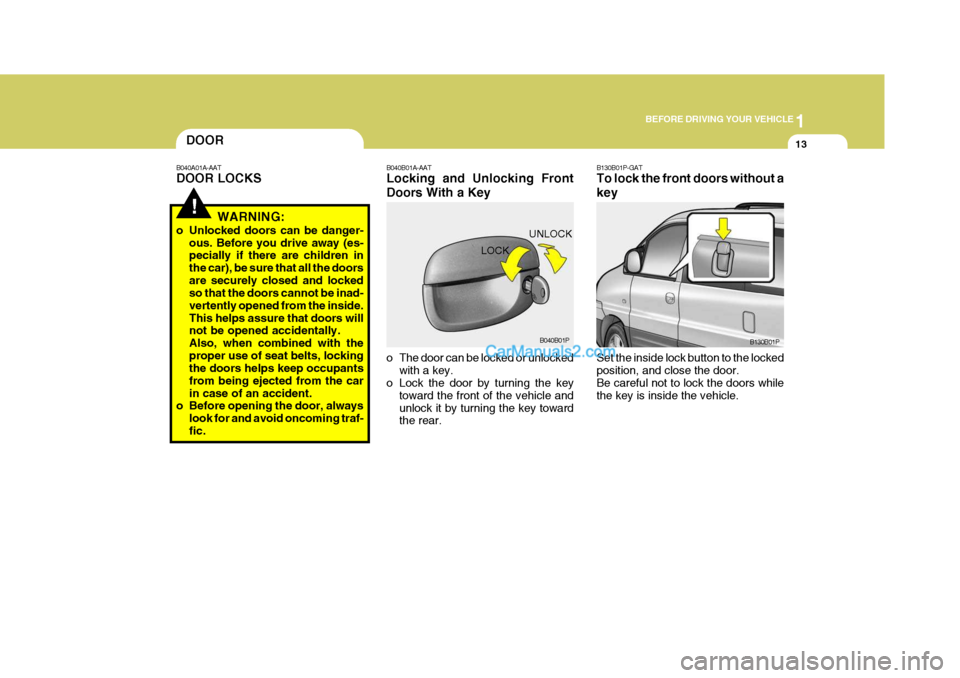
o The door can be locked or unlocked
with a key.
o Lock the door by turning the key
toward the front of the vehicle and unlock it by turning the key toward the rear. LOCK
B130B01P-GAT To lock the front doors without a key Set the inside lock button to the locked position, and close the door. Be careful not to lock the doors while the key is inside the vehicle.
B040B01P
B130B01P
UNLOCK
Page 42 of 284
1BEFORE DRIVING YOUR VEHICLE
28
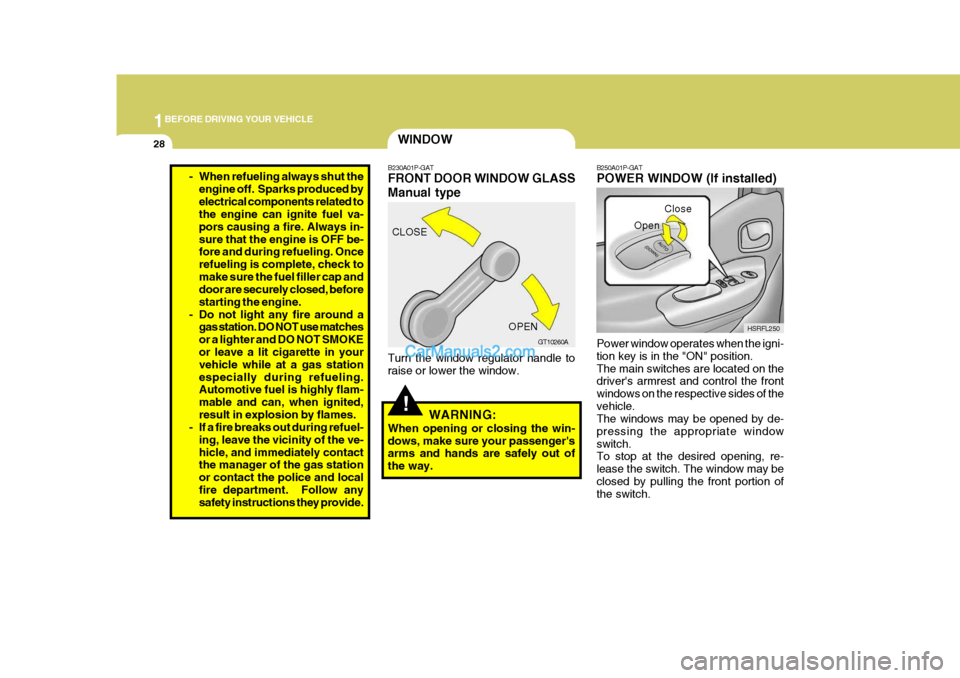
B250A01P-GAT POWER WINDOW (If installed) Power window operates when the igni- tion key is in the "ON" position.The main switches are located on the driver's armrest and control the front windows on the respective sides of thevehicle. The windows may be opened by de- pressing the appropriate windowswitch. To stop at the desired opening, re- lease the switch. The window may beclosed by pulling the front portion of the switch. Close
HSRFL250
Open
WINDOW
!
B230A01P-GAT FRONT DOOR WINDOW GLASS Manual type
Turn the window regulator handle to raise or lower the window. WARNING:
When opening or closing the win- dows, make sure your passenger's arms and hands are safely out of the way. CLOSE
GT10260A
OPEN
- When refueling always shut the
engine off. Sparks produced byelectrical components related to the engine can ignite fuel va- pors causing a fire. Always in-sure that the engine is OFF be- fore and during refueling. Once refueling is complete, check tomake sure the fuel filler cap and door are securely closed, before starting the engine.
- Do not light any fire around a gas station. DO NOT use matchesor a lighter and DO NOT SMOKE or leave a lit cigarette in your vehicle while at a gas stationespecially during refueling. Automotive fuel is highly flam- mable and can, when ignited,result in explosion by flames.
- If a fire breaks out during refuel-
ing, leave the vicinity of the ve-hicle, and immediately contact the manager of the gas station or contact the police and localfire department. Follow any safety instructions they provide.
Page 43 of 284
1
BEFORE DRIVING YOUR VEHICLE
29
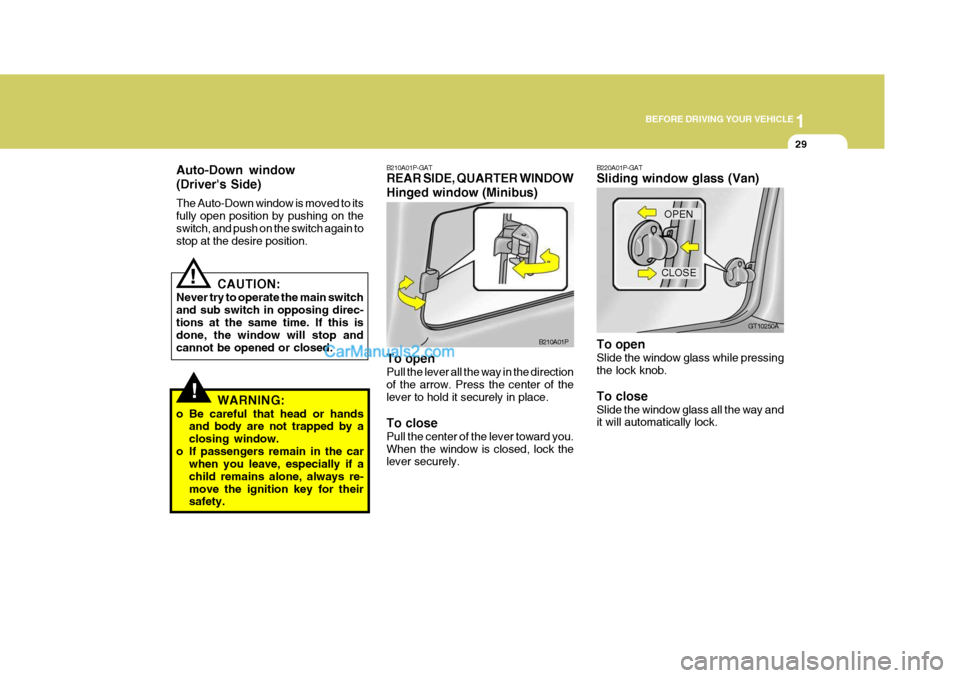
B210A01P-GAT REAR SIDE, QUARTER WINDOW Hinged window (Minibus) To open Pull the lever all the way in the direction of the arrow. Press the center of the lever to hold it securely in place. To close Pull the center of the lever toward you. When the window is closed, lock the lever securely. B210A01P
!
Auto-Down window (Driver's Side) The Auto-Down window is moved to its fully open position by pushing on theswitch, and push on the switch again to stop at the desire position.
CAUTION:
Never try to operate the main switch and sub switch in opposing direc-tions at the same time. If this is done, the window will stop and cannot be opened or closed.
WARNING:
o Be careful that head or hands and body are not trapped by aclosing window.
o If passengers remain in the car when you leave, especially if achild remains alone, always re-move the ignition key for their safety.
!
B220A01P-GAT Sliding window glass (Van) To open Slide the window glass while pressing the lock knob. To close Slide the window glass all the way and it will automatically lock. CLOSE
GT10250A
OPEN
Page 48 of 284
1BEFORE DRIVING YOUR VEHICLE
34
5
!
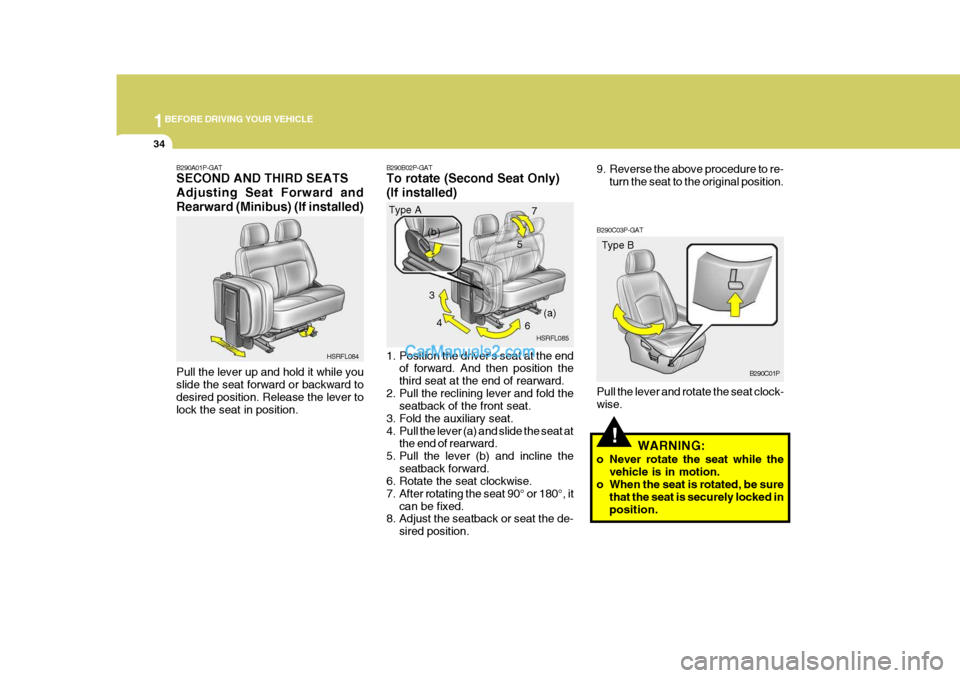
B290C03P-GAT Pull the lever and rotate the seat clock- wise.
WARNING:
o Never rotate the seat while the vehicle is in motion.
o When the seat is rotated, be sure
that the seat is securely locked inposition.
B290A01P-GAT SECOND AND THIRD SEATS Adjusting Seat Forward andRearward (Minibus) (If installed) Pull the lever up and hold it while you slide the seat forward or backward to desired position. Release the lever tolock the seat in position.
B290B02P-GAT To rotate (Second Seat Only) (If installed)
1. Position the driver's seat at the end
of forward. And then position the third seat at the end of rearward.
2. Pull the reclining lever and fold the seatback of the front seat.
3. Fold the auxiliary seat.
4. Pull the lever (a) and slide the seat at the end of rearward.
5. Pull the lever (b) and incline the seatback forward.
6. Rotate the seat clockwise.
7. After rotating the seat 90° or 180°, it
can be fixed.
8. Adjust the seatback or seat the de-
sired position.
HSRFL084
Type A
HSRFL085Type B
B290C01P
3
4 67
(a)
(b)
9. Reverse the above procedure to re-
turn the seat to the original position.
Page 49 of 284
1
BEFORE DRIVING YOUR VEHICLE
35
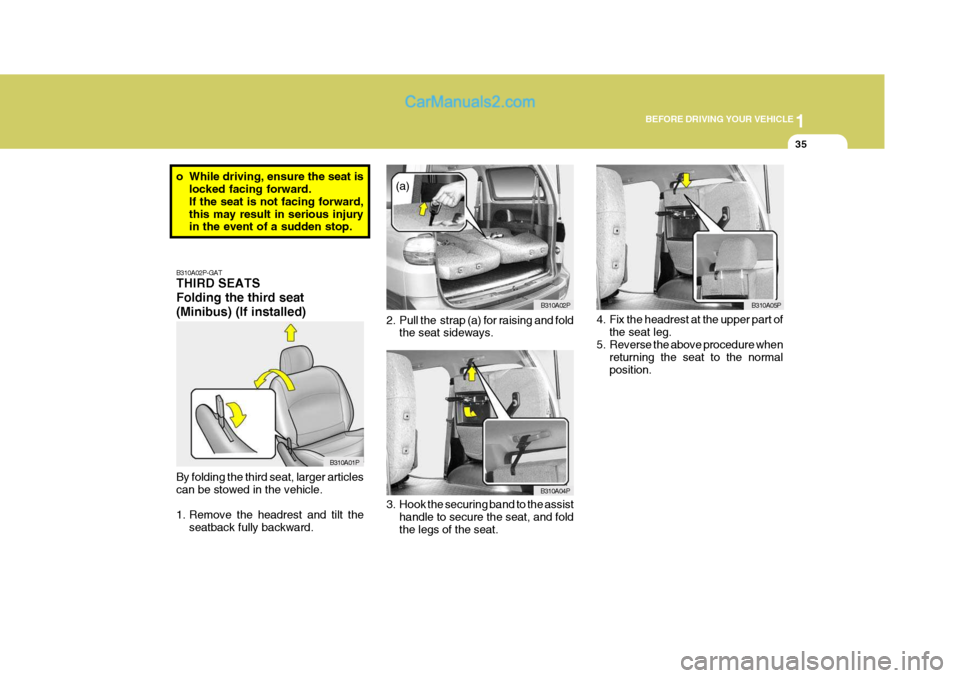
B310A02P-GAT THIRD SEATS Folding the third seat(Minibus) (If installed) By folding the third seat, larger articles can be stowed in the vehicle.
1. Remove the headrest and tilt the
seatback fully backward. 2. Pull the strap (a) for raising and fold
the seat sideways.
3. Hook the securing band to the assist handle to secure the seat, and fold the legs of the seat.
B310A01P B310A02P
B310A04P B310A05P
(a)
4. Fix the headrest at the upper part ofthe seat leg.
5. Reverse the above procedure when returning the seat to the normalposition.
o While driving, ensure the seat is
locked facing forward.If the seat is not facing forward,this may result in serious injury in the event of a sudden stop.
Page 53 of 284
1
BEFORE DRIVING YOUR VEHICLE
39
HSRFL088
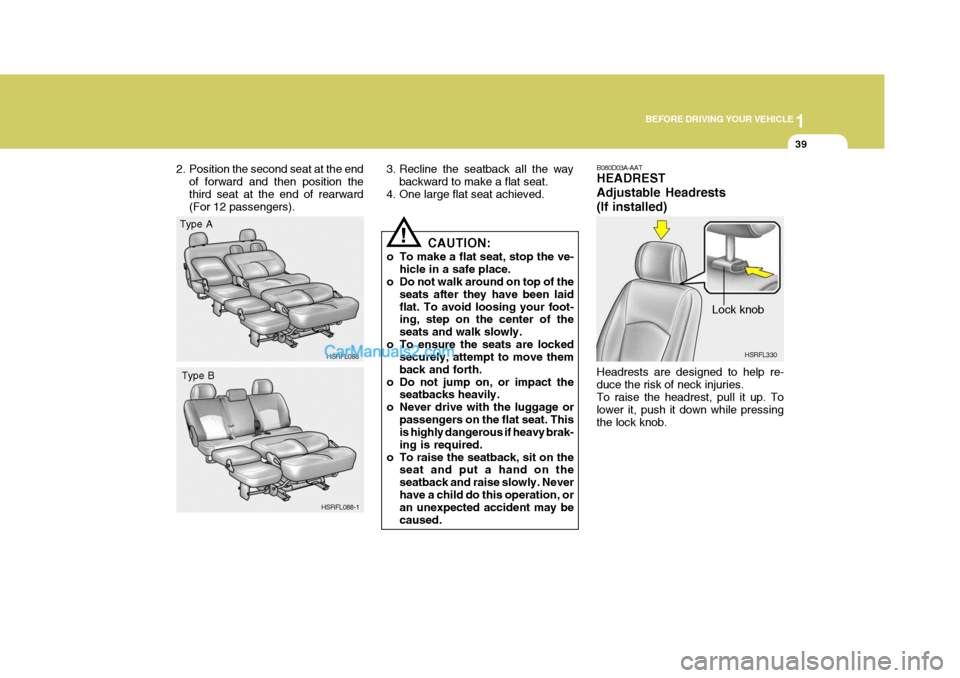
2. Position the second seat at the end
of forward and then position the third seat at the end of rearward (For 12 passengers). 3. Recline the seatback all the way
backward to make a flat seat.
4. One large flat seat achieved.
CAUTION:
o To make a flat seat, stop the ve- hicle in a safe place.
o Do not walk around on top of the
seats after they have been laid flat. To avoid loosing your foot- ing, step on the center of the seats and walk slowly.
o To ensure the seats are locked securely, attempt to move themback and forth.
o Do not jump on, or impact the seatbacks heavily.
o Never drive with the luggage or
passengers on the flat seat. This is highly dangerous if heavy brak- ing is required.
o To raise the seatback, sit on the seat and put a hand on theseatback and raise slowly. Neverhave a child do this operation, or an unexpected accident may be caused.
!
HSRFL088-1
Type A
Type B
B080D03A-AAT HEADREST Adjustable Headrests(If installed) Headrests are designed to help re- duce the risk of neck injuries. To raise the headrest, pull it up. To lower it, push it down while pressingthe lock knob. Lock knob
HSRFL330
Page 61 of 284
1
BEFORE DRIVING YOUR VEHICLE
47
!WARNING:
o A child restraint system must be placed in the rear seat. Never install a child or infant seat onthe front passenger's seat. Should an accident occur and cause the passenger side airbagto deploy, it could severely in- jure or kill an infant or child seated in an infant or child seat. Thus,only use a child restraint in the rear seat of your vehicle.
o Since a safety belt or child re- straint system can become veryhot if it is left in a closed vehicle, be sure to check the seat coverand buckles before placing a child there.
o When the child restraint system is not in use, fasten it with asafety belt so that it will not be thrown forward in the case of asudden stop or an accident.
o Children who are too large to be ina child restraint should sit in the rear seat and be restrained withthe available lap/shoulder belts.
o Always make sure that the shoul-
der belt portion of the outboardlap/shoulder belt is positioned midway over the shoulder, never across the neck. Moving the childcloser to the center of the vehicle may help provide a good shoul- der belt fit. The lap belt portion ofthe lap/shoulder belt or the cen- ter seat lap belt must always be positioned as low as possible onthe child's hips and as snug as possible.
o If the seat belt will not properly fit the child, we recommend the useof an approved booster seat in the rear seat in order to raise thechild's seating height so that the seat belt will properly fit the child.
o Never allow a child to stand up or kneel on the seat.o Never use an infant carrier or child safety seat that "hooks" over a seatback; it may not provide ad-equate security in an accident.
o Never allow a child to be held in a
person's arms while they are in amoving vehicle, as this could re- sult in serious injury to the child in the event of an accident or asudden stop. Holding a child in a moving vehicle does not provide the child with any means of pro-tection during an accident, even if the person holding the child is wearing a seat belt.
o If the child restaint seat is not anchored properly, the risk of achild being seriously injured orkilled in a collision greatly in- creases.
Page 62 of 284
1BEFORE DRIVING YOUR VEHICLE
48
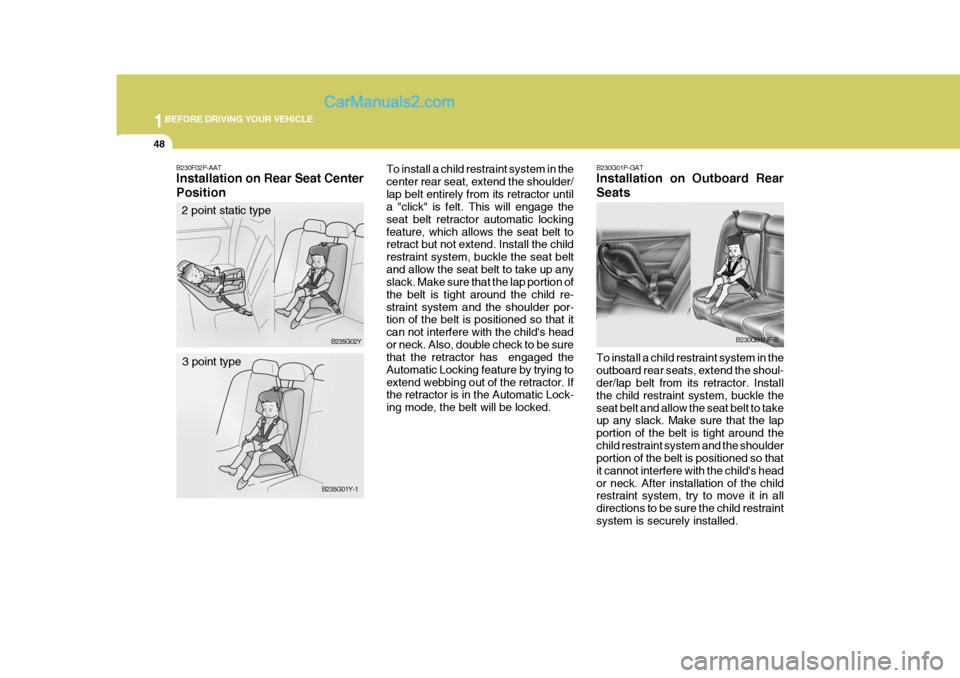
B230G01P-GAT Installation on Outboard Rear Seats To install a child restraint system in the outboard rear seats, extend the shoul- der/lap belt from its retractor. Install the child restraint system, buckle theseat belt and allow the seat belt to take up any slack. Make sure that the lap portion of the belt is tight around thechild restraint system and the shoulder portion of the belt is positioned so that it cannot interfere with the child's heador neck. After installation of the child restraint system, try to move it in all directions to be sure the child restraintsystem is securely installed. B230G01NF-B
To install a child restraint system in thecenter rear seat, extend the shoulder/lap belt entirely from its retractor until a "click" is felt. This will engage the seat belt retractor automatic lockingfeature, which allows the seat belt to retract but not extend. Install the child restraint system, buckle the seat beltand allow the seat belt to take up any slack. Make sure that the lap portion of the belt is tight around the child re-straint system and the shoulder por- tion of the belt is positioned so that it can not interfere with the child's heador neck. Also, double check to be sure that the retractor has engaged the Automatic Locking feature by trying toextend webbing out of the retractor. If the retractor is in the Automatic Lock- ing mode, the belt will be locked.B230F02P-AAT Installation on Rear Seat Center Position
2 point static type
B235G02Y
B235G01Y-1
3 point type