battery Hyundai H-1 (Grand Starex) 2006 Owner's Manual
[x] Cancel search | Manufacturer: HYUNDAI, Model Year: 2006, Model line: H-1 (Grand Starex), Model: Hyundai H-1 (Grand Starex) 2006Pages: 284, PDF Size: 12.21 MB
Page 33 of 284
1
BEFORE DRIVING YOUR VEHICLE
19
B070F03A-GAT Keyless Entry System (If installed) Locking doors
1. Close all doors.
2. Push the button on the transmitter.
3. At the same time all doors lock, the turn signal lights will blink once toindicate that the system is armed.
Unlocking doors 1. Push the button on the transmitter once more after all doors were locked.
2. At the same time all doors unlock,
the turn signal lights will blink twiceto indicate that the system is dis- armed. NOTE:
o The transmitter will not work if any
of following occur:
- The ignition key is in ignition
switch.
- You exceed the operating dis-
tance limit (10 m).
- The battery in the transmitter is weak.
- Other vehicles or objects may be blocking the signal.
- The weather is extremely cold.
- The transmitter is close to a
radio transmitter such as a radio station or an airport which can interfere with normal operationof the transmitter.
When the transmitter does not workcorrectly, open and close the doorwith the ignition key. If you have a problem with the transmitter, con- tact an authorized Hyundai Dealer.
o Keep the transmitter away from water or any liquid. If the keylessentry system is inoperative due toexposure to water or liquids, it will not be covered by your manufac- turer vehicle warranty.
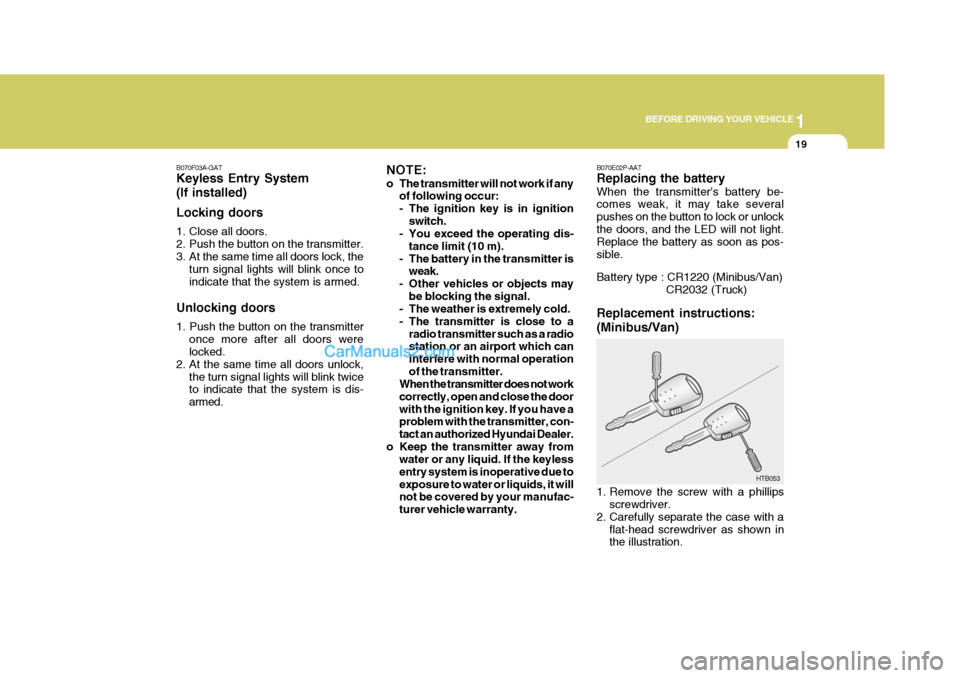
B070E02P-AAT Replacing the battery When the transmitter's battery be- comes weak, it may take several pushes on the button to lock or unlockthe doors, and the LED will not light. Replace the battery as soon as pos- sible. Battery type : CR1220 (Minibus/Van) CR2032 (Truck)
Replacement instructions: (Minibus/Van)
1. Remove the screw with a phillips screwdriver.
2. Carefully separate the case with a flat-head screwdriver as shown in the illustration. HTB053
Page 34 of 284
1BEFORE DRIVING YOUR VEHICLE
20
B070E01P-1
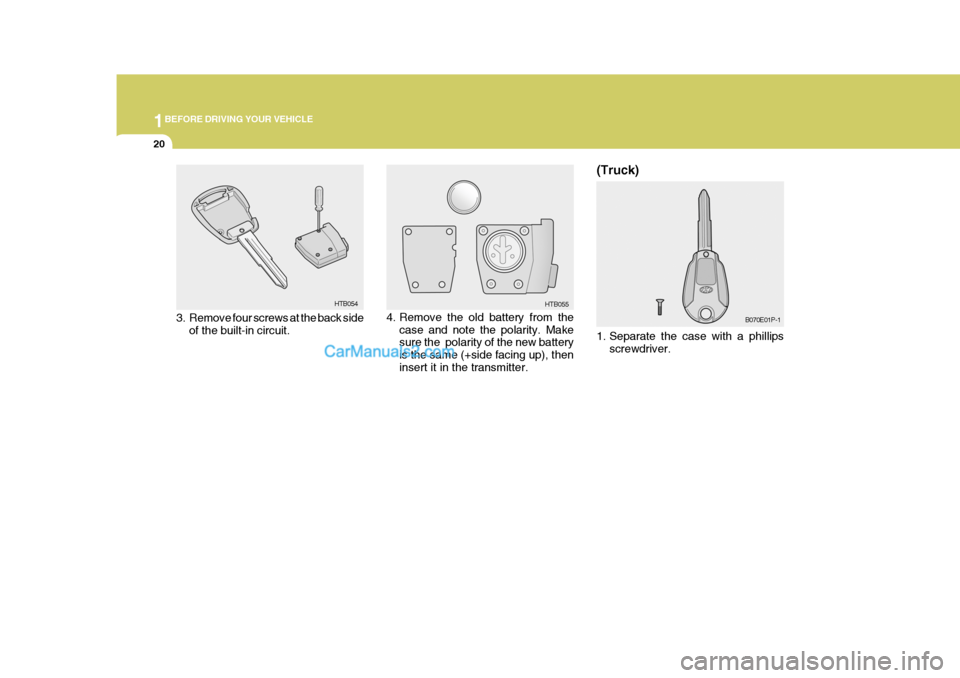
(Truck)
1. Separate the case with a phillips
screwdriver.3. Remove four screws at the back side of the built-in circuit. HTB054
HTB055
4. Remove the old battery from the case and note the polarity. Make sure the polarity of the new battery is the same (+side facing up), theninsert it in the transmitter.
Page 35 of 284
1
BEFORE DRIVING YOUR VEHICLE
21
B070E02P-1
TAIL GATE
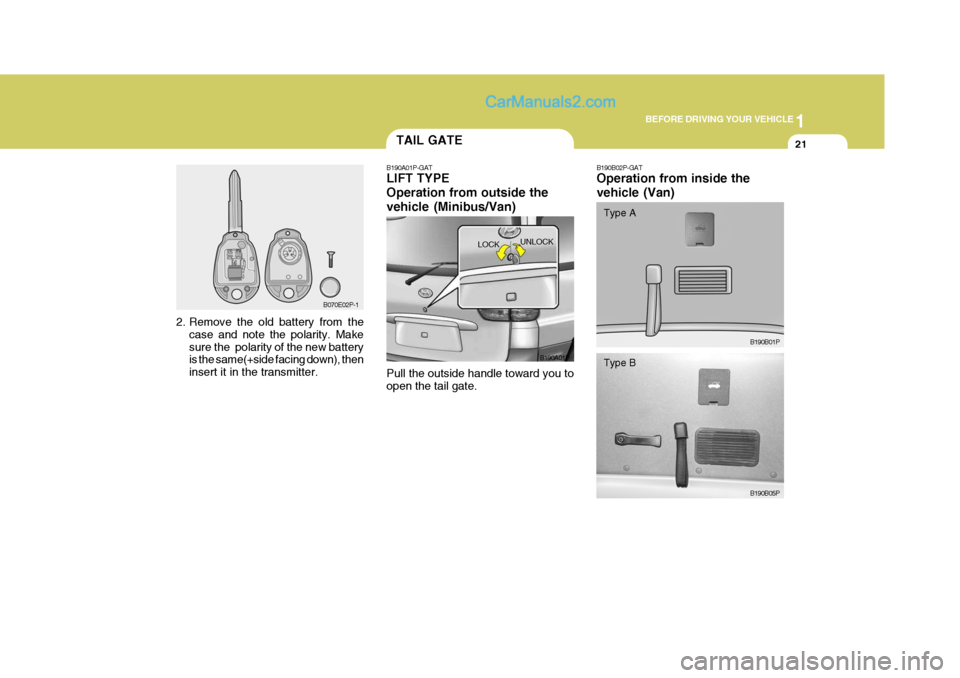
B190A01P-GAT LIFT TYPE Operation from outside thevehicle (Minibus/Van) Pull the outside handle toward you to open the tail gate. B190A01P
LOCK
UNLOCK
2. Remove the old battery from the case and note the polarity. Makesure the polarity of the new battery is the same(+side facing down), then insert it in the transmitter.
B190B02P-GAT Operation from inside the vehicle (Van)
B190B01P
B190B05P
Type A Type B
Page 67 of 284
1
BEFORE DRIVING YOUR VEHICLE
53
CAUTION:
When installing the container of liquid air refresher inside a vehicle, do not place it near the instrumentcluster nor on the crash pad sur- face. If there is any leakage from the air refresher onto these areas (In-strument cluster, crash pad or air ventilator), it may damage these parts. If the liquid from air refresherdoes leak onto these areas, wash them with water immediately.!
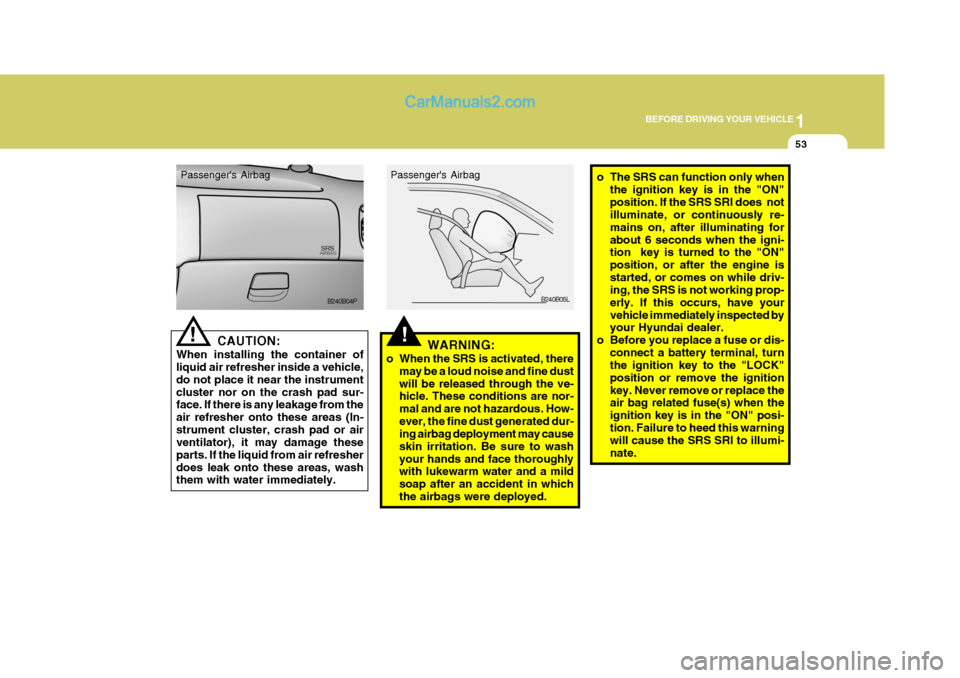
Passenger's Airbag
B240B04P!WARNING:
o When the SRS is activated, there may be a loud noise and fine dust will be released through the ve- hicle. These conditions are nor- mal and are not hazardous. How-ever, the fine dust generated dur- ing airbag deployment may cause skin irritation. Be sure to washyour hands and face thoroughly with lukewarm water and a mild soap after an accident in whichthe airbags were deployed. B240B05L
Passenger's Airbag
o The SRS can function only when
the ignition key is in the "ON" position. If the SRS SRI does not illuminate, or continuously re- mains on, after illuminating forabout 6 seconds when the igni- tion key is turned to the "ON" position, or after the engine isstarted, or comes on while driv- ing, the SRS is not working prop- erly. If this occurs, have yourvehicle immediately inspected by your Hyundai dealer.
o Before you replace a fuse or dis-
connect a battery terminal, turnthe ignition key to the "LOCK" position or remove the ignitionkey. Never remove or replace the air bag related fuse(s) when the ignition key is in the "ON" posi-tion. Failure to heed this warning will cause the SRS SRI to illumi- nate.
Page 89 of 284
2 INSTRUMENTS AND CONTROLS
20
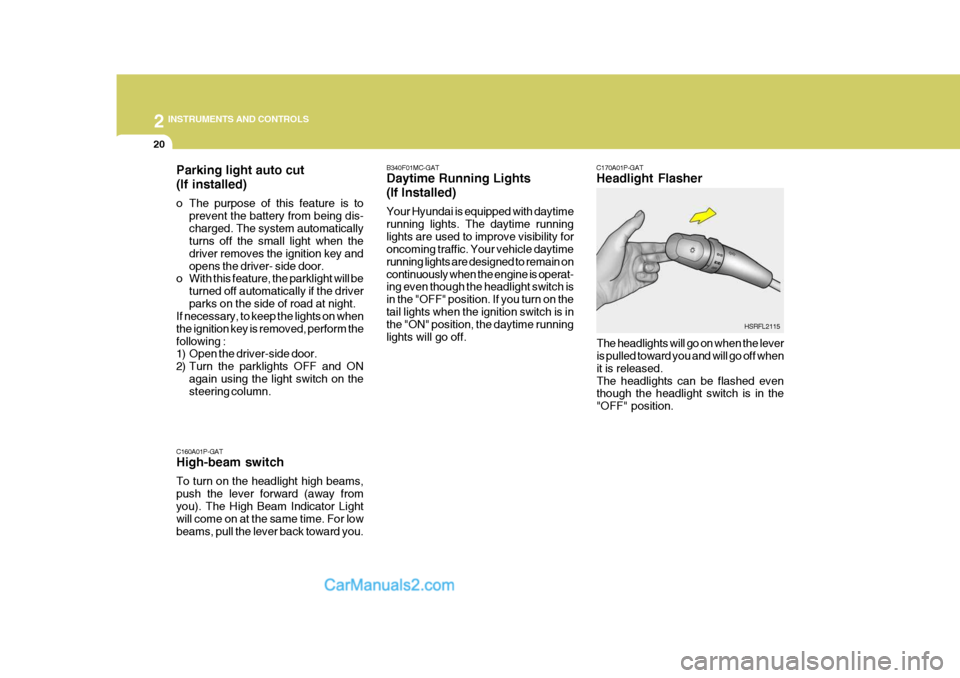
C160A01P-GAT High-beam switch To turn on the headlight high beams, push the lever forward (away fromyou). The High Beam Indicator Light will come on at the same time. For low beams, pull the lever back toward you. C170A01P-GAT Headlight Flasher
The headlights will go on when the lever is pulled toward you and will go off when it is released.The headlights can be flashed even though the headlight switch is in the "OFF" position.
B340F01MC-GAT Daytime Running Lights (If Installed) Your Hyundai is equipped with daytime running lights. The daytime runninglights are used to improve visibility for oncoming traffic. Your vehicle daytime running lights are designed to remain oncontinuously when the engine is operat- ing even though the headlight switch is in the "OFF" position. If you turn on thetail lights when the ignition switch is in the "ON" position, the daytime running lights will go off.
HSRFL2115
Parking light auto cut (If installed)
o The purpose of this feature is to
prevent the battery from being dis- charged. The system automatically turns off the small light when the driver removes the ignition key andopens the driver- side door.
o With this feature, the parklight will be
turned off automatically if the driverparks on the side of road at night.
If necessary, to keep the lights on whenthe ignition key is removed, perform thefollowing :
1) Open the driver-side door.
2) Turn the parklights OFF and ON
again using the light switch on the steering column.
Page 129 of 284
2 INSTRUMENTS AND CONTROLS
60
B260D03O-AAT
1. Playing CD
o Insert the CD with the label facingupward.
o Insert the CD to start CD playback, during radio operation.
o When a disc is in the CD deck, if you press the CD button, the CD player will begin playing even if the radio is being used.
o The CD player can be used when the ignition switch is in either the"ON" or "ACC" position.
2. FF/REW ( / ) If you want to fast forward or reverse through the compact disc track, push and hold in the FF ( ) or REW ( ) button.When you release the button, the com- pact disc player will resume playing. 3. TRACK UP/DOWN
o The desired track on the disc cur-
rently being played can be selected using the track number.
o Press once to skip forward to
the beginning of the next track.Press once to skip back to the beginning of the track.
4. SCAN Button
o Press the SCAN button to playback the first 10 seconds of each track.
o Press the SCAN button again within 10 sec. When you have reached the desired track.
5. REPEAT Button
o To repeat the track you are cur- rently listening to, press the RPT button. To cancel , press again.
o If you do not release RPT operation
when the track ends, it will automati-cally be replayed. This process will be continued until you push the button again. 6. EJECT Button When the EJECT button is pressed with a CD loaded, the CD will eject. NOTE:
o To assure proper operation of
the unit, keep the vehicle interior temperature within a normal range by using the vehicle's air conditioning or heating system.
o When replacing the fuse, replace it with a fuse having the correctcapacity.
o The preset station frequencies are all erased when the car bat-tery is disconnected. Therefore,all data will have to be set again if this should occur.
o Do not add any oil to the rotating parts. Keep magnets, screwdriv-ers and other metallic objects away from the tape mechanismand head.
o This equipment is designed to
be used only in a 12 volt DCbattery system with negative ground.
Page 138 of 284
2
INSTRUMENTS AND CONTROLS
69
o This equipment is designed to be used only in a 12 volt DC battery system with negative ground.
o This unit is made of precision
parts. Do not attempt to disas-semble or adjust any parts.
o When driving your vehicle, be sure to keep the volume of theunit set low enough to allow you to hear sounds coming from theoutside.
o Do not expose this equipment
(including the speakers and tape)to water or excessive moisture.
! CAUTION:
o Do not insert warped or poor quality discs into the CD player as damage to the unit may occur.
o Do not insert anything like coins into the player slot as damage tothe unit may occur.
o Do not place beverages close to the audio system. The playbackmechanism may be damaged ifyou spill them.
o Do not impact on the audio sys-
tem, or the playback mechanismcould be damaged.
o Driving on the off-roads or other
vibrations may skip your com-pact disc. Do not use the audio system on off-roads as the discs could bescratched and damaged.
o Do not grip or pull out the disc
with your hand while the disc isbeing pulled into the unit by the self loading mechanism. These can cause poor disc scratchingto occur or trouble in the com- pact disc player. o Avoid using CD-Recordable or CD-
Rewritable as the player could notbe operated in recording way of the CD maker. When using thecompact disc player, genuine CDs are recommended.
Page 149 of 284
3
STARTING AND OPERATING
5
C070C01E-1
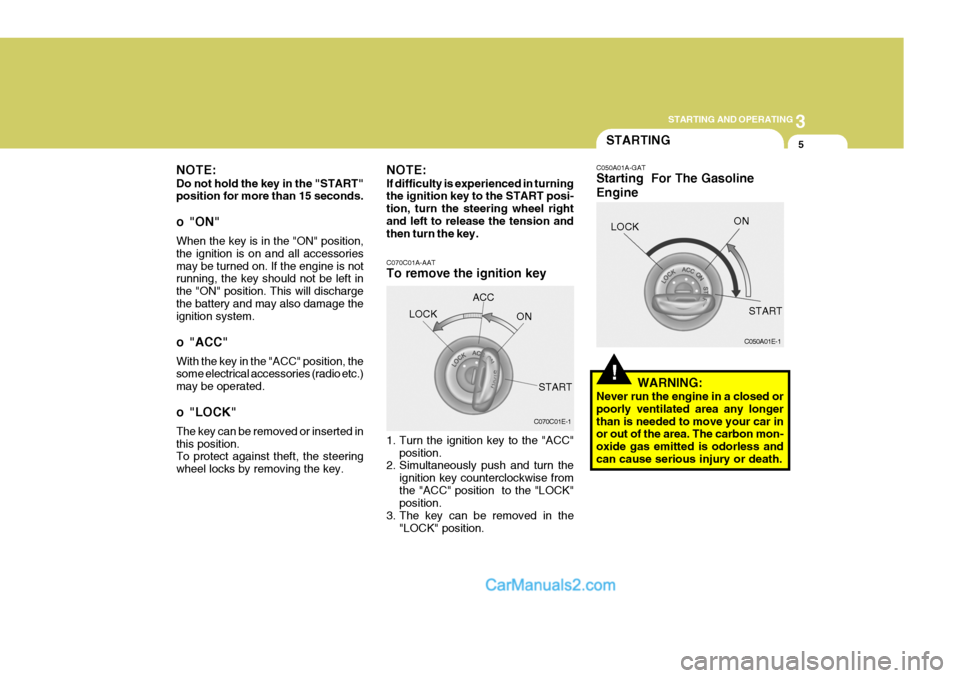
C070C01A-AAT To remove the ignition key
1. Turn the ignition key to the "ACC"
position.
2. Simultaneously push and turn the
ignition key counterclockwise from the "ACC" position to the "LOCK" position.
3. The key can be removed in the
"LOCK" position.LOCK
ACC
ON
START
NOTE: Do not hold the key in the "START" position for more than 15 seconds.
o "ON" When the key is in the "ON" position, the ignition is on and all accessoriesmay be turned on. If the engine is not running, the key should not be left in the "ON" position. This will dischargethe battery and may also damage the ignition system.
o "ACC" With the key in the "ACC" position, the some electrical accessories (radio etc.) may be operated.
o "LOCK" The key can be removed or inserted in this position. To protect against theft, the steering wheel locks by removing the key. NOTE: If difficulty is experienced in turning the ignition key to the START posi- tion, turn the steering wheel rightand left to release the tension and then turn the key.
!
STARTING
C050A01A-GAT Starting For The Gasoline Engine
C050A01E-1
WARNING:
Never run the engine in a closed or poorly ventilated area any longerthan is needed to move your car in or out of the area. The carbon mon- oxide gas emitted is odorless andcan cause serious injury or death. LOCK
ON
START
Page 151 of 284
3
STARTING AND OPERATING
7
!WARNING:
Be sure that the clutch is fully de- pressed when starting a manualtransmission vehicle. Otherwise there is the potential to cause dam- age to the vehicle or injury to some-one inside or outside the vehicle as a result of the forward or backward movement of the vehicle that willoccur if the clutch is not depressed when the vehicle is started.
5. Turn the ignition key to the "START" position and release it when theengine starts. D040A01P-GAT Tips for starting
o Do not operate the starter motor
continuously for longer than ten seconds; doing so could run down the battery. If the engine does not start, turn the ignition switch backto "LOCK", wait a few minutes, and then try again.
o If the engine cannot be started be- cause the battery is weak or dead,refer to the emergency starting sec- tion for instructions on EmergencyStarting.
o After starting the engine, do not
keep the engine idling without driv-ing. Once when the atmospheric tem- perature is very low, warm up theengine at a high idling speed to ensure proper circulation of the oil. CAUTION:
o Do not run the engine at high rpm or drive the vehicle at high speed until the engine has had achance to warm up.
o Release the ignition key as soon
as the engine starts to avoiddamaging the starter motor.!
Page 174 of 284
3 STARTING AND OPERATING
30
D180C01P-GAT Battery The capacity of the battery is reduced at low temperatutes.This is an inevitable result of its chemi- cal and physical properties. This is why a very cold battery, particularlyone that is not fully charged anyway, will only deliver a fraction of the starter current which is normally available.It is recommended that you have the battery checked by an authorized HYUNDAI dealer before the start ofcold weather and, if necessary, have it charged. This not only ensures reliable starting,but a battery which is kept fully charged also has a longer life. C160G02A-AAT To Keep Locks from Freezing To keep the locks from freezing, squirt an approved de-icer fluid or glycerineinto the key opening. If a lock is cov- ered with ice, squirt it with an approved de-icing fluid to remove the ice. If thelock is frozen internally, you may be able to thaw it out by using a heated key. Handle the heated key with careto avoid burning your fingers. NOTE: The proper temperature for using the immobilizer key is from -40°C to 80°C. If you heat the immobilizer key over 80°C to open the frozenlock, it may cause damage to the transponder in its head.
D180G01P-GAT Door locks To prevent the door locks from freez- ing up, the lock cylinders should be masked with tape, etc., when washingthe vehicle in cold weather to prevent the entrance of water.
D180D01P-GAT Washer fluid To ensure proper operation of the wind- shield or rear window at low tempera-tures, anti-freeze should be added to the washer fluid at a rate of one part antifreeze to one part water. D180E01P-GAT Wiper blades Before operating the wipers, check the wiper blades to confirm that they arenot frozen to the windshield or tailgate. If the blades are frozen to the wind- shield or tailgate, do not operate thewipers until the ice has melted and the blades are freed. D180F01P-GAT Ventilation slots The ventilation slots in the headlight housing on the assistant seat side should be brushed clear after a heavysnowfall so that the operation of the heating and ventilation systems will not be impaired.